If you love cruising around the golf course or your neighborhood in a golf cart, you know that reliable performance is key. One crucial component that can affect how well your cart runs is the solenoid. In this friendly guide, we’ll walk you through how to check a solenoid on a golf cart. With a bit of DIY spirit and the right information, you’ll be back on the greens in no time!
What is a Solenoid?
Before diving into the checking process, let’s understand what a solenoid is. A solenoid is an electromechanical device that acts as a switch to control the flow of electricity in your golf cart. When energized, it transfers electrical energy from the battery to the motor, allowing your cart to move. If it’s faulty, your golf cart won’t start or may even stop during use.
Common Symptoms of a Bad Solenoid
- Clicking Sound: You might hear a clicking noise when you try to start the cart.
- No Power: The cart won’t respond at all.
- Intermittent Operation: The cart starts and stops unexpectedly.
- Burnt Smell: A burnt odor can indicate electrical issues.
Tools You’ll Need
Having the right tools can make the task easier and safer. Here’s a list:
- Multimeter: For measuring voltage.
- Wrench set: To remove the solenoid.
- Screwdriver set: For any fasteners.
- Safety gloves: To protect your hands.
- Safety goggles: Eye protection is key.
Step-by-Step Guide to Checking a Solenoid
Step 1: Safety First!
Before starting any maintenance, ensure the golf cart is turned off and disconnected from the power source. This prevents electrical shock or damage.
Step 2: Locate the Solenoid
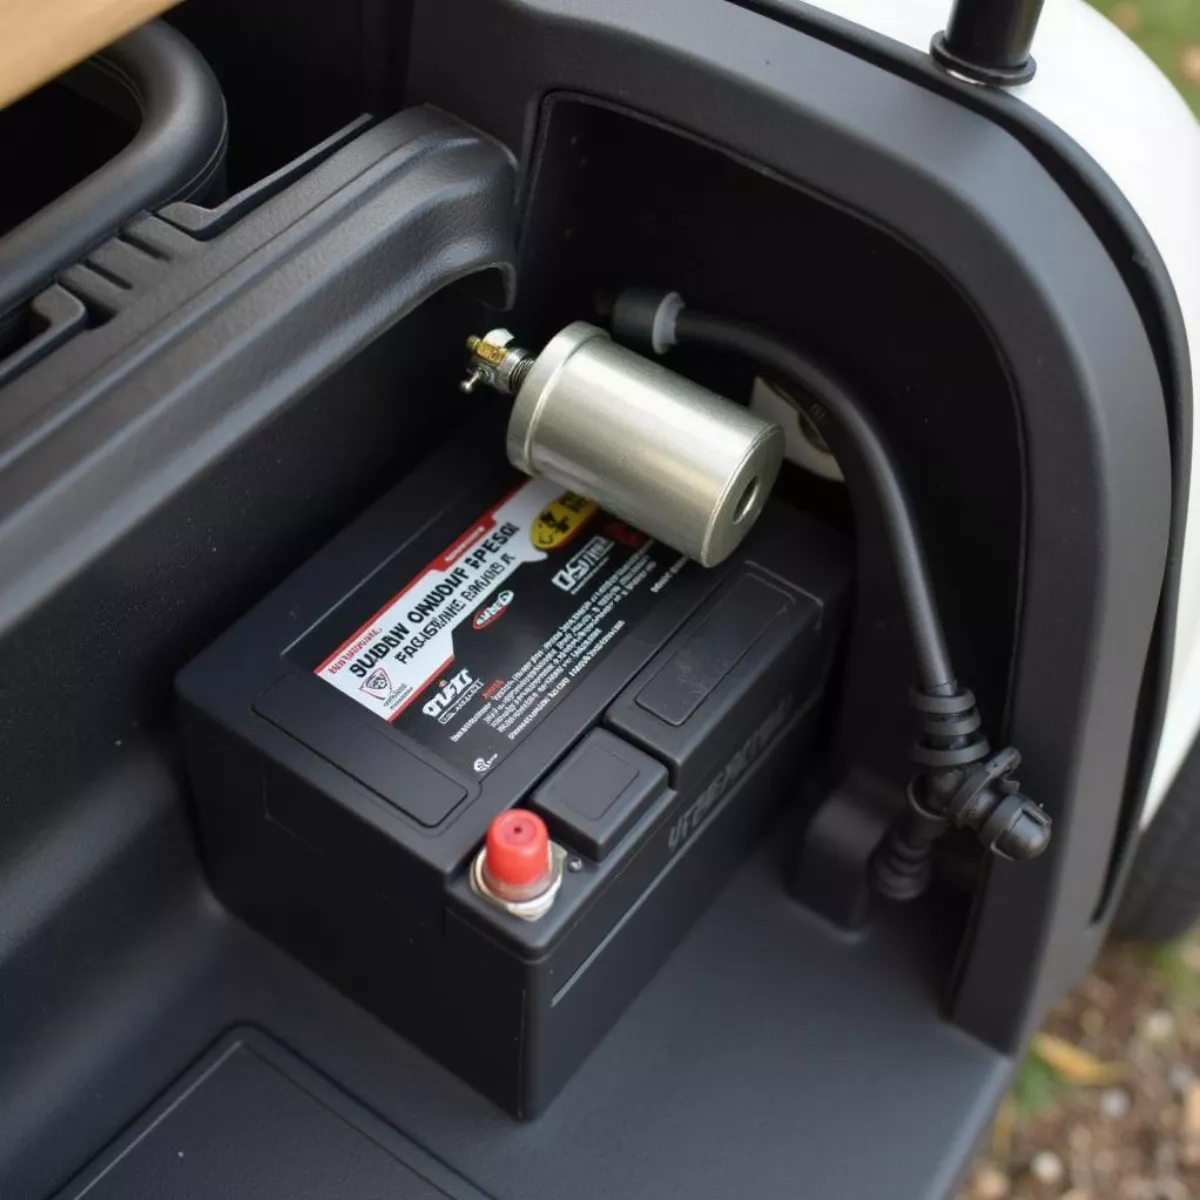
The solenoid is usually located near the battery on the golf cart. Here’s how to find it:
- Open the seat compartment: Most golf carts have a seat that opens to reveal the battery.
- Look for a cylindrical component: The solenoid may look like a small cylinder with wires coming out.
 Golf Cart Solenoid Location
Step 3: Visual Inspection
Inspect the solenoid for any obvious signs of damage.
- Check for burnt marks or cracks.
- Look at the connections to see if they are rusted or loose.
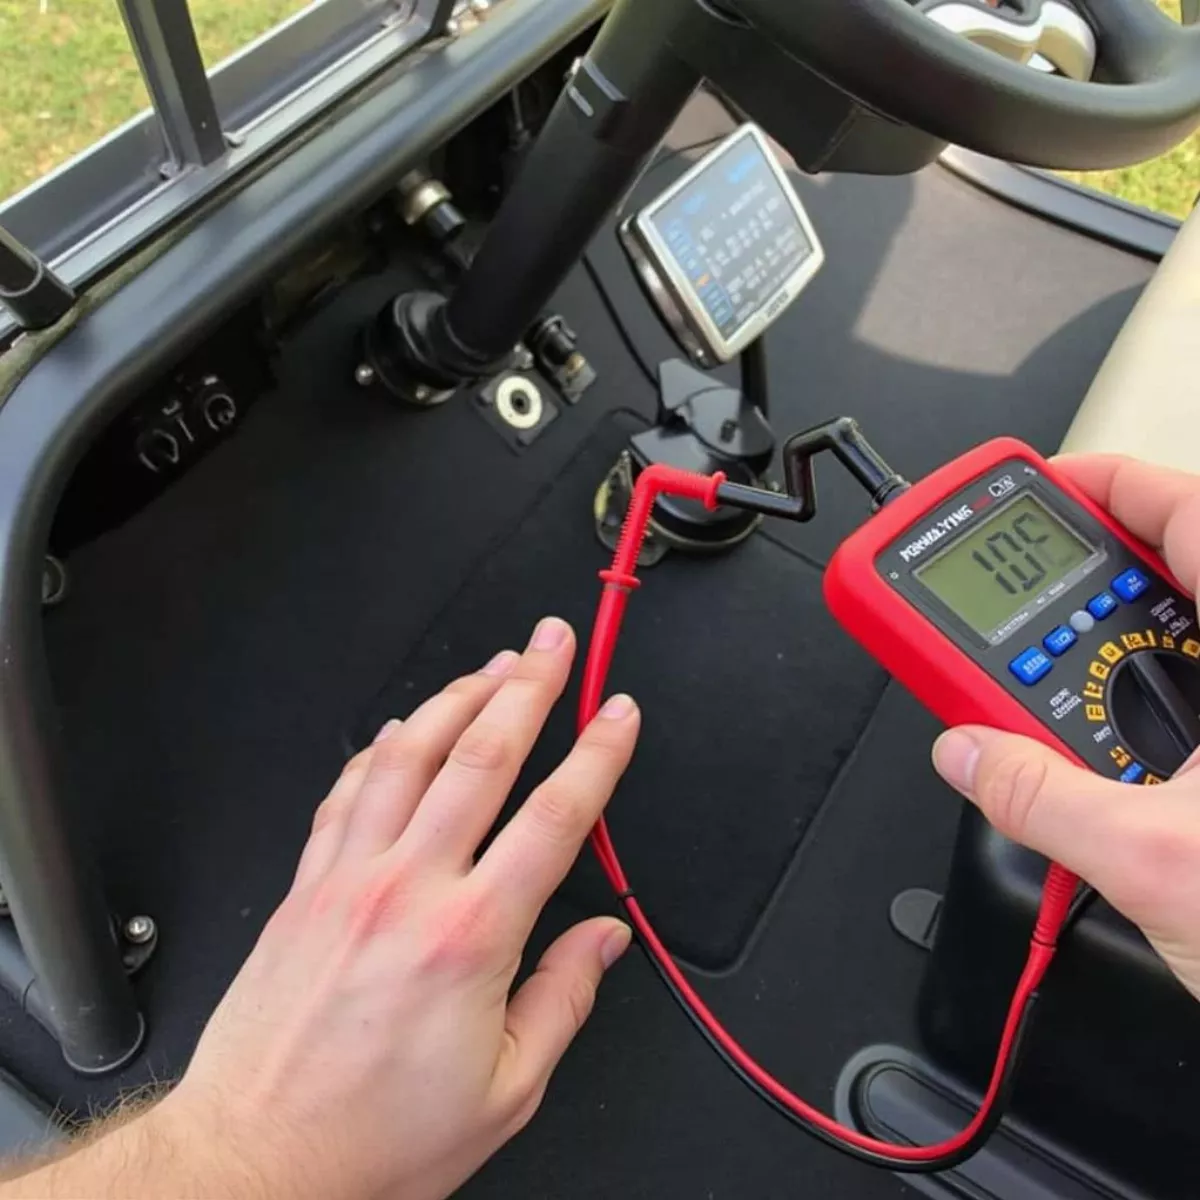
Step 4: Testing with a Multimeter
Once you’ve done a visual inspection, it’s time for some testing:
- Set your multimeter to DC volts.
- Connect the multimeter leads: Place the negative lead on a grounded part of the golf cart. Then connect the positive lead to the solenoid’s positive terminal.
- Check the reading: Have someone press the accelerator. You should see a reading of 12 volts or more.
Table: Solenoid Values
| Voltage Reading | Condition |
|---|---|
| 12.0V – 14.5V | Solenoid is good |
| 0V | Failed solenoid |
| Voltage drop | Possible wiring issue |
 Testing Golf Cart Solenoid with Multimeter
Step 5: Testing the Resistance
- Set the multimeter to ohms.
- Disconnect the solenoid.
- Place one lead on each terminal of the solenoid.
- A typical reading should be between 0.5 to 2.0 ohms.
If it reads Infinity (OL), the solenoid is likely open and needs replacement.
Step 6: Replace if Necessary
If your tests indicate a bad solenoid, don’t fret! Here’s how to replace it:
- Make sure you have a replacement solenoid.
- Disconnect the old solenoid by unscrewing it from its mounting.
- Carefully remove the wires (take note of where each wire connects).
- Install the new solenoid by attaching it in the same manner as the old one.
- Reconnect the wires precisely as they were before.
replacing-golf-cart-solenoid|Replacing Golf Cart Solenoid|A series of three images showing the step-by-step process of replacing a golf cart solenoid.
Image 1: Disconnecting the old solenoid and removing the wires.
Image 2: Comparing the old solenoid with the new replacement solenoid.
Image 3: Installing the new solenoid and reconnecting the wires.
Step 7: Test the Golf Cart
After replacing the solenoid, reconnect the battery and turn on your golf cart. Test the accelerator to ensure it’s functioning correctly.
Key Takeaways
- Understand your solenoid: It acts as a switch to power your golf cart.
- Common symptoms of failure include clicking sounds, lack of power, or burn smells.
- Use the multimeter correctly to check both voltage and resistance.
- Replace the solenoid if it’s defective for optimal performance.
Frequently Asked Questions (FAQ)
1. How often should I check the solenoid on my golf cart?
It’s a good practice to check your solenoid during routine maintenance, ideally every 6 months or if you experience starting issues.
2. Can I clean a solenoid instead of replacing it?
In some cases, cleaning the connections can help improve performance, but if the solenoid is damaged or shows high resistance, replacement is the better option.
3. What will happen if I ignore a bad solenoid?
Ignoring a faulty solenoid can lead to more significant electrical issues and may ultimately leave you stranded.
4. Are solenoids universal?
While many solenoids may look similar, it’s important to find a solenoid compatible with your specific golf cart model.
5. Is it safe to check the solenoid myself?
Yes, as long as you observe proper safety precautions, such as disconnecting the battery.
6. Can a bad solenoid drain the battery?
Yes, if the solenoid is stuck in the closed position, it may continuously draw power, draining your battery.
7. How do I know which solenoid to buy?
Refer to your golf cart’s owner’s manual or consult a specialist to ensure you purchase the correct replacement solenoid.
8. If replaced, will I need to recalibrate my golf cart?
Typically no, but it’s a good idea to check with the manufacturer’s recommendations.
9. How can I tell if the solenoid is working without a multimeter?
Listen for the clicking sound when you press the accelerator pedal; if you hear it, the solenoid is likely working. However, this is not definitive.
By following this friendly and informative guide, you should feel more confident checking and maintaining the solenoid on your golf cart. For more DIY tips and tricks on golf cart maintenance, check out our other articles!
By providing clear, engaging content that reflects your needs, we’ve created a user-friendly guide that you can refer back to whenever necessary. Happy carting!

