Author Archives: Larry Scott

Avatar Of Larry Scott

About Larry Scott

My name is Larry Scott founder of Golf Life Wiki. You'll find a treasure trove of knowledge, insights, and personal experiences about the game of golf. Whether you're a beginner looking to learn the basics, an amateur seeking to improve your skills, or a seasoned player wanting to stay updated with the latest trends, this blog has something for everyone.

Best Southern Ireland Golf Courses

best southern ireland golf courses

Golf enthusiasts often seek out stunning landscapes and challenging courses, and Southern Ireland delivers both in spades. With its breathtaking coastal views, rolling hills, and top-tier facilities, this region boasts some of the finest golf courses in the world. Whether you’re a seasoned pro or a casual player, there’s something for everyone. In this guide, we’ve compiled a list of the best Southern Ireland golf courses to help you plan your next golfing adventure.

Why Golf in Southern Ireland?

Southern Ireland is renowned not just for its exceptional golf courses but also for its warm hospitality and rich cultural heritage. Playing golf here allows you to experience the beautiful Irish landscape while enjoying the sport you love. Here’s what makes Southern Ireland a fantastic destination for golf:

  • Diverse Course Options: Courses range from seaside links to parkland layouts.
  • Stunning Scenery: The natural beauty of this region is unparalleled, with coastal cliffs, lush greens, and historical landmarks.
  • Rich History: Many courses have a storied past, often designed by famous golfers and architects.

Top Golf Courses in Southern Ireland

1. Ballybunion Golf Club (Old Course)

Located in County Kerry, Ballybunion is often hailed as one of the best links courses in the world. The Old Course, with its magnificent views of the Atlantic and challenging holes, caters to golfers of all skill levels.

  • Highlight: The dramatic landscape features steep cliffs and rolling dunes.
  • Tip: Finally, don’t miss the 14th hole, also known as the "Cliffs of Moher."

2. Tralee Golf Club

Set against the backdrop of Ballyheigue Bay, Tralee Golf Club combines natural beauty with a challenging layout designed by Arnold Palmer.

  • Highlight: Stunning views of the Slieve Mish Mountains and the Atlantic Ocean.
  • Tip: Make sure to experience the breathtaking 4th hole, which has a stunning seaside backdrop.

3. Waterville Golf Links

Part of the famous “Ring of Kerry,” Waterville Golf Links is another must-play. The course is known for its pristine condition and breathtaking scenery.

  • Highlight: The course strategically uses the natural landscape, creating a challenging yet inviting game.
  • Tip: Check out the 12th hole, a par 5 that offers incredible views.

4. Dooks Golf Links

Situated in County Kerry, Dooks Golf Links is a hidden gem. This traditional links course is known for its friendly atmosphere and stunning seaside views.

  • Highlight: The natural terrain and cultural richness make it a truly unique golfing experience.
  • Tip: Don’t miss the experience of the par 3 8th hole, which offers an astonishing view of the surrounding area.

5. Fota Island Resort

For those who prefer parkland courses, Fota Island offers a different experience. This resort, located near Cork, boasts both a rich history and beautiful surroundings.

  • Highlight: The course has hosted several prestigious tournaments, showcasing its elite design.
  • Tip: Explore all three courses at Fota Island for a broader golfing experience.

6. Killarney Golf & Fishing Club

Killarney is not just about golf; it’s also a haven for those who enjoy fishing. The golf course here offers a superb combination of beautiful lakes and mountains.

  • Highlight: Spectacular views of the Macgillycuddy’s Reeks mountain range.
  • Tip: The Killeen Course is a standout, challenging players with its design.

7. Old Head Golf Links

Old Head is not just a golf course; it’s an experience that’s hard to forget. Located on a stunning headland that juts out into the Atlantic, this link course is famous for its breathtaking views.

  • Highlight: Often considered one of the most spectacular golf courses in the world.
  • Tip: Book your tee time in advance; this course is in high demand!

Course Name Location Type Signature Hole
Ballybunion Golf Club County Kerry Links 14th – Cliffs
Tralee Golf Club County Kerry Links 4th
Waterville Golf Links Ring of Kerry Links 12th
Dooks Golf Links County Kerry Links 8th
Fota Island Resort Near Cork Parkland N/A
Killarney Golf Club Killarney Parkland Killeen Course
Old Head Golf Links Kinsale Links N/A

Tips for Planning Your Golf Trip

To make the most of your golf adventure in Southern Ireland, consider the following:

  • Book Early: Popular courses fill up quickly, especially during peak season (April to October).
  • Check the Weather: Always check the weather forecast before your trip. Pack layers and be prepared for some rain!
  • Plan Nearby Activities: Explore local culture, such as visiting castles, trying traditional Irish cuisine, or enjoying a pint at a local pub.

Key Takeaways

  • Southern Ireland offers a plethora of world-class golf courses catering to all skill levels.
  • Ballybunion, Waterville, and the Old Head are standout links courses that deliver breathtaking scenery and memorable golfing.
  • Book your tee times in advance to ensure a spot on these highly sought-after courses.
  • Always check the weather and plan accordingly to make your golfing experience enjoyable.

FAQ: Your Golfing Questions Answered

  1. What is the best time to play golf in Southern Ireland?

    • The best time is from April to October when the weather is more favorable and the courses are in excellent condition.

  2. Are there any golf packages available in Southern Ireland?

    • Yes, many golf resorts offer packages that include accommodations, meals, and access to golf courses.

  3. Do I need to be a member to play these courses?

    • Most courses allow visitor bookings, but it’s always best to check availability in advance.

  4. What equipment should I bring?

    • Bring your clubs, appropriate golf attire, and layers to prepare for changing weather conditions.

  5. Can I hire a caddy?

    • Yes, many courses offer caddy services, which can enhance your experience by providing valuable local knowledge.

  6. Are there dining options at these golf courses?

    • Many courses have on-site restaurants or cafes where you can enjoy a meal or drink after your game.

  7. What is the average cost to play a round of golf?

    • Prices vary greatly, but expect to pay anywhere from €50 to over €200 per round depending on the course.

  8. Is it possible to play multiple courses in one trip?

    • Absolutely! Southern Ireland is home to various courses within a short drive, making it easy to play multiple rounds.

  9. Are golf lessons available at these courses?

    • Most top courses offer lessons with professional instructors for players looking to improve their game.

  10. Can I rent golf clubs at these courses?
    • Yes, many courses provide rental clubs, but it’s best to reserve them when booking your tee time.

With these insights, you’re on your way to exploring the incredible golf courses that Southern Ireland has to offer. Pack your bags, grab your clubs, and prepare for an unforgettable golfing experience surrounded by some of the world’s most stunning landscapes!

How To Select A Golf Ball

how to select a golf ball


Golf balls may seem trivial in the grand scheme of your game, but choosing the right one can enhance your performance and enjoyment on the course. With so many options available, selecting the perfect golf ball may feel overwhelming. But worry not! This extensive guide will walk you through the criteria you need to consider, helping you find that ideal ball suited to your playing style. So let’s dive into the world of golf balls!

Understanding Golf Ball Basics

Before you start shopping, it’s essential to understand the basics of golf balls. They come in various types, construction styles, and features. Here are key terms and components to familiarize yourself with:

Types of Golf Balls

  • Two-Piece Balls: These are beginner-friendly. They consist of a solid core and a simple cover, making them durable and affordable. Perfect for those just starting out.

  • Three-Piece Balls: Offering more spin and control, three-piece balls have a core, a layer, and a cover. Ideal for intermediate to advanced players.

  • Four-Piece Balls: These boast an inner core, outer core, a layer for spin, and a cover. They provide superior control and spin, catering to experienced golfers.

Factors to Consider

  • Compression: The degree to which a ball compresses when struck. Higher compression balls are best for players with faster swing speeds, while lower compression suits slower swings.

  • Cover Material: Golf balls come with different cover materials, mainly urethane and ionomer. Urethane covers offer better spin control but are usually more expensive.

Ball Color and Visibility

Color: Most golf balls are white, but you’ll find options in yellow, orange, and even pink. Choose a color that enhances visibility on the course.

Evaluating Your Needs

To find the right golf ball, first evaluate your skill level and playing style. Let’s explore these aspects.

Skill Level

  • Beginner: Look for two-piece balls. They provide distance, straight shots, and durability.

  • Intermediate: If you’re honing your skills and want a balance of distance and control, consider three-piece balls.

  • Advanced: For those with higher swing speeds and refined techniques, four-piece balls will help you improve

Playing Style

Your swing style and overall approach to the game influence the type of ball that will suit you best:

  • Power Hitters: If you drive the ball long distances, focus on lower compression three-piece or four-piece balls for exceptional control and feel.

  • Control Seekers: If you prioritize accuracy and control, consider three-piece balls with a softer feel and excellent spin rates.

Shopping for Golf Balls

Now that you understand your personal needs, it’s time to hit the shops! Here’s a checklist to keep you focused:

Key Features to Look For

Feature Beginner Intermediate Advanced
Type Two-Piece Three-Piece Four-Piece
Compression Low Medium High
Material Ionomer Urethane Urethane
Spin Control Low Medium High
Price Range Affordable ($20-$30) Moderate ($30-$45) Premium ($45+)

Price Points

  • Budget Golf Balls: Generally within the $20-$30 range. Great for beginners.

  • Mid-range Options: Typically between $30-$45. Suitable for improving players.

  • Premium Golf Balls: Priced above $45. Ideal for low handicappers seeking the best performance.

Testing Your Golf Balls

Once you’ve narrowed down your choices, it’s critical to test them. Here’s how:

  1. Hit Different Shots: Practice your drives, approach shots, and putts with each option.

  2. Play a Round: Take them for a spin during a casual round to see how they perform under pressure.

  3. Evaluate the Feel: Notice how each ball feels off the clubface. Control and comfort are crucial.

Maintaining Your Golf Balls

To ensure they last, proper care of your golf balls is essential:

  • Clean Regularly: Use a wet towel or soft brush to remove dirt and debris.

  • Store Properly: Keep them in a cool, dry place. Avoid extreme temperatures.

  • Check for Damage: Inspect them for cuts or scrapes before play.

Key Takeaways

  • Know Your Skill Level: This will determine the type of golf ball that suits you best.

  • Consider Compression: Match the ball’s compression to your swing speed for optimal performance.

  • Test Different Balls: The best way to find your favorite is simply to try them out.

  • Maintain Your Balls: Keeping them clean and in good condition will extend their life.

  • Pay Attention to Price: Don’t overspend; find a ball that meets your needs without breaking the bank.

FAQ Section

Here are some frequently asked questions about selecting golf balls:

Q1: What is the best golf ball for beginners?

A1: Two-piece golf balls are typically best for beginners because they offer distance and durability.

Q2: How does swing speed affect golf ball choice?

A2: Faster swing speeds benefit from higher compression balls, while slower swings favor lower compression options.

Q3: Are more expensive golf balls worth it?

A3: Generally, premium balls provide better performance, spin, and distance. However, it varies by individual needs.

Q4: Do I need different golf balls for different courses?

A4: Not necessarily, but you may want to adjust your choice based on course conditions (windy, soft, etc.).

Q5: Can I use colored golf balls in tournaments?

A5: Yes, as long as they are approved by the governing body of the tournament.

Q6: How often should I change my golf balls?

A6: Change your balls when they show signs of wear or if you lose them during play.

Q7: What’s the difference between soft and hard golf balls?

A7: Soft balls typically offer more control and spin, while hard balls provide distance.

Q8: Can I mix different types of balls in a single round?

A8: You can, but it’s generally better to stick to one type for consistency.

Q9: How does the cover material affect performance?

A9: Urethane covers provide more spin and feel, while ionomer covers are more durable and less expensive.

Q10: Should I buy a dozen of the same ball?

A10: It’s recommended to have a dozen of the same model for consistency, especially while you’re honing your skills.

By utilizing this guide to select the right golf ball, you’re well on your way to improving your game. Whether you’re just starting out or fine-tuning your skills, knowing how to choose the best golf ball for your needs makes all the difference. Happy golfing!


This guide aims to be informative and friendly, engaging readers while providing them with the essential knowledge to select golf balls effectively. Enjoy your next round on the green!

The Iconic Mesh Polo Shirt

the iconic mesh polo shirt

The mesh polo shirt has secured its place as a staple in the casual wardrobe of many individuals across the globe. Renowned for its blend of comfort, style, and versatility, it has traversed from athletic fields to everyday streets and even upscale events. Let’s delve into the fascinating world of mesh polo shirts, highlighting their history, material, and style tips.

A Brief History of the Mesh Polo Shirt

The mesh polo shirt has roots that stretch back to the 1920s. Originally designed for tennis players, the polo shirt offered a breathable alternative to the heavy cotton shirts of the time. It was René Lacoste, a French tennis champion, who popularized the modern design. The shirt he introduced featured short sleeves, a collar, and a button placket — a far cry from the long-sleeved, stifling shirts commonly worn during the sport.

The introduction of mesh fabric came later, primarily driven by the need for breathability, making it more suitable for sports and warmer climates. Mesh allows for better airflow, which means that players could remain cooler during intense matches. Over the decades, designers have incorporated various fabrics, colors, and patterns, turning the humble polo into a fashion statement beloved by many.

Key Characteristics of a Mesh Polo Shirt

When it comes to the iconic mesh polo shirt, several characteristics make it a go-to choice for many.

  • Breathability: The mesh fabric is airy and lightweight, ensuring comfort, particularly in hot weather.
  • Versatility: A mesh polo can be dressed up or down, making it suitable for various occasions — from a casual day at the park to a dinner out.
  • Durability: Quality mesh shirts can withstand regular wear and maintain their shape and color over time.
  • Easy Care: Most mesh polos are machine washable and resistant to wrinkles, making them perfect for those on-the-go lifestyles.

Choosing the Right Mesh Polo Shirt

Selecting the perfect mesh polo requires considering several factors to ensure it suits your style and needs. Here’s what to look for:

Feature Importance
Fabric Opt for a breathable, quality material like cotton or polyester blends. Look for moisture-wicking qualities if you plan to wear it for sports.
Fit Mesh polos come in various fits: fitted, slim, and relaxed. Choose one that complements your body shape.
Color Classic colors like white, navy or black are versatile, while bright colors can add a fun pop to your outfit.
Brand Consider reputable brands known for quality — they are more likely to offer a better fit and durability.

Suggested Styles to Wear With a Mesh Polo Shirt

The mesh polo shirt is incredibly versatile. Here are some stylish combinations you might consider:

  • Casual Look: Pair a fitted mesh polo with denim shorts or chinos for everyday outings.
  • Smart Casual: Combine it with tailored trousers or dark jeans, topped off with loafers for a smart look conducive to semi-formal events.
  • Athletic Attire: Match it with joggers or athletic shorts, and complete the outfit with sneakers for an ideal athletic or lounge setting.
  • Layered Looks: During cooler months, layering a mesh polo underneath a lightweight jacket or sweater adds depth to your outfit.

Care Tips for Your Mesh Polo Shirt

Proper care extends the life of your beloved mesh polo shirt and maintains its shape and color. Here’s how to do it:

  • Washing: Always follow the label’s care instructions. Typically, machine wash in cold water on a gentle cycle is recommended.
  • Drying: Hang dry to reduce shrinkage. If using a dryer, keep it on a low-heat setting.
  • Ironing: If necessary, use a low heat setting and iron on the inside of the fabric to avoid any damage.
  • Storage: Store in a cool, dry place, preferably hung or folded neatly to avoid creasing.

Iconic Brands for Mesh Polo Shirts

The popularity of the mesh polo shirt has led to various brands producing these stylish shirts. Here’s a quick list of some iconic brands you might want to consider:

  • Lacoste: The original creator of the polo shirt, known for its classic designs.
  • Ralph Lauren: Offers a range of stylish options, from casual to semi-formal.
  • Nike: Known for its high-performance athletic polos that blend style and functionality.
  • Adidas: Offers sporty designs with premium quality, perfect for a workout or casual wear.

The Fashion Evolution of the Mesh Polo Shirt

As fashion evolves, so does the mesh polo shirt. What was once quintessential for sporting events has transformed into a fashion accessory. Celebrities and influencers alike have embraced this trend, often layering their polo shirts with jackets, blazers, or even sweaters for a chic look.

“The mesh polo shirt is the epitome of casual elegance. It speaks comfort while maintaining a sense of style.” — Fashion Expert, Jane Doe

Modern Embrace of the Mesh Polo Shirt

In today’s world, the mesh polo has found a place in various fashion realms. You might spot it on:

  • Fashion Runways: Designers showcasing unique patterns or extravagant designs.
  • Casual Outings: A classic choice for lunch dates or weekend gatherings.
  • Corporate Attire: A trend among professionals looking for smart-casual options.

This evolution ensures the mesh polo shirt remains relevant across different cultures and fashion trends.

Key Takeaways

To wrap it up, the mesh polo shirt is an essential staple in any wardrobe. Here are the core tips you should remember:

  • History: Understand its roots to appreciate its evolution.
  • Features: Choose breathable, versatile designs.
  • Care: Follow washing and storage guidelines to maintain quality.
  • Style: Experiment with different looks to find what suits you best.
  • Brands: Opt for trusted brands to ensure quality and fit.

FAQ Section

Here are some frequently asked questions about mesh polo shirts:

1. What material is a mesh polo shirt made from?

Mesh polo shirts are typically made from breathable materials such as cotton, polyester, or blends that offer moisture-wicking properties.

2. Are mesh polo shirts suitable for formal occasions?

While traditionally casual, mesh polo shirts can be dressed up with the right trousers and accessories for smart-casual events.

3. How do I choose the right size polo shirt?

It’s essential to refer to the sizing chart provided by the brand, as sizes can vary. Measure your chest and waist for an accurate fit.

4. Can I wear a mesh polo shirt in winter?

Yes, you can layer a mesh polo with sweaters or jackets to keep warm while still looking stylish.

5. How many mesh polo shirts should I own?

A good rule of thumb is to have at least three: a classic white, a neutral color, and a fun, patterned option for variety.

6. How can I dress up a mesh polo shirt?

Pair it with tailored trousers, a blazer, or stylish shoes to elevate your look.

7. Is it suitable for working out?

Absolutely! Many brands produce mesh polos designed for athletic performance that offer moisture-wicking properties.

8. Can mesh polo shirts shrink in the wash?

To prevent shrinkage, consider washing in cold water and air-drying whenever possible.

9. Are there eco-friendly options for mesh polos?

Yes, many brands are now offering sustainable fabrics made from recycled materials. Be sure to look for eco-friendly labels!

10. Where can I buy quality mesh polo shirts?

You can find high-quality options at sporting goods stores, department stores, or online retailers specializing in casual and activewear.

With this comprehensive guide, you’re now equipped to explore the world of mesh polo shirts and make informed choices about your fashion wardrobe. Remember, comfort and style can go hand in hand! Happy shopping!

figuring golf handicap 9 holes

Golf is a sport rich in tradition and complexity, but nothing might be more baffling than calculating your golf handicap, especially when playing on just 9 holes. A golf handicap helps level the playing field among players of varying skill levels, allowing everyone to compete fairly. If you’ve ever wondered how to determine your golf handicap for a short course, this guide will walk you through the nitty-gritty details step-by-step.

Understanding Golf Handicaps

Before we dive into the specifics of calculating a golf handicap for 9 holes, it’s essential to understand what a golf handicap is. Put simply, your handicap is a numerical representation of your potential skill level relative to par. It allows players of different abilities to compete on an equitable basis.

Key Components of a Golf Handicap:

  • Course Rating: This indicates the difficulty level of a golf course for a scratch golfer (a player with a handicap of 0).
  • Slope Rating: This measures the difficulty of the course for a bogey golfer (a player with a handicap higher than 0).
  • Adjusted Gross Score (AGS): This is your total strokes taken plus any local rules adjustments, such as maximum strokes per hole.

The Basics of Golf Handicaps for 9 Holes

When calculating a 9-hole golf handicap, you will typically use half the formulas used for a full 18-hole course. While it may seem straightforward, there are nuances that can affect the calculation, which we will cover in detail!

Steps to Calculate Your Golf Handicap for 9 Holes

Step 1: Record Your Scores

Before you can calculate your handicap, you’ll need to track your scores for at least five rounds of 9-hole play. Consistency is key for an accurate assessment!

  • Example: Record scores like:
    • Round 1: 45
    • Round 2: 42
    • Round 3: 48
    • Round 4: 41
    • Round 5: 44

Step 2: Calculate Your Adjusted Gross Score (AGS)

Your AGS is essential in determining your handicap. For each round, you adjust your score based on the course rating and your actual strokes.

  • Formula:

    AGS = Score - (Course Rating - Par) x (Strokes Allowed)

  • Example: Let’s say the course rating is 35 and the par is 36. If you score 45, it would be:

    AGS = 45 - (35 - 36) = 45 + 1 = 46

Repeat this for each recorded score.

Step 3: Find Your Average AGS

Now, use all your adjusted scores to calculate an average.

  • Calculation:

    Average AGS = (AGS1 + AGS2 + AGS3 + AGS4 + AGS5) / 5

Using the previous adjustment example:

  • AGS1 = 46
  • AGS2 = 41
  • AGS3 = 48
  • AGS4 = 43
  • AGS5 = 44

Your calculation would be:

Average AGS = (46 + 41 + 48 + 43 + 44) / 5 = 44.4

Step 4: Apply the Slope Rating

To factor in the slope rating, you’ll need to know this for your course. Assume the slope rating is 113.

  • Formula:

    Effective Handicap = (Average AGS - Course Rating) x (113 / Slope Rating)

Using our example:

Effective Handicap = (44.4 - 35) x (113 / 113) = 9.4

Since this is a 9-hole handicap, you can round it to the nearest whole number, finalizing your handicap at 9!

Example Table

Here’s a quick reference table to show scores, AGS, and effective handicap calculations:

Round Score Course Rating AGS
1 45 35 46
2 42 35 43
3 48 35 49
4 41 35 42
5 44 35 45
Average AGS 44.4
Effective Handicap 9

Tips for Maintaining an Accurate Handicap

  • Play Regularly: The more rounds you play, the more accurate your handicap.
  • Use Technology: Various apps are available that automate handicap calculations for you.
  • Keep a Consistent Record: Write down your scores immediately after each round.

Key Takeaways

  • Your golf handicap levels the playing field for players of various skill levels.
  • Calculate your handicap using Adjusted Gross Score, Average AGS, and the Slope Rating.
  • It’s usually easier to calculate the handicap for 9 holes by using half the standard 18-hole formulas.
  • Regular play and scorekeeping improve accuracy in your handicap calculations.

FAQs

Q1: How often should I update my golf handicap?

  • A: You should update your handicap after every 20 rounds or any time there’s a significant score variation.

Q2: What if I can only play on 9-hole courses?

  • A: You can still establish a handicap based on your performance on those courses, using the same calculation methods.

Q3: Can I compete without an official handicap?

  • A: Yes, but participating in formal leagues or competitions usually requires one.

Q4: How can I find my course’s rating and slope?

  • A: These ratings are often listed on scorecards or can be found on the golf course’s official website.

Q5: Is there an app to help with the calculations?

  • A: Yes, numerous mobile apps can help you keep track of your scores and compute handicaps automatically.

Q6: How do you adjust for weather conditions during play?

  • A: Generally, weather conditions should not be adjusted for; focus instead on consistent play over time.

Q7: Can I use a temporary handicap for a tournament?

  • A: If the organizer allows it, you can use a temporary handicap based on your recent scores.

Q8: Are there different rules for different countries?

  • A: Yes, golf handicapping systems can vary; it’s essential to check region-specific guidelines.

By following the steps laid out in this guide, you can navigate the seemingly complex world of golf handicaps with ease. Now, the next time you hit the links for a round of 9 holes, you’ll not only know how to calculate your handicap, but you’ll also have a concrete understanding of why it matters. Happy golfing!

How To Cut A Graphite Shaft

how to cut a graphite shaft

Cutting a graphite shaft may sound intimidating, but with the right tools, knowledge, and a bit of patience, you can do it yourself. Whether you’re customizing your golf clubs, tinkering with a fishing rod, or adjusting a racquet, knowing how to cut a graphite shaft properly can lead to improved performance and a personalized experience. In this guide, we’ll walk you through the step-by-step process of cutting a graphite shaft while offering tips, tricks, and all the key information you need.

Why Cut a Graphite Shaft?

Before we dive into the nitty-gritty, let’s discuss why you might want to cut a graphite shaft in the first place.

  • Personalization: You may want to tailor the length of your equipment to match your height and playing style.

  • Performance: A shorter shaft can enhance control and potentially improve your performance.

  • Repair: If a shaft is damaged, cutting it can sometimes be a reliable way to salvage the equipment.

Tools Needed for Cutting Graphite Shafts

Having the right tools can make the cutting process seamless. Here’s a list of necessary items:

  • Graphite shaft cutter: This specialized tool minimizes damage while cutting.

  • Measuring tape: Accurate measurements are crucial for achieving the desired length.

  • Masking tape: Use this to mark your cutting line and prevent fraying.

  • Sandpaper: To smooth out the edges after cutting.

  • Safety goggles: Always prioritize safety when working with sharp tools.

  • Work surface: A stable and flat work table helps ensure precision during the cutting process.

Optional Tools

  • Dremel tool with a cutting wheel: For those with a little more experience, this can provide cleaner cuts.

  • Clamps: To hold the shaft securely in place while you work.

Step-by-Step Guide to Cutting a Graphite Shaft

Now that you’ve gathered your tools, let’s get into the step-by-step process of cutting a graphite shaft.

Step 1: Measure the Length

Start with a firm measurement.

  1. Decide on the Desired Length: Consider your height, swing style, and preferences.

  2. Use the Measuring Tape: Measure from the butt end of the shaft to the point you plan to cut.

  3. Mark the Cutting Point: Use a piece of masking tape to clearly mark the exact location. This tape also helps to reduce fraying.

Step 2: Secure the Shaft

To ensure precision, you want to keep the shaft stable.

  • If you have clamps, secure the shaft to your work surface.

  • If not, hold it firmly by hand, making sure to keep it steady throughout the cutting process.

Step 3: Make the Cut

Using your graphite shaft cutter:

  • Position the cutting tool at the tape mark.

  • Apply gentle pressure while starting the cut, ensuring that you maintain a straight line.

  • Avoid rushing; a slow, steady approach will yield the best results.

"Patience is key! A rushed cut can lead to a rough edge or an improper measurement."

Step 4: Smooth the Edge

Once you’ve cut through the shaft:

  • Use sandpaper to smooth the cut edge. This will not only make it more comfortable to handle but will also provide a cleaner finish.

Step 5: Inspect Your Work

Check the shaft for any imperfections.

  • Look for Fraying: Ensure that there aren’t any fibers sticking out. If you notice any, sand them down.

  • Measure Again: Confirm that you’ve reached the desired length. If not, small adjustments can be made with further cutting or sanding.

Additional Tips for Cutting Graphite Shafts

  • Use the Right Tools: As mentioned, a graphite shaft cutter is ideal because it’s specifically designed for this material.

  • Work Slowly: You’ll want to take your time to prevent damage or measurement errors.

Key Takeaways

  • Measure Twice, Cut Once: Proper measurements are crucial for a successful cut.

  • Use Masking Tape: This not only marks your cut but minimizes fraying.

  • Smoothing Matters: Don’t skip this step; it can enhance comfort and performance.

  • Safety First: Always wear safety goggles and handle your tools with care.

  • Practice Makes Perfect: If you’re new to cutting, consider practicing on a scrap piece before attempting your final cut.

FAQ: Cutting a Graphite Shaft

1. How do I know how much to cut off my graphite shaft?

Measure your height and swing style. A general rule is that the longer the shaft, the more you may need to adjust depending on your comfort.

2. Will cutting my graphite shaft affect its strength?

If done properly, cutting should not significantly affect the strength, but avoid cutting too close to the tip as it may compromise the integrity.

3. Can I cut my graphite shafts at home?

Absolutely! With the right tools and technique, you can perform this task yourself.

4. What happens if I cut too much off?

If you cut too much, the shaft will be too short to be effective. In this case, you may need to consider using extensions or purchasing a new shaft.

5. Can I use a regular saw to cut the shaft?

While you could use a regular saw, it’s not recommended. A specialized graphite shaft cutter is designed to minimize damage.

6. How can I smooth out the cut edge?

Use fine-grit sandpaper carefully to smooth out any rough edges after cutting.

7. Is it necessary to wear protective gear?

Yes, safety goggles are important to protect your eyes from graphite dust or shards.

8. How do I know if the shaft is right for me after cutting?

Once cut, take it for a test swing or use it to ensure it feels comfortable and practical for your playing style.

9. Can I replace a tip after cutting a shaft?

Yes, you can replace tips or extensions, but making sure your cut is clean will ease the process.

10. How can I prevent fraying when cutting?

Using masking tape to mark your cutting line will significantly reduce fraying at the cut.

Making the decision to cut a graphite shaft can be a rewarding DIY project. With the right tools, techniques, and a little patience, you’re set to enhance your performance and enjoy a personalized piece of equipment. Now, go ahead and make that precise cut—you’ve got this!

What Is Pureing A Golf Shaft

what is pureing a golf shaft

Golf is more than a sport; it’s a passion for many. At the heart of every great game is precision and personalized equipment, especially when it comes to your golf shaft. One essential process that often gets overlooked is pureing a golf shaft. If you’ve ever wondered what this is, how it can improve your game, or if you should consider it, you’re in the right place!

Understanding Pureing

So, what exactly is pureing a golf shaft? In simple terms, it’s a method that ensures the shaft is optimally aligned for the best performance. This is achieved by identifying the shaft’s true bend point and aligning it accordingly with the club head during installation. The essence of pureing is to enhance consistency, promote accuracy, and improve overall feel.

Why is Pureing Important?

Here are a few reasons why pureing a golf shaft is crucial for your game:

  • Enhanced Consistency: A pure shaft ensures that each swing feels the same, leading to better results hole after hole.
  • Improved Accuracy: By aligning the bend point with your swing, you can increase your accuracy on the course.
  • Better Feel: Golfers often report that a pure shaft offers a better feedback loop, allowing for a more satisfying swing.

The Process of Pureing a Golf Shaft

1. Identifying the Shaft’s Bend Point

To begin, you first need to determine the true bend point of your golf shaft. Different shafts have different characteristics, so knowing how yours performs is essential.

2. Aligning the Shaft with the Club Head

Once you know the bend point, the next step is to align it correctly with the club head. This alignment ensures that when you swing, the energy is transferred properly throughout the club and meets the ball in the ideal position.

3. Consultation with Experts

It’s often advisable to consult with club fitters or golf professionals who specialize in shaft pureing. They have the tools and expertise needed to ensure the process is done perfectly.

Tools You Might Need for Pureing

  • Shaft Aligning Tool: To help identify the bend point.
  • Measuring Tape: For precise measurements.
  • Marker: To mark alignment points on your shaft.
  • Vice: For stabilizing the club during alignment.

Different Types of Shafts and Pureing Techniques

Not all golf shafts are created equal. Different materials and designs can influence the pureing process. Here’s a quick overview:

Shaft Type Material Pureing Technique
Steel Shafts Steel Standard pureing
Graphite Shafts Carbon Fiber Advanced alignment
Hybrid Shafts Combination Custom fitting

Pureing Techniques:

  • Standard Pureing: Commonly used for steel shafts, this is a straightforward approach that doesn’t require extensive equipment.
  • Advanced Alignment: Used mostly for graphites; this method might involve additional measurements based on how the golfer swings.

Tips for Golfers Considering Pureing

  • Evaluate Your Swing: Understanding how you swing can help in deciding whether pureing could benefit you.
  • Consult Professionals: Don’t hesitate to reach out to experts. They can provide valuable insights tailored to your playing style.
  • Consider Your Equipment: Different golfers require different setups—what works for one might not work for another.

Key Takeaways

  • Pureing a golf shaft optimizes alignment for improved accuracy and consistency.
  • Understanding the bend point of your shaft is crucial for successful pureing.
  • Consulting with professionals can greatly enhance your experience.
  • Different shaft types might require different pureing techniques.

FAQ Section

1. What is the primary objective of pureing a golf shaft?

The main objective of pureing is to ensure optimal alignment of the shaft’s bending characteristics, resulting in enhanced performance during swings.

2. How do I know if my golf shaft needs pureing?

If you notice inconsistencies in your shots or feel a lack of control, pureing might be beneficial. Consulting a professional can also provide insights.

3. Can I perform pureing myself?

While it’s possible to do it yourself, it is often best carried out by a professional club fitter to ensure precision.

4. What types of golfers benefit the most from pureing?

All golfers can benefit, but serious players or those looking to improve consistency, accuracy, and feel may find it particularly advantageous.

5. Does pureing a golf shaft affect distance?

Indirectly, yes. By improving accuracy and consistency, players often see better distances as they hit the ball more squarely.

6. How long does the pureing process take?

The duration can vary, but expect anywhere from a few hours to a day if a professional is working on it.

7. Is pureing more important for certain types of shafts?

Yes, graphite shafts generally benefit more from pureing due to their unique characteristics compared to steel shafts.

8. Are there common brands that specialize in pureing?

Brands like Mitsubishi, Project X, and Fujikura often have technologies and services specifically tailored to shaft pureing.

9. What equipment do I need for pureing?

You’ll need a shaft aligning tool, measuring tape, a marker, and a vice for stabilizing your club.

10. Can I see improvements in my game immediately after pureing?

Many golfers report immediate improvements, but the full benefits might become apparent over a few rounds as you adjust to the changes.


Pureing a golf shaft may sound like a nuanced process, but it can significantly impact your game’s quality. Whether you’re a weekend warrior or a regular player on the circuit, considering pureing might just be the secret to elevating your performance. Now that you understand what pureing is and how it can help, you’ll be well on your way to optimizing your golf equipment for your best game yet!

For more information on club fitting, check out our article on Choosing the Right Golf Club. Happy golfing!

overseeding golf courses in az

Overseeing golf courses is one of the essential practices to maintain lush, playable greens and fairways, especially in the unique climate of Arizona. With hot summers and temperate winters, it’s crucial for course managers and groundskeepers to understand the best practices in overseeding to enhance the playing experience. This guide will delve into the reasons why overseeding is crucial, how it’s done, and tips for achieving the best results in the Arizona golf scene.


What is Overseeding?

Overseeding involves planting new grass seed into existing grass without tearing up the turf. This practice helps rejuvenate the grass, filling in thin or bare areas and improving the overall health of the course. For golfers in Arizona, overseeding keeps greens vibrant and playable in peak golfing seasons.

Why is Overseeding Important?

Overseeding is especially significant in Arizona for several reasons:

  • Climate Adaptation: The harsh desert climate requires grass types that can withstand heat and drought. Overseeding helps introduce more resilient varieties.
  • Aesthetic Enhancement: A lush, green course improves the visual appeal, attracting more golfers.
  • Improved Playability: New grass helps maintain smooth, playable surfaces throughout the year.
  • Seasonal Transition: Different grass types thrive in different seasons. Overseeding ensures optimal growing conditions year-round.

When to Overseed in Arizona?

Timing is everything when it comes to overseeding. In Arizona, the best time to overseed is usually in late summer to early fall, typically between mid-September and early October. This timing allows the seeds to germinate and establish before the cooler winter months.


Steps of the Overseeding Process

Here’s how to execute a successful overseeding strategy in detailed steps:

1. Prepare the Soil

  • Mow: Begin by lowering the mowing height to remove excess grass. This creates a suitable bed for new seeds.
  • Aerate: Aerating the soil helps improve water absorption while also exposing the soil to air and nutrients.
  • Clean: Rake up any debris, dead grass, or thatch to provide a clean seed bed.

2. Choose the Right Seed

Selecting the appropriate seed type is critical. Common grass varieties in Arizona include:

Grass Type Best For Benefits
Bermuda Summer Heat tolerance, fast-growing
Ryegrass Winter overseeding Cool season growth, vibrant color
Fescue Transitional areas Drought resistance

3. Seed Application

  • Broadcast or Drop Spread: Use a spreader for even seed distribution. When applying, aim for about 3-4 seeds per square inch.
  • Seed Depth: Ensure seeds are not buried too deep—roughly 1/8 inch is ideal.

4. Watering

Water is critical for the germination of seeds. Follow these tips:

  • Initial Watering: Water lightly after seeding to ensure good seed-to-soil contact.
  • Consistent Moisture: Keep the soil consistently moist for the first few weeks until the seeds germinate.

5. Fertilization

An appropriate fertilization schedule supports new grass growth. Use a starter fertilizer with a high phosphorus content to encourage root development.

6. Cutting and Maintenance

Resume regular mowing once the new grass reaches about 3 inches tall. Follow these guidelines for maintenance:

  • Mowing Height: Keep the blade height at about 2 inches during the establishment phase.
  • Fertilization: After 4-6 weeks, consider reapplying a balanced fertilizer to promote healthy growth.


Tips for Successful Overseeding

To achieve the most successful overseeding results on Arizona golf courses, consider these essential tips:

  • Choose the Right Seed: Always select seeds suited for the Arizona climate.
  • Adequate Preparation: Don’t skip soil preparation; it’s crucial for seed success.
  • Focus on Watering: Consistent moisture increases the likelihood of germination.
  • Monitor Growth: Keep an eye on new grass growth; adjust watering and fertilizing as needed.


Key Takeaways

  • Overseeding is vital for maintaining high-quality golf courses in Arizona.
  • The best time to overseed is in late summer to early fall.
  • Proper preparation, seed selection, and maintenance will significantly enhance overseeding results.
  • Regular watering and monitoring are essential in the early stages post-seeding.


FAQ Section

1. What is the primary purpose of overseeding?

Overseeding enhances turf quality by rejuvenating existing grasses and improving aesthetics and playability.

2. When should I start overseeding at my Arizona golf course?

Aim to overseed between mid-September and early October for the best results.

3. What types of grass are best for overseeding in Arizona?

Bermuda, ryegrass, and fescue are widely used for their adaptability to various conditions.

4. How often should I water after overseeding?

Initially, ensure the soil is kept consistently moist until seeds germinate, typically within 7-14 days.

5. When can I start mowing the new grass?

Once new grass reaches about 3 inches in height, you can resume mowing.

6. Do I need to aerate before overseeding?

Yes, aerating helps create a conducive environment for seeds by improving soil aeration and moisture retention.

7. Is fertilization necessary after overseeding?

Yes, using a starter fertilizer after overseeding promotes healthy root development and ensures vigorous growth.

8. How long does it take for newly overseeded grass to establish?

Typically, new grass takes 4-6 weeks to establish before it can withstand regular maintenance.

9. What are the signs that overseeding has been successful?

Signs of success include healthy green shoots, even growth, and improved turf density.

10. Can I overseed on an existing turf?

Absolutely! This is the essence of overseeding, offering a seamless transition to healthier grass without tearing up existing turf.


By following this comprehensive guide on overseeding golf courses in Arizona, you can ensure that your course maintains its vibrant appearance and optimal playability throughout the year. Happy overseeding!

How To Fit Golf Irons

how to fit golf irons

Golf is a game where precision meets artistry. Fitting golf irons is a crucial step for every golfer who wants to improve their game and enjoy their time on the course. Whether you’ve just picked up a club or you’re a seasoned player, understanding how to properly fit your golf irons can significantly impact your performance.

In this guide, we will explore the various aspects of golf iron fitting, share tips, and provide answers to frequently asked questions. Let’s dive in!

Why Fitting Golf Irons Matters

Understanding the importance of fitting golf irons begins with recognizing how versatility and correctness can elevate your game.

  • High Accuracy: Well-fitted clubs lead to better shot consistency.
  • Improved Comfort: Feeling comfortable and confident with your iron can boost your confidence.
  • Enhanced Performance: A proper fit helps you achieve optimal distance and control.

The Basics of Golf Irons

Before we jump into the fitting process, let’s briefly explore the components of golf irons you should consider:

  1. Length: Longer irons can lead to greater distance but might reduce control.
  2. Lie Angle: This affects the direction your shots will travel.
  3. Grip Size: The thickness and texture of your grips matter for comfort and control.
  4. Flexibility: Shaft flexibility affects how much the club can bend during a swing.

How to Fit Golf Irons

Fitting golf irons is not just about measurements; it’s about finding the right balance between comfort and performance. Here’s a step-by-step guide to help you through the fitting process.

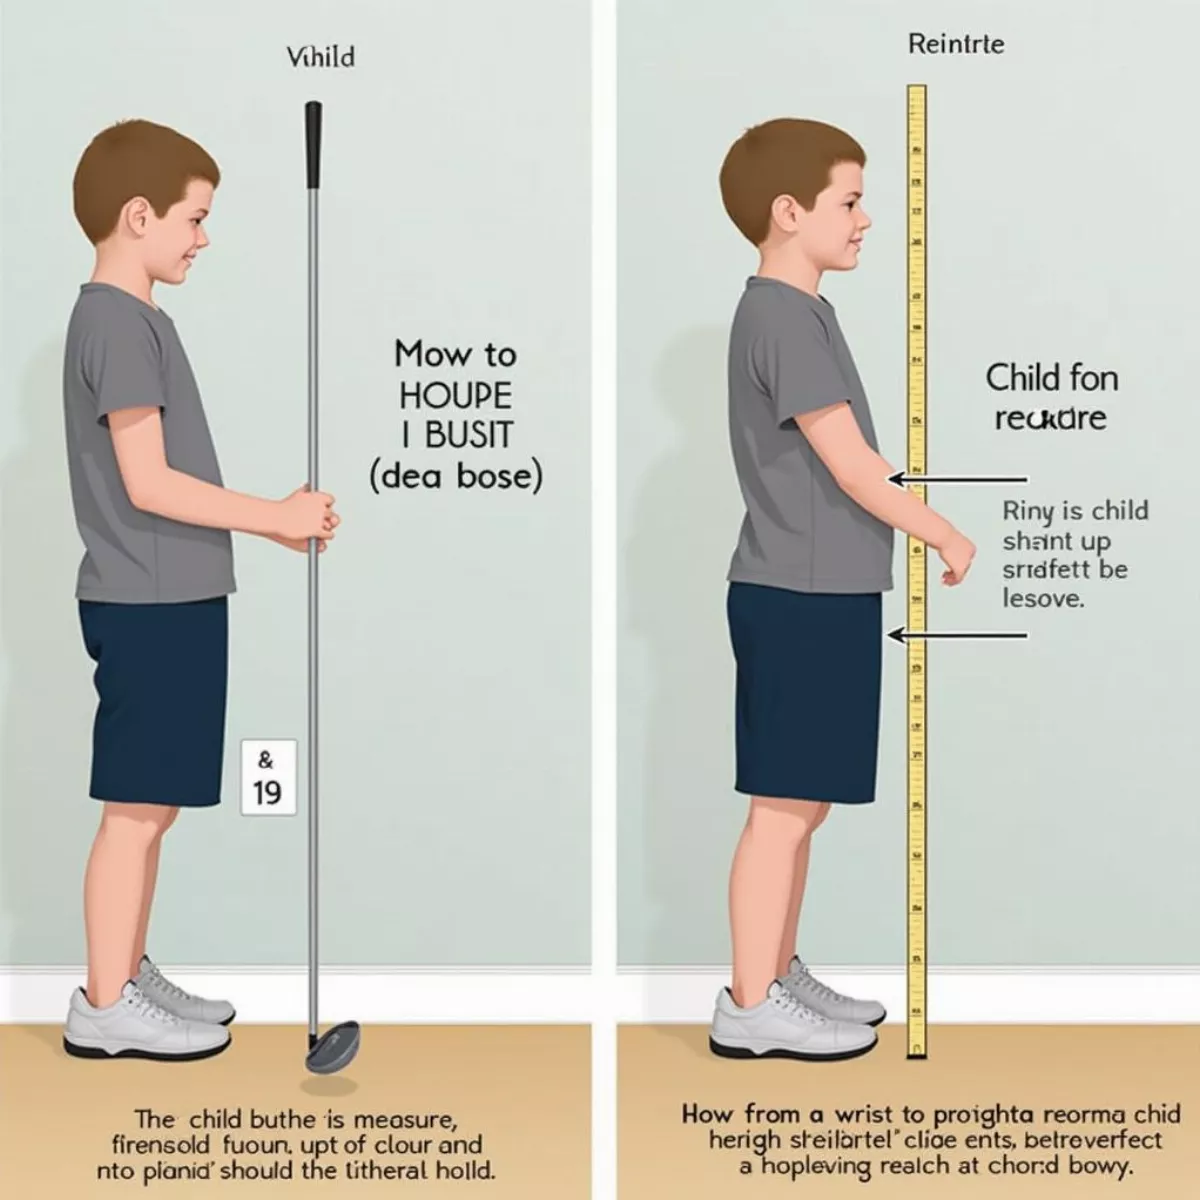
1. Measure Your Height and Wrist to Floor Length

To get started, you’ll want to measure your height and the distance from your wrist to the floor:

  • Height: Stand barefoot against a wall and mark your height.
  • Wrist to Floor: With your arms relaxed, measure the distance from your wrist to the floor.

This data will help determine the club length that works best for you.

2. Assess Your Current Swing Mechanics

Understanding your swing is crucial. Whether you are a beginner or a pro, getting a professional to analyze your swing can provide valuable insights. Here’s what to observe:

  • Swing Speed: Faster swing speeds often necessitate stiffer shafts.
  • Shot Dispersion: Take note of how spread out your typical shots are.

3. Determine Your Lie Angle

The lie angle of the club affects the trajectory of your shots. It’s best to check the lie angle with a fitting professional or at a fitting session. Generally, a lie angle adjustment may be needed if:

  • Shots consistently go left or right.

4. Choose the Right Shaft Flex

Choosing the appropriate shaft flex is pivotal in optimizing your performance. The common flex types include:

  • L – Ladies Flex
  • A – Senior Flex
  • R – Regular Flex
  • S – Stiff Flex
  • X – Extra Stiff Flex

Consider your swing speed and playing style when deciding on these options.

5. Test Grip Size

Grip size should feel comfortable. Different folks hold the club differently. To get the right grip size:

  • Standard Grip: For regular hands.
  • Midsize Grip: For larger hands.
  • Jumbo Grip: Best for oversized hands or players with grip issues.

6. Try Different Clubs on the Range

Once you have a baseline from the previous steps, it’s time to try various irons at a driving range. Take note of:

  • Feel and Comfort: Do you feel in control of the club?
  • Shot Trajectory: Are your shots consistently going straight?
  • Distance Control: Are you hitting the expected distances?

Working with a Professional Fitter

While this guide gives you a strong foundation, working with a professional club fitter is often beneficial. A professional can tailor the fitting process to your individual needs, finding the perfect combination of components for your game.

Best Practices During the Fitting Process

  • Bring Your Current Irons: This helps the fitter understand what you currently play with.
  • Communicate Your Goals: Be open about what you hope to achieve with your new fitting.
  • Be Patient: Finding the right fit is a process. Take your time to ensure the best results.

Equipment You Might Need

Here’s a quick reference table to what you’ll need during a fitting:

Equipment Purpose
Measuring Tape To measure height and wrist-to-floor length
Golf Balls For testing various irons
Club-Swing Analyzer Analyzes swing speed and mechanics
Notepad Take notes during the fitting session

Key Takeaways

  • Properly fitted golf irons can greatly enhance your game.
  • Measure your height and wrist length for accurate club length.
  • Assess your swing mechanics to tailor the fitting process.
  • Choose the best flex and lie angle suited to your playstyle.
  • Consider getting help from a professional for optimal results.

Frequently Asked Questions (FAQ)

1. How often should I get my golf irons fitted?

It’s recommended to get fitted every few years, especially if you notice a change in your swing or physical condition.

2. Can I fit my golf irons myself?

While you can start the process yourself, professional fitting usually yields the best results.

3. What’s the difference between Standard and Custom golf irons?

Custom irons are tailored based on your specifications, whereas standard models are mass-produced and may not fit all players.

4. What can affect the flex of my golf shaft?

Your swing speed, technique, and playing style are the main factors affecting shaft flex.

5. How do I know if the lie angle of my clubs is correct?

If your shot patterns consistently go to one side of the fairway, it’s a sign your lie angle may need adjustment.

6. Does my skill level matter in fitting?

Yes, fitting is essential for all skill levels. Beginners benefit from proper fittings to establish a good foundation.

7. What should I expect from a fitting session?

You can expect personalized recommendations based on your measurements, swing analysis, and testing different club specifications.

8. Where can I find a professional club fitter?

Local pro shops at golf courses or stores like Golf Galaxy often have certified club fitters.

9. Can I use my old grips on my new irons?

It’s advisable to get new grips fitted to the new clubs, as the texture and size matter greatly for comfort and control.

10. What’s the average cost of a professional fitting?

Fittings can range from $50 to $300 depending on location, store, and level of service provided.

In Conclusion

Fitting golf irons is an essential part of enhancing your game. By taking the time to assess your needs and work with professionals, you will find the right combination that supports your playing style and goals. So why wait? Get started on fitting your golf irons today and unlock your potential on the course!


If you have any further questions or need personalized assistance, feel free to reach out! Happy golfing!

Best Golf Ball Marker Pen

best golf ball marker pen

When it comes to the game of golf, precision matters—right down to your golf ball marker pen. While it may seem like a simple accessory, selecting the best golf ball marker pen can significantly enhance your performance on the course. Whether you’re a seasoned pro or a weekend warrior, having the right tools can make your experience more enjoyable and efficient. Let’s dive into everything you need to know about golf ball marker pens.

Why Do You Need a Golf Ball Marker Pen?

A golf ball marker pen is not just a trendy accessory; it serves an essential role on the golf course. Here are a few reasons why having the best golf ball marker pen is crucial:

  • Marking Your Ball: The primary function is to mark your ball’s position on the green, allowing you to pick it up for cleaning or in preparation for your next putt.
  • Rule Compliance: According to the rules of golf, you’re required to mark your ball whenever it interferes with another player’s line or during other circumstances.
  • Stylish Expression: Many players enjoy personalizing their golf accessories, making their game not only about skill but also about style.

What to Look for in a Golf Ball Marker Pen

When selecting the best golf ball marker pen, consider the following factors:

1. Ink Quality

  • Water-based Ink: It’s typically easier to remove and generally has a lower environmental impact.
  • Permanent Ink: Offers durability and is less likely to smudge, making it perfect for wet conditions.

2. Tip Size

  • Fine Tip Pens: Great for detailed designs or small markings.
  • Broad Tip Pens: Easy to see and quick for jotting down positions.

3. Durability

  • Material: Look for pens made from robust materials that withstand outdoor conditions.
  • Weather Resistance: A good pen should be able to perform well in rain or humidity.

4. Design

  • Ergonomic Design: A comfortable grip can make it easier to use, especially for long rounds.
  • Creative Designs: Some markers offer different colors and designs for personalization.

5. Portability

  • Size: Compact size is ideal for carrying in your golf bag.
  • Integrated Clip: Look for pens that can clip onto your bag for easy access.

6. Ease of Removal

  • Easily Erasable: Choose markers that can be removed without excessive effort, especially if you plan to change your ball position frequently.

Recommendations for the Best Golf Ball Marker Pens

Here is a table summarizing some of the best golf ball marker pens available today:

Product Ink Type Tip Size Durability Price
Sharpie Ultra Fine Permanent Fine High $2.99
Golfers Club Marking Pen Water-based Broad Moderate $4.99
Callaway Custom Marker Non-toxic Permanent Fine High $5.99
Titleist Pen Permanent Fine High $3.49
Nicklaus Golf Marker Water-based Broad Moderate $6.99

How to Use a Golf Ball Marker Pen

Using a golf ball marker pen is straightforward, but here’s a quick guide to help you out:

Steps:

  1. Choose the Spot: Before lifting your ball, choose the spot on the green where your ball is resting.
  2. Mark the Ball: Use the pen to create an easily recognizable mark (dot, line, or personal logo) on the green.
  3. Lift the Ball: Carefully pick up the ball for cleaning or repositioning.
  4. Replace the Ball: Place the ball back on the spot by aligning it with the marker.
  5. Erase the Marker: After your turn, if required, clean the mark from the green using a wet cloth or fingers.

Creative Ways to Personalize Your Golf Ball Marker Pen

Why not add a little flair to your game? Here are some creative ways to personalize your golf ball marker pen:

  • Initials or Monograms: Writing your initials can give your pen a personal touch.
  • Unique Designs: Create custom designs like logos of your favorite teams or brands.
  • Color-Coding: Use different colored pens for marking different clubs or conditions.

Key Takeaways

  • Choosing the best golf ball marker pen enhances your golfing experience.
  • Factors like ink quality, tip size, and portability are crucial in your decision-making process.
  • Personalization options add fun and creativity to your game.
  • Practice using the marker can enhance efficiency during your round.

Frequently Asked Questions (FAQs)

1. What is a golf ball marker pen used for?

A golf ball marker pen is primarily used to indicate the position of your golf ball on the course, especially on the green.

2. Can I use any ink pen to mark my golf ball?

No, it’s best to use a specific golf ball marker pen to ensure it’s compliant with golfing rules and can be easily removed.

3. How do I remove markings made by a golf ball marker pen?

Use a damp cloth to gently wipe away the markings on the green. Ensure it doesn’t damage the grass.

4. Are there specific colors that are best for marking?

Bright colors like fluorescent green or orange are easier to see, especially on a green.

5. Can I use a golf ball marker pen during competition play?

Yes, as long as the ink used complies with the rules of golf and doesn’t cause any harm to the course.

6. Do I need permission to mark my ball?

No, players are permitted to mark their balls according to the Rules of Golf. However, it’s courteous to inform other players.

7. Is a permanent marker suitable for golf?

While they are durable, permanent markers can be harder to remove and may not be advisable, especially on the green.

8. How do I maintain my golf marker pen?

Store it in a cool, dry place and ensure the cap is on tightly to prevent it from drying out.

9. Are there eco-friendly options available?

Yes, many brands now offer water-based inks that are eco-friendlier.

10. Can I find golf ball marker pens in different designs?

Absolutely! Many brands offer custom designs, or you can personalize your pen with your own designs.

In conclusion, investing in a quality golf ball marker pen not only follows etiquette but enhances your overall golfing experience. With the right knowledge, you’ll not only choose the best pen but also enjoy the beauty of customizing your golfing gear. Happy golfing!

What Is The Rough On A Golf Course

what is the rough on a golf course

When you step onto a golf course, the manicured greens beckon, but lurking just off the fairway is a less welcoming terrain: the rough. Often viewed as an obstacle, the rough plays a pivotal role in the strategy and challenge of the game. In this guide, we’ll delve deeply into what the rough is, its different types, its impact on play, and how to navigate it effectively.

What is the Rough?

In simple terms, the rough is the area between the fairway and the out-of-bounds or hazards. It’s typically characterized by longer grass, thicker vegetation, or other natural elements like trees. The purpose of the rough is to provide both a challenge for golfers and an environment for wildlife.

Types of Rough

  1. First Cut: This is the area just outside the fairway, where the grass is typically longer than on the fairway but shorter than in the deeper rough. It can still present difficulties but is often more manageable.

  2. Deep Rough: This refers to the areas farther away from the fairway where the grass is much taller and denser. Getting stuck here can lead to challenging shots.

  3. Heathland Rough: In some courses, particularly links courses, the rough may consist of heathland vegetation like gorse and heather, which adds more challenges due to their thickness and ability to snag golf balls.

  4. Natural Rough: It’s a non-maintained area of the course, often home to natural foliage and wild grasses, which can be incredibly difficult to navigate.

Characteristics of the Rough

  • Height: The taller the grass, the harder it is to find and play the ball.
  • Density: Thick rough can conceal the ball entirely, requiring a bit of luck and skill to extricate it.
  • Surface: Wet or muddy rough can cause clubs to snag, impacting shot execution.

Why Does the Rough Matter?

The rough serves multiple purposes on a golf course. Effectively, it:

  • Challenges Players: It penalizes wayward shots, encouraging precision and control.
  • Promotes Strategy: Players must decide whether to risk an aggressive shot or play it safe.
  • Balances Course Design: It adds variety to the layout, maintaining interest throughout the round.

Strategies for Navigating the Rough

Getting stuck in the rough is challenging, but there are ways to improve your chances of making a successful recovery. Here are some key strategies to consider:

Understanding Your Lie

  • Ball Above Ground: Play a more lofted club to help launch it back up to the fairway.
  • Ball at Ground Level: Use a more aggressive swing to cut through the grass effectively.
  • Ball Below Your Feet: Align your shoulders downward for better balance, and adjust the clubface to account for a potential pull.

Club Selection

  • Hybrid Clubs: They can be very effective for navigating rough, offering a combination of forgiveness and distance.
  • Long Irons: If you’re confident, a long iron can penetrate deeper grass.

Technique Adjustments

  • Steeper Angle of Attack: Digging in can help you get more power to reach the ball effectively.
  • Follow Through: Maintain a nice follow-through to ensure you don’t get snagged.

Practice Drills

Incorporating rough shots into your practice session can pay off. Here are a couple of drills to consider:

  • Aim for the Toughest Lies: During your practice, place a few balls in the rough and practice your recovery game.
  • Focus on Different Clubs: Use several clubs to find out which works best for you in the rough.

The Mental Game

When faced with the rough, your mindset can significantly affect your performance. Remember:

  • Stay Calm: Accept that the rough is part of the game.
  • Visualize Success: Imagine your shot going perfectly to regain your composure.

Key Takeaways

  • The rough serves as both an obstacle and a strategic challenge on the golf course.
  • Different types of rough require different approaches. Knowing the types can help you strategize effectively.
  • Club selection and technique adjustments are crucial for making successful shots out of the rough.
  • Mental resilience plays a huge role; staying composed can improve your chances of success.

FAQs

1. What is the rough in golf?

The rough is the area of longer grass and thicker vegetation found on a golf course, situated between the fairway and other hazards.

2. How does the rough affect my game?

The rough poses a challenge by making it harder to find and play your ball, often penalizing errant shots.

3. What are the different types of rough?

Types include the first cut, deep rough, heathland rough, and natural rough, each presenting unique challenges.

4. How can I improve my shots from the rough?

Focus on your lie, adjust your club selection, and modify your techniques for a better chance at a successful recovery.

5. Should I change my grip when hitting from the rough?

You may not need to change your grip, but ensure that you maintain control and don’t grip too tightly, which can hinder your swing.

6. Are there specific clubs that work better in the rough?

Hybrids and long irons are preferable for navigating the rough, providing balance and distance.

7. What mental techniques help when playing from the rough?

Staying calm, visualizing your shot, and accepting the challenge are essential to maintaining a positive mindset.

8. How important is practice for playing from the rough?

Practice is crucial; working on your technique in the rough can lead to better performance on the course.

9. Can I expect different rough conditions at various courses?

Yes, rough conditions can vary considerably by course, including grass height, density, and types of vegetation.

10. What should I do if my ball is lost in the deep rough?

If you can’t find your ball after a reasonable search, you may have to take a drop and proceed according to the rules of golf.

Navigating the rough can be challenging for any golfer, but understanding its nuances can enhance your game. Armed with these insights, you’ll be better prepared to tackle whatever the course throws at you!