Author Archives: Larry Scott

About Larry Scott

My name is Larry Scott founder of Golf Life Wiki. You'll find a treasure trove of knowledge, insights, and personal experiences about the game of golf. Whether you're a beginner looking to learn the basics, an amateur seeking to improve your skills, or a seasoned player wanting to stay updated with the latest trends, this blog has something for everyone.

Golf Cart Governor Location

how to disable the governor on a golf cart

Are you looking to speed up your golf cart for a more exciting ride around the course, or perhaps you want to customize it for other recreational activities? Disabling the governor on your golf cart is a common modification that many golf cart enthusiasts consider. In this guide, we will walk you through how to do it safely while explaining the benefits and potential drawbacks. Let’s dive in!

What is a Governor and Why Disable It?

Before we get into the how-tos, let’s clarify what a governor is. In a golf cart, the governor is a device that regulates the maximum speed of the cart. Its purpose is to ensure that the vehicle doesn’t exceed a certain cruising speed, enhancing safety and providing a smooth experience, especially for beginners.

Reasons for Disabling the Governor:

  • Increased Speed: The most obvious reason to disable the governor is to increase speed, making your golf cart more fun to drive!
  • Performance for Off-Roading: If you use your cart in rugged terrain, increased speed may be beneficial.
  • Customization: Enthusiasts often modify their golf carts for a unique look and performance style.

However, keep in mind that removing the governor can affect vehicle safety, so it’s crucial to do this modification responsibly.

Tools and Materials Needed

Before you begin, make sure you have the following tools and materials:

  • Basic hand tools:
    • Wrench set
    • Screwdrivers (flathead and Phillips)
    • Pliers
  • Safety gear:
    • Gloves
    • Safety goggles
  • Instruction manual: Specific to your golf cart model for reference.

Step-by-Step Guide to Disable the Governor on Your Golf Cart

Step 1: Safety First

Start by ensuring your golf cart is parked on a flat surface with the ignition turned off. Safety precautions are critical, so wear your safety gear to protect yourself from any moving parts.

Step 2: Locate the Governor

The location of the governor may vary depending on your golf cart model. Typically, it can be found:

  • On the engine
  • Near the throttle
  • Close to the rear of the cart

Refer to your owner’s manual to find the exact location.

Step 3: Examine the Governor Mechanism

Once located, inspect the mechanism. Most governors can be adjusted or removed entirely.

  • For adjustable governors:
    • Locate the adjustment screw.
    • You may need to turn it clockwise to increase speed limits.

Step 4: Remove the Governor (if applicable)

If you decide to remove the governor entirely:

  1. Disconnect the battery by removing the negative lead first.
  2. Unscrew the governor assembly carefully.
  3. Disconnect any linkage to the throttle and other components.
  4. Store the governor for future use in case you decide to reinstate it.

Golf Cart Governor LocationGolf Cart Governor Location

Step 5: Reconnect and Test

After removing or adjusting the governor:

  • Reconnect the battery.
  • Turn on the ignition and carefully test the golf cart’s speed. Ensure everything functions correctly.

Step 6: Regular Maintenance Checks

Once you disable the governor, it’s essential to monitor your golf cart regularly. Increased speed can lead to wear, so keep an eye on:

  • Tire pressure
  • Brake functionality
  • Battery health

Tips for Safe Operation After Modifications

  1. Drive Responsibly: Avoid racing or reckless driving.
  2. Wear Seatbelts: If your golf cart has them, use them.
  3. Do Regular Maintenance: Schedule routine checks to ensure all systems operate effectively.

Golf Cart Safety CheckGolf Cart Safety Check

Risks of Disabling the Governor

While increasing the speed can enhance your experience, it may come with risks:

  • Safety Hazards: Higher speeds can lead to accidents.
  • Legal Issues: Some golf carts are only allowed to operate at set speeds in certain areas.
  • Insurance Complications: Modifications might affect your insurance coverage.

Key Takeaways

  • Understand the Governor: The governor keeps your golf cart at a safe speed.
  • Use Proper Tools: Ensure you have tools handy before starting.
  • Follow the Steps Carefully: Remove or adjust the governor as per your model’s guidelines.
  • Prioritize Safety: Always wear safety gear and drive responsibly.

Frequently Asked Questions (FAQ)

Here are some common questions regarding disabling the governor on a golf cart.

1. Is it legal to disable the governor on a golf cart?

Generally, it is legal, but local laws may vary. Always check your local regulations.

2. Will disabling the governor void my warranty?

Yes, it can void your warranty. Consult your dealer before making modifications.

3. Can I remove the governor completely?

Yes, you can, but be cautious. Removing it may have safety and performance implications.

Disabled Golf Cart GovernorDisabled Golf Cart Governor

4. What are the risks of increasing my golf cart’s speed?

Increased speed can lead to accidents and may affect the longevity of your cart.

5. How do I know if my golf cart’s governor is adjusted correctly?

Test the speed of your golf cart after adjustments. It should operate within safe limits.

6. What maintenance should I perform after disabling the governor?

Keep an eye on tire pressure, battery condition, and brake performance.

7. Can I reinstall the governor once removed?

Yes, if you kept the governor parts, you can reinstall it.

8. How much faster will my golf cart go after removing the governor?

The speed increase varies by model but often is between 5-10 mph.

9. Will this modification affect battery performance?

Potentially. Higher speeds can lead to faster battery drain.

10. Are there alternative ways to increase speed without disabling the governor?

Yes, consider upgrading tires, batteries, or adding a performance controller.

By following this detailed guide, you can safely modify your golf cart for enhanced performance while keeping safety a priority. Enjoy your rides, and don’t forget to adhere to local regulations!

Types of Golf Clubs

how to determine which golf club to use in different situations on the golf course

Golf is a game of strategy and skill, and knowing which golf club to use in different situations is crucial for scoring well. Whether you’re a beginner or a seasoned player, understanding the appropriate clubs for specific scenarios can significantly enhance your game. In this guide, we’ll take a closer look at the various golf clubs and provide you with the tips and insights needed to make the right choice on the course.

The Basics: Understanding Golf Clubs

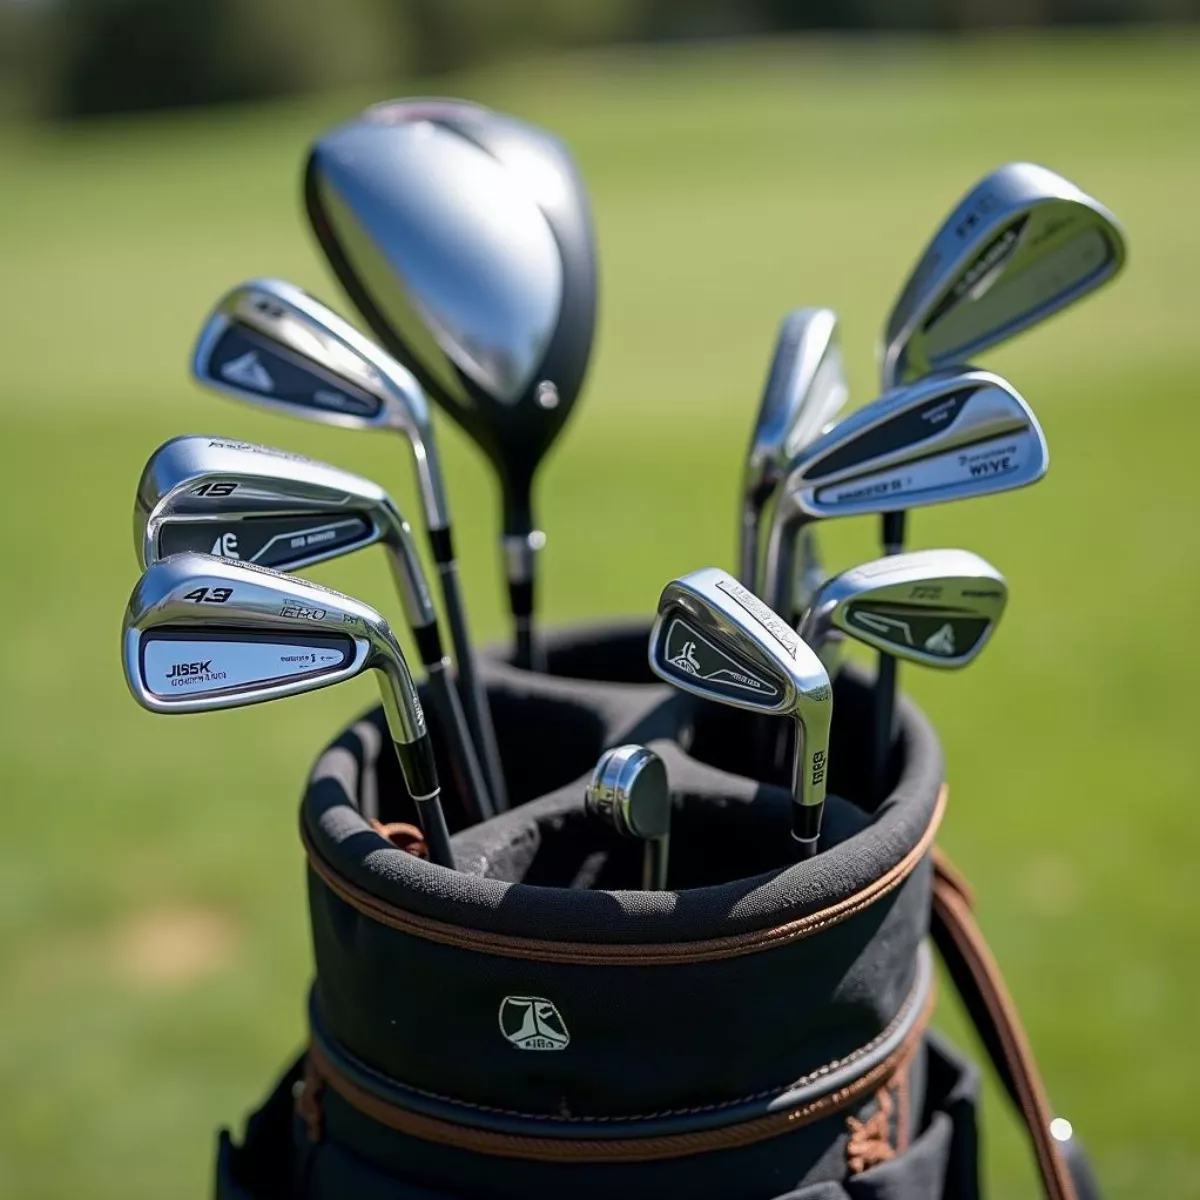
Before diving into specific situations, let’s familiarize ourselves with the types of golf clubs available:

  1. Woods:
    • Best for long-distance shots
    • Used primarily off the tee or for reaching the green from long distances
  2. Irons:
    • Generally numbered from 1 to 9, with lower numbers for distance and higher for accuracy
    • Used for approach shots and shorter distances
  3. Wedges:
    • A type of iron, specifically designed for short, precise shots
    • Includes pitching, sand, and lob wedges
  4. Putters:
    • Designed for use on the green
    • Helps direct the ball into the hole with precision

Understanding the purpose and mechanics of each club is essential as you navigate the course.
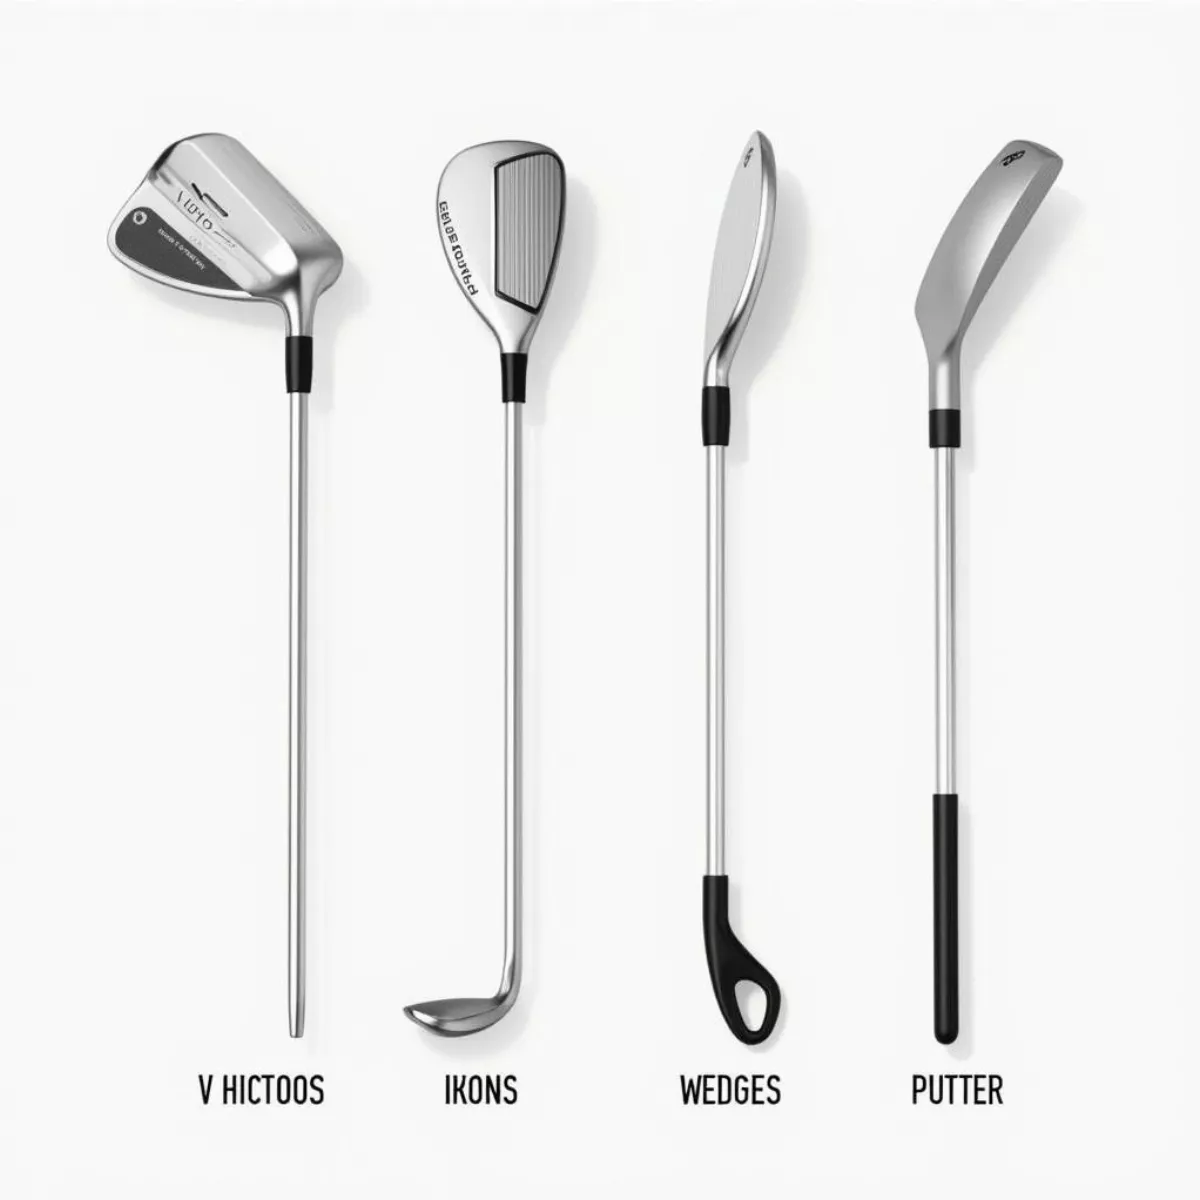
Types of Golf ClubsTypes of Golf Clubs

Factors to Consider When Choosing a Club

When you stand on the tee box or approach a shot, several factors influence your decision. Consider the following:

  • Distance to the Target: Measure how far you need to hit the ball.
  • Lie of the Ball: Is the ball in the rough, on the fairway, or in a bunker?
  • Weather Conditions: Wind speed and direction can greatly affect your shot.
  • Course Layout: Understand the layout, including hazards and pin placements.

By evaluating these factors, you can make better club selections.

Deciding on the Right Club for Different Situations

Here’s a breakdown of common scenarios you’ll encounter on the golf course and recommended clubs to use:

1. Tee Shots

  • Long Par 4s/5s:
    • Driver: A must-have for length.
  • Short Par 4s:
    • 3-Wood or 5-Wood: Provides distance while keeping control if you prefer accuracy over power.

2. Approaching the Green

  • 150+ Yards:
    • 3-Iron or 4-Iron: Good for long approach shots.
  • 100-150 Yards:
    • 7-Iron or 8-Iron: Offers a balance of distance and trajectory.
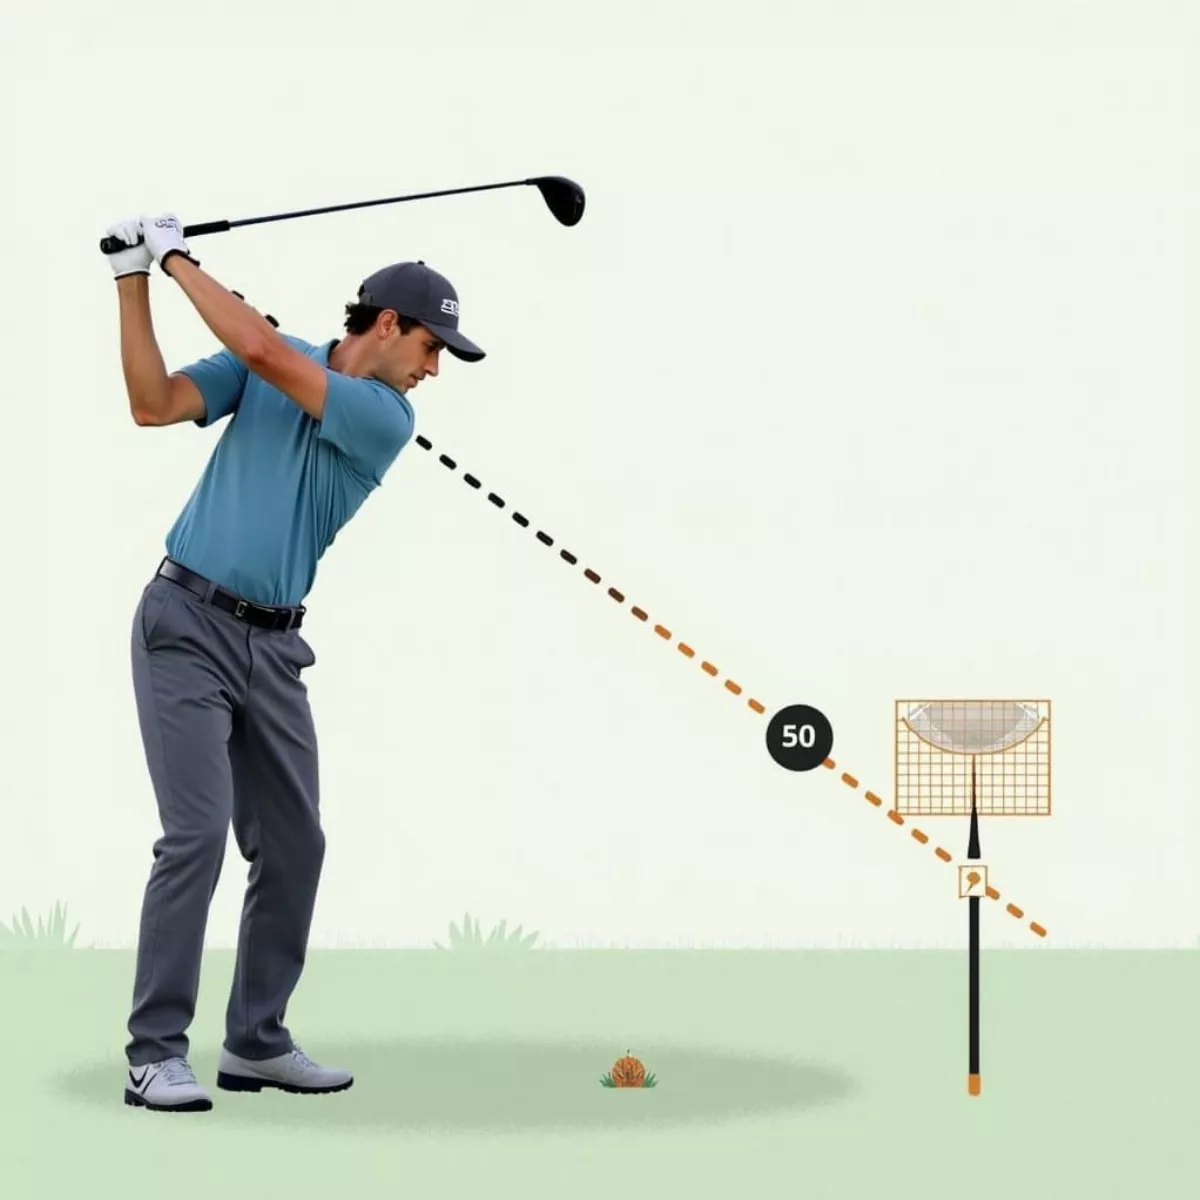
  • 50-100 Yards:
    • Pitching Wedge or Gap Wedge: Ideal for giving you increased control and accuracy.
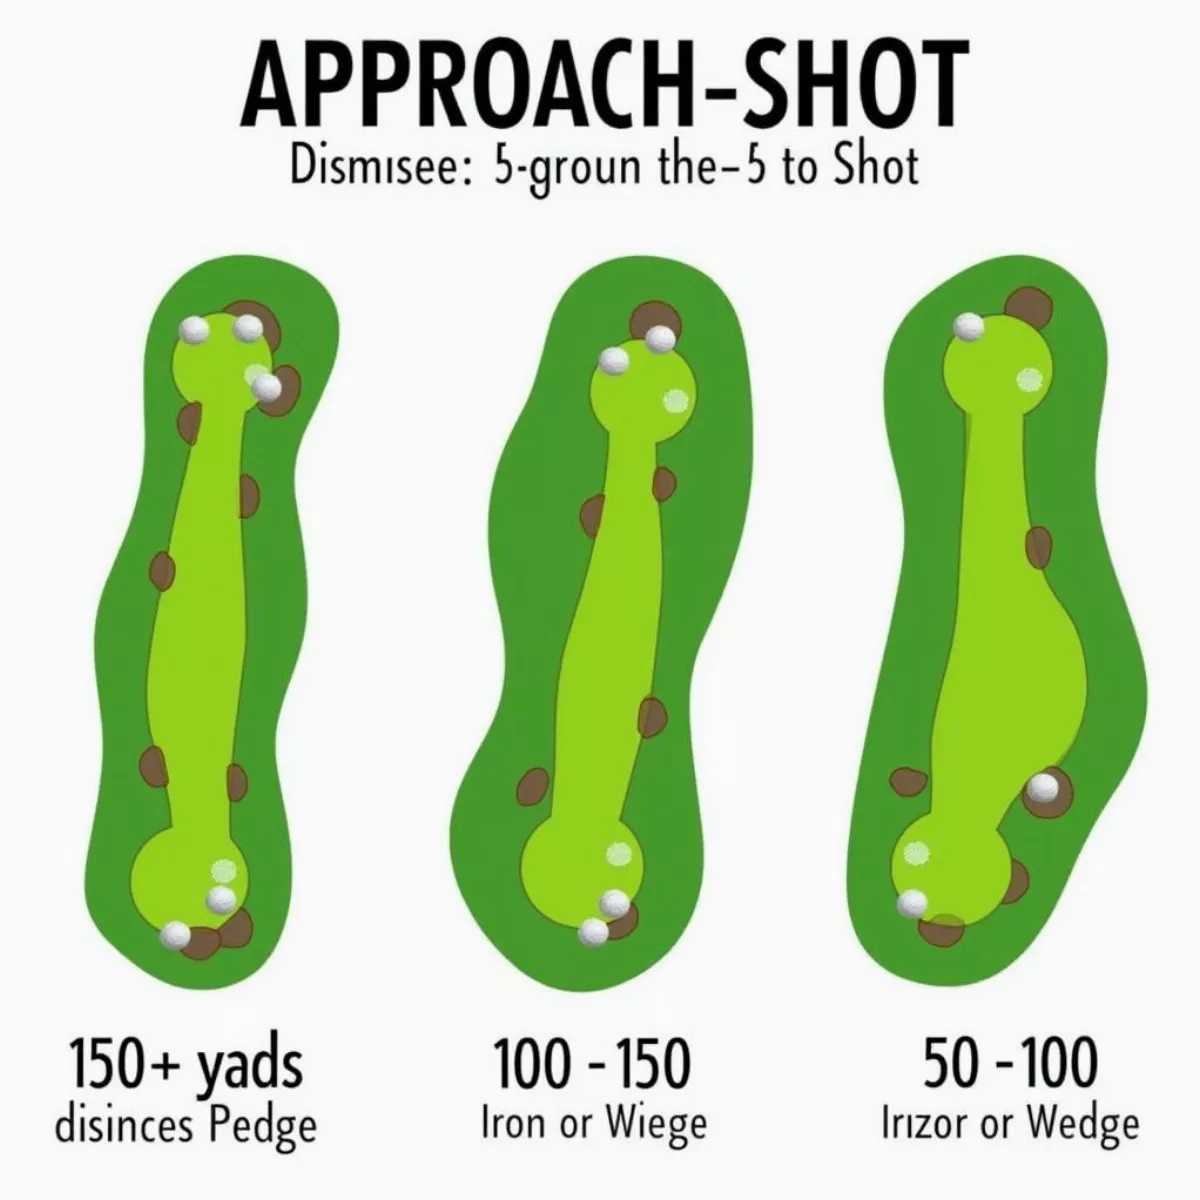
Golf Course Approach ShotsGolf Course Approach Shots

3. Short Game Situations

  • In the Rough:
    • Choose a sand wedge or lob wedge for more loft and control.
  • Bunker Shots:
    • Sand Wedge: Designed to help you clear sand and get onto the green.

4. Putting

  • On the Green:
    • Use a putter. Practice your distance control and aim.

Visualization of Club Selection

Here’s a table summarizing club selection based on different situations:

Situation Recommended Club
Long Tee Shots Driver
Short Tee Shots 3-Wood or 5-Wood
150+ Yards Approach 3-Iron or 4-Iron
100-150 Yards Approach 7-Iron or 8-Iron
50-100 Yards Chip Shot Pitching Wedge or Gap Wedge
Bunker Sand Wedge
Putting Putter

Tips for Making Better Club Decisions

Here are a few tips to keep in mind:

  • Practice: Regular practice helps you understand your distances better.
  • Course Management: Play the course smartly. Sometimes laying up is better than going for it.
  • Stay Relaxed: Take a few deep breaths to clear your mind. Stress can lead to poor decisions.

A famous quote by golfing pro Ben Hogan encapsulates this sentiment beautifully: “The best laid plans often go awry.” Remember, even the pros can falter; finding the right club is as much about your playing style as it is about your choices.

Golfer Choosing a ClubGolfer Choosing a Club

Key Takeaways

  • Know the basic types of golf clubs: woods, irons, wedges, and putters.
  • Always assess the distance, lie, weather, and course layout when selecting a club.
  • Use the appropriate club for different scenarios to enhance your game.
  • Practice is vital for understanding your distances and improving your decision-making.

FAQ Section

1. How do I determine the distance I hit each club?

  • Most golfers measure their yardage through practice. Use a GPS or rangefinder for accuracy, or visit a driving range with marked distances.

2. What club should I use for a downhill shot?

  • Opt for one club less than you would normally use for that distance due to the impact of gravity.

3. Is it necessary to carry all types of clubs?

  • While it’s not necessary, having a variety of clubs allows you to handle different situations better.

4. How can I practice my short game?

  • Set up an area in your yard or at the range to practice chipping and putting with various clubs, focusing on distance control.

5. What’s the difference between a pitching wedge and a gap wedge?

  • A pitching wedge typically has less loft than a gap wedge, which makes the gap wedge better for shorter, loftier shots.

6. Should I always use a driver off the tee?

  • Not necessarily. Assess the hole and conditions. Using a 3-wood or 5-wood can be smarter on tighter holes.

7. How do wind conditions affect club selection?

  • Strong headwinds may necessitate using one club longer, while tailwinds can allow you to club down for more control.

8. Can I use the same club for different distances?

  • Yes, skilled golfers can use the same club for different distances by changing their swing mechanics, but this requires practice and experience.

9. How important is feel when choosing a club?

  • Extremely important. Your personal comfort and confidence with a club can greatly influence decision-making on the course.

10. Should I consider my playing style when selecting clubs?

  • Absolutely. Understanding your strengths and weaknesses can lead you to the right clubs for various situations.

By employing these strategies and tips, you’ll be well-equipped to make better club choices, leading to improved performance on the golf course. Remember, it’s not just about distance; it’s about playing smart. Enjoy the game!

Ventana Canyon golf course green

the greens at ventana canyon

Nestled in the stunning foothills of the Santa Catalina Mountains, Ventana Canyon is not just a visual masterpiece; it’s a golfer’s paradise. If you’re considering a golf trip, learning more about the greens at Ventana Canyon is essential. Whether you’re a seasoned player or a beginner, the experience offered at Ventana Canyon will leave you with unforgettable memories. So grab your clubs, and let’s dive into this fantastic golf locale!

A Quick Overview of Ventana Canyon Golf Course

Before delving into the greens, it’s essential to understand what makes the Ventana Canyon Golf Course stand out. Here’s a snapshot:

  • Location: 6200 N Clubhouse Ln, Tucson, AZ
  • Established: 1984
  • Designer: Tom Fazio
  • Number of Holes: 36, divided into two distinct courses: the Mountain Course and the Canyon Course.
  • Web Address: Ventana Canyon Golf & Racquet Club

Both courses offer unique challenges that blend beautifully into the natural desert landscape, enhancing your golfing experience.

The Greens: What to Expect

1. Challenging Layouts

The greens at Ventana Canyon present various challenges that can be both rewarding and tough. Each green is meticulously maintained and has varying slopes and speeds, which require skill and strategy:

  • Mountain Course Greens: These greens are known for their undulations, making putting both critical and tricky. A good strategy here is to approach the pin from the right angle.
  • Canyon Course Greens: A bit more forgiving, these greens offer wider landing areas, but they can be deceptive. Think about how the elevation changes may affect your shot.

2. Maintenance Standards

One of the most significant advantages of the greens at Ventana Canyon is the level of maintenance they receive. The grounds crew utilizes advanced techniques in turf management, ensuring the greens remain lush and hard during peak season. Many golfers note how the consistency of the turf contributes to a smoother putting experience.

Ventana Canyon golf course greenVentana Canyon golf course green

3. Scenic Backdrops

Playing at Ventana Canyon is not just about the game; it’s about enjoying breathtaking views. As you putt on the greens, take a moment to appreciate the stunning views of the surrounding mountains and desert flora. The natural beauty can often pen an emotional connection with players and adds to the overall experience.

4. Playing Conditions

The weather is another pivotal factor when considering the greens at Ventana Canyon. Tucson’s climate typically provides a dry, sunny environment ideal for golf. The fairways and greens are kept in excellent shape throughout the year, moving players to adjust their game based on seasonal weather conditions. This consistency makes them a favorite among local and visiting golfers alike.

Tips for Playing at Ventana Canyon

To ensure your day on the greens is successful, here are some expert tips:

  • Know Your Distances: Understanding your range and accuracy will help you navigate the greens effectively.
  • Put in Practice Time: Spend some time on the practice green before your round. This will help you adjust to the pace and feel of the greens.
  • Use the Right Clubs: The elevation can be deceiving. Sometimes, adjusting to a lower or higher club than usual can lead to more successful plays.
  • Be Patient: The greens can be tricky. If your first putt doesn’t go as planned, don’t let it frustrate you. Stay focused on the next shot!

“The key to great golf is mastering your mental game and trusting your instincts on the greens.”

Amenities and Additional Features

The Ventana Canyon Golf Course offers amenities that enhance the golfing experience:

Feature Details
Clubhouse Full-service dining and lounge area
Pro Shop High-quality golf gear and accessories
Practice Facilities Driving range, putting green, and chipping area
Golf Lessons Available for all skill levels

Ventana Canyon golf course clubhouseVentana Canyon golf course clubhouse

1. Additional Activities

If you’re traveling with family or friends, the Ventana Canyon area has more to offer than just golf. Other recreational activities include:

  • Hiking and Nature Walks: Explore miles of trails in the surrounding mountains.
  • Spa Services: Pamper yourself with relaxing massages and treatments after a long day on the greens.
  • Dining Options: Savor delicious meals at nearby restaurants, showcasing local cuisine.

Why Choose Ventana Canyon?

The greens at Ventana Canyon are among the best in Tucson for several reasons:

  • Quality: The meticulous maintenance results in exceptional playing conditions.
  • Accessibility: Both courses are open year-round, offering a fantastic golfing experience.
  • Natural Beauty: The stunning landscape adds an element of awe to each round.

Key Takeaways

  • Understanding the Greens: Familiarize yourself with each green’s layout for a better game.
  • Practice: Use practice facilities to adjust your game before hitting the course.
  • Plan for Amenities: Enjoy additional activities and amenities that enhance your visit.

FAQ

1. What are the green fees for Ventana Canyon?

While fees can change, average costs hover around $100 on weekdays and $150 on weekends for both courses. Check their website for current rates and specials.

2. Are tee times required?

Yes, it’s highly recommended to book tee times in advance, particularly during peak seasons.

3. Can I rent clubs at Ventana Canyon?

Absolutely! The pro shop offers rental clubs for golfers who do not want to travel with their equipment.

4. Are there any on-course dining options?

Yes, the course has snack stands for refreshments, and the clubhouse features a full-service restaurant.

5. Do they offer golf lessons?

Yes, individual and group lessons are available for all levels. Inquire at the pro shop for details.

6. Can I play both courses in one day?

Yes, you can purchase a double-header tee time to play both the Mountain and Canyon courses in the same day.

7. Is Ventana Canyon suitable for beginners?

Yes, while it offers challenges for advanced golfers, the layout also accommodates beginners, especially on the Canyon course.

8. What should I wear on the course?

Collared shirts and appropriate golf shoes are required. Always check specific dress codes before heading out.

9. Are there any events held at Ventana Canyon?

Yes, there are frequent tournaments and special events throughout the year. Check their calendar for upcoming dates.

10. What happens if it rains?

Golf outings are typically not canceled unless the course is deemed unplayable. It’s essential to stay updated via the course’s official site.

Ventana Canyon golf course view from the mountainsVentana Canyon golf course view from the mountains
With its breathtaking scenery and well-maintained greens, Ventana Canyon remains one of Tucson’s premier golfing destinations. By understanding what to expect and being well-prepared, you can ensure a memorable and enjoyable golfing experience. Happy golfing!

Scotty Cameron Circle T 009 Putter

scotty cameron circle t 009

If you’re a golf enthusiast or an aspiring player, chances are you’ve heard the name Scotty Cameron. Renowned for creating some of the finest putters in the world, his brand has become synonymous with quality and craftsmanship. Among the crown jewels of his collection, the Circle T 009 stands out as a top-tier option for those seeking precision and style. In this article, we’ll delve into what makes the Scotty Cameron Circle T 009 a prized possession for golfers, its unique characteristics, and why it remains a favorite among professionals and amateurs alike.

What is the Scotty Cameron Circle T 009?

The Scotty Cameron Circle T 009 is part of the highly coveted Circle T line, which represents Scotty Cameron’s best offerings tailored for Tour players. The “Circle T” signifies a premium line exclusive to professional golfers and collectors. The Circle T 009, in particular, is recognized for its elegant design and technical features that cater to committed players looking for superior performance on the green.

Key Features of the Circle T 009

Here are some of the standout features that make the Circle T 009 a favorite among golfers:

  • Milled from a solid block of stainless steel, providing exceptional feel and feedback.
  • Tour-inspired designs that offer personalized adjustments for weight and balance.
  • Sleek aesthetic with minimal engraving and a classic finish that attracts the eye.
  • High-performance alignment systems to enhance accuracy during putting.
  • Tailored specifications, which include different loft and lie angles to fit individual preferences.

The Circle T Legacy

The Circle T putters have earned a cult following, particularly for their association with Tour players. Many of the game’s greats have trusted their putting to a Scotty Cameron, further reinforcing the reputation of the Circle T line. The Circle T 009 is the embodiment of tradition and innovation, combining classic styling with cutting-edge technology.

Scotty Cameron Circle T 009 PutterScotty Cameron Circle T 009 Putter

Materials and Construction

One aspect that sets the Circle T 009 apart is its exceptional construction. The putters are milled from 303 stainless steel, which is well-regarded for its durability and ability to deliver a soft yet solid feel. This meticulous attention to materials ensures that every Circle T 009 feels as good as it looks.

**Table: Main Specifications of the Scotty Cameron Circle T 009**

| Specification         | Details                   |
|----------------------|---------------------------|
| Material             | 303 Stainless Steel       |
| Headweight           | Varies (Customization)    |
| Loft                 | 3.5°                      |
| Lie Angle            | Customized                |
| Finish               | Satin / Black             |
| Grip Type            | Customized Options        |

Performance on the Green

When it comes to performance, the Circle T 009 excels in multiple aspects:

  1. Feel: One of the hallmarks of Scotty Cameron putters is their exceptional feel. The milled design provides immediate feedback on contact, helping players gauge their strokes better.
  2. Control: The weighting of the Circle T 009 allows for enhanced control over putts, making it easier to execute both short and long-range shots.
  3. Consistency: With precision engineering, the putter delivers repeatable performance that allows players to develop a reliable putting stroke.

Golfer Putting with Scotty Cameron Circle T 009Golfer Putting with Scotty Cameron Circle T 009
The Aesthetic Appeal

Golf is as much about style as it is about performance, and the Circle T 009 doesn’t disappoint in the looks department. With a clean design, understated elegance, and the option to customize, it’s a putter that not only performs but also looks phenomenal in your hands.

Why Choose a Circle T 009?

Now that we’ve covered the features and performance aspects, you might be wondering why you should invest in a Circle T 009. Here are some compelling reasons:

  • Exclusive Performance: Being a Circle T, it is designed for and used by Tour pros, providing a direct link to elite performance.
  • Customization Options: Each putter can be tailored to fit your specific playing style and preferences, making it a truly individualized piece of equipment.
  • Collector’s Value: The limited availability and prestige of the Circle T line often lead to high resale values, making it not only a practical choice but an investment as well.

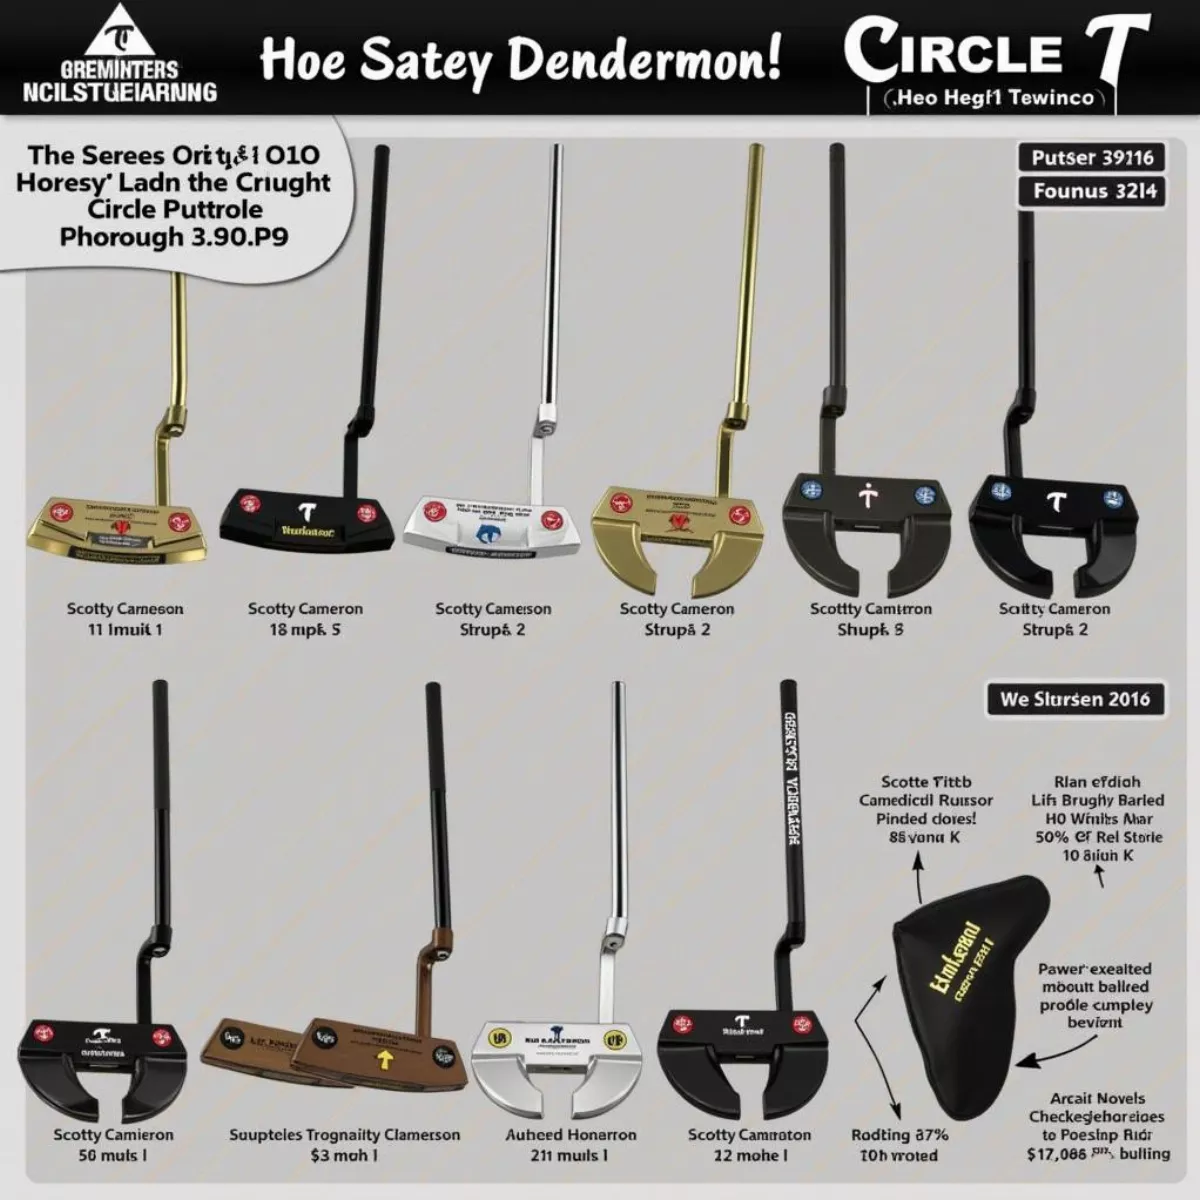
Collection of Scotty Cameron Circle T PuttersCollection of Scotty Cameron Circle T Putters
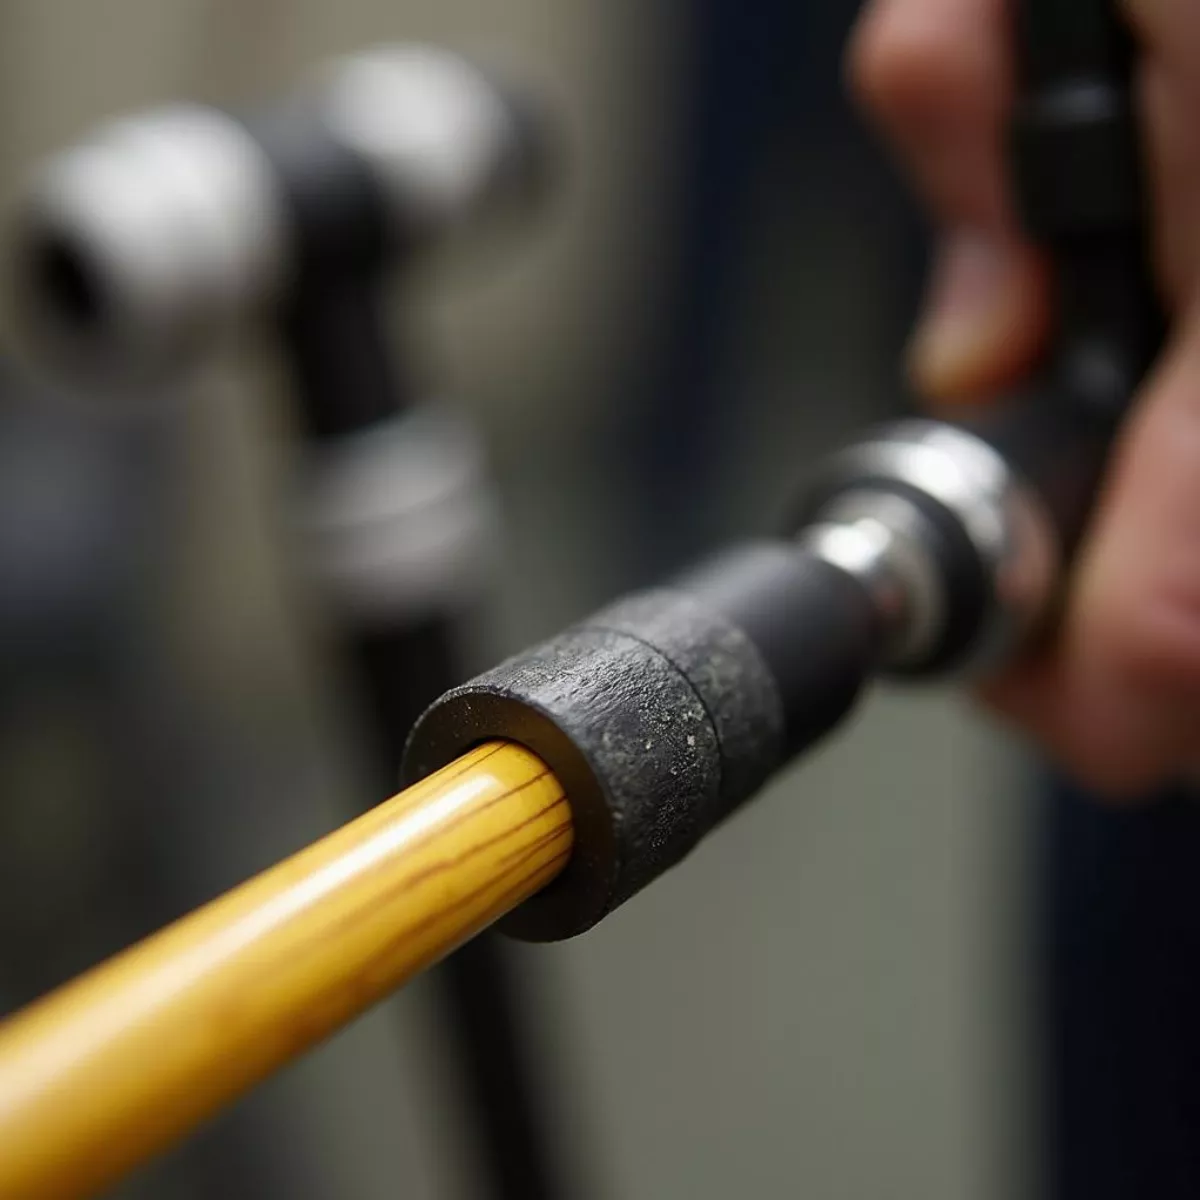
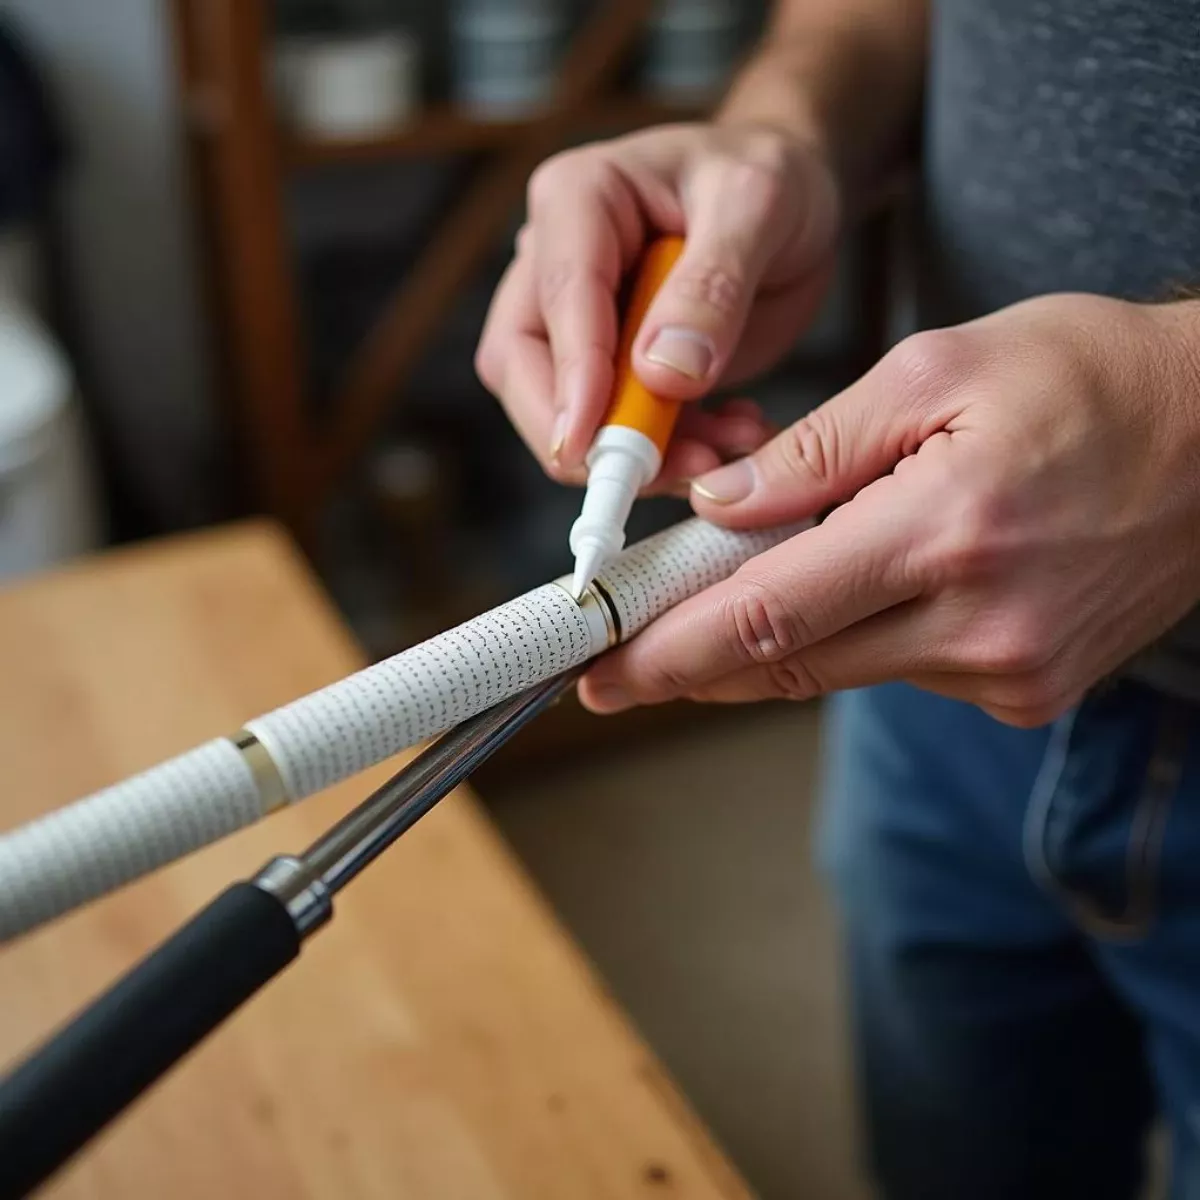
Key Takeaways

  • The Scotty Cameron Circle T 009 is a premium putter designed for serious golfers seeking exceptional performance and aesthetics.
  • Constructed from 303 stainless steel, it offers great feel and consistency.
  • Provides customization options that cater to individual preferences, making it a truly personalized club.
  • Its legacy and association with Tour players make it a sought-after item among collectors.

Frequently Asked Questions (FAQ)

  1. What makes the Circle T 009 different from other Scotty Cameron putters?
    • The Circle T series is designed specifically for Tour players and features customized specifications that are not found in standard models.
  2. How do I know if the Circle T 009 is right for me?
    • If you’re a player who values precision, feedback, and customization in your putter, the Circle T 009 may be an excellent fit.
  3. Is the Circle T 009 worth the investment?
    • For serious golfers and collectors, the exceptional performance and potential resale value make it a worthy investment.
  4. Can I customize the Circle T 009 to my specifications?
    • Yes, Scotty Cameron offers customization options for loft, lie angle, grip type, and headweight to fit your game perfectly.
  5. Where can I buy a Circle T 009?
  6. What other golfers use the Scotty Cameron Circle T line?
    • Many professional golfers on the PGA Tour rely on Circle T putters, endorsing their performance and reliability.
  7. How should I care for my Circle T 009?
    • Regular cleaning after each use, storing it in a protected cover, and avoiding extreme temperatures will help maintain its quality.
  8. Does the Circle T 009 come with a warranty?
    • Yes, Scotty Cameron offers a warranty covering defects in workmanship, though customization may affect this coverage.
  9. Can I re-grip my Circle T 009?
    • Yes, you can re-grip your Circle T 009, but stick to high-quality grips for optimal performance and feel.
  10. What are the most popular shaft options for the Circle T 009?
    • Many golfers typically choose steel shafts for the Circle T 009 due to better feedback and control, but diameters may vary based on preference.

In conclusion, the Scotty Cameron Circle T 009 is not just a putter; it’s a refined tool that embodies craftsmanship and performance. Whether you’re looking to improve your game or add a beautiful piece to your collection, the Circle T 009 stands out as a premium choice that won’t disappoint. Happy putting!

Cutting Graphite Golf Shaft

how to cut graphite golf shaft

When it comes to golf performance, every detail matters. One of the crucial aspects that can influence your game is the length of your golf shaft. Cutting graphite golf shafts isn’t just about making them shorter; it’s about enhancing your overall golfing experience. Whether you’re seeking more control, distance, or comfort, this guide will walk you through everything you need to know about cutting graphite golf shafts effectively.

Why You Might Need to Cut Your Graphite Golf Shaft

There can be various reasons you might want to cut down your graphite golf shaft:

  • Personal Preference: Players often prefer shafts of different lengths based on their swing mechanics.
  • Fit and Comfort: A properly sized shaft helps with posture and swing dynamics, leading to better performance.
  • Control: A shorter shaft can sometimes provide more control over your shots.
  • Improved Consistency: Cutting down a shaft can lead to more predictable shot patterns.

Tools You Will Need

Before diving into the step-by-step guide, let’s gather the necessary tools. Here’s a handy list:

  • Graphite shaft cutter: A specialized cutter designed for graphite shafts.
  • Measuring tape: For accurately measuring the desired shaft length.
  • Chalk or marker: To mark the cutting line clearly.
  • Protective eyewear: Safety first, especially when cutting materials.
  • Cutting mat or surface: To protect your workspace.
  • Shaft grip and adhesive: If you need to reattach grips after cutting.

Step-by-Step Guide to Cutting a Graphite Golf Shaft

Now that you have your tools handy, let’s take a look at the step-by-step process.

Step 1: Determine the Desired Length

  • Use your measuring tape to determine the appropriate length of the golf shaft.
  • Standard lengths commonly range from 43 to 45 inches. However, your ideal length may vary based on your height, swing style, and comfort level.

Step 2: Mark the Cutting Line

  • With your chalk or marker, mark where you intend to make your cut. It’s vital that this line is clear and precise to avoid mistakes.

Step 3: Secure the Shaft

  • Attached to a stable surface, secure the shaft in place to ensure it doesn’t move while you’re cutting. Clamp it down if possible.

Step 4: Cut the Shaft

  • Using a graphite shaft cutter, begin cutting at the marked line. It’s essential to use a slow and steady motion to avoid fracturing the shaft.
  • Tip: Avoid excessive force; let the tool do its job.

Cutting Graphite Golf ShaftCutting Graphite Golf Shaft

Step 5: Smooth the Cut Edge

  • Once you’ve made your cut, there might be some rough edges. Use sandpaper or a file to smooth out the end for a flush finish. This prevents damage when reattaching the grip.

Step 6: Reattach the Grip

  • After cutting, it’s time to apply your grip. Use a suitable adhesive, following the instructions provided with the grip.

Reattaching Golf GripReattaching Golf Grip

Step 7: Measure Again

  • Measure the shaft again post-cutting, just to ensure accuracy. You want to confirm that the shaft is now at the proper length before hitting the course.

Additional Tips for Cutting Graphite Golf Shafts

  • Consult a Professional: If you’re unsure, consider consulting a golf club professional. They can provide guidance based on your swing and stats.
  • Do Not Rush: Patience is key. Rushing the process can lead to costly mistakes.
  • Watch Videos: Seek out tutorial videos online to visualize the process. It could provide additional insight and confidence.

Key Takeaways

Cutting graphite golf shafts isn’t as daunting as it may seem. Here’s a quick recap of the essential points to remember:

  • Measure twice, cut once: Always double-check your desired length.
  • Use the right tools: A graphite shaft cutter and measuring tape are essential for success.
  • Prioritize safety: Wear protective eyewear and take precautions during the cutting process.
  • Smooth edges: Ensure the cut edge is free of any rough spots before reattaching the grip.
  • Seek Help if Needed: Don’t hesitate to consult professionals for guidance.

Frequently Asked Questions (FAQ)

1. Can I cut my graphite golf shaft myself?

Yes, cutting your graphite golf shaft can be done at home, provided you have the right tools and skills.

2. What if I cut my shaft too short?

If you cut your shaft too short, the only remedy is to replace it. There’s no way to add length back on once it’s cut.

3. Do I need to replace the grip after cutting?

Yes, it’s recommended to replace the grip after cutting, as the original grip may not fit correctly.

4. Can I use a regular saw to cut the shaft?

No, a regular saw can damage the graphite. Using a dedicated graphite shaft cutter is crucial for a clean cut.

5. How much can I cut off?

It often depends on personal preference, but generally, 1-2 inches is a common range for cutting.

6. Will cutting my shaft affect my swing?

Yes, cutting the shaft can alter your swing dynamics and help improve control and consistency.

Golf Swing MechanicsGolf Swing Mechanics

7. Is it essential to smooth the cut edge?

Absolutely! A smooth edge prevents potential damage to the grip and decreases the risk of splintering.

8. Where can I find the right tools for cutting a graphite shaft?

Tools can be found at most golf specialty stores or online retailers that sell golf equipment.

9. How often should I check my shaft length?

It’s a good idea to evaluate shaft length whenever you change your swing style, height, or preferences.

10. What’s the best way to ensure accurate measurements?

Using a measuring tape and a straight edge can significantly increase accuracy. Always double-check numbers.


In conclusion, cutting your graphite golf shaft can enhance your performance on the course. By following this detailed guide, you’ll equip yourself with the knowledge needed to safely and effectively alter your shaft length. Whether you are an avid golfer or just starting, understanding how to cut graphite golf shafts properly can lead to a better game and more enjoyable rounds.


Feel free to check out more articles on golf club fitting, swing techniques, and other related topics essential for improving your game!

Different Types of Golf Putters

how to choose a golf putter

Choosing the right golf putter can often feel like a daunting task, especially with the myriad of options available today. Whether you’re a beginner or a seasoned golfer, understanding what makes a great putter is crucial for enhancing your game. In this comprehensive guide, we’ll walk you through everything you need to know to pick the perfect putter for your style and needs.

Why the Putter Matters

The putter is considered the most important club in your bag, as it’s used more than any other club. In fact, it’s estimated that around 40% of all strokes taken in a round of golf occur on the putting green. A good putter can not only lower your score but also boost your confidence on the course.

Types of Putters

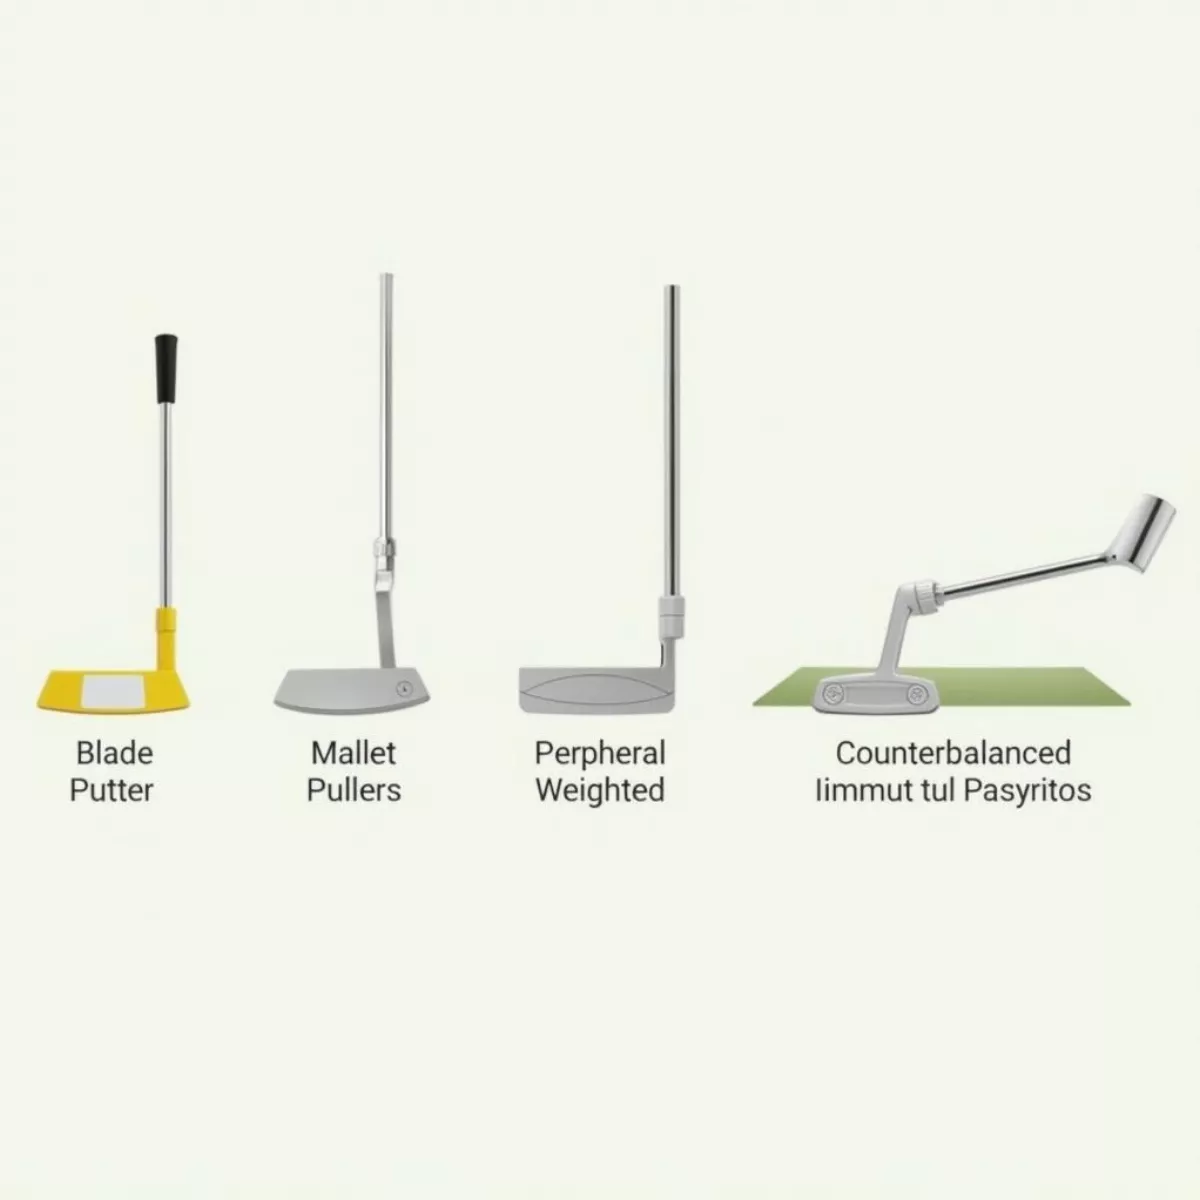
When selecting a putter, it’s important to understand the various types available. Here’s a closer look at the most common ones:

  • Blade Putters: Often preferred by experienced players for their simple design and control, blade putters have a classic look that appeals to many golfers.
  • Mallet Putters: These are larger and typically offer more stability, making them a great choice for players who want forgiveness on off-center hits.
  • Peripheral Weighted Putters: These combine the aspects of both blade and mallet putters, distributing weight to the edges for better forgiveness.
  • Counterbalanced Putters: These putters have added weight in the grip and often work well for golfers who like to use a long stroke.

Different Types of Golf PuttersDifferent Types of Golf Putters

Key Specifications to Consider

When narrowing down your choices, focus on the following key specifications:

Specification Description
Length Typically between 32-36 inches; choose based on your height and stance.
Grip Size Thicker grips (e.g. oversized) can help players with less wrist control.
Loft Generally between 2° to 4°; affects the launch angle of the ball.
Face Type Decide between a smooth and grooved face for different feel and distance control.
Weight Heavier putters tend to stabilize your stroke, while lighter ones allow for a quicker release.

How to Find the Right Length

Finding the appropriate length is essential for your comfort and performance. Here’s a simple method to measure your ideal putter length:

  1. Stand Up Straight: Hold your arms comfortably at your side.
  2. Bend Slightly at the Hips: This will mimic your stance when putting.
  3. Hold a Stick or Club: Rest it against your stomach, and let it drop naturally to the ground.

This length can serve as a good starting point.

Test Before You Invest

When it comes to golf putters, always try before you buy. Head to a local golf shop where you can test various models. Here are a few tips while testing:

  • Feel: How does the putter feel in your hands? The best putter is one that feels comfortable during the stroke.
  • Balance: Test both blade and mallet putters to see which one aligns better with your natural stroke.
  • Roll: Pay attention to how the putter interacts with the ball. A good putter should create a smooth roll without skidding.

Golfer Testing Putters in a ShopGolfer Testing Putters in a Shop

Putting Style and Technique

Your putting style also plays a significant role in which putter is right for you. Here are some common styles:

  • Straight Back and Through: Ideal with a blade putter; it allows for maximum control.
  • Arc Stroke: A rounded motion that may benefit from a mallet putter; it offers greater forgiveness.

Key Factors Influencing Your Putter Choice:

  • Skill Level: Beginners often find mallet putters easier to manage.
  • Stroke Type: Your putting stroke has a big influence on which style of putter will work best.
  • Feel Preference: Some golfers prefer a firmer feel, while others may lean towards a softer touch.

Price Considerations

Golf putters range dramatically in price, from budget-friendly options to high-end designs. Here are some things to keep in mind:

  • Budget-Friendly: Great options are available under $100. Brands like Wilson and Cleveland offer reliable putters without breaking the bank.
  • Mid-Range: Expect to spend between $100-$250 for reliable brands like TaylorMade, Ping, or Callaway.
  • High-End: These can range from $250 to $500 or more. Brands like Scotty Cameron and Bettinardi are known for their craftsmanship and technology.

Custom Fitting: Is It Worth It?

While you might think you can choose any putter off the shelf, getting a custom fitting can significantly enhance your performance. Professional fitters consider your height, grip style, stroke type, and clubhead speed to recommend putters tailored to your unique needs.

Benefits of Custom Fitting:

  • Enhanced Accuracy
  • Consistent Performance
  • Greater Comfort

Professional Golfer Custom Putter FittingProfessional Golfer Custom Putter Fitting
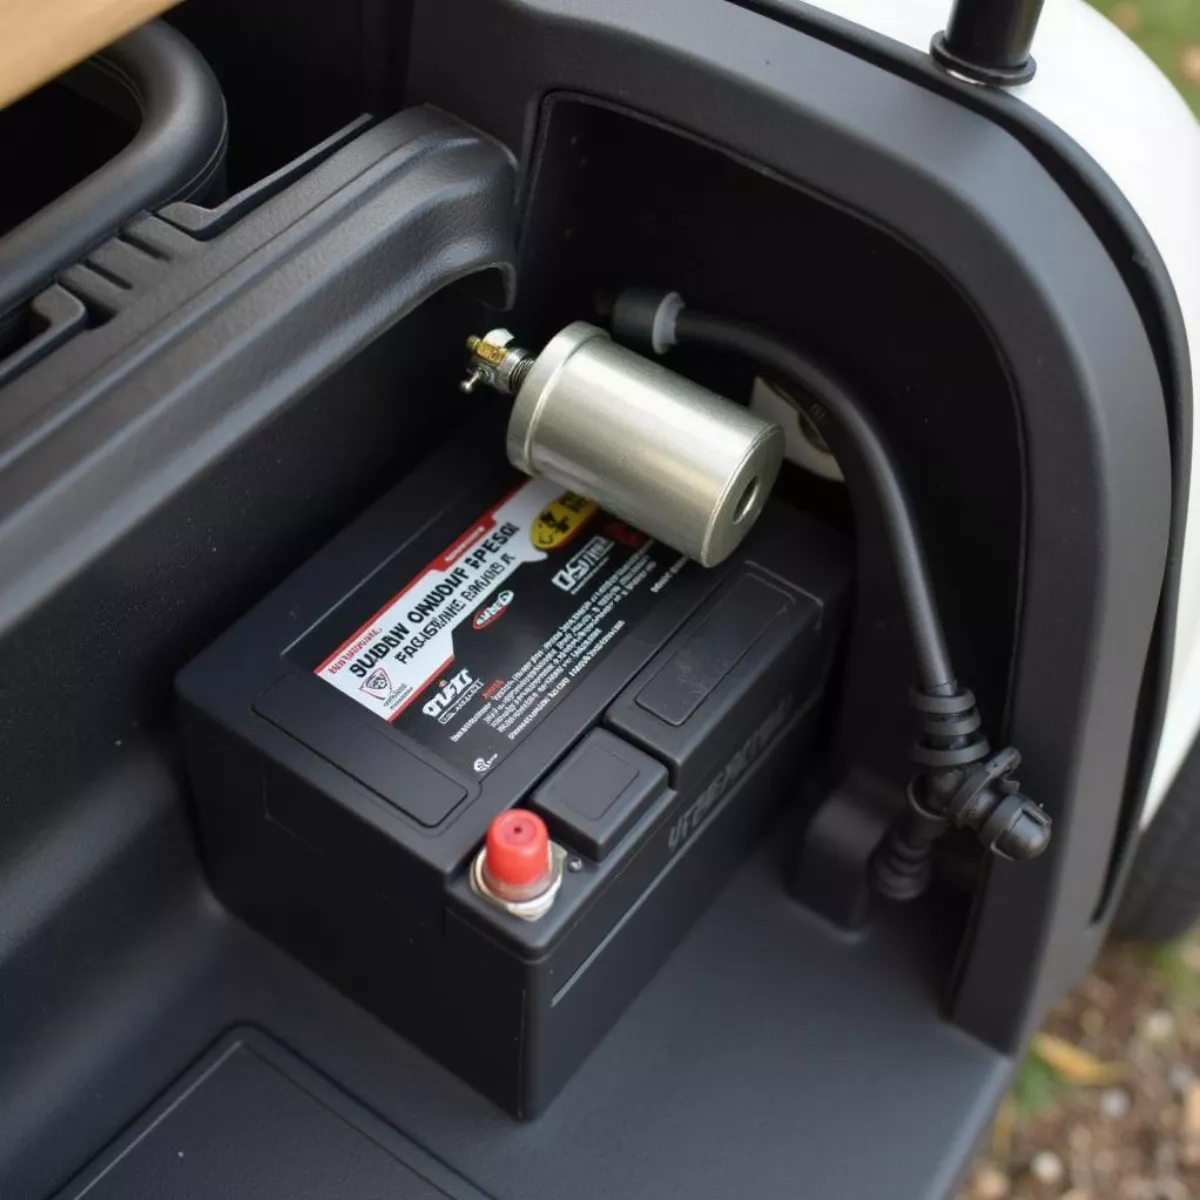
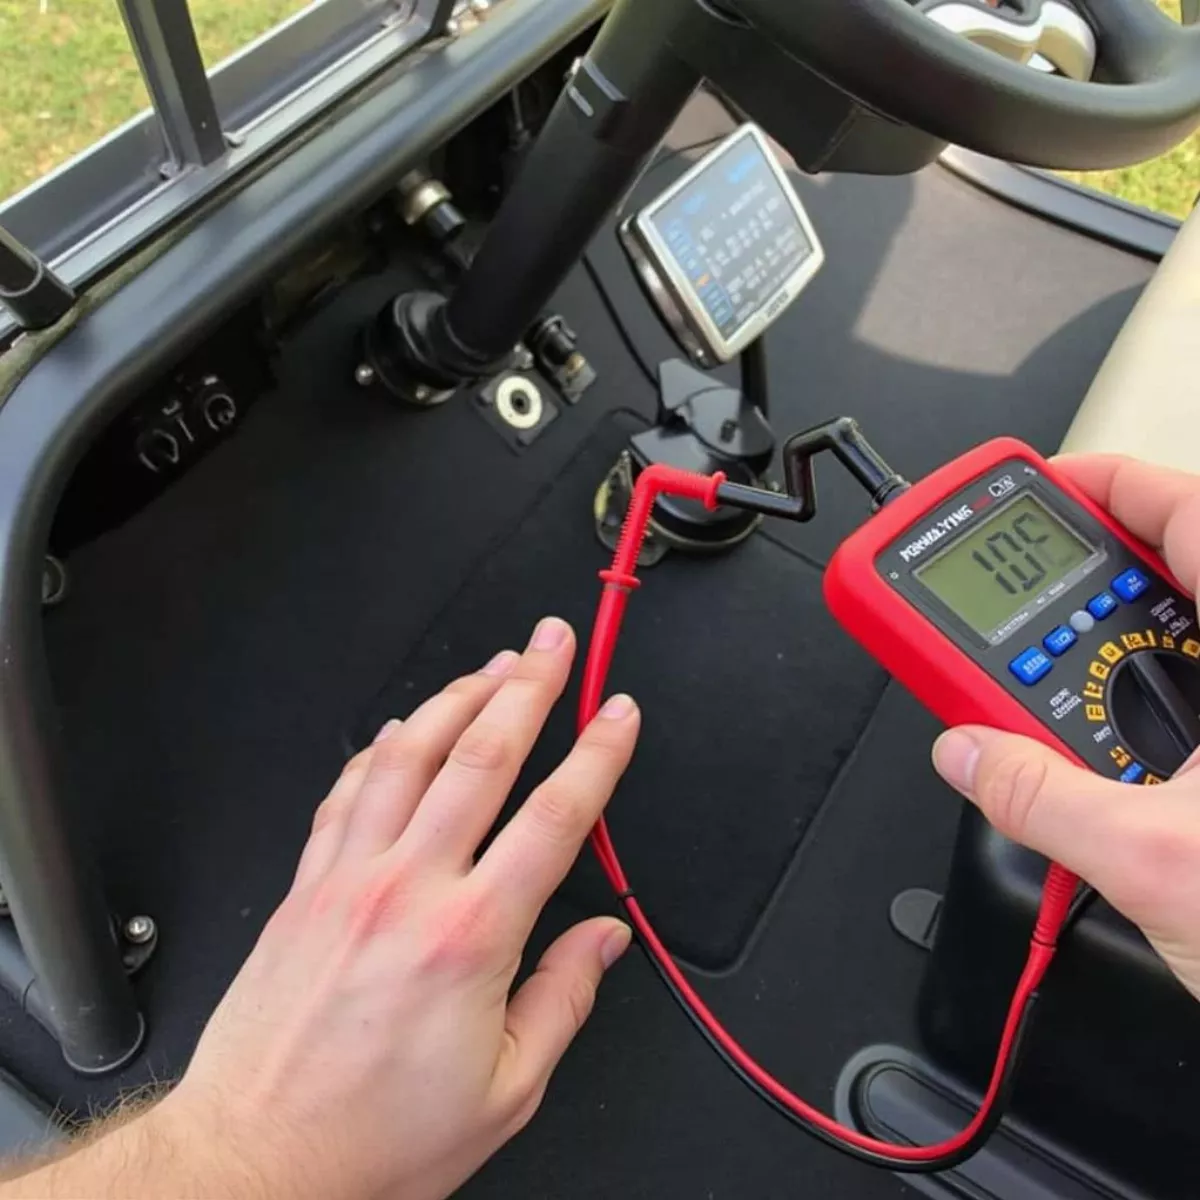
Key Takeaways

Choosing the right golf putter boils down to personal preference and a little understanding of the fundamentals:

  • Understand the Types: Blade vs. mallet vs. other styles.
  • Focus on Specs: Length, grip size, loft, face type, and weight matter.
  • Test It Out: Always try before you buy to determine what feels best.
  • Know Your Style: Your putting technique influences which putter is right for you.
  • Consider Budget: There are excellent options in every price range.
  • Custom Fitting: It can make a meaningful difference in your game.

FAQ

1. What is the average length of a golf putter?

Typically, putters range between 32 to 36 inches. However, it’s crucial to choose a length that suits your stance and height.

2. What type of putter is best for beginners?

Mallet putters are often recommended for beginners due to their stability and forgiveness on off-center hits.

3. How do I know if I need a heavier or lighter putter?

If you have a quicker stroke speed, you may prefer a heavier putter for stability. A lighter putter can suit those with a slower stroke.

4. Is a custom fitting necessary for my putter?

While it’s not necessary, a custom fitting can provide significant benefits in terms of accuracy and comfort.

5. Can the type of putting grip affect my performance?

Absolutely. The grip influences your control and comfort. Try oversized grips if you struggle with controlling your wrist during the stroke.

6. Should I always use the same putter?

You may want to experiment as golfers evolve, but consistency can lead to better results.

7. How often should I replace my putter?

If you notice significant wear or it no longer feels comfortable, it might be time for a change, typically every few years for casual players.

8. What is the difference between a smooth and grooved putter face?

A smooth face promotes a softer feel, while a grooved face provides better grip on the ball for a controlled roll.

9. How important is the putter’s material?

Different materials offer varying feels and durability. For example, aluminum is lightweight, while stainless steel is heavy and durable.

10. Can I use a putter on the green for other shots?

Generally, it’s not against the rules to use a putter for other shots, but strategically, it may not be the best choice in many situations.

By understanding these key aspects, you can confidently select the ideal golf putter that fits your style, enhances your putting skills, and helps lower your scores. Happy putting!

Golf Cart Solenoid Location

how to check a solenoid on a golf cart

If you love cruising around the golf course or your neighborhood in a golf cart, you know that reliable performance is key. One crucial component that can affect how well your cart runs is the solenoid. In this friendly guide, we’ll walk you through how to check a solenoid on a golf cart. With a bit of DIY spirit and the right information, you’ll be back on the greens in no time!

What is a Solenoid?

Before diving into the checking process, let’s understand what a solenoid is. A solenoid is an electromechanical device that acts as a switch to control the flow of electricity in your golf cart. When energized, it transfers electrical energy from the battery to the motor, allowing your cart to move. If it’s faulty, your golf cart won’t start or may even stop during use.

Common Symptoms of a Bad Solenoid

  • Clicking Sound: You might hear a clicking noise when you try to start the cart.
  • No Power: The cart won’t respond at all.
  • Intermittent Operation: The cart starts and stops unexpectedly.
  • Burnt Smell: A burnt odor can indicate electrical issues.

Tools You’ll Need

Having the right tools can make the task easier and safer. Here’s a list:

  • Multimeter: For measuring voltage.
  • Wrench set: To remove the solenoid.
  • Screwdriver set: For any fasteners.
  • Safety gloves: To protect your hands.
  • Safety goggles: Eye protection is key.

Step-by-Step Guide to Checking a Solenoid

Step 1: Safety First!

Before starting any maintenance, ensure the golf cart is turned off and disconnected from the power source. This prevents electrical shock or damage.

Step 2: Locate the Solenoid

The solenoid is usually located near the battery on the golf cart. Here’s how to find it:

  • Open the seat compartment: Most golf carts have a seat that opens to reveal the battery.
  • Look for a cylindrical component: The solenoid may look like a small cylinder with wires coming out.

Golf Cart Solenoid LocationGolf Cart Solenoid Location

Step 3: Visual Inspection

Inspect the solenoid for any obvious signs of damage.

  • Check for burnt marks or cracks.
  • Look at the connections to see if they are rusted or loose.

Step 4: Testing with a Multimeter

Once you’ve done a visual inspection, it’s time for some testing:

  1. Set your multimeter to DC volts.
  2. Connect the multimeter leads: Place the negative lead on a grounded part of the golf cart. Then connect the positive lead to the solenoid’s positive terminal.
  3. Check the reading: Have someone press the accelerator. You should see a reading of 12 volts or more.

Table: Solenoid Values

Voltage Reading Condition
12.0V – 14.5V Solenoid is good
0V Failed solenoid
Voltage drop Possible wiring issue

Testing Golf Cart Solenoid with MultimeterTesting Golf Cart Solenoid with Multimeter

Step 5: Testing the Resistance

  • Set the multimeter to ohms.
  • Disconnect the solenoid.
  • Place one lead on each terminal of the solenoid.
  • A typical reading should be between 0.5 to 2.0 ohms.

If it reads Infinity (OL), the solenoid is likely open and needs replacement.

Step 6: Replace if Necessary

If your tests indicate a bad solenoid, don’t fret! Here’s how to replace it:

  1. Make sure you have a replacement solenoid.
  2. Disconnect the old solenoid by unscrewing it from its mounting.
  3. Carefully remove the wires (take note of where each wire connects).
  4. Install the new solenoid by attaching it in the same manner as the old one.
  5. Reconnect the wires precisely as they were before.

replacing-golf-cart-solenoid|Replacing Golf Cart Solenoid|A series of three images showing the step-by-step process of replacing a golf cart solenoid.
Image 1: Disconnecting the old solenoid and removing the wires.
Image 2: Comparing the old solenoid with the new replacement solenoid.
Image 3: Installing the new solenoid and reconnecting the wires.

Step 7: Test the Golf Cart

After replacing the solenoid, reconnect the battery and turn on your golf cart. Test the accelerator to ensure it’s functioning correctly.

Key Takeaways

  • Understand your solenoid: It acts as a switch to power your golf cart.
  • Common symptoms of failure include clicking sounds, lack of power, or burn smells.
  • Use the multimeter correctly to check both voltage and resistance.
  • Replace the solenoid if it’s defective for optimal performance.

Frequently Asked Questions (FAQ)

1. How often should I check the solenoid on my golf cart?

It’s a good practice to check your solenoid during routine maintenance, ideally every 6 months or if you experience starting issues.

2. Can I clean a solenoid instead of replacing it?

In some cases, cleaning the connections can help improve performance, but if the solenoid is damaged or shows high resistance, replacement is the better option.

3. What will happen if I ignore a bad solenoid?

Ignoring a faulty solenoid can lead to more significant electrical issues and may ultimately leave you stranded.

4. Are solenoids universal?

While many solenoids may look similar, it’s important to find a solenoid compatible with your specific golf cart model.

5. Is it safe to check the solenoid myself?

Yes, as long as you observe proper safety precautions, such as disconnecting the battery.

6. Can a bad solenoid drain the battery?

Yes, if the solenoid is stuck in the closed position, it may continuously draw power, draining your battery.

7. How do I know which solenoid to buy?

Refer to your golf cart’s owner’s manual or consult a specialist to ensure you purchase the correct replacement solenoid.

8. If replaced, will I need to recalibrate my golf cart?

Typically no, but it’s a good idea to check with the manufacturer’s recommendations.

9. How can I tell if the solenoid is working without a multimeter?

Listen for the clicking sound when you press the accelerator pedal; if you hear it, the solenoid is likely working. However, this is not definitive.

By following this friendly and informative guide, you should feel more confident checking and maintaining the solenoid on your golf cart. For more DIY tips and tricks on golf cart maintenance, check out our other articles!


By providing clear, engaging content that reflects your needs, we’ve created a user-friendly guide that you can refer back to whenever necessary. Happy carting!

Cancelling Golf Membership Online

how to cancel performance golf

Performance golf can be a rewarding pursuit for any enthusiast looking to refine their game. However, there may come a time when you need to cancel your performance golf membership or participation. Whether it’s due to financial constraints, changing commitments, or personal reasons, knowing how to navigate the cancellation process smoothly is essential. This guide walks you through everything you need to know to cancel your performance golf program effectively.


Reasons to Cancel Your Performance Golf Membership

Understanding why you might want to cancel your performance golf membership can help clarify your decision. Here are some common reasons:

  • Financial Constraints: Golf can be an expensive pursuit, with fees for lessons, equipment, and memberships adding up.
  • Time Limitations: Life can get busy, and you may find it hard to fit golf into your schedule.
  • Change in Interest: Your passion for the game might shift towards another hobby or activity.
  • Relocation: Moving to a new area could mean a change in golf facilities or opportunities.
  • Health Issues: Injuries or other health concerns can make it challenging to play.


How to Cancel Your Performance Golf Membership

Now that you’ve identified your reasons, follow these steps to cancel your performance golf membership:

1. Review Your Membership Agreement

Before taking action, it is crucial to review your specific membership agreement. Here you’ll find important details such as:

  • Cancellation notice period
  • Fees associated with cancellation
  • Specific terms for terminating the contract

2. Contact Customer Service

Reach out to the customer service of your golf club or program. It’s best to do this via:

  • Phone: Direct conversation can expedite the process.
  • Email: For a written record, send a formal cancellation request.
  • In-Person: If possible, visit the club to speak directly with staff.

3. Prepare Your Documentation

Collect necessary documents, including:

  • Proof of identity
  • Membership details
  • Any correspondence regarding cancellation

4. Submit Your Cancellation Request

When ready to cancel, submit your request formally:

  • Written Request: Include your name, membership number, and cancellation reason.
  • Delivery Method: If sending via mail, consider certified delivery to ensure it’s received.

5. Follow Up

After submitting your request, follow up to confirm the cancellation:

  • Wait for confirmation from the club.
  • Keep a record of any communications for your records.

6. Cancel Automatic Payments

If you have set up automatic payments, ensure you:

  • Cancel these transactions with your bank.
  • Monitor your account for any unexpected charges.

Cancelling Golf Membership OnlineCancelling Golf Membership Online


Tips for a Smooth Cancellation Process

To ensure a hassle-free cancellation of your performance golf membership, consider these tips:

  • Communicate Early: Don’t leave it until the last minute; communicate your intention to cancel as soon as possible.
  • Know the Policies: Familiarize yourself with your club’s specific cancellation policies to avoid surprises.
  • Be Polite and Professional: A friendly demeanor goes a long way in customer service interactions.
  • Confirm in Writing: Always ask for written confirmation of your cancellation.


Key Takeaways

  • Understand Your Membership: Review your membership agreement for cancellation policies and any fees.
  • Reach Out for Help: Contact customer service via phone, email, or in-person.
  • Document Everything: Keep a record of your cancellation request and any related correspondence.
  • Follow Up for Confirmation: Ensure your cancellation has been processed correctly.
  • Cancel Automatic Payments: Monitor your bank account to avoid subsequent charges.

Golfer Reviewing Membership AgreementGolfer Reviewing Membership Agreement


FAQ: Canceling Performance Golf Memberships

1. What happens if I don’t cancel my membership on time?

Failing to cancel by the deadline may result in continued charges. Always be aware of your club’s cancellation notice period.

2. Can I cancel my membership online?

Many clubs may offer online cancellation options. Check their website or contact customer service for details.

3. Are there any fees associated with cancellation?

Some memberships may include cancellation fees. Review your membership agreement for specifics.

4. How long does the cancellation process take?

This can vary depending on the golf club, but it typically takes 5-10 business days for processing.

5. Can I get a refund if I cancel my membership early?

Refund policies vary by club. Check your membership agreement or reach out to customer service for clarification.

6. What if I’m moving to another state?

If you relocate, inquire about a possible membership transfer to a different location or golf club.

7. Is there a way to freeze my membership instead of canceling it?

Many clubs offer a freeze option for memberships during periods of inactivity. Ask customer service about this possibility.

8. What if I am facing health issues?

Most clubs may allow cancellation or special provisions for members dealing with health issues. Document proof if required.

9. Will canceling affect my membership history?

Generally, canceling your membership doesn’t affect your history; however, benefits tied to long-term membership might be lost.

10. How can I confirm my cancellation has been processed?

Request written confirmation from your club, and monitor your account for any further transactions.


By following the steps outlined in this guide, you can confidently and successfully navigate the cancellation process for your performance golf membership. Take the time to communicate your needs and stay informed about your specific club’s policies. Happy golfing, and best of luck with your next adventures!

Tuscany Falls Golf Course Overview

tuscany falls golf course arizona

Welcome fellow golf enthusiasts! If you’re looking for a picturesque golf experience in Arizona, look no further than Tuscany Falls Golf Course. Nestled in the vibrant city of Goodyear, this course offers an array of amenities and challenges that cater to golfers of all skill levels. Join me as we delve deep into what makes Tuscany Falls a must-visit destination for both locals and travelers alike.

A Swing into the Tuscany Falls Experience

Tuscany Falls Golf Course is part of the larger PebbleCreek community, creating a wholly immersive experience for those seeking leisure and recreation. Established in 1996, the course has matured beautifully, both in its facilities and in its challenging layout.

The Course Layout

Tuscany Falls features two distinct 18-hole courses that cater to different play styles:

  • The East Course: Known for its rolling terrain and scenic views, this course is perfect for golfers who enjoy a bit of challenge without losing sight of beauty.
  • The West Course: This course has a more traditional design, featuring more water hazards and strategically placed bunkers that demand precision in your game.
Course Name Number of Holes Difficulty Level Signature Hole
East Course 18 Moderate 13th Hole
West Course 18 Challenging 15th Hole

Tuscany Falls Golf Course OverviewTuscany Falls Golf Course Overview

What to Expect

Greens and Fairways

Keeping the greens in top-notch condition is a priority, and you’ll find that the undulating greens provide a perfect putting surface. Well-maintained fairways ensure a great playing experience throughout the year, making it an ideal choice for golf enthusiasts.

Tournaments and Events

Tuscany Falls is also a hotspot for local tournaments. Whether you’re an amateur or more seasoned player, there are events tailored made for all skill levels. It’s a fantastic opportunity to meet other golf lovers while enjoying the camaraderie that comes with playing golf.

Golf Tournament at Tuscany FallsGolf Tournament at Tuscany Falls

Amenities to Savor

Beyond the greens, Tuscany Falls offers several amenities that elevate the golfing experience:

  • Pro Shop: Featuring the latest golf gear and apparel, the pro shop is stocked with everything you might need.
  • Dining: After your round, relax at the on-site restaurant, where you can enjoy delectable meals made from fresh local ingredients.
  • Practice Facilities: The driving range and putting greens provide the perfect space for warming up before hitting the course.

Golfing Tips

To enhance your experience at Tuscany Falls, here are some valuable tips:

  • Book Online: Take advantage of online booking for easier scheduling and potential discounts.
  • Dress Appropriately: Make sure to adhere to the dress code, which typically requires collared shirts and proper golf shoes.
  • Visit During the Morning: Early morning tee times generally provide cooler temperatures and a less crowded course.
  • Stay Hydrated: Arizona can get hot; ensure you bring enough water, especially during the peak summer months.

Navigating Goodyear: A Golfer’s Guide

After a great round of golf, Goodyear offers great options for relaxation and fun:

  • Shopping and Dining: Explore The Estrella Falls shopping center for everything from dining to shopping.
  • Nearby Parks: Take a stroll at Goodyear Community Park, enjoying the beautiful Arizona landscape.
  • Local Events: Keep an eye on the Goodyear calendar for annual celebrations such as the Goodyear Ballpark Spring Training.

Goodyear Cityscape with Golf Course in BackgroundGoodyear Cityscape with Golf Course in Background

Environmental Considerations

Tuscany Falls Golf Course is committed to sustainability. The management utilizes eco-friendly practices to maintain the beautiful surroundings you enjoy while playing. The course has sustainable irrigation practices, employing efficient systems to conserve water, which is especially important in the arid climate of Arizona.

Key Takeaways

  • Tuscany Falls Golf Course features two distinct 18-hole courses, ideal for golfers of all skill levels.
  • On-site amenities include a pro shop, dining facilities, and ample practice areas.
  • Consider booking online to better secure your tee times and potentially snag discounts.
  • Stay hydrated and check the dress code for a smooth experience on the course.

Frequently Asked Questions (FAQ)

  1. What is the best time of year to play at Tuscany Falls?
    • The ideal time to play is during the fall and spring when temperatures are milder.
  2. Do I need a membership to play at Tuscany Falls?
    • No, both residents and visitors are welcome to play on the courses without a membership.
  3. What is the dress code at Tuscany Falls Golf Course?
    • A collared shirt and appropriate golf shoes are typically required. Check the course’s website for specific guidelines.
  4. Are there any golfing clinics available?
    • Yes, Tuscany Falls offers golfing clinics and lessons for all skill levels. Check with the pro shop for schedules.
  5. Is there a driving range at the course?
    • Yes, Tuscany Falls has a well-maintained driving range along with practice greens.
  6. Can I book tee times online?
    • Absolutely! Booking online across Tuscany Falls’ official website is recommended for convenience and specials.
  7. What kind of dining options are available?
    • The on-site restaurant offers a variety of meals, from light snacks to hearty dinners after your game.
  8. Are there any golf tournaments held at Tuscany Falls?
    • Yes, Tuscany Falls hosts various tournaments throughout the year catering to different skill levels.

By exploring Tuscany Falls Golf Course, you are sure to enhance your golfing journey while soaking up the beautiful Arizona landscape. Whether you’re a local or a visitor, this destination promises to provide an unforgettable experience.


Feel free to reach out if you have any questions or need further information regarding Tuscany Falls or other golf courses in the area! Happy golfing!

TaylorMade Spider Tour Putter Design

used taylormade spider tour putter

When it comes to improving your golf game, the right equipment is crucial, and the TaylorMade Spider Tour Putter has become a favorite among both amateurs and professionals alike. But what do you need to know if you’re considering a used TaylorMade Spider Tour Putter? This guide is designed to provide you with all the information required to make an informed choice, enhance your putting skills, and understand why this particular putter stands out.

Why Choose a TaylorMade Spider Tour Putter?

The TaylorMade Spider Tour Putter is recognized for its sleek design and innovative technology. Here’s what makes it appealing:

  • Weight Distribution: The putter has a unique design that allows for effective weight distribution, improving stability and accuracy.
  • Visual Alignment: It features a distinct visual alignment aid, giving golfers the confidence to line up their shots effectively.
  • High MOI (Moment of Inertia): The design ensures that even off-center hits keep your putts on line, which is essential for consistent performance.

“The Spider Tour Putter feels like an extension of my arm; it’s become an essential part of my game!” – A satisfied Spider Tour user

Features of the TaylorMade Spider Tour Putter

When exploring a used TaylorMade Spider Tour Putter, let’s delve into the features that set it apart:

1. Materials and Construction

  • Body Material: The putter is typically crafted with a high-grade aluminum body, offering durability without sacrificing performance.
  • Face Material: Some models incorporate a soft insert designed to optimize feel and roll.

2. Design Aesthetics

  • The Spider Tour Putter is available in various finishes, including matte black and chrome, appealing to different golfer preferences.
  • Its wide stance contributes to a larger sweet spot, making it easier to achieve solid contact.

3. Grip Options

  • Different grip sizes are available, accommodating various hand sizes and ensuring comfort during play.
  • The TaylorMade Pure Roll Technology enhances feel and promotes a smoother roll, which can make a significant difference on the greens.

4. Adjustability

  • Some models offer adjustable weights, allowing you to customize the feel and performance according to your swing style.

TaylorMade Spider Tour Putter DesignTaylorMade Spider Tour Putter Design

Buying a Used TaylorMade Spider Tour Putter

Considerations Before Purchase

When shopping for a used TaylorMade Spider Tour Putter, here are key factors to consider:

  • Condition: Inspect for wear, scratches, or any damages that could affect performance. Look closely at the face, alignment aids, and grip.
  • Model Year: Different models may come with varying technology; newer models often offer better features.
  • Price Comparison: Prices fluctuate based on condition and model year. Check previous sales to ensure you’re getting a fair deal.

Where to Buy

  • Local Pro Shops: A great place to try before you buy.
  • Online Retailers: Websites like eBay or specialized golf sites often have a selection of used clubs.
  • Golf Forums: Many golf communities have sections for buying and selling used equipment.

Tips for Buying a Used Putter

  • Test it Out: If possible, roll some putts with the club to feel how it performs for you.
  • Ask About History: Check if the previous owner had any specific adjustments or repairs made.

Golfer Testing Putter in Pro ShopGolfer Testing Putter in Pro Shop

Core Benefits of the TaylorMade Spider Tour Putter

The TaylorMade Spider Tour Putter offers numerous benefits that can improve your game:

  • Increased Confidence: The sleek design and alignment features enable better focus on making the putt.
  • Improved Accuracy: Thanks to its high MOI and excellent weight distribution, you’ll likely see improved accuracy on the green.
  • Enhanced Feel: The sophisticated material choices and design yield a soft feel, which many golfers appreciate.

Key Takeaways

  • The TaylorMade Spider Tour Putter boasts unique features for improved alignment and stability.
  • Consider the condition and history before purchasing a used model.
  • Take advantage of different grip options and customization settings for a personalized feel.
  • Buying from reliable sources can ensure you’re getting a good deal.

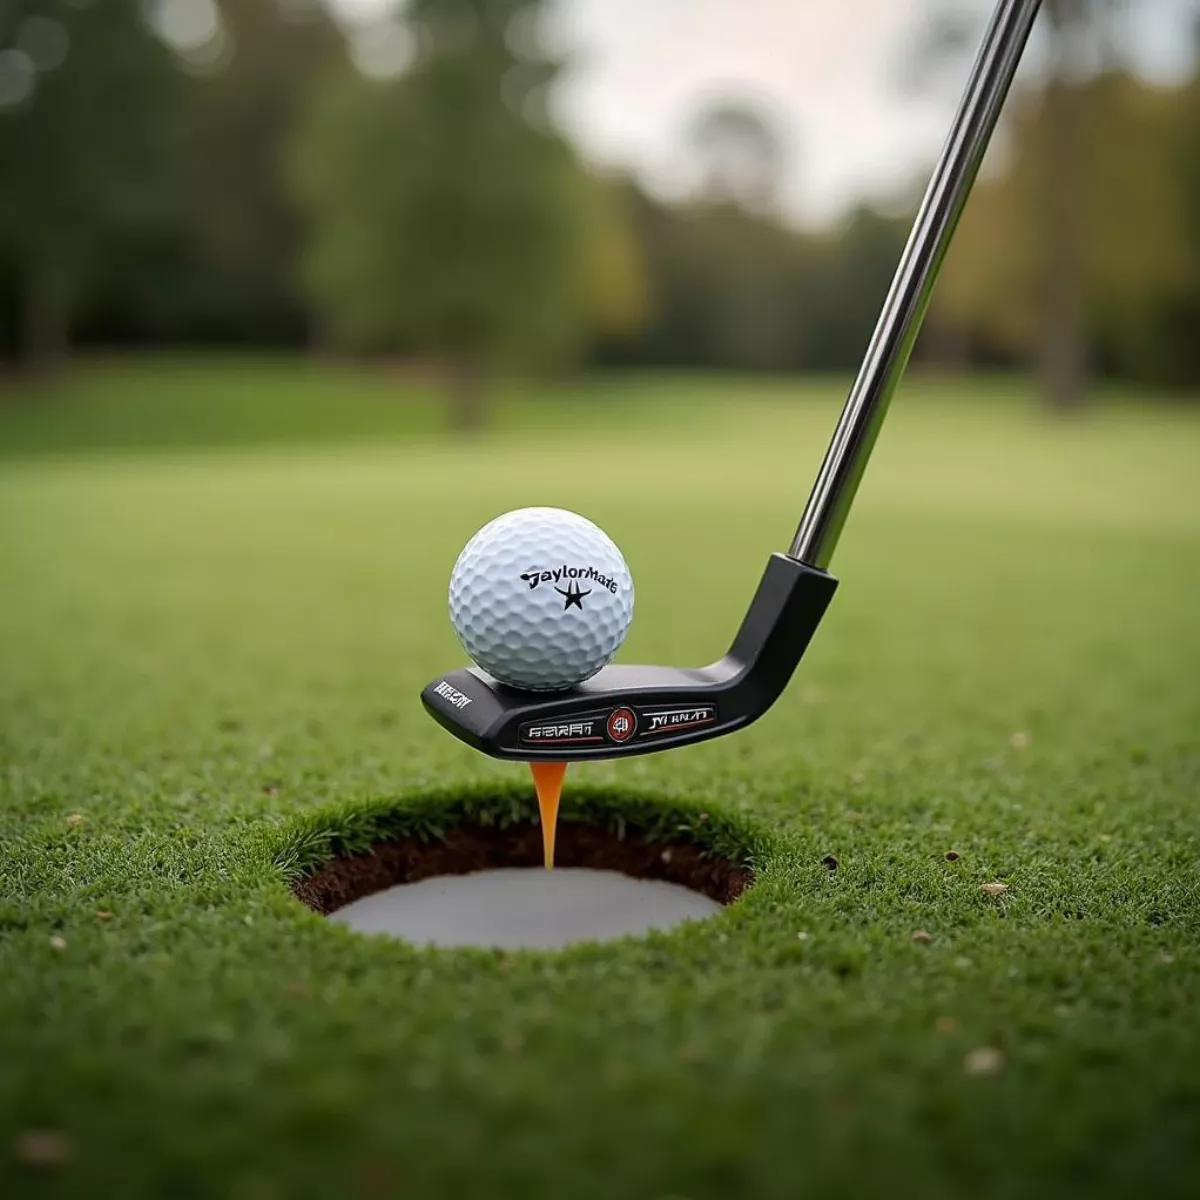
Golf Ball Rolling into HoleGolf Ball Rolling into Hole

Frequently Asked Questions (FAQs)

1. What is the difference between the TaylorMade Spider Tour Putter and other putters?

The Spider Tour Putter features advanced technology that allows for better weight distribution and alignment, resulting in improved stability and accuracy compared to traditional putters.

2. How can I determine the condition of a used putter?

Inspect the face for wear and scratches, check the grip for condition, and look for any unusual signs of wear on the shaft and clubhead.

3. Is it worth buying a used TaylorMade Spider Tour Putter?

Yes, if the condition is good, a used model can provide significant savings and the same performance benefits at a fraction of the cost of a new one.

4. Can I customize the weight of a Spider Tour Putter?

Some models of the Spider Tour Putter come with adjustable weights, allowing you to customize feel and performance to suit your swing style.

5. What’s the average price for a used TaylorMade Spider Tour Putter?

Prices can vary widely based on condition and model year, but typically range from $150 to $300. Always compare prices from various sellers to ensure a fair deal.

6. How do I know if a putter suits my putting style?

Try out different putters to see which one feels most comfortable and stable for your swing. Pay attention to your feel and accuracy during practice.

7. Are there different models of TaylorMade Spider Tour Putters?

Yes, TaylorMade has released several models of the Spider Tour Putter over the years, each with unique features and enhancements.

8. What is the benefit of the Pure Roll Technology?

The Pure Roll Technology helps promote smoother rolls and better distance control, which can enhance your performance on the green.

9. Where can I read more about the latest on golf equipment?

Consider exploring sites like Golf Digest, which regularly reviews and features golf equipment.

10. Is the Spider Tour Putter suitable for beginners?

Absolutely! The stability and forgiving design make it beneficial for golfers at all levels, including beginners just starting on the greens.

In conclusion, purchasing a used TaylorMade Spider Tour Putter can be an excellent decision for golfers looking to upgrade their putting game. By understanding the features, benefits, and best practices for buying, you can make an informed decision that elevates your performance on the course. Happy putting!