Category Archives: FAQs

Golf cart lifted with jack and secured with jack stands

how to raise a golf cart without using a kit

Golf carts are not just for the golf course anymore; they’ve become incredibly versatile vehicles, ideal for various outdoor activities, events, and even community transport. However, one common quest among golf cart owners is finding ways to raise their golf carts effectively without breaking the bank on expensive kits. In this guide, we’ll explore step-by-step methods you can use to raise your golf cart on your own, ensuring better off-road capability and that extra bit of style.

Why Raise Your Golf Cart?

Before diving into the “how,” let’s talk about the “why.” Raising your golf cart can provide several benefits:

  • Improved Off-Road Capability: A higher ride allows for easier navigation over uneven terrains.
  • Better Tire Choices: With additional lift, you can upgrade to larger tires that enhance traction and performance.
  • Increased Ground Clearance: This reduces the risk of bottoming out on tough terrains.
  • Enhanced Visual Appeal: A lifted cart just looks cooler, and an aesthetically pleasing cart can be a great conversation starter.

Tools and Materials Needed

Before you start, gather all necessary tools and materials:

  • Basic Tools: Wrenches, sockets, and ratchets
  • Jack and Jack Stands: To lift your cart safely
  • Heavy-Duty Springs or Spacers: For raising the cart
  • Wood Blocks or Planks: Optional, for temporary height adjustments
  • Measure Tape: To ensure desired height is achieved
  • Lubricant: For easier disassembly of bolts and nuts

Step-by-Step Instructions

Step 1: Prepare Your Golf Cart

  1. Choose a Safe Location: Ensure your golf cart is on a flat, stable surface.
  2. Disconnect the Battery: Safety first! Always disconnect the battery before starting any maintenance work.
  3. Measure Initial Height: Use a tape measure to find the current ground clearance. This will help you gauge how much you want to raise it.

Step 2: Lift Your Golf Cart

  1. Jack Up the Cart: Using a jack, lift the back or front of the cart high enough to work comfortably underneath. Support it with jack stands for safety.
  2. Secure the Cart: Before working on it, give it a light shake to confirm it’s stable.

Golf cart lifted with jack and secured with jack standsGolf cart lifted with jack and secured with jack stands

Step 3: Remove Old Springs or Shocks

  1. Locate the Suspension Components: Identify the springs and shocks.
  2. Remove Nuts and Bolts: Use your wrenches to take out the fasteners holding the shocks in place.
  3. Take Out Old Springs/Shocks: Carefully wiggle them free.

Step 4: Install New Springs or Spacers

  1. Choose Your Replacement: Depending on how high you want your cart to go, you can use either heavy-duty springs or spacers.
  2. Install New Components:
    • If using springs: Fit the new springs into place and secure them using the same nuts and bolts.
    • If using spacers: Position them above the existing springs, ensuring they fit snugly.
  3. Double Check Your Work: Ensure everything is tight and properly positioned.
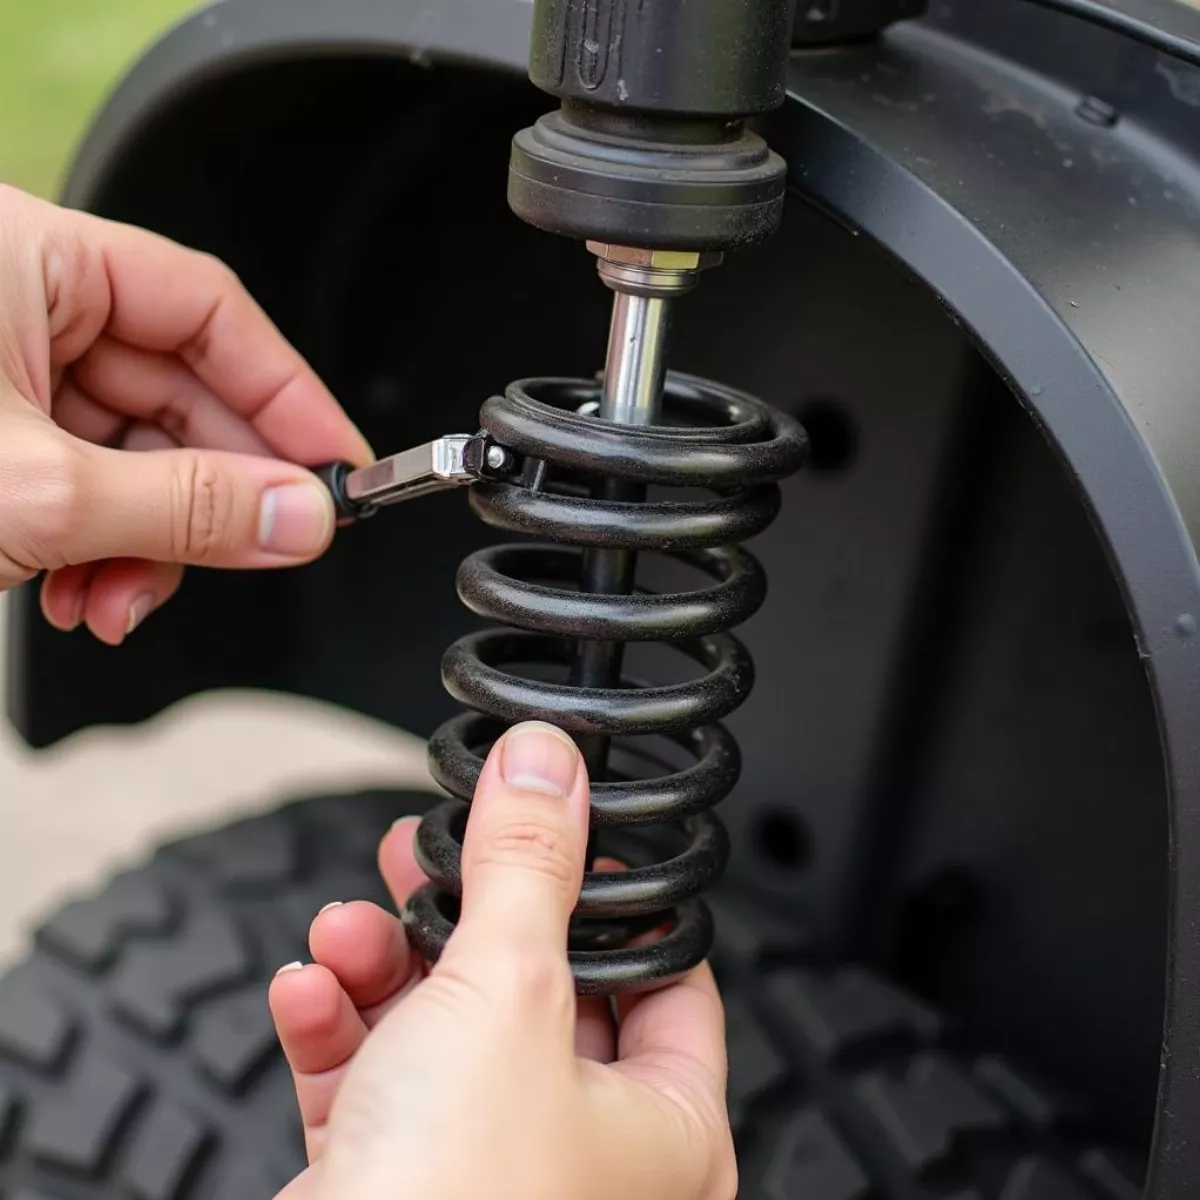
Installing new springs on a golf cartInstalling new springs on a golf cart

Step 5: Reassemble and Test

  1. Reattach Shocks: Fix the shocks back into their places.
  2. Reconnect the Battery: If everything looks good, reconnect the battery.
  3. Lower Your Cart: Carefully remove jack stands and lower the cart to the ground.
  4. Final Measurement: Measure the ground clearance again. Congratulations, you’ve raised your golf cart!

Maintenance Tips

After you’ve raised your golf cart, it’s essential to keep it in great condition. Here are some tips:

  • Regularly Inspect the Suspension: Keep an eye on the springs and shocks for any signs of wear.
  • Lubricate Moving Parts: Ensure all moving parts operate smoothly for better longevity.
  • Check Tire Pressure: With larger tires, the right pressure becomes crucial for performance and safety.

Key Takeaways

  • Raising a golf cart without a kit is achievable by using basic tools and some heavy-duty springs or spacers.
  • Always prioritize safety by working in a stable environment and disconnecting the battery.
  • Regular maintenance will ensure your modified golf cart remains in excellent condition.

FAQs About Raising a Golf Cart Without a Kit

1. Can I raise my golf cart without modifications to the frame?

Yes, using heavy-duty springs or spacers allows you to raise the cart without needing to modify the frame.

2. Will raising my golf cart affect its speed or power?

Generally, it can lead to slightly reduced speed due to added weight, but upgraded tires can enhance traction which potentially improves handling.

3. How high can I raise my golf cart?

Typically, you can safely raise it 2-4 inches depending on the components used and the manufacturer’s recommendations.
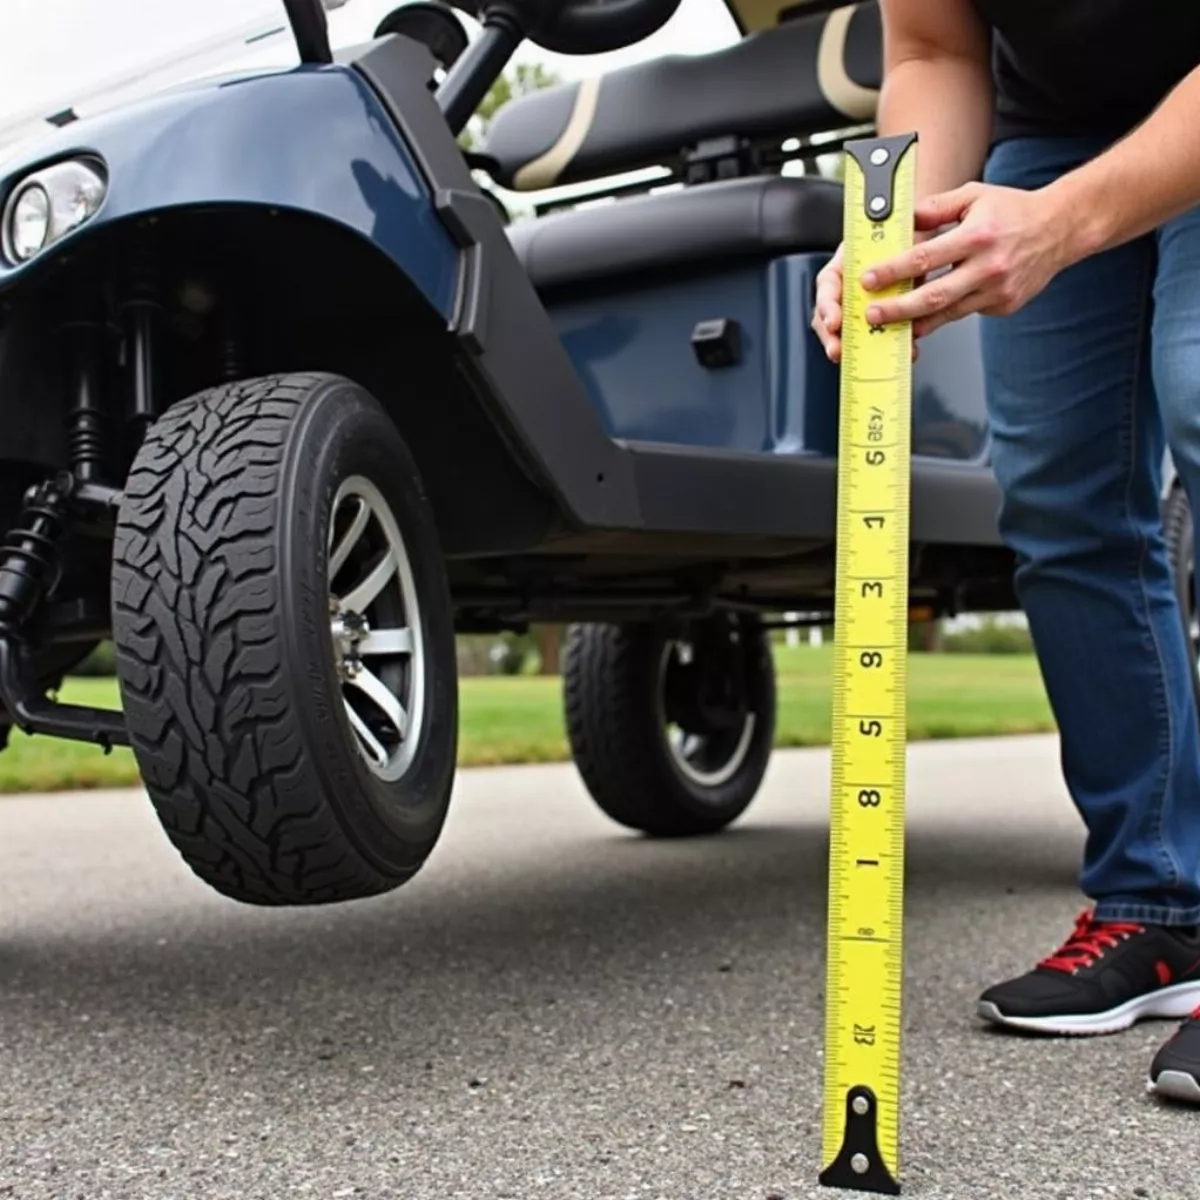
Measuring golf cart's ground clearanceMeasuring golf cart's ground clearance

4. Should I replace my tires when raising my golf cart?

It’s advisable to consider larger tires for better performance and stability after raising the cart.

5. Is it necessary to change the shocks when I raise my cart?

While it’s not strictly necessary, upgrading the shocks might be beneficial for better handling and stability.

6. How can I ensure my cart remains safe after modifications?

Regularly inspect all suspension components and keep an eye on the alignment and tire pressure.

7. Will raising my golf cart void my warranty?

This depends on your golf cart’s warranty policies. Always check your warranty terms before making modifications.

8. How long does the raising process take?

If done correctly, this can take anywhere from two to four hours, depending on your experience and the tools available.

9. Can these methods be applied to electric golf carts?

Yes, electric golf carts can be raised using the same methods; however, consider the potential impact on the battery placement and weight distribution.

10. Where can I find specific parts for raising my cart?

Look for local parts websites or retailers that specialize in golf cart components, or check with your golf cart’s manufacturer.

Raising your golf cart can truly change how you use it, enhancing performance while adding a personal touch. Now that you’ve got the knowledge and steps to do it, you’ll be cruising in style in no time!

Impact-Resistant Glass

how to protect windows from golf balls

If you’re living in proximity to a golf course or you have a passionate golfer in your household, you’re probably familiar with the risk of golf balls crashing into your windows. These little projectiles can cause significant damage, leading to costly repairs and even safety hazards. But fear not! In this guide, we will explore various effective strategies to protect windows from golf balls while keeping your home safe and stylish.

Why Golf Balls are a Concern

Before diving into protective measures, it’s important to understand why golf balls can be a concern in residential areas. Golf balls, although small, are made of hard materials like plastic and rubber and can travel at high speeds. A well-hit golf ball can reach speeds of over 160 mph. Imagine what kind of damage that can inflict on a window!

Factors Contributing to Window Damage

  • Proximity to the Golf Course: Homes situated near golf courses are at higher risk.
  • Type of Windows: Older or single-pane windows are generally more vulnerable than modern double-pane alternatives.
  • Wind Conditions: Wind can alter the trajectory of a golf ball, making it more likely to hit your windows.

Effective Strategies to Protect Your Windows

Now that we’ve covered the risks, let’s explore some effective strategies for protecting your windows from unwanted golf balls.

1. Install Impact-Resistant Glass

One of the most durable solutions for protecting windows is to install impact-resistant glass. This type of glass is designed to withstand high-velocity impacts. It incorporates a polyvinyl butyral (PVB) layer that holds the glass together, even when shattered.

  • Benefits:
    • Durable and long-lasting
    • Less likely to shatter
    • Reduces noise and increases energy efficiency

Impact-Resistant GlassImpact-Resistant Glass

2. Use Window Film

Another cost-effective option is applying window film. This specialized film enhances the window’s strength and holds the glass together when it’s hit.

  • Advantages:
    • UV Protection: Reduces harmful UV rays.
    • Privacy: Adds a level of privacy without sacrificing visibility.
    • Easy to Install: Many films can be applied by homeowners themselves.

3. Install Protective Screens

Protective screens can physically block golf balls from hitting the glass. Made from sturdy materials, these screens can absorb the impact of golf balls.

  • Features:
    • Variety of Designs: Screens can be customized to match your home’s aesthetics.
    • Versatility: Can be removed or adjusted as needed.

Protective Window ScreensProtective Window Screens

4. Employ Strategic Landscaping

Using strategic landscaping can help deflect golf balls before they get to your windows. By placing shrubs, trees, or other features, you create a natural barrier.

  • Best Plants: Consider using dense foliage such as:
    • Holly bushes: Thick and tall, providing effective cover.
    • Bamboo: Grows quickly and can create a protective screen.

5. Create a Net Barrier

Installing a net barrier between your home and the golf course can be an effective deterrent. This solution is particularly useful for homes situated very close to the course.

  • Material Options:
    • Heavy-duty nylon: For durability.
    • Metal mesh: For added strength.

Golf Course Net BarrierGolf Course Net Barrier

6. Consider a Golf Course Buffer

If you have the resources, creating a buffer zone between your home and the golf course can be extremely beneficial. This might involve purchasing additional land or working with local authorities to establish protective measures.

  • Benefits:
    • Reduces the impact of stray golf balls.
    • Enhances the scenic beauty of your property.

7. Opt for Solar Screens

Installing solar screens can serve a dual purpose. They protect against harmful UV rays while also providing a buffer against golf balls.

  • Features:
    • Energy Efficiency: Helps in maintaining cooler interiors.
    • Privacy: Provides a level of seclusion.

8. Reinforce Existing Windows

If replacing windows is not an option, you can reinforce your existing windows using simple methods.

Ways to Reinforce:

  • Use shatterproof film: This glass protective solution can be applied over your existing windows.
  • Install storm shutters: These can be closed during potential golf ball storm days.

Key Takeaways

  • Impact-resistant glass is a top choice for durability.
  • Window film adds both protection and UV resistance.
  • Protective screens prevent direct impacts from golf balls.
  • Strategic landscaping can create natural barriers.
  • Buffer zones and net barriers can ward off incoming golf balls effectively.

Frequently Asked Questions

Q1: How much does impact-resistant glass cost?

A1: The cost can vary widely based on size and installation, typically ranging from $500 to $1,500 per window.

Q2: Can I install window film myself?

A2: Yes, many window films come with DIY installation kits, but be sure to follow the instructions carefully.

Q3: Are protective screens visible from the outside?

A3: Most protective screens can be designed to blend seamlessly with your home’s exterior.

Q4: How do I maintain my protective screens?

A4: Routine cleaning with mild soap and water will generally suffice; avoid abrasive materials that could cause scratches.

Q5: Is installing a net barrier effective?

A5: Yes, a properly installed net can significantly reduce the likelihood of golf balls reaching your windows.

Q6: What plants are best for deflecting golf balls?

A6: Dense shrubs like holly or fast-growing plants like bamboo can create an effective barrier.

Q7: Can I reinforce existing windows without replacing them?

A7: Absolutely, applying shatterproof film or installing storm shutters are great options.

Q8: Will a solar screen block my view?

A8: Solar screens are designed to reduce glare while still allowing visibility, so your view should remain largely intact.

Q9: What are the benefits of a golf course buffer?

A9: A buffer zone can significantly lessen the chance of golf balls reaching your home while enhancing your property’s appeal.

Q10: Are there local regulations regarding installing barriers?

A10: Yes, always check with local zoning and homeowners’ association (HOA) regulations before installing barriers.

Conclusion

Protecting your windows from errant golf balls doesn’t have to be complicated or costly. By understanding the options available, such as impact-resistant glass, window films, and landscaping, you can ensure the safety and longevity of your every window while enjoying peace of mind. Whether you’re a golf enthusiast or simply a homeowner, these practical solutions will keep your home safe and stylish for years to come.

By taking proactive steps to safeguard your windows, you can enjoy the lush beauty of a nearby golf course, minus the worry of shattered glass. Happy golfing, and may your windows remain intact!

Golf club cleaning kit

how to properly clean golf clubs

Keeping your golf clubs in top condition is essential for enhancing your performance on the course. Like any equipment, golf clubs require regular maintenance to ensure they perform at their best. Whether you’re a beginner or a seasoned golfer, knowing how to properly clean your golf clubs can help maintain their lifespan and keep them looking polished. In this guide, we’ll walk you through the steps and tips for cleaning various types of golf clubs, the best tools to use, and some common mistakes to avoid.

Why Clean Your Golf Clubs?

Before we dive into the specifics, let’s discuss why cleaning your golf clubs is important to your game:

  • Improved Performance: Dirty clubs can affect your ability to hit the ball efficiently. Dirt and debris can impact ball spin and distance.
  • Extended Lifespan: Regular cleaning can prevent rust and other damage, prolonging the life of your clubs.
  • Aesthetics: Clean clubs look better and can enhance your confidence on the course.

Tools You’ll Need

Before getting started, gather the following cleaning tools:

Tool Purpose
Soft-bristled brush Removes dirt from club faces and grooves
Bucket of warm water For soaking heads and cleaning
Mild dish soap Breaks down grime and grease
Towel For drying and polishing
Toothpick or metal tip cleaner For cleaning stubborn debris
Spray bottle (optional) For easy application of water

Golf club cleaning kitGolf club cleaning kit

Step-by-Step Cleaning Process

1. Preparation

Make sure you have your workspace organized. Lay out your tools and set the bucket of warm, soapy water nearby.

2. Cleaning the Clubheads

  • Iron and Wedge Cleaning:
    • Submerge the clubheads (not the shafts) in warm, soapy water.
    • Let them soak for a few minutes to loosen dirt.
    • Use a soft-bristled brush to scrub the clubface, ensuring you pay special attention to the grooves.
    • Tip: For stubborn mud, use a toothpick to carefully scrape it away.
  • Driver and Woods Cleaning:
    • Wipe the heads down with a damp towel to remove surface dirt.
    • Avoid submerging the club in water; instead, use the brush with soapy water for the crown and face.
    • Wipe dry with a towel.

3. Cleaning the Shafts

  • To clean the shafts:
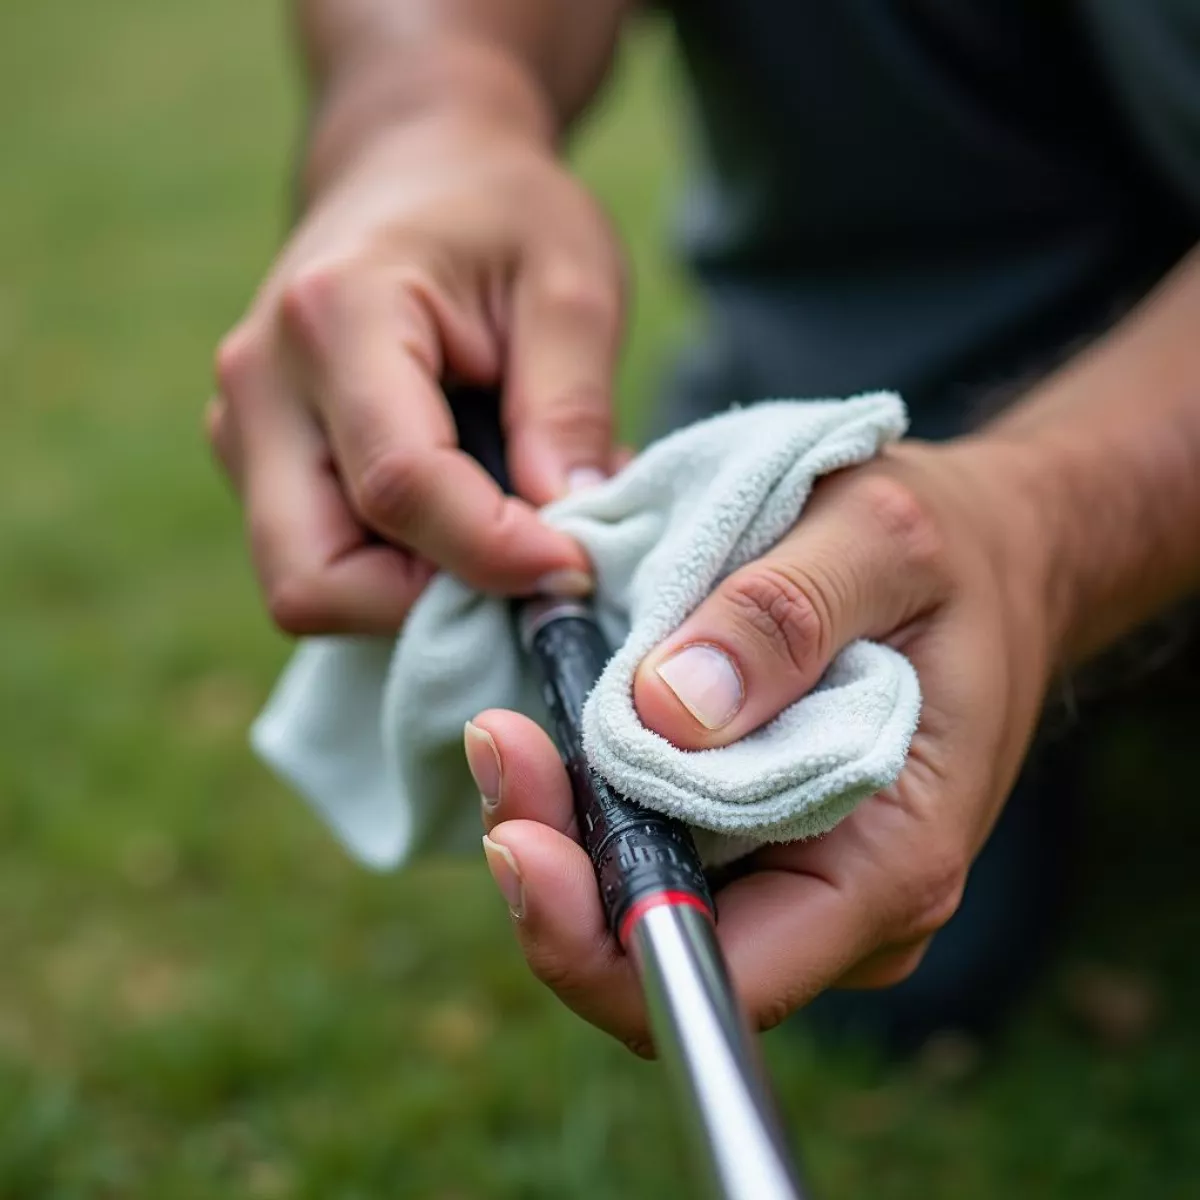
    • Use a damp cloth with a little soap to wipe them down.
    • Avoid soaking the entire club as this can loosen the grip over time.
    • Pay attention to the grip; a clean grip gives you better control.

Cleaning a golf club shaftCleaning a golf club shaft

4. Drying

  • After cleaning, thoroughly dry each club with a towel. This will help prevent rust and corrosion.

5. Finishing Touches

  • Check for golf ball marks or debris in the grooves and use your cleaning tool as necessary.
  • Store your clubs in a dry environment—avoid leaving them in damp areas like basements.

Cleaning Golf Clubs Regularly

How Often Should You Clean Your Clubs?

  • After every round of golf.
  • After hitting at the driving range.
  • If you’ve played in wet conditions.

Doing this routinely will help maintain their performance and appearance.

Common Mistakes to Avoid

  • Using Harsh Chemicals: Avoid bleach or strong chemicals that may damage club finishes.
  • Neglecting the Grips: Grips are often overlooked but require just as much attention.
  • Inadequate Drying: Not drying your clubs properly can lead to rust.

Rusty golf club headRusty golf club head

FAQs about Cleaning Golf Clubs

Here are some frequently asked questions regarding golf club cleaning:

  1. How often should I clean my golf clubs?
    • After each round and after practice sessions, particularly after playing in wet conditions.
  2. Can I put my clubs in the dishwasher?
    • No, dishwashers spray high heat and can damage the finishes and grips of the clubs.
  3. What’s the best way to clean grips?
    • Use a damp cloth with mild soap, and rinse with clean water; let them air dry fully.
  4. Can I clean my clubs with a wire brush?
    • It’s not recommended as a wire brush can scratch and damage the club surfaces.
  5. Does club cleaning improve performance?
    • Yes, clean clubs enhance your contact with the ball, thereby improving performance.
  6. What should I do if my clubs rust?
    • You can often remove surface rust with vinegar or metal polish; if it’s severe, consulting a professional may be best.
  7. Is it necessary to clean my driver differently?
    • Yes, avoid submerging the driver in water; instead, use a damp cloth and soft brush.
  8. Do I need to take special care of antique clubs?
    • Yes, antique clubs may require special cleaning solutions or techniques to avoid damage.
  9. Can I use a pressure washer to clean my clubs?
    • Avoid pressure washers as they can force water into club heads and damage them.
  10. How do I know if my clubs are clean enough?
    • They should be free of dirt and debris, especially in the grooves of clubfaces for optimal performance.

Key Takeaways

  • Always clean your golf clubs after every use to maintain their performance and aesthetic.
  • Use mild soap, water, and the right tools like a soft-bristled brush to clean effectively.
  • Dry your clubs thoroughly to prevent rust and deterioration.
  • Stay clear of harsh chemicals and avoid soaking shafts to protect the grips.
  • Give special attention to cleaning the grooves for improved shot accuracy.

By following these guidelines, you’ll ensure that your golf clubs remain in excellent condition, maximizing your performance on the course. Keeping clubs clean isn’t just about aesthetics; it’s about ensuring you perform at your best every time you step up to tee off!

Golfer on the course with clean clubsGolfer on the course with clean clubs

Now that you have everything you need to keep your golf clubs clean and performing well, it’s time to hit the course! Happy golfing!

Picturesque Golf Courses in Scotland

how to plan a golf trip

Golf trips are more than just playing a round of golf; they’re about experiencing beautiful landscapes, sharing laughs with friends, and creating unforgettable memories. Whether you’re heading to a local course or a prestigious destination, proper planning ensures a great time on and off the greens. This guide will walk you through everything from selecting the perfect destination to making daily itineraries, packed with insider tips and tricks. Let’s put on our golf shoes and dive into the details!

Step 1: Choose Your Destination

Selecting a destination is the first key to a successful golf trip. Here are steps to consider:

  • Research: Look for golf courses that suit your skill level, budget, and preferences.
  • Weather: Check average temperatures and seasonal rainfall to avoid unpleasant surprises.
  • Accessibility: Consider how close the courses are to each other and to your accommodations.
  • Attractions: Look for nearby attractions for your non-golfing companions.

Popular Golf Destinations

Destination Reccommended Courses Best Time to Visit
Scottsdale, AZ TPC Scottsdale, Troon North October-April
Myrtle Beach, SC Pinehurst, TPC of Myrtle Beach April-October
Pebble Beach, CA Pebble Beach Golf Links, Spyglass Hill May-October
St. Andrews St. Andrews Links, Kingsbarns Golf Links May-September

Picturesque Golf Courses in ScotlandPicturesque Golf Courses in Scotland

Step 2: Accommodations

When planning your golf trip, consider where to stay. Here are some options:

  • Resorts: Great for golf-centric stays, often with packages including tee times.
  • Hotels: Good for convenience, especially if you’re near popular courses.
  • Vacation Rentals: Ideal for groups wanting a home base with kitchen amenities.

Tip: Look for hotels or rentals that offer shuttle services to nearby courses.

Step 3: Budget Planning

Understanding your budget is crucial. Here are some points to consider:

  • Green Fees: Research course fees and look for packages that may save you money.
  • Car Rentals: Factor in transportation costs—renting a car can be more economical for groups.
  • Dining: Check out local restaurants and create a meal budget.
  • Other Activities: Set aside funds for non-golf-related activities—going sightseeing or dining out.

Sample Budget Breakdown

Item Estimated Cost
Green Fees (per day) $100
Accommodation (per night) $150
Dining (per day) $70
Transportation $50

Group of Friends Planning a Golf TripGroup of Friends Planning a Golf Trip

Step 4: Schedule Your Tee Times

Once you have settled on your destination and accommodations, it’s time to book your tee times. Here are a few guidelines:

  • Book Early: High-demand courses can get booked quickly, especially during peak season.
  • Flexibility: Look into twilight rates or off-peak times for lower fees.
  • Consider Group Sizes: Most courses have restrictions on how many players can start at once. Pre-booking for larger groups is advisable.

Step 5: Plan Non-Golf Activities

To keep everyone entertained, plan a few non-golf activities. Here are suggestions:

  • Local Attractions: Museums, parks, or scenic views.
  • Dining Experiences: Research the best local cuisine and book reservations.
  • Nightlife: Find hotspots for evening entertainment.

Golfers Enjoying Drinks and Food at a RestaurantGolfers Enjoying Drinks and Food at a Restaurant

Step 6: Prepare Your Gear

Before you leave, ensure you have all the necessary golf gear. Don’t forget the following:

  • Clubs: Check that your clubs are in good condition.
  • Balls: Pack enough for both practice and play.
  • Apparel: Check for course dress codes and pack accordingly.
  • Accessories: Sunscreen, gloves, and hats are essential for comfort.

Step 7: Create an Itinerary

Creating a detailed itinerary helps maximize your time. Here’s a basic template to follow:

Time Activity
7:00 AM Breakfast at Hotel
8:00 AM Tee Time at [Course Name]
1:00 PM Lunch at Nearby Restaurant
3:00 PM Afternoon Activity (e.g., sightseeing)
6:00 PM Dinner at [Restaurant Name]

Key Takeaways

  • Choose the right destination based on the group’s preferences and skill levels.
  • Book accommodations early, considering proximity to golf courses.
  • Plan your budget carefully; include all potential expenses.
  • Schedule tee times promptly to secure your ideal golfing experience.
  • Incorporate non-golf activities into your itinerary for a balanced experience.

Golf Bags and Equipment Packed for a TripGolf Bags and Equipment Packed for a Trip
FAQ Section

1. When is the best time for a golf trip?

The best time varies by destination but generally falls in the spring and fall when the weather is mild.

2. How do I choose the right golf course?

Look for courses that match your skill level and read reviews to gauge the quality of the course.

3. Should I rent clubs or bring my own?

If travel costs are a concern or if you play infrequently, renting clubs may be more economical. Otherwise, bringing your own provides comfort and familiarity.

4. What if the weather is bad on my scheduled tee time?

Check the course’s cancellation policy. Many courses will allow you to reschedule in case of severe weather.

5. Are golf packages worth it?

Golf packages often save money on green fees and accommodations. It can be cheaper than booking everything separately.

6. What are the benefits of traveling with a group?

Traveling with a group can lower costs per person, offer camaraderie, and allows for shared experiences on and off the golf course.

7. How can I prepare for my golf trip?

Practice your swing, check your gear, and familiarize yourself with the courses you’ll be playing.

8. What else should I pack aside from golf gear?

Sunscreen, appropriate clothing, personal items, and enough casual clothes for post-golf activities are essential.

9. Should I book travel insurance?

It’s wise to consider travel insurance, especially for expensive trips, to protect against cancellations or unforeseen circumstances.

10. How can I ensure everyone in my group enjoys the trip?

Gather input before planning, include options for varied activities, and be flexible with the itinerary.

Isn’t it exhilarating to think about your next golfing adventure? By following these well-structured steps and tips, you’re bound to have an unforgettable experience hitting the links and enjoying your time with friends. Now, gather your buddies, and get ready for a trip full of swing and laughter!

Digital loft and lie gauge for golf clubs

how to measure loft on a golf club

Golf is more than just a sport; it’s a science. One of the key scientific aspects of the game lies in understanding equipment, particularly the loft of your golf clubs. Loft can greatly affect your shots, making it essential to be familiar with how to measure it. This guide will walk you through everything you need to know about measuring the loft on golf clubs, ensuring you’ll have the tools needed to enhance your game and elevate your performance on the course.

What Is Loft in Golf Clubs?

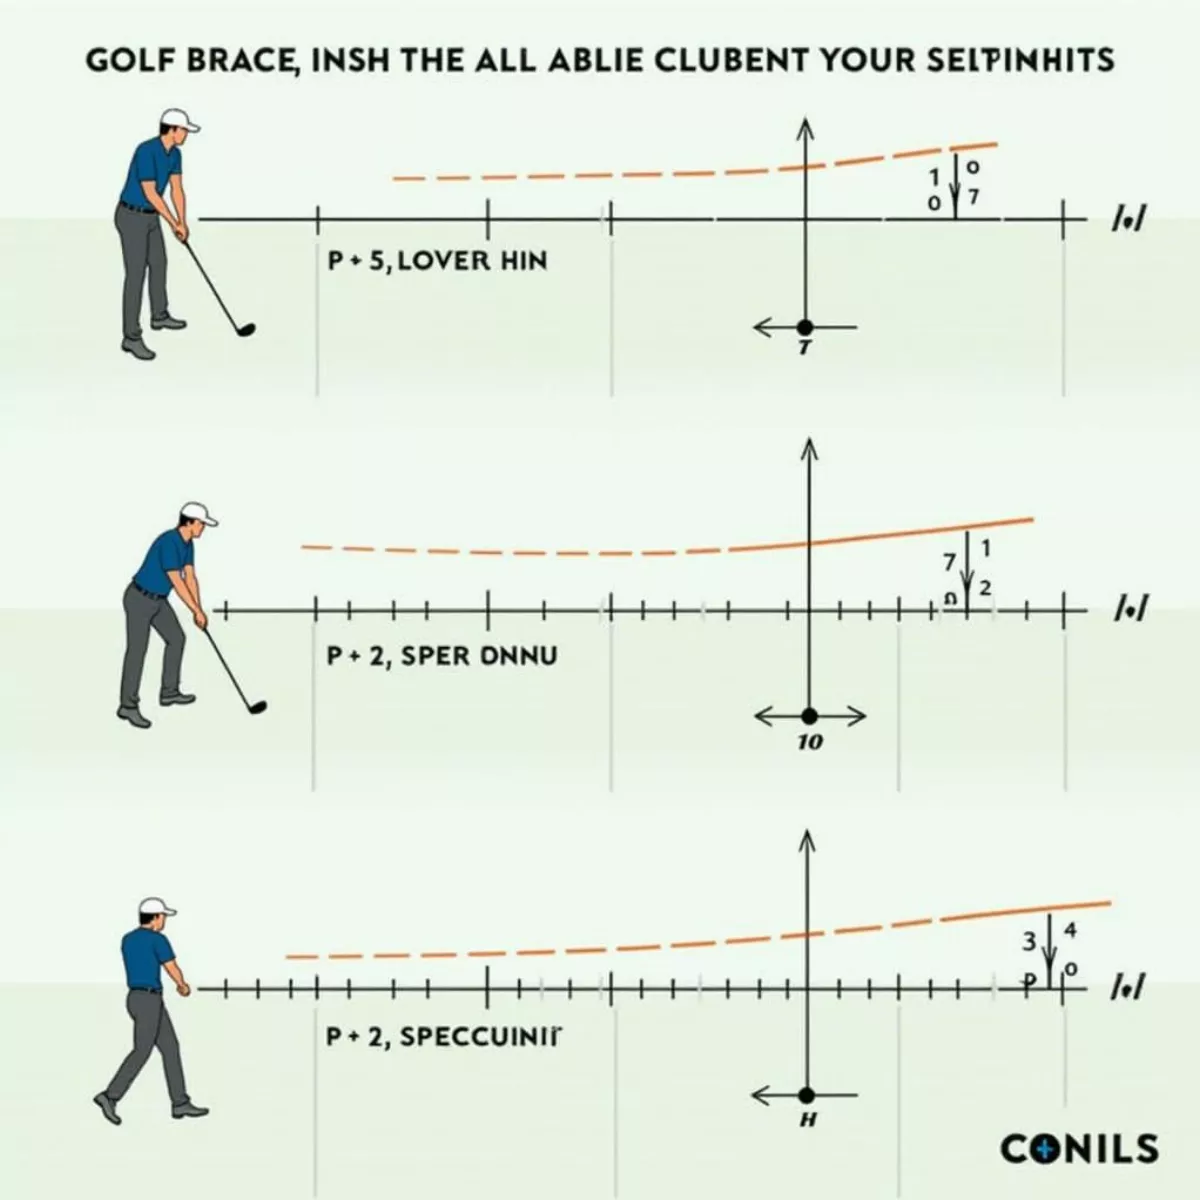
Loft refers to the angle of the clubface relative to the ground. The angle at which the clubface is tilted impacts how high the ball travels and how far it carries. Different clubs come with varying lofts:

  • Drivers: Typically have the least loft (around 8° to 12°)
  • Irons: Loft ranges from approximately 18° for a 3-iron to 48° for a pitching wedge
  • Wedges: Usually have the most loft, ranging from about 52° to 60°+

Understanding loft is vital because it affects ball trajectory, spin rate, and distance.

Why Measure Loft?

Measuring the loft of your clubs is important for several reasons:

  • Custom Fitting: Ensures your clubs are tailored to your swing style.
  • Consistency: Helps maintain consistent ball flight.
  • Performance: Optimizes club selection based on your playing conditions.

Tools You’ll Need

Here’s a handy list of tools you can use to measure loft accurately:

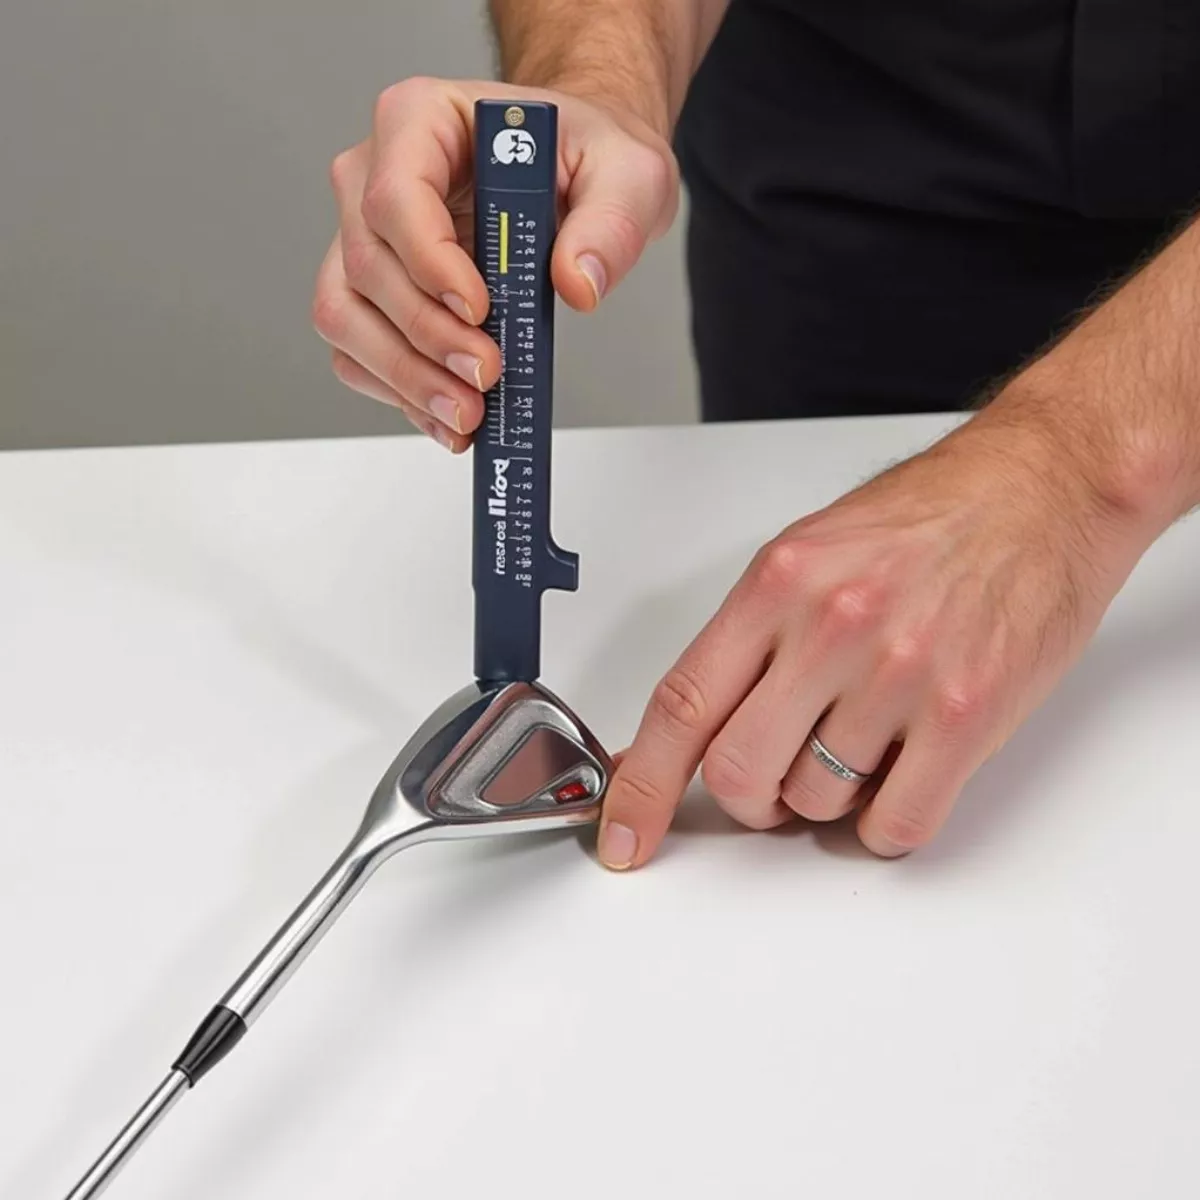
  • Digital Loft and Lie Gauge: The most precise tool for measuring loft.
  • An Angle Finder: A simple DIY tool that can give a rough estimate.
  • Ball Markers: For marking the centerline to help position the club correctly.

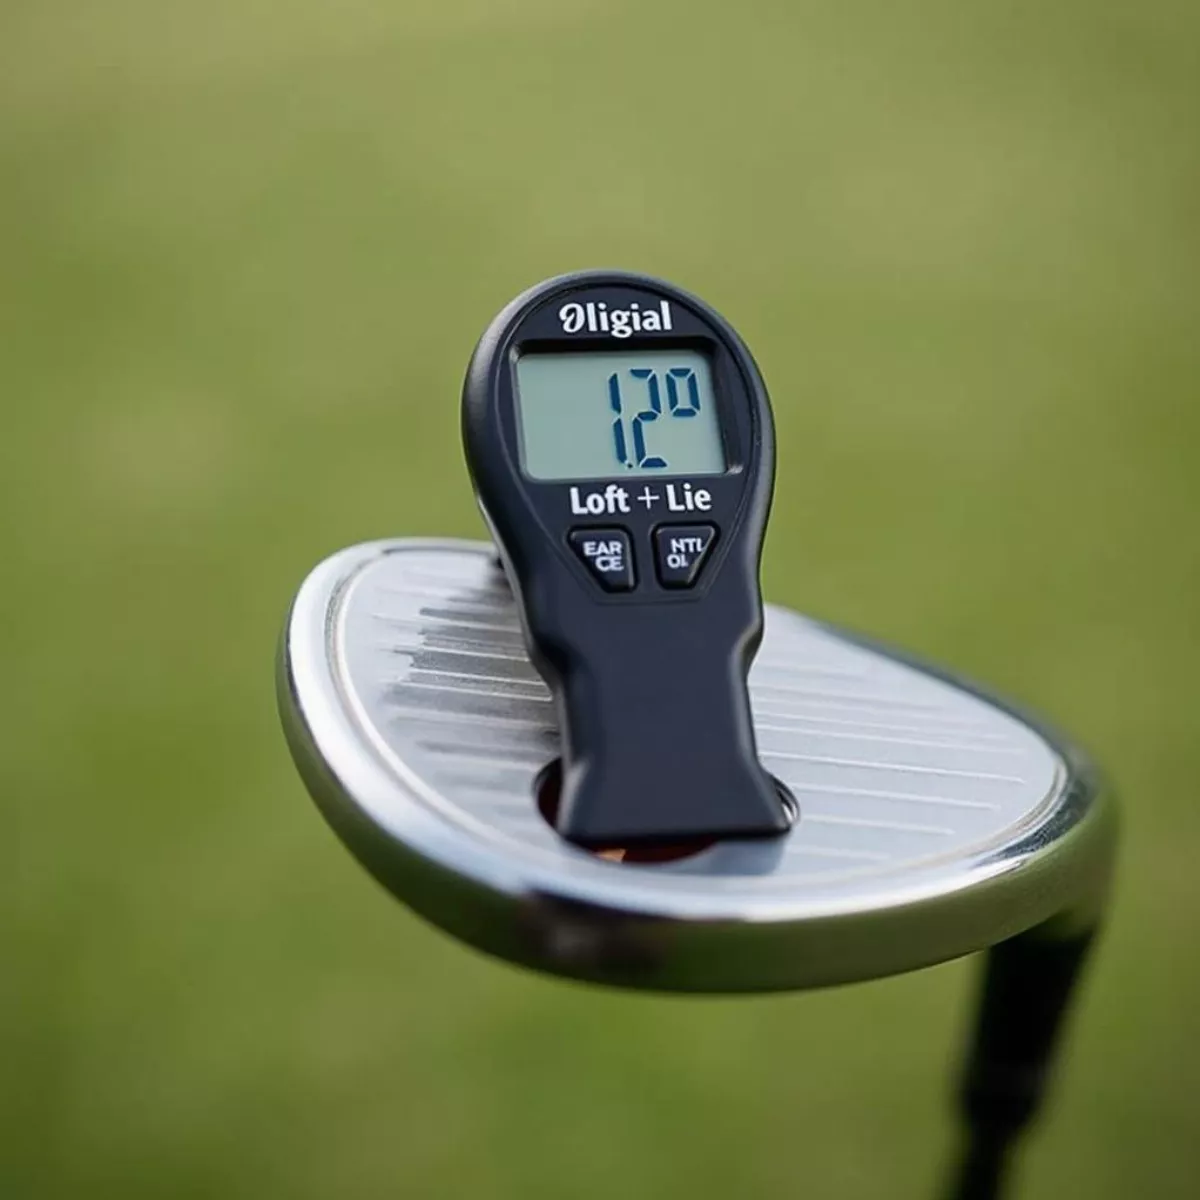
Digital loft and lie gauge for golf clubsDigital loft and lie gauge for golf clubs

How to Measure Loft: Step-by-Step Guide

Step 1: Prepare Your Workspace

Make sure you have a flat surface to work with and good lighting.

Step 2: Position the Club

  • Place the club horizontally on the ground.
  • Ensure it’s resting flat and the clubface is perpendicular to your measuring surface.

Step 3: Use the Loft and Lie Gauge

  1. Place the Gauge: Line the club up with the gauge’s back.
  2. Read the Loft: The loft angle will be indicated on the gauge.

Step 4: Double-Check Your Measurement

Measurement errors can happen, so it’s always wise to take a second reading. Repeat the measurement to ensure its accuracy.

Step 5: Document the Loft

Write down the loft measurements for each club. You should also note their corresponding lies for further analysis.

Golfer measuring loft of a golf club using a gaugeGolfer measuring loft of a golf club using a gauge
External Resources for In-depth Knowledge

  • For more information on golf club specifications, consider checking Golf Digest’s Equipment Section.
  • Explore PGA Tour’s Equipment Insights for pro-level understanding.

Common Loft Angles for Golf Clubs

Here’s a handy reference guide to the loft angles of common golf clubs:

Club Type Loft Angle (Degrees)
Driver 8° – 12°
3-Wood 13° – 15°
5-Wood 18° – 20°
3-Iron 18°
4-Iron 20°
5-Iron 23°
6-Iron 26°
7-Iron 30°
8-Iron 34°
9-Iron 38°
PW (Pitching Wedge) 44° – 48°
SW (Sand Wedge) 54° – 58°
LW (Lob Wedge) 58° – 60°

Adjusting Loft

If your clubs are not performing as expected, you may consider adjusting the loft. Here’s how:

  • Loft Adjustment Tools: Some manufacturers offer adjustable hosels in drivers and woods. Invest in these products if you frequently change your loft settings.
  • Visit a Professional: For precise adjustments, consider visiting a local pro shop.

Benefits of Adjusting Loft

  • Increased control over ball flight.
  • Ability to tailor loft to specific courses or weather conditions.
  • Enhanced performance through higher or lower launch angles.

Key Takeaways

  • Understanding loft is crucial in optimizing your golf clubs for better gameplay.
  • Utilize a digital loft gauge or an angle finder for accurate measurement.
  • Document your loft measurements for custom fitting and consistent performance.
  • Loft adjustments can significantly affect ball trajectory and performance.

FAQ Section

1. What is the ideal loft angle for a driver?

The ideal loft angle for a driver generally ranges from 8° to 12°, depending on your swing speed and playing style.

2. How often should I measure the loft of my clubs?

It’s a good practice to measure the loft of your clubs every 6 to 12 months or after hitting a significant number of shots with them.

3. Can I adjust the loft of my clubs myself?

While some clubs are designed for easy adjustments, it’s best to consult a professional for precise modifications to avoid damaging your equipment.

4. Does loft affect distance?

Yes, loft heavily influences the distance the ball travels. Lower lofts typically produce longer shots, while higher lofts provide better control and shorter distances.

5. What happens if the loft is too low?

If the loft is too low, it can lead to lower ball flight, decreased spin, and an overall loss of control over your shots.

Golf ball trajectories with different loft anglesGolf ball trajectories with different loft angles

6. How can lie angle impact loft measurement?

Lie angle can impact how the club interacts with the ground, possibly affecting the accuracy of loft measurement. It’s advisable to measure both during your analysis.

7. Are there standard loft angles for all golf clubs?

While there’s a general standard, loft angles can vary by manufacturer and club design. Always check the specific manufacturer’s guidelines.

8. Can different swings impact the loft measurement?

Yes, your swing style can lead to dynamic changes in effective loft at impact. Consistent swing mechanics will yield more reliable loft measurements.

9. What is the standard loft for a sand wedge?

The standard loft for a sand wedge typically ranges from 54° to 58°.

10. Do all golfers need to know how to measure loft?

Even beginner golfers can benefit from knowing how to measure loft, as it can inform their choices in equipment and help them learn the style of shots they can consistently produce.

By understanding how to measure the loft on a golf club, you will not only improve your game but also take a significant step toward becoming a more knowledgeable player. Happy golfing, and may your next round be your best yet!

Golf Balls with Various Marks

how to mark your golf ball

Golf is not just a game of skill; it’s also about precision and integrity. One aspect of ensuring you play the game correctly is knowing how to mark your golf ball effectively. Whether you’re a beginner just getting started or a seasoned player looking to brush up on etiquette, this guide will help you understand everything about marking your golf ball.

Why Mark Your Golf Ball?

Marking your golf ball serves multiple purposes, such as:

  • Identifying Your Ball: With many players on the course, marking your ball ensures you can easily recognize it.
  • Making it Unique: Adding a personal mark helps differentiate your ball from others, especially in casual play or tournaments.
  • Aligning Your Putts: Some golfers use marks for lining up their putts more accurately.
  • Avoiding Confusion: If your ball lands near another player’s, having it marked helps in assuring everyone knows which is which.

Golf Balls with Various MarksGolf Balls with Various Marks

Different Methods to Mark Your Golf Ball

There are various ways you can choose to mark your golf ball. Here’s a breakdown of some popular methods:

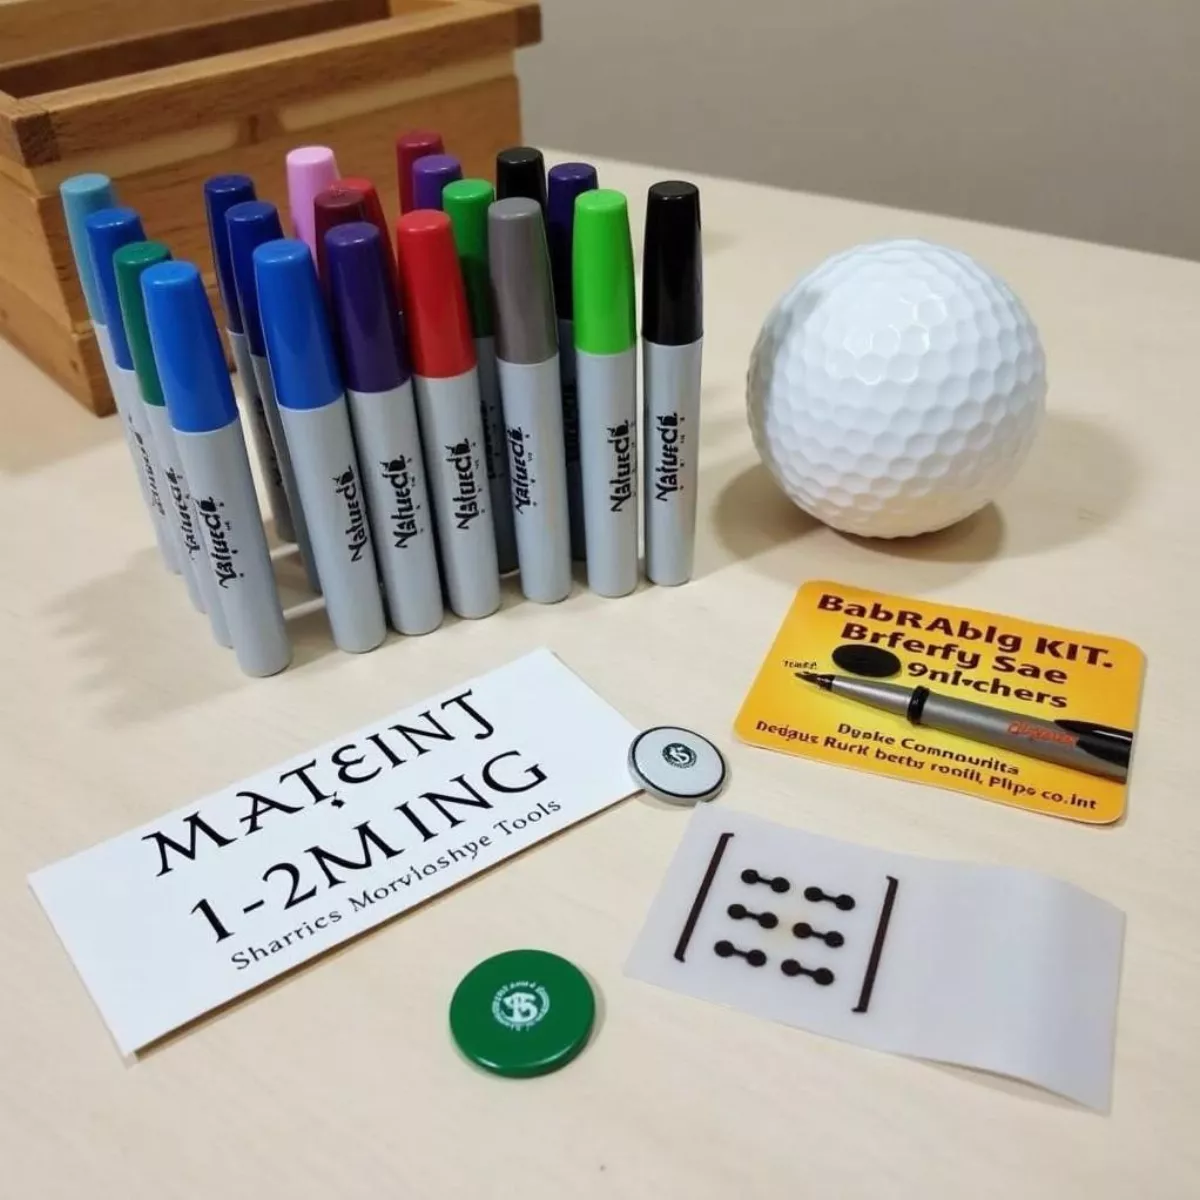
1. Using a Sharpie

Marking your golf ball with a Sharpie is one of the simplest and most effective methods. Here’s how to do it:

  • Choose Your Color: Opt for a color that stands out against the ball’s surface. Black or bright colors work well.
  • Design Your Mark: Common designs include initials, a dot, or stripes. Think about what you’d like that makes your ball unique.
  • Keep it Simple: Your mark should be easy to recognize but not overly elaborate.

2. Using Stickers

Stickers can also be a fun way to mark your golf ball. Choose from small stickers that can fit comfortably on your ball.

  • Design Options: You can find stickers in various shapes and colors. Pick something that reflects your personality!
  • Adhere Properly: Ensure the sticker is securely attached so it won’t come off during play.

3. Using Ball Marking Kits

For those who want a professional look, consider using a ball marking kit that comes with a stencil.

  • Easy to Use: Follow the kit instructions for applying your designs correctly.
  • Variety of Designs: Kits often come with multiple designs or templates.

Golfer Marking Their Ball on the Putting GreenGolfer Marking Their Ball on the Putting Green
Where to Mark Your Golf Ball

Once you’ve decided how to mark your golf ball, you need to determine where to place the mark.

  1. Side of the Ball: The most common place is the side. Choose an area that’s easy to see when you place the ball on the tee or on the green.
  2. Top or Bottom: While less common, you might opt to mark the top or bottom of the ball, particularly if you’re trying to align it during putts.
  3. Near the Logo: If your ball has a logo, marking around it while keeping it visible can also be an option.

Golf Ball Marking Etiquette

Understanding the etiquette around marking your golf ball is crucial, especially in a competitive play environment. Here are a few important rules to adhere to:

  • Always Notify Other Players: When marking your ball on the green, inform your playing partners. This helps to maintain transparency and sportsmanship.
  • Be Quick: Don’t take too long marking your ball. Speed up the process to keep the game moving smoothly.
  • Use the Right Tools: If using alignment aids, ensure they comply with USGA rules.

Quick Tips for Etiquette

  • Always mark before lifting the ball.
  • Do not erase someone else’s mark.
  • Replace the ball in the exact spot.

Golf Ball Markers and Sharpies on a TableGolf Ball Markers and Sharpies on a Table

Tools You Might Need

Essential Tools

Tool Purpose
Sharpie Mark your ball uniquely.
Steering Kit Provides professional designs.
Stickers Quick and fun way to mark your ball.
Ball Marker Use as a reference for alignments.

Optional Tools

  • Unique colored pens for better visibility
  • A small notebook for keeping track of personal ball designs

Key Takeaways

  • Always mark your golf ball to avoid confusion and ensure you can identify your equipment easily.
  • Use tools such as Sharpies, stickers, or marking kits to create a mark that is uniquely yours.
  • Be aware of golf etiquette when marking your ball, including informing other players and acting quickly.
  • Choose the right location for your mark for easy visibility and alignment.

Frequently Asked Questions (FAQ)

1. Can I mark my ball during play?

Yes, you can mark your ball at any time during play, especially on the green.

2. Is there a required size for ball marks?

No specific size is mandated, but your mark should be easily visible to you and your playing partners.

3. What if I forget to mark my ball and lift it?

If you forget and lift your ball without marking it, you may incur a penalty. It’s best to mark your ball first.

4. Can I use any type of ink to mark my golf ball?

It’s advisable to use permanent markers or specially designed ink that won’t smudge or wear away.

5. Are there specific designs I should avoid?

Avoid overly elaborate designs or markings that can alter the ball’s performance or might be seen as distracting to others.

6. Does marking a golf ball have any impact on gameplay?

No, as long as the mark does not interfere with the ball’s flight and conforms to regulations, it shouldn’t affect gameplay.

7. Is it acceptable to change my ball mark during the game?

Absolutely! You can change your mark as long as you can identify your ball easily.

8. What’s the best way to clean my golf ball before marking it?

Use a soft cloth and clean water to remove dirt and grass before marking.

9. Can I use a design from another golfer?

It’s better to create your unique mark, but you can take inspiration as long as it’s distinguishable.

10. How can I ensure my ball mark lasts the entire round?

Use high-quality markers and ensure they dry properly before use.

With this complete guide, you’re now armed with the knowledge to mark your golf ball effectively. Keep practicing your golf skills and remember, a well-marked ball is just one step towards enhancing your game! Enjoy your time on the course!

LSV Safety Features

how to make a golf cart street legal in florida

Golf carts are not just for the greens anymore! Many Floridians have discovered the convenience of using golf carts for local errands and short trips because of their agility and compact size. However, if you want to embrace the open roads in your golf cart, you need to ensure that it meets specific legal standards. Let’s explore how to make your golf cart street legal in Florida!

What Does Street Legal Mean?

Before diving into the specifics of making your golf cart street legal, let’s clarify what “street legal” means. A vehicle that is street legal can be driven on public roads and must comply with specific state laws, including safety standards and equipment requirements.

Step-by-Step Guide to Make Your Golf Cart Street Legal

1. Understand the Definition of a Low-Speed Vehicle (LSV)

In Florida, golf carts can be classified as Low-Speed Vehicles (LSV) if they meet certain criteria.

  • Speed Limit: Must be capable of speeds between 20-25 mph.
  • Weight Restrictions: Cannot exceed 3,000 pounds.
  • Safety Features: Must have the following safety features to be classified as an LSV:
    • Headlights
    • Taillights
    • Turn signals
    • Stop lights
    • Rearview mirrors
    • Windshield
    • Seat belts

LSV Safety FeaturesLSV Safety Features

2. Make Necessary Modifications

If your golf cart doesn’t meet the requirements for an LSV, you’ll need to make some modifications. Here’s a checklist:

  • Install a Windshield
  • Add Lighting: Ensure that your headlights, taillights, and turn signals are functioning.
  • Install Mirrors: A rearview mirror is essential, while side mirrors can enhance visibility.
  • Safety Features:
    • Ensure your cart has approved seat belts.
    • Consider adding additional safety features like a horn.

3. Complete the Required Paperwork

After making the necessary modifications, the next step is to obtain the paperwork:

  • Fill Out the Application: You’ll need to complete the Florida Department of Highway Safety and Motor Vehicles (DHSMV) application for LSV registration.
  • Provide Proof of Insurance: You must have liability insurance for your golf cart. Ensure your insurance policy covers golf carts specifically.

Golf Cart Insurance DocumentsGolf Cart Insurance Documents

4. Visit Your Local DMV

You’ll need to visit your local Department of Motor Vehicles (DMV) office to finalize the registration process.

  • Documents Required:
    • Completed application
    • Proof of insurance
    • Sales tax payment (if applicable)
    • Associated fees for registration
  • Obtain a Title: If your golf cart doesn’t have a title, you may need to apply for one.

5. Get Your Golf Cart Registered

Once your cart is modified and you have completed all necessary paperwork, you will register it as an LSV. Here’s what happens:

  • Receive License Plates: After registration, you will receive license plates that must be displayed on the vehicle.
  • Pay Applicable Fees: Licensing and registration fees will apply.

6. Follow Local Laws

Once your golf cart is street legal, it’s essential to follow local laws and regulations. This may include:

  • Speed Limits: LSVs generally must adhere to a maximum speed of 25 mph.
  • Road Restrictions: Be aware of which roads and areas allow LSV travel.

“Knowledge is key! Always ensure you’re informed about local traffic regulations and restrictions.”

Street Legal Golf Cart on RoadStreet Legal Golf Cart on Road

Safety Tips for Driving Your Street Legal Golf Cart

  • Wear Your Seatbelt: Always wear your seatbelt for safety.
  • Stay Visible: Use reflective materials if driving in low-light conditions.
  • Obey Traffic Signals: Treat your golf cart as you would any other vehicle on the road.

Key Takeaways

  • Understanding LSV Criteria: Ensure your golf cart meets the definition and requirements of a Low-Speed Vehicle.
  • Modifications Required: Install headlights, taillights, a windshield, and seat belts to meet safety standards.
  • Complete Necessary Paperwork: Fill out the application, provide proof of insurance, and pay applicable fees at the DMV.
  • Adhere to Local Laws: Know the driving laws applicable in your area regarding speed limits and road usage.

With these steps, you can enjoy the freedom of driving your golf cart legally on the streets of Florida!

Frequently Asked Questions (FAQs)

1. Is there a difference between a golf cart and an LSV?

Yes! A golf cart is typically limited to golf courses, while a Low-Speed Vehicle (LSV) can operate on public roads if it meets specific requirements.

2. Can I drive a golf cart on highways in Florida?

No, golf carts are generally not allowed on highways. They can only be driven on roads with speed limits of 35 mph or less.

3. What is the cost to make my golf cart street legal?

Costs vary based on modifications and registration fees. Be prepared for expenses related to insurance and any necessary equipment.

4. Do I need a special license to drive a street-legal golf cart?

No special license is required to drive an LSV, but operators must be at least 14 years of age and hold a valid driver’s license.

5. Is insurance mandatory for a golf cart?

Yes, you must have liability insurance to operate a golf cart legally on public roads in Florida.

6. What happens if I drive my golf cart without it being street legal?

Driving an unregistered vehicle can result in fines, impoundment of the vehicle, and increased insurance premiums.

7. Can I convert any golf cart to be street legal?

Not all golf carts can be converted; it must be capable of speeds between 20-25 mph and meet safety standards.

8. Where can I find more information about Florida traffic laws?

You can visit the Florida Department of Highway Safety and Motor Vehicles website for detailed information about traffic laws and regulations.

9. Are there restrictions on where I can park my street-legal golf cart?

Yes, you should follow local parking regulations just as you would for other vehicles.

10. Can I drive my street-legal golf cart at night?

Yes, however, ensure that you have functional headlights and taillights before driving after dark.

With this comprehensive guide, you’re all set to make your golf cart street legal in Florida! Enjoy your rides while abiding by the rules of the road and ensuring safety for you and others. Happy driving!

Different Golf Cart Types: Electric vs. Gas

how to make a golf cart go faster

Golf carts are wonderful vehicles, often associated with leisurely drives around the golf course or neighborhood. But what if you want to add some speed to your ride? Whether you’re looking to beat your friends in a daytime golf match or simply enjoy a breezy ride, this guide will help you understand how to make your golf cart go faster. With tips and tricks that are easy to follow, let’s get started!


Understanding Your Golf Cart

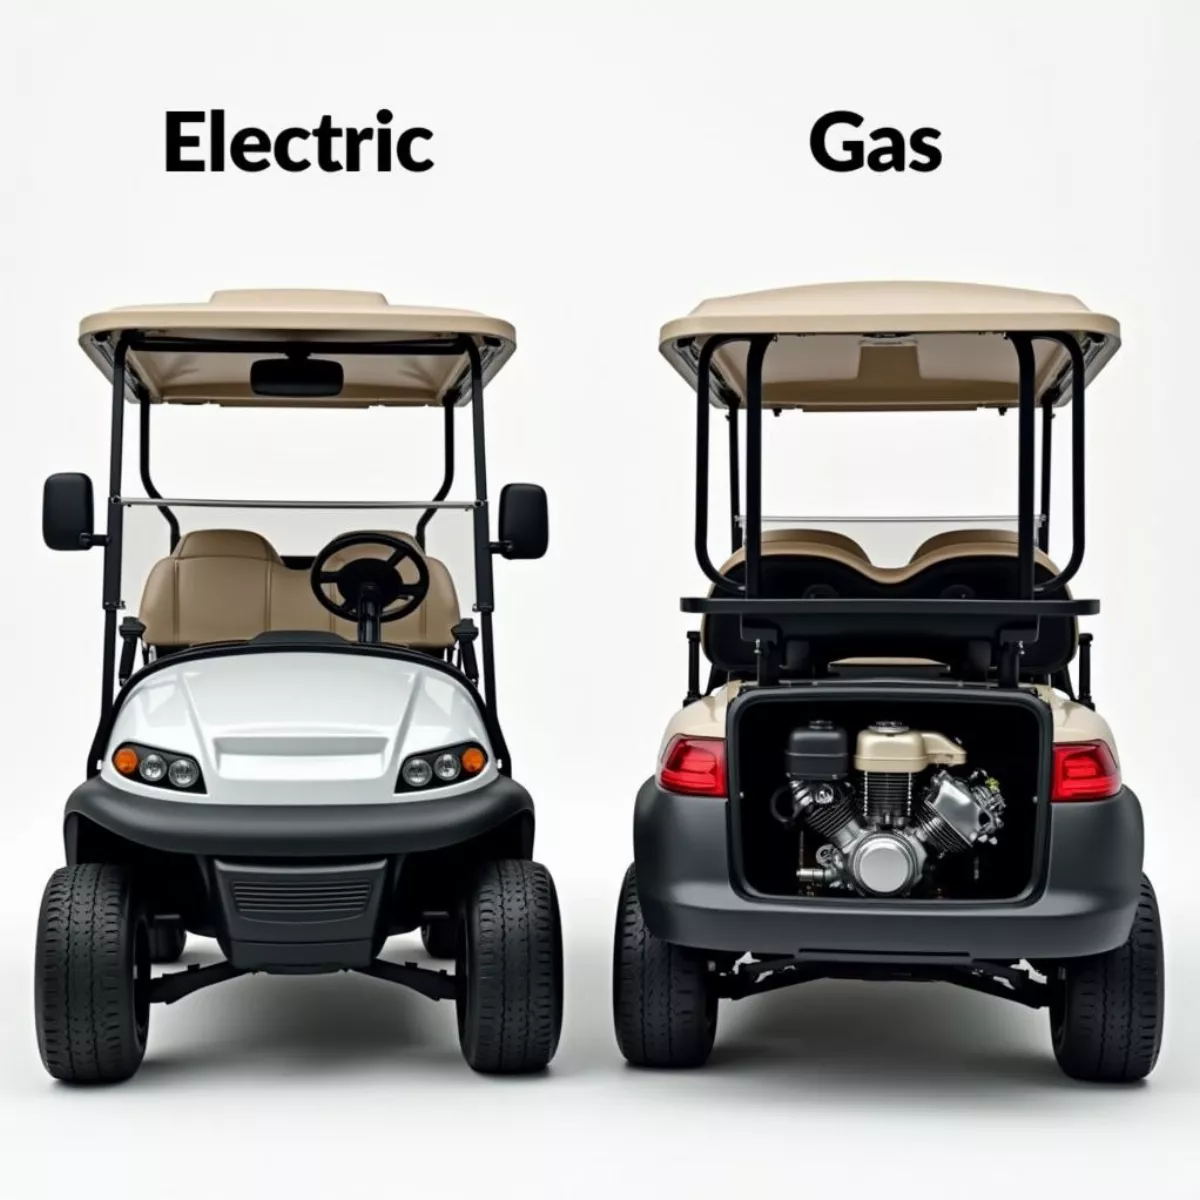
Before we dive into the specifics of increasing your golf cart’s speed, it’s essential to understand the types of golf carts available on the market today. Most significantly, they fall into two categories: electric and gas-powered carts. Each has its characteristics and methods for enhancing speed.

Types of Golf Carts

Type Description Performance
Electric Runs on batteries and is eco-friendly. Generally slower, quiet
Gas-powered Uses gasoline, similar to small engines. Typically faster, noisier

Understanding the differences will help you choose the correct upgrades for your particular type of cart.

Different Golf Cart Types: Electric vs. GasDifferent Golf Cart Types: Electric vs. Gas


7 Tips to Make Your Golf Cart Go Faster

Now that you have a grasp of the different types of golf carts, let’s look into practical tips to enhance the speed of your ride.

1. Upgrade the Speed Controller

The speed controller regulates how much power flows to the motor. A higher-grade controller will typically allow your cart to reach higher speeds.

  • Tip: Consider a controller rated for the voltage of your batteries. For instance, upgrading from a 35-amp to a 500-amp controller can significantly increase speed.

2. Change Your Tires

Tire selection plays a crucial role in the overall performance of your golf cart.

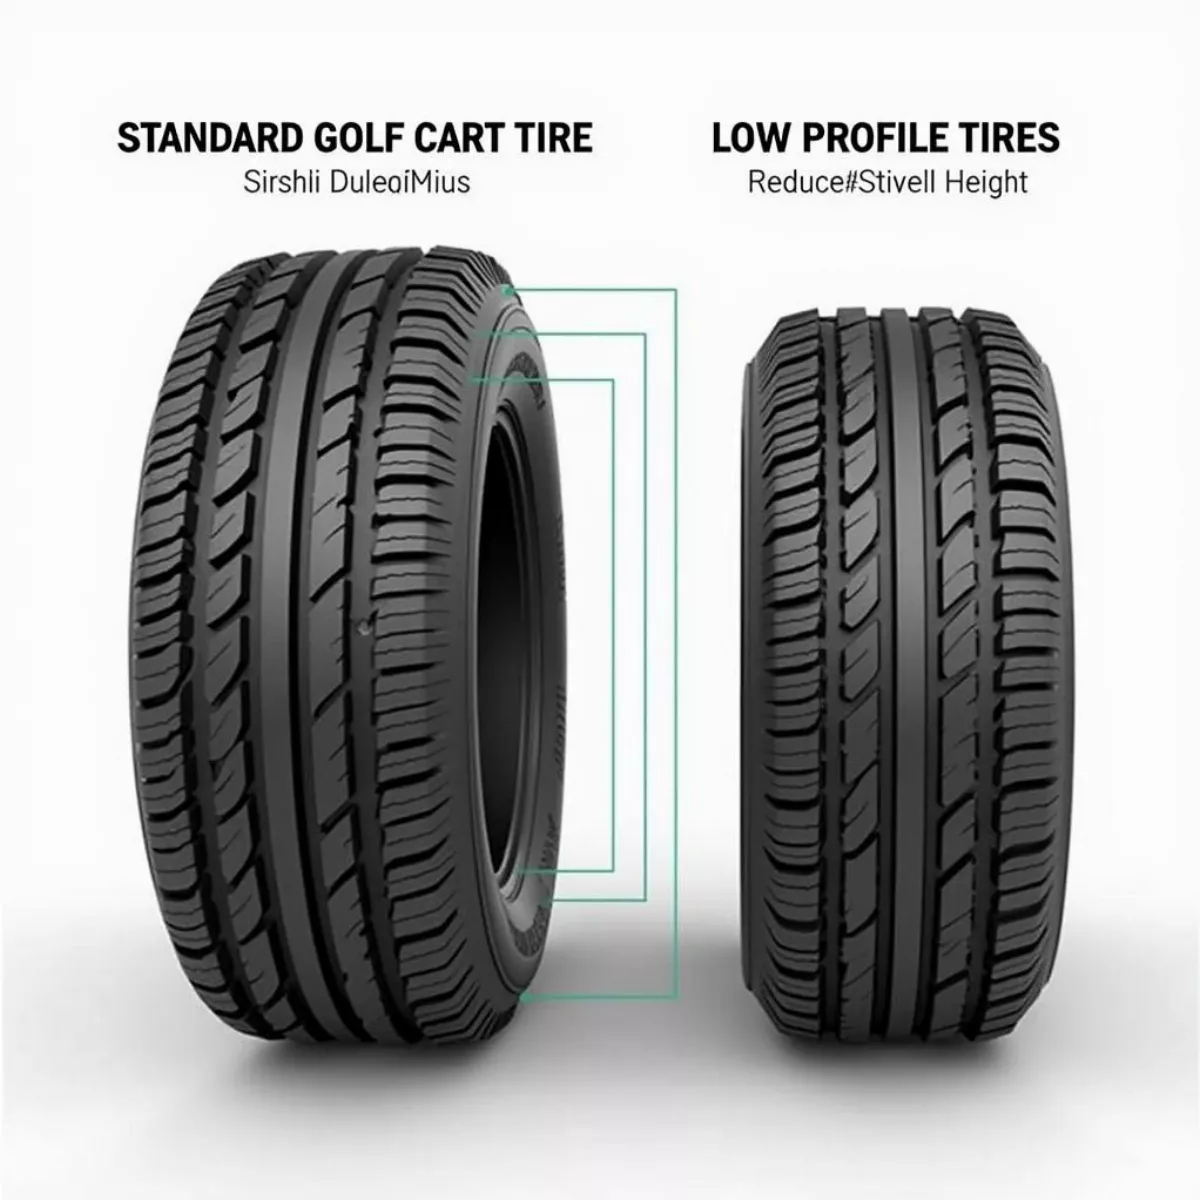
  • Select Low-Profile Tires: These tires have a smaller sidewall and can reduce rolling resistance.
  • Increase Tire Pressure: Check the manufacturer’s recommended tire pressure. Proper inflation can enhance speed and efficiency.

Golf Cart Tire Comparison: Standard vs. Low-ProfileGolf Cart Tire Comparison: Standard vs. Low-Profile
3. Upgrade the Motor

If you’re serious about speed, upgrading to a high-performance motor can make a world of difference.

  • Consider High-Torque Motors: They provide more power, allowing for increased acceleration and higher top speeds.

4. Improve Weight Distribution

Reducing weight or optimizing the distribution can enhance speed.

  • Remove Unessential Components: Take out any unnecessary items in your cart.
  • Position the Weight: Ensure that heavier items are distributed evenly to maintain balance and efficiency.

5. Consider Performance Batteries

The type of batteries you use can limit speed.

  • Switch to Lithium Batteries: These weigh less than traditional lead-acid batteries and offer quicker charging and longer life.
  • Choose Higher Voltage Batteries: Increasing your voltage (up to a safe limit) can help improve speed.

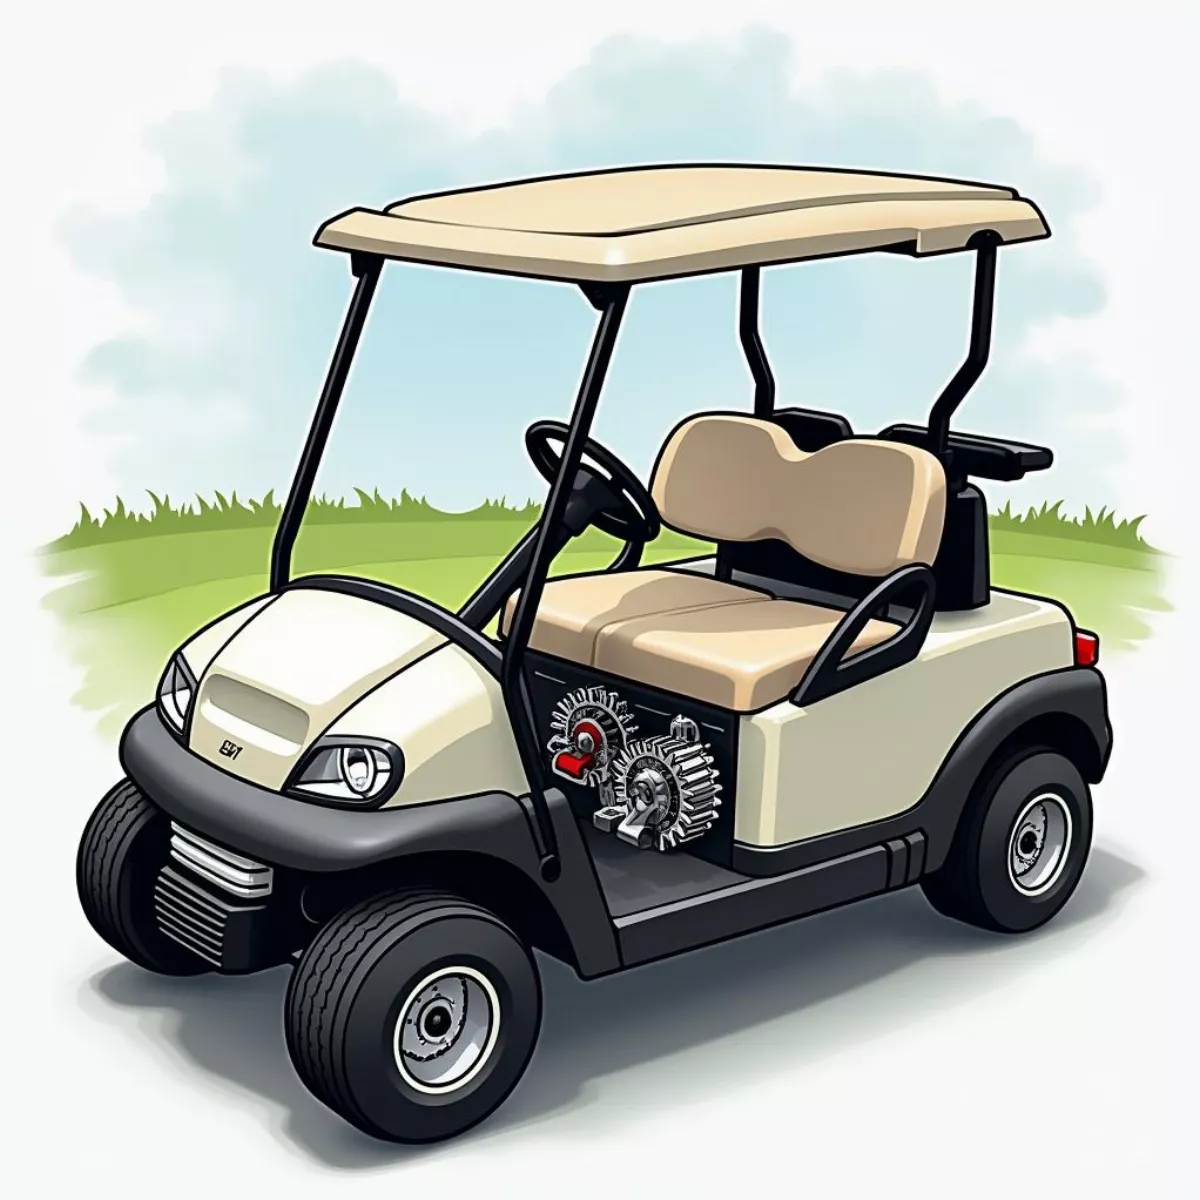
6. Modify the Gear Ratio

The gear ratio of your cart affects its acceleration and top speed.

  • Use a Speed Gear Set: This modification can allow your cart to have a higher top speed but may sacrifice some acceleration.

Golf Cart Gear System with Speed Gear SetGolf Cart Gear System with Speed Gear Set

7. Tune-up and Maintenance

Regular maintenance can ensure that your cart runs optimally.

  • Check Brake Resistance: Ensure that the brakes aren’t dragging, as this can slow you down.
  • Lubricate Moving Parts: Use the appropriate lubricant for better responsiveness and efficiency.


Safety First!

With the excitement of achieving higher speeds in your golf cart, never overlook safety. Here are a few tips to ensure you stay safe while enjoying your faster ride:

  • Wear Seatbelts: If your cart is equipped with them.
  • Follow Local Regulations: Many areas have speed restrictions for golf carts.
  • Be Mindful of the Environment: Always prioritize the safety of pedestrians and other vehicles.


Key Takeaways

  • Familiarize yourself with your golf cart’s type (electric vs. gas) to choose the appropriate upgrades.
  • Upgrade the speed controller and motor for noticeable speed improvements.
  • Select high-performance tires and maintain optimal weight distribution for enhanced performance.
  • Consider high-quality batteries and adjust the gear ratio accordingly.
  • Regular maintenance checks are crucial for keeping your cart running at peak performance.


Frequently Asked Questions (FAQ)

1. Can I increase the speed of an electric golf cart?

Yes, upgrades to the speed controller, motor, and batteries can significantly enhance the speed of electric golf carts.

2. Are there legal speed limits for golf carts?

Yes, many jurisdictions have laws setting speed limits for golf carts. Always check local regulations.

3. What is the fastest speed a golf cart can reach?

Depending on modifications, some golf carts can reach speeds over 30 mph (48 km/h).

Golf Cart SpeedometerGolf Cart Speedometer

4. Will upgrading my battery affect my golf cart’s speed?

Absolutely! Performance batteries, especially lithium batteries, can improve speed due to their lower weight and higher efficiency.

5. Can I modify my gas golf cart too?

Yes, gas-powered carts can also be modified using techniques like changing the gear ratio or upgrading the engine.

6. How often should I perform maintenance on my golf cart?

Maintenance should be performed at least once a season or more frequently if you use your cart often.

7. Is it necessary to consult a professional for upgrades?

While some upgrades can be done at home, consulting a professional is recommended for complex modifications.

8. Will these modifications void my warranty?

Possibly. Always check your manufacturer’s warranty policy before making significant modifications.

9. Can I use my golf cart on public roads?

In many areas, yes, but it depends on local laws. Ensure that your cart meets safety standards if you plan to drive it on the road.

10. What are the benefits of a performance motor?

A performance motor can significantly increase speed, acceleration, and overall performance, providing a more thrilling ride.


With this guide in hand, you should feel confidently equipped to speed up your golf cart while ensuring it remains safe and reliable. Remember, the key is to strike a balance between performance and safety, making every joyride an unforgettable experience!

Golf Cart on Course

how to maintain golf cart batteries

If you’re a golf enthusiast, you understand how important a good golf cart is for an enjoyable day on the course. A key component of that cart is its battery. Properly maintaining golf cart batteries is crucial not only for performance but also for longevity. Whether you own an electric golf cart or simply want to ensure you get the most out of your battery, this guide covers everything you need to know!


Why Battery Maintenance Matters

You might be wondering why battery maintenance is so crucial. Well, just think of your golf cart’s battery as the heart of the machine. It’s responsible for powering everything from the motor to the lights. Poor maintenance can lead to a range of issues, including:

  • Reduced performance
  • Shortened lifespan
  • Increased charging times
  • Potential safety hazards

A well-maintained battery can enhance your golf cart’s efficiency and help you avoid costly replacements.

Golf Cart on CourseGolf Cart on Course

Types of Golf Cart Batteries

Before diving into maintenance tips, it’s essential to understand the types of batteries commonly used in golf carts:

  1. Lead-Acid Batteries: These are the most common type and come in two varieties—flooded and sealed (AGM/gel).
  2. Lithium-Ion Batteries: More advanced, these batteries offer longer life and lighter weight but are often more expensive.

Understanding the type of battery you have will dictate how you maintain it. Each type requires a slightly different approach, but many tips will overlap.

1. Regular Charging

How Often Should You Charge?

  • Daily use: Charge after every use.
  • Infrequent use: Charge at least once a month.

Best Practices

  • Avoid deep discharges. Try not to let the battery voltage drop below 50%.
  • Use a quality charger designed for your battery type.

2. Cleaning the Battery

Keeping your battery clean can significantly affect its performance. Dirt and corrosion can lead to inefficient charging. Follow these steps:

Cleaning Steps

  1. Turn off the power. Don’t forget safety first!
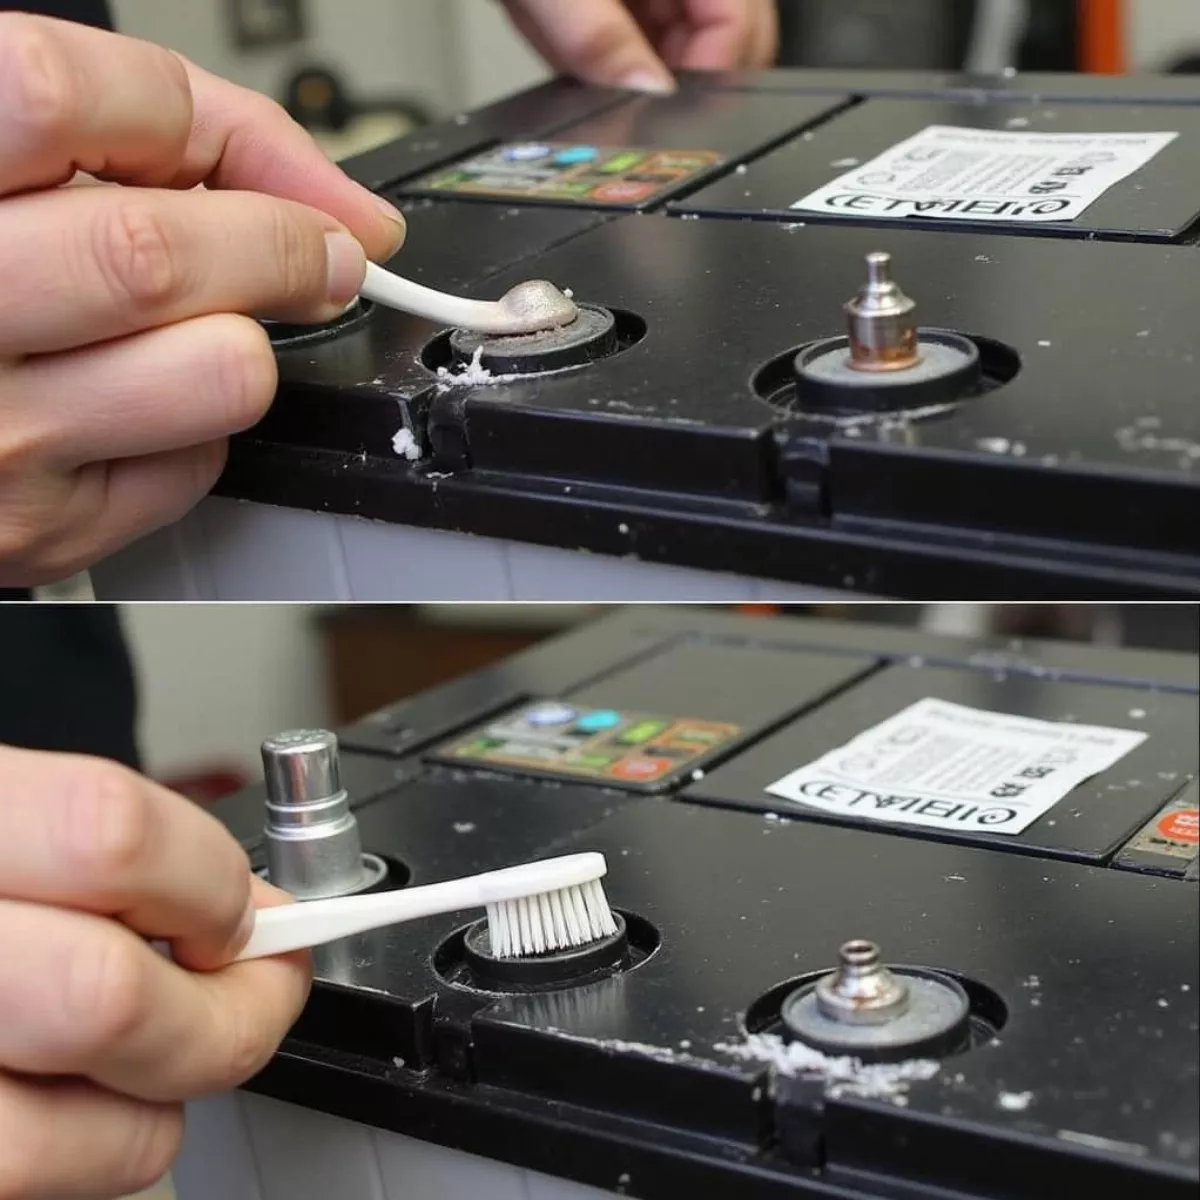
  2. Use a mixture of baking soda and water to clean corrosion. A toothbrush can help target specific areas.
  3. Rinse and dry thoroughly to avoid any residue left on the terminals.
  4. Inspect the terminals. If there are any signs of damage, consider replacing them.

Schedule

  • Frequency: Clean at least once a year, or more frequently if you notice buildup.

Cleaning Golf Cart Battery TerminalsCleaning Golf Cart Battery Terminals

3. Watering the Batteries

If you have flooded lead-acid batteries, they require regular watering to ensure they function properly. Here’s how to do it:

Watering Steps

  1. Use distilled water only. Tap water can contain minerals that can damage the battery.
  2. Check fluid levels regularly. The plates inside should be submerged in water.
  3. Fill as needed, making sure not to overfill.

Schedule

  • Frequency: Check every month, but more frequently in hot weather.

4. Temperature Control

Batteries are sensitive to temperature. Extreme heat or cold can hinder performance and shorten lifespan.

Ideal Temperature Range

  • Operating Temperature: 32°F to 120°F (0°C to 49°C)
  • Storage Temperature: Keep your batteries in a garage or shaded area during extreme weather.

Tips for Managing Temperature

  • Insulate your batteries in colder months.
  • If possible, park your golf cart in a temperature-controlled environment.

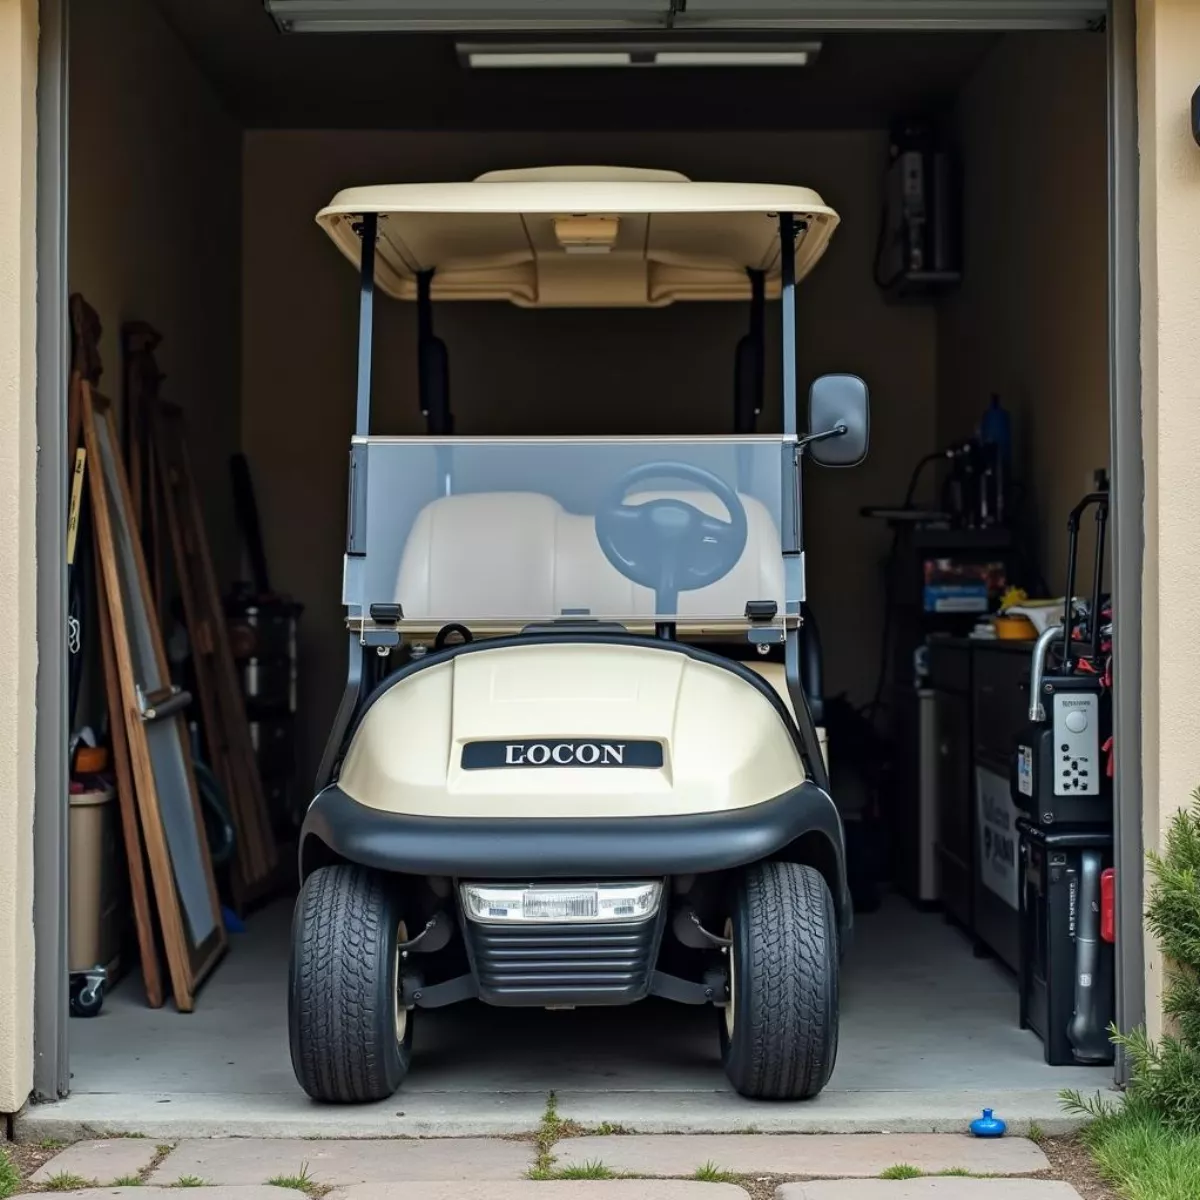
Golf Cart Stored in GarageGolf Cart Stored in Garage

5. Monitoring Battery Voltage

Regularly checking your battery’s voltage can help you catch any issues early. Tools like a voltmeter can help you measure the battery’s state of charge.

Voltage Guidelines

  • Fully Charged: 12.6 volts or higher
  • Partially Charged: 12.4 to 12.6 volts
  • Needs Charging: Below 12.4 volts

6. Periodic Maintenance Inspections

Routine maintenance checks can catch any potential issues before they escalate. Here’s what to check for:

Inspection Checklist

  • Corrosion on terminals and cables.
  • Fluid levels in flooded batteries.
  • Physical condition of battery cases and cables.
  • Any signs of swelling or leaks.

Schedule

  • Check once every three months or before long trips/golf outings.

Key Takeaways

Here are the essential tips you should remember for effective golf cart battery maintenance:

  • Charge regularly—Don’t let your battery drop below 50%.
  • Clean your batteries—Remove dirt and corrosion at least once a year.
  • Water your flooded batteries with distilled water monthly.
  • Monitor storage temperature—Keep batteries cool and insulated in extreme weather.
  • Check voltage regularly to catch issues early.
  • Conduct periodic inspections every three months.

By following these guidelines, you’ll be well on your way to ensuring that your golf cart batteries last longer and perform better.


Frequently Asked Questions (FAQs)

1. How long do golf cart batteries last?

Typically, golf cart batteries can last between 5 to 7 years with proper maintenance.

2. Can I overcharge my golf cart battery?

Yes, overcharging can lead to overheating and damage. Always use a quality charger that suits your battery type.

3. What should I do if my battery is leaking?

Immediately disconnect the battery and consult a professional. Leaking batteries can pose safety risks.

4. How can I tell if my golf cart battery needs replacing?

Signs include a noticeable drop in performance, frequent need for charging, and visible physical damage.

5. Should I leave my golf cart plugged in all the time?

While modern chargers have float modes that prevent overcharging, it’s best to charge only when necessary.

6. What is the difference between gel and flooded batteries?

Flooded batteries require maintenance (like watering), while gel batteries are maintenance-free and less prone to spills.

7. Is it safe to work on golf cart batteries?

Always take safety precautions such as wearing gloves and eye protection when handling batteries.

8. How do I correctly dispose of my old batteries?

Most local recycling centers or battery retailers can guide you on proper disposal methods.

9. Can weather conditions affect golf cart batteries?

Yes, extremely hot or cold temperatures can impact battery performance and lifespan.

10. Is it essential to use distilled water for flooded batteries?

Yes, using distilled water is crucial to prevent mineral buildup that can harm the battery.


With this comprehensive guide, you’ll be equipped to maintain your golf cart batteries effectively, ensuring they remain reliable and performance-driven for all your golfing adventures. If you have more questions or topics you’d like covered, feel free to reach out! Happy golfing!

Golf Club Distance Chart

how to know which golf club to use

Golf is a sport steeped in tradition, but it can sometimes feel overwhelming, especially when it comes to understanding which golf club to use in various situations. Whether you’re a seasoned golfer or a beginner, making the right choice of club can be the difference between a great shot and a disappointing one. In this comprehensive guide, we’ll break down how to choose the right golf club for your situation, focusing on key aspects like distance, loft, and your individual playing style.

Understanding the Basics of Golf Clubs

Before we dive into the specifics of club selection, it’s essential to familiarize ourselves with the types of golf clubs available. Generally, golf clubs can be divided into the following categories:

  • Woods: Usually used for long-distance shots from the tee or fairway. They have a large head and a low center of gravity, making it easier to hit the ball high and far.
  • Irons: Typically numbered (3 through 9), these clubs are versatile and used for various shots. Higher numbers indicate more loft and shorter distances.
  • Wedges: A subcategory of irons, wedges are used for short approach shots and around the greens—particularly effective for soft landings on the green.
  • Putters: Used on the green to roll the ball into the hole, putters are vital for your short game.

Club Specifications

When choosing a golf club, understanding the following club specifications can help you make informed decisions:

Specification Description
Loft The angle of the clubface, influencing launch angle. Higher loft equals higher launch but shorter distance.
Length The height of the golfer can impact the ideal length of the club. A taller golfer may need longer clubs to maintain control.
Lie Angle The angle between the shaft and the ground. Improper lie angle can lead to inconsistencies in your shots.

How to Choose the Right Golf Club

1. Assess Your Distance Needs

Determining the distance to the hole is one of the first steps in choosing the right club. Depending on this distance, various clubs will be suitable. Generally speaking:

  • Driver: Best for tee shots, usually best for distances over 220 yards.
  • Woods: Effective for second shots from further out, typically good for 150-230 yards.
  • Irons: Ideal for distances ranging from 50-180 yards, depending on the iron number.
  • Wedges: Use these for approach shots under 100 yards and around the green.
  • Putter: Solely for shots from the green.

2. Know Your Club Distances

Every golfer has different strengths and weaknesses. It’s crucial to understand how far you can hit each club. Here’s a general overview of distances for the average golfer:

Club Type Average Distance (Yards)
Driver 220-250
3 Wood 200-230
5 Wood 180-210
3 Iron 180-200
5 Iron 160-180
7 Iron 140-160
9 Iron 120-140
Pitching Wedge 100-120
Sand Wedge 90-110
Lob Wedge 60-90

Note: Distance varies widely based on strength, skill, and the specific club.

Golf Club Distance ChartGolf Club Distance Chart

3. Consider the Lie of the Ball

The position of the ball can significantly influence your choice of club:

  • Fairway: When the ball is on the fairway, you have more options. Depending on your distance, choose between a wood, iron, or wedge.
  • Rough: When in the rough, consider a more forgiving club, like a hybrid or a higher-lofted iron.
  • Bunker: The sand wedge is typically the best option for getting out of a bunker due to its loft.

4. Weather Conditions

Wind and elevation can also affect your club selection:

  • When it’s windy: You may need to choose a club that will yield a lower shot to combat the wind.
  • At higher elevations: The air is thinner, and the ball travels farther, so you might need to club down.

5. Know Your Playing Style

Understanding your unique playing style is crucial in selecting the right golf club. Ask yourself:

  • Are you more comfortable with a draw or fade?
  • Do you prefer hitting high lofted shots or penetrating drives?
  • How is your short game? Are you confident with wedges around the greens?

Tip: Keep practicing to get a feel for which clubs fit your style.

Golfer Selecting a Golf ClubGolfer Selecting a Golf Club

6. Practice, Practice, Practice

One of the best ways to improve your club selection skills is to practice at the range. Spend time hitting different clubs to see how far and accurately you can hit each one. This familiarity will help you quickly assess the best option when you’re on the course.

Key Takeaways

  • Assess distance: Understand the distance to the pin to choose your club.
  • Know your distances: Familiarize yourself with how far you can hit each club.
  • Consider the lie: Factor in the ball’s position.
  • Watch weather conditions: Adjust your club selection based on wind and elevation.
  • Understand your style: Recognize what shots you’re comfortable with.
  • Regular practice: Spend time on the range to understand your clubs better.

Frequently Asked Questions (FAQ)

  1. What is the best club for beginners?
    • The 7-iron is great for beginners due to its versatility.
  2. How do I know if my club is the right length?
    • Stand with the club in hand; the bottom of the grip should ideally align with your wrist when your arms hang naturally.
  3. Should I use a hybrid instead of long irons?
    • Hybrids are often easier to hit and can replace long irons for many golfers.
  4. What loft should my wedges have?
    • A standard pitching wedge usually has 44-48 degrees of loft, a sandwich around 54-58 degrees, and a lob wedge can range from 58-64 degrees.
  5. Should I adjust my club selection based on my swing speed?
    • Yes, faster swing speeds may require less loft, while slower swing speeds benefit from more loft.
  6. How often should I practice to improve my club selection skills?
    • Aim for at least one practice session per week for consistent improvement.
  7. Can different brands affect how my clubs perform?
    • Yes, brands can design clubs that slightly vary in length, loft, and shape.
  8. Is it advisable to buy a full set of clubs?
    • If you’re starting, it’s better to buy the essential clubs first and add others as you progress.
  9. How important is a fitting session for my clubs?
    • A fitting session can greatly help tailor clubs to your playing style and physicality, improving performance.
  10. Can technology like launch monitors help in choosing the right club?
    • Absolutely! Launch monitors provide valuable data to help you understand your shots better.

Golfer Using a Launch MonitorGolfer Using a Launch Monitor

Choosing the right golf club is about understanding the basics and how each club functions in various scenarios. With practice and a little bit of thoughtful consideration, you will be well on your way to making more informed decisions on the golf course. Happy golfing!