Category Archives: FAQs

Golf Wedge Bounce Illustration

how to use bounce on wedges

Golfing is not just about power and accuracy; it’s also about finesse and technique. One of the most critical aspects you’ll need to master is bounce on your wedges. Understanding how to use bounce effectively can significantly improve your short game. This article will guide you through what bounce is, how to use it correctly, and tips for maximizing your performance on the green.

What is Bounce?

In golf, bounce refers to the angle between the leading edge and the lowest point of the club’s sole. When a wedge has more bounce, it means the club’s bottom is more rounded, which allows it to “bounce” off the ground rather than dig into it.

Different Types of Bounce

  • Low Bounce (0-10 degrees): Ideal for firm conditions where you need to get under the ball quickly.
  • Medium Bounce (10-14 degrees): Versatile for various turf conditions and player styles.
  • High Bounce (14+ degrees): Best for softer ground, helping prevent the club from digging into the turf.

To choose the right amount of bounce, consider your normal Course conditions and your swing style.
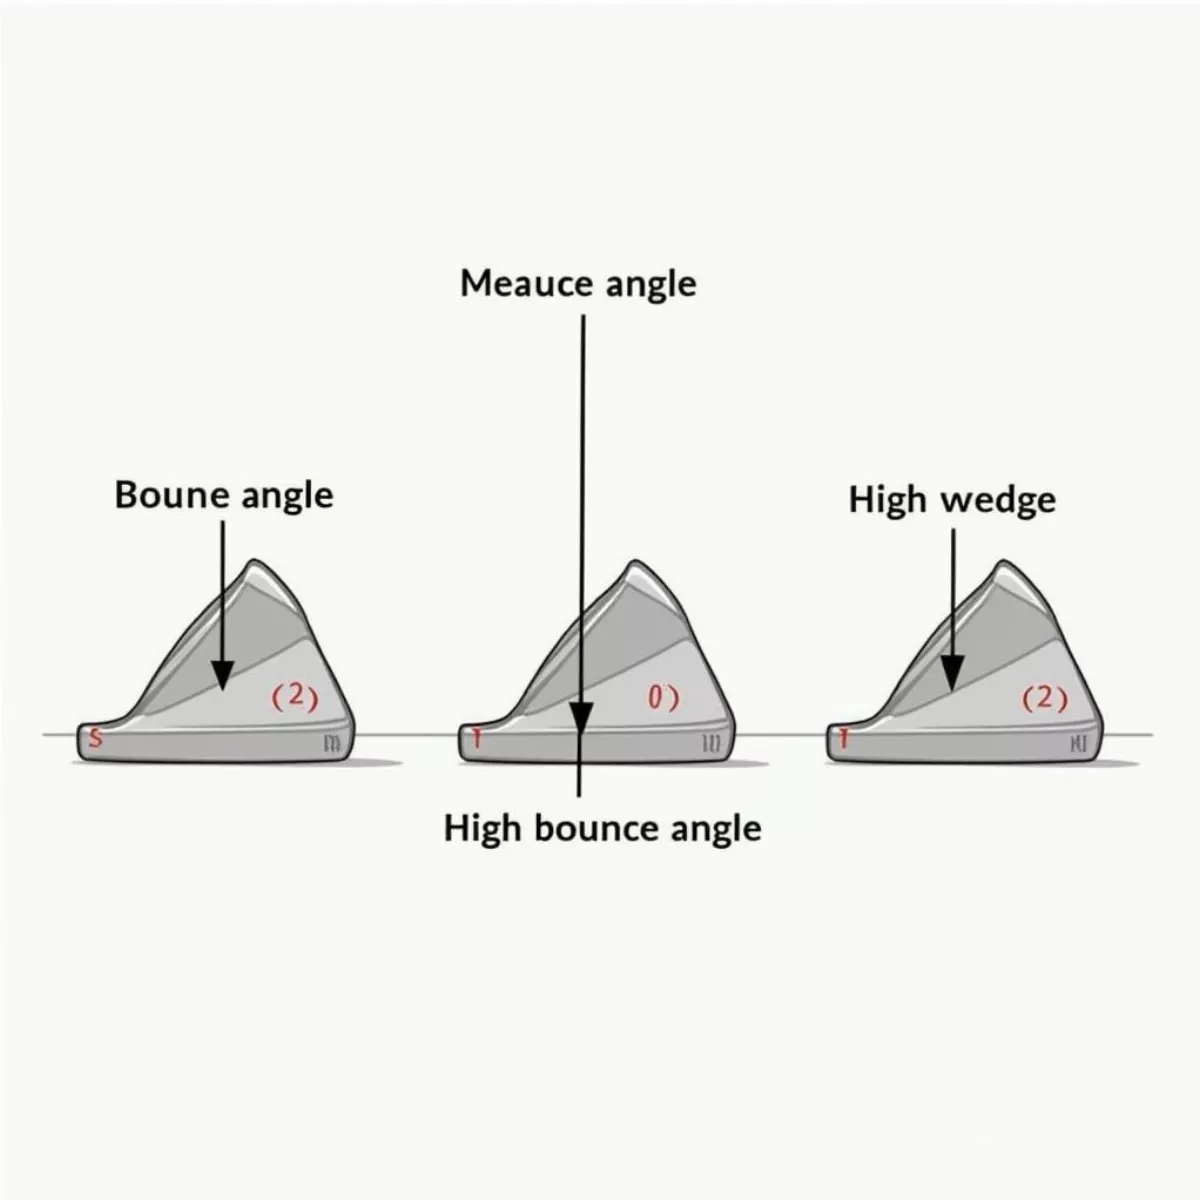
Golf Wedge Bounce IllustrationGolf Wedge Bounce Illustration

Why Is Bounce Important?

Bounce plays a significant role in wedge performance. It affects how the club interacts with the ground during different shots. Knowing how to use it properly helps you achieve better control, spin, and accuracy on delicate shots around the green. Here are a few reasons why bounce is crucial:

  1. Prevention of digging: A good bounce can prevent the club from digging too deep into the ground.
  2. Improved versatility: Different shots will require different bounces, allowing you to adapt to varying conditions.
  3. Enhanced feel: Understanding bounce enhances your feel for the shot, leading to increased confidence.

How to Use Bounce in Your Shots

1. Choose the Right Wedge

Your first step is selecting the right wedge for your game. Consider the following:

  • Loft: Ensure your wedges cover different lofts (52, 56, 60 degrees).
  • Bounce: Match the bounce to your swing type and the course conditions.
Wedge Type Typical Loft Typical Bounce Best Conditions
Gap Wedge 50-52 degrees 8-10 degrees Firm or normal turf
Sand Wedge 54-56 degrees 10-14 degrees Soft or sandy conditions
Lob Wedge 58-60 degrees 12+ degrees Soft turf or bunkers

2. Understand Your Swing

Your swing type significantly influences how bounce works for you:

  • Sweeping Swing: If you tend to sweep the ball rather than hit down on it, opt for lower bounce wedges.
  • Downward Angle of Attack: If you hit down on the ball, a higher bounce will help prevent digging.
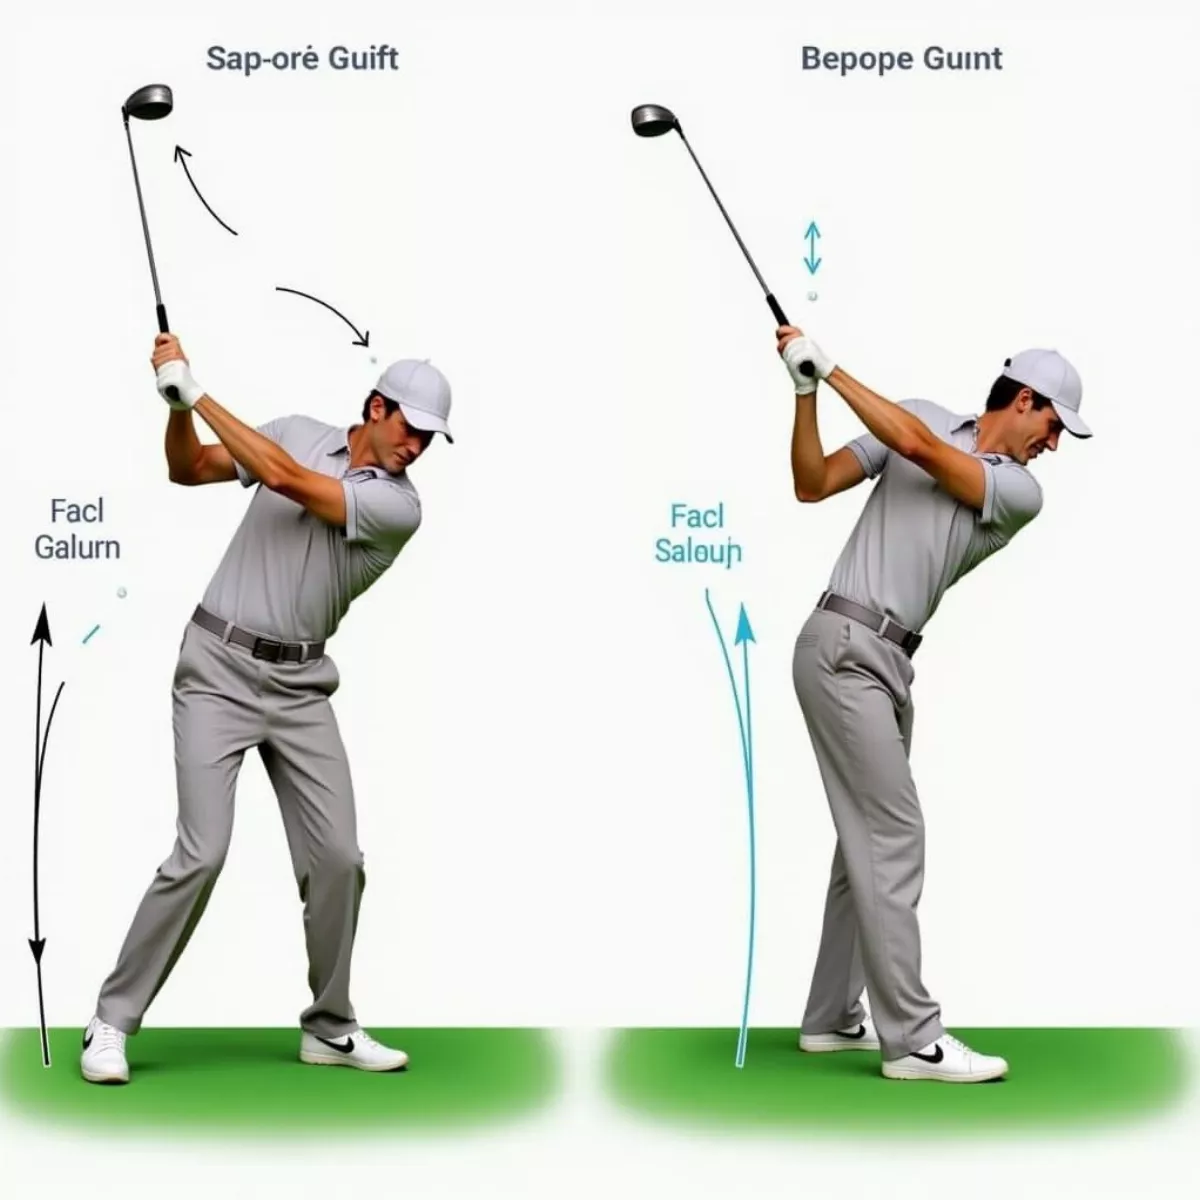
Different Golf Swing Types and BounceDifferent Golf Swing Types and Bounce

3. Set Up Properly

Before you swing, focus on your setup:

  • Ball Position: Position the ball towards your front foot for better contact with the club’s bounce.
  • Weight Distribution: Keep your weight slightly forward to encourage a downward strike on the ball.

4. The Correct Swing Technique

Now that you’re set up, here’s how to execute your shot:

  • Open the Clubface: For flop shots or delicate chips, open the clubface slightly to engage more bounce.
  • Maintain Your Angle: Focus on keeping a consistent angle of attack while ensuring you let the bounce do the work.

Key Techniques for Various Shots

Shot Type Bounce Technique
Chips Use medium to high bounce; don’t decelerate.
Flop Shots Open the clubface and engage the bounce.
Sand Shots Stand slightly open to the target; utilize high bounce to help lift the ball.

5. Practice, Practice, Practice

As with anything in golf, practice is essential. Work on different shots with different bounces to see how they react. A local practice green or a driving range is a great place to hone your skills.

Issues with Bounce Usage

Sometimes, golfers struggle with bounce usage. Here are a few common issues and how to overcome them:

Common Problems

  • Digging into the turf: Often caused by too much angle on the attack and requires a higher bounce wedge.
  • Flying the ball over the green: This may indicate that you need to lower your bounce or adjust your swing path.

Tips for Overcoming Bounce Challenges

  • Trust the bounce: Allow the club to slide along the ground rather than try to scoop the ball.
  • Experiment with different setups: Alter your stance and ball position to find what works best.
  • Assess the turf conditions: Choose between low or high bounce wedges based on the situation.
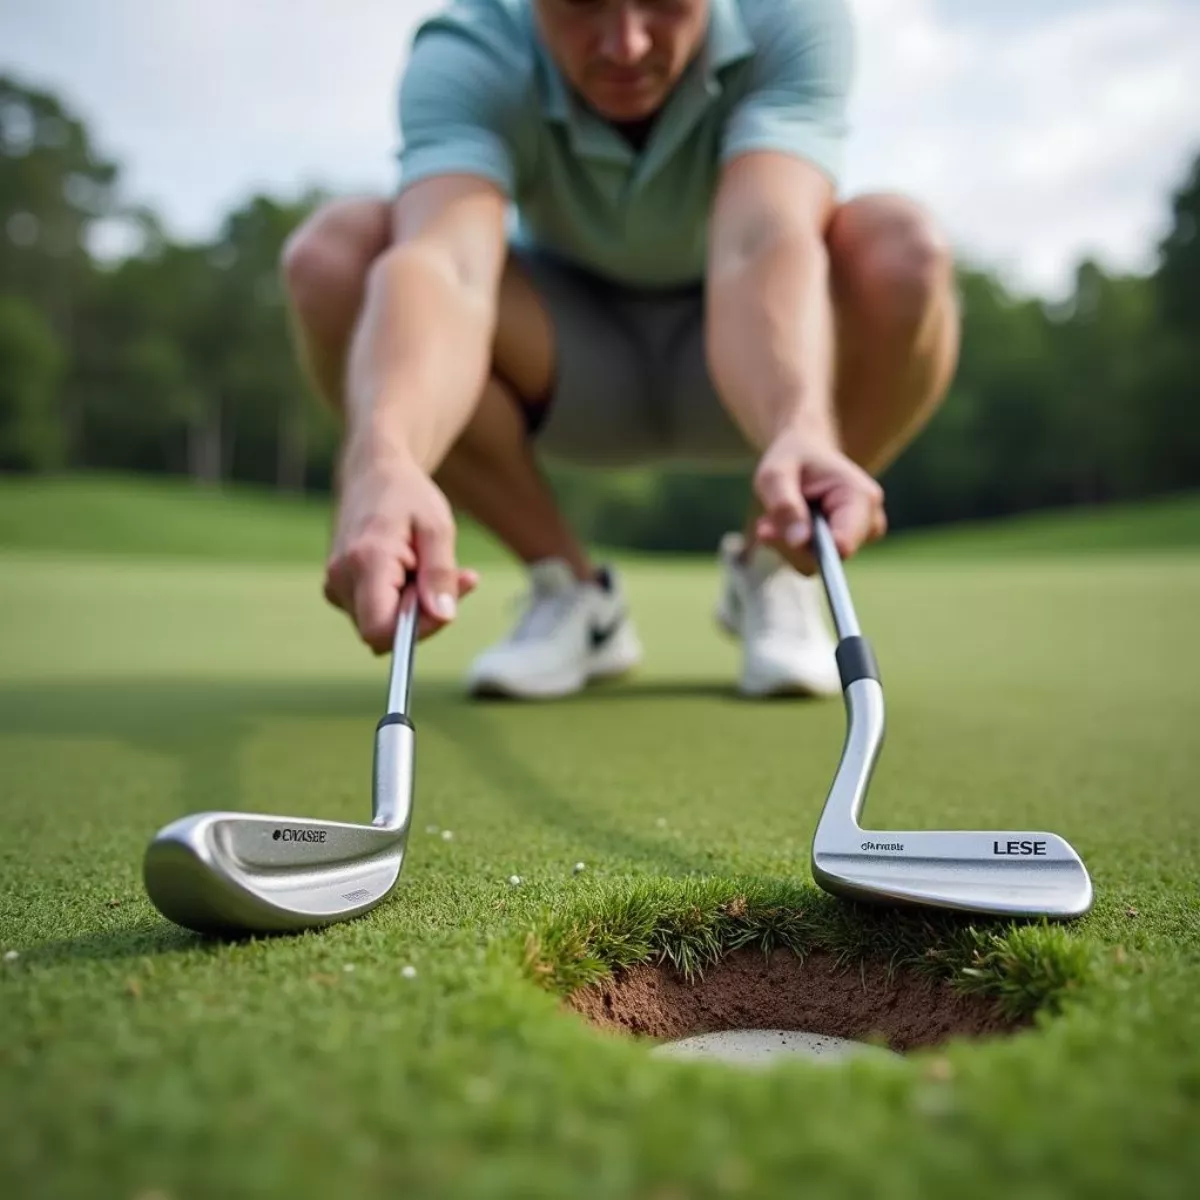
Golfer Selecting Wedge Based on Turf ConditionsGolfer Selecting Wedge Based on Turf Conditions

Key Takeaways

  • Bounce is essential in understanding how your wedge interacts with the ground.
  • Choose the right wedge based on loft and bounce suited to your swing style.
  • Proper setup alongside a correct swing technique will help you engage bounce effectively.
  • Regular practice will enhance your skills with different bounces and conditions.

Frequently Asked Questions (FAQ)

1. What is the best bounce for a sand wedge?

A sand wedge typically benefits from a higher bounce (10-14 degrees) to help prevent it from digging into the soft sandy surface.

2. Can I use a low bounce wedge in soft conditions?

While possible, it’s not recommended as it may result in digging. High or medium bounce is preferable in soft conditions.

3. How do I know if I need more or less bounce?

Test different wedges during practice. If you frequently dig into the turf, you may need a higher bounce. If your shots tend to pop up, consider lower bounce options.

4. Should I alter my swing for different bounces?

Yes! Adjust your angle of attack and swing technique according to the bounce of the wedge you are using.

5. Can bounce affect the spin of my shots?

Definitely! A correct bounce can enhance spin control by allowing proper interaction with the turf and ball.

6. What’s the ideal loft for a gap wedge?

A gap wedge typically ranges from 50-52 degrees and should have a bounce that suits your style of play.

7. Can I use one wedge for all conditions?

While possible, it’s best to use different wedges with varying bounces to match conditions effectively.

8. How can I practice effectively with wedges?

Focus on controlled chip shots, flop shots, and sand shots, experimenting with different bounces and conditions.

9. What if I feel uncomfortable using a high bounce wedge?

Take time to practice with it and try different setups to become accustomed to it. Keep experimenting until you find a comfortable method.

10. Does the brand of the wedge matter?

Yes, different brands have varying designs and bounce options. It’s recommended to try out several to find what fits your game best.

By mastering the concept of bounce and applying these insights, you can enhance your short game and shoot lower scores. Understanding the nuanced role of bounce will help you shift your approach, make better shots, and ultimately enjoy the game even more! Happy golfing!
how to use a belly putter

Golf is a game of precision, skill, and a little bit of luck. For many players, the right equipment can make a world of difference. One such piece of equipment is the belly putter. If you’re curious about how to use a belly putter effectively, you’ve come to the right place! This guide will walk you through everything you need to know—from choosing the right belly putter to mastering your technique.

What is a Belly Putter?

A belly putter is a type of putter that is longer than a traditional putter and is designed to rest against the belly, providing stability during the stroke. This unique design allows for a more controlled and consistent putting stroke, which is why many golfers have adopted it over the years.

The Benefits of Using a Belly Putter

Using a belly putter comes with several advantages:

  • Stability: The belly putter helps stabilize your hands during the stroke.
  • Consistency: Keeps your body and arms connected, which produces a repeatable motion.
  • Less Misalignment: Encourages a more consistent alignment which can help to reduce the likelihood of mis-hits.

Choosing the Right Belly Putter

Selecting the right belly putter is crucial for reaping its benefits. When choosing a belly putter, consider the following:

  • Length: Typical belly putters range from 41 to 44 inches. Ensure it rests comfortably against your body.
  • Weight: Look for designed weight distribution that feels right in your hands.
  • Grip: Choose a grip that feels good and allows for a strong feel without being too bulky.

Feature Recommended Range
Length 41-44 inches
Weight 340-400 grams
Grip Thickness 0.580 – 0.600 inches

Mastering the Technique

Setting Up Your Stance

The first step in using a belly putter is setting up your stance. Here’s how to do it effectively:

  1. Position the Ball: Place the ball slightly forward in your stance—generally just inside your left heel.

  2. Grip the Putter: Use a grip that feels natural, typically the traditional grip or the cross-handed grip works best.

  3. Anchor the Putter: Rest the midsection of the putter against your belly while ensuring your elbows are relaxed and pointed down.

The Putting Stroke

When it comes to the actual stroke, follow these steps:

  • Keep Your Eyes Level: This allows for a better line of sight to the hole.

  • Use Your Shoulders: The motion should come primarily from your shoulders, not your wrists.

  • Maintain Stability: Hold your body still as you execute the stroke; this helps keep the putter on line.

  • Follow Through: Allow your arms to extend naturally to ensure a smooth and controlled follow-through.

Drills to Enhance Your Skills

Here are a few drills that can help you improve your belly putting skills:

  • Line Drill: Place several coins in a line towards the hole. Practice hitting each coin to maintain straight strokes.

  • Distance Control: Set up various targets at different distances and practice getting the ball to stop at those points.

  • Consistency Drill: Hit several putts in a row from the same spot without adjusting your setup to ensure consistency.

Common Mistakes to Avoid

Using a belly putter, like any piece of golf equipment, comes with its pitfalls. Here are some common mistakes to avoid:

  • Anchoring Incorrectly: Make sure the putter is correctly anchored against your belly without excessive pressure.

  • Using Too Much Wrist Action: Keep wrists steady and focus on shoulder movement.

  • Poor Alignment: Always check your alignment before taking the putt. You should be able to draw a straight line from your ball to your target.

Additional Tips for Success

  • Practice Patience: Learning to master a belly putter may take time. Practice regularly to build confidence.

  • Get Feedback: Consider having a professional take a look at your setup and stroke to ensure you’re on the right track.

  • Stay Relaxed: Tension can lead to poor strokes. Take a deep breath before each putt.

Key Takeaways

  • A belly putter helps in stabilizing your stroke and can increase consistency.
  • Choose the right putter based on length, weight, and grip to match your comfort level.
  • Focus on shoulder movement and keep your eyes level during your putting motion.
  • Regular practice with drills will enhance your belly putting skills and build muscle memory.

Frequently Asked Questions (FAQ)

  1. Can I use a belly putter if I’ve never used one before?

    • Absolutely! Many golfers switch to a belly putter as it can help improve consistency.

  2. Why was the belly putter banned in professional golf?

    • The use of belly putters was banned for anchoring in 2016 because they were deemed to provide an unfair advantage.

  3. What’s the best way to practice with a belly putter?

    • Incorporating drills that focus on distance control and stroke consistency is essential.

  4. How do I choose the right length for my belly putter?

    • The putter should comfortably rest against your belly without excessive bending or reaching.

  5. Can I use a belly putter for long putts?

    • Yes, belly putters can be effective for longer putts, but focus on controlling the distance through practice.

  6. What grip should I use with a belly putter?

    • A traditional grip or a cross-handed grip is often recommended, but choose what feels best for you.

  7. How often should I practice with my belly putter?

    • Regular practice (at least a few times a week) will help build confidence and improve your technique.

  8. Is a belly putter suitable for beginners?

    • Yes, beginners can benefit from the stability and consistency that a belly putter offers.

  9. What’s the difference between a belly putter and a long putter?

    • A belly putter anchors against the stomach, while a long putter is anchored in the chest.

  10. Can I modify my belly putter?
    • Customizing your belly putter with different grips or weights can help tailor it to your preferences.

By following the above tips and techniques, you’ll be well on your way to mastering the use of a belly putter. With practice and patience, you’ll find yourself improving on the greens, and your game will thank you for it! Happy putting!

Golf travel bags

how to travel with golf clubs

Are you an avid golfer? If so, you probably know the thrill of playing on different courses. However, traveling with your golf clubs can seem daunting, whether you’re heading to a weekend getaway or an exotic golf holiday. Don’t worry! This guide will walk you through everything you need to know about traveling with golf clubs, ensuring your next golfing adventure goes smoothly.

Understanding Your Options

1. **Choosing the Right Golf Bag**

Before you hit the road (or the skies), the first step is to choose the right golf bag. Here are your options:

  • Carry Bags: Lightweight and portable, ideal for walking the course. However, they may not offer the best protection for your clubs on long trips.
  • Cart Bags: These have more storage and pockets and are designed for being placed on golf carts. They’re okay for travel but again, might lack adequate protection.
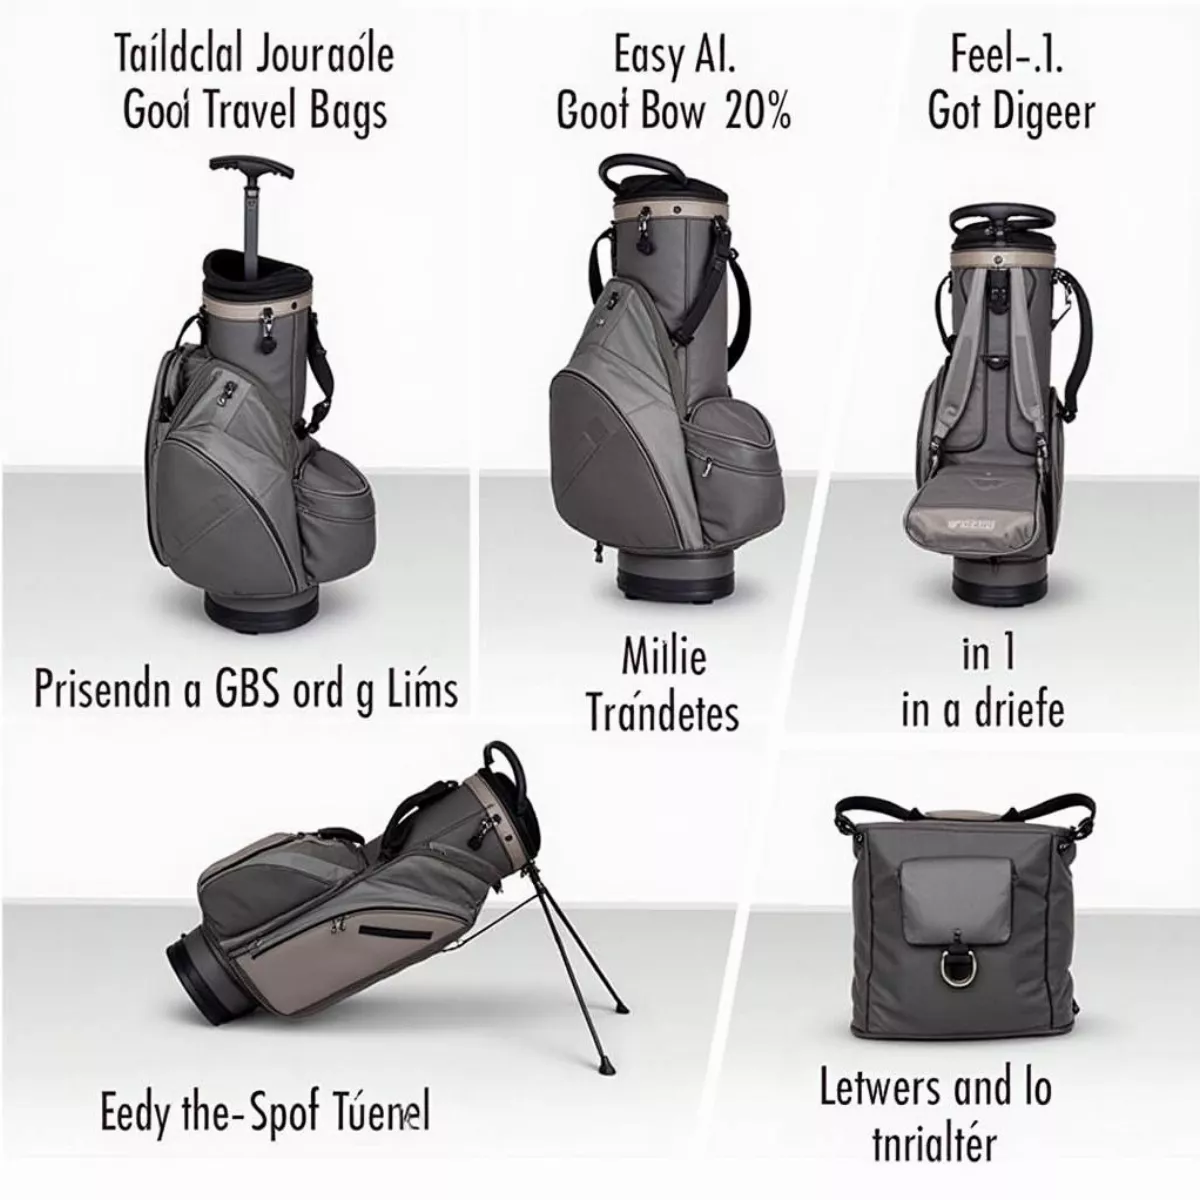
  • Travel Bags: These are specifically designed for flying and long-distance travel. They provide padding and extra protection.

Recommendation: Consider investing in a sturdy travel bag with adequate padding for your clubs.

Golf travel bagsGolf travel bags

2. **Preparing Your Clubs for Travel**

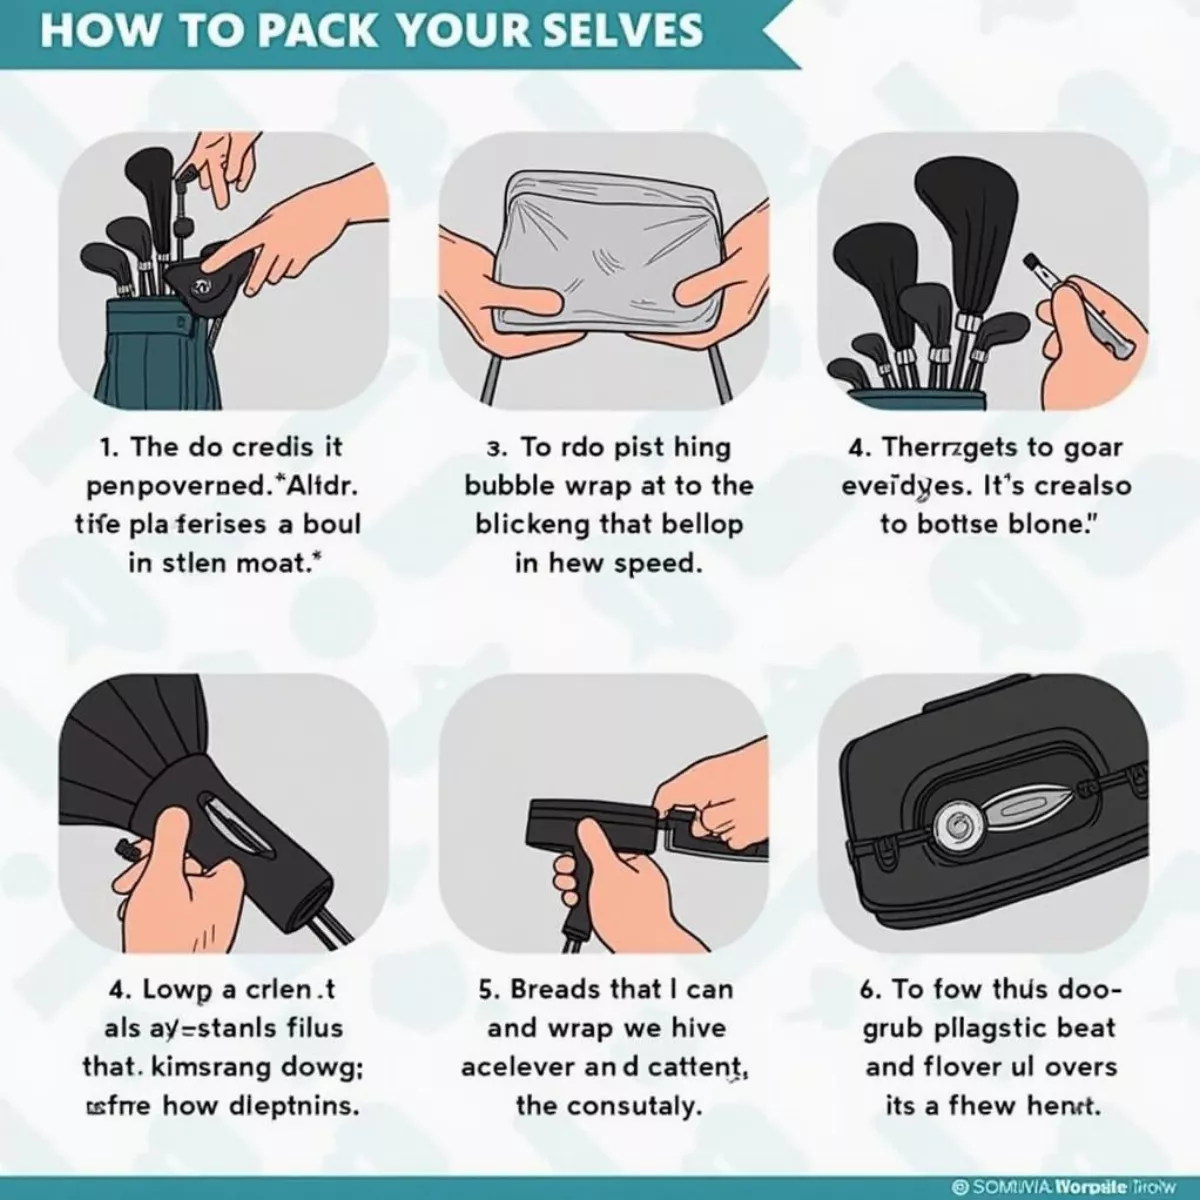
Properly preparing your clubs can save you stress and potential damage. Follow these steps:

  • Remove the Heads: If your clubs are detachable, take off the iron heads to minimize breakage.
  • Use Headcovers: Protect your driver and woods with headcovers to prevent scratches and dents.
  • Wrap Your Clubs: Use bubble wrap or towels to provide extra cushioning, especially for fragile areas.
  • Secure Loosely-Fitting Parts: Use tape or rubber bands to keep any loose parts in place.

3. **Documentation and Insurance**

When traveling with golf clubs, it’s important to have the right documentation and insurance:

  • Keep Receipts: Maintain receipts for high-value items in case you need to file a claim.
  • Travel Insurance: Consider purchasing travel insurance that covers your golf equipment.
  • Special Tags: If you travel with airlines often, look for companies that provide special tags for golf equipment.

Packing golf clubs for travelPacking golf clubs for travel

Transportation Options

1. **Flying with Golf Clubs**

Flying can be the most challenging aspect of traveling with golf clubs. Here’s how to make the process easier:

Key Things to Consider:

  • Check Airline Policies: Different airlines have varying rules for sporting equipment. Always check before booking your flight.
  • Fees and Costs: Most airlines charge fees for transporting golf bags. Fees can range from $30 to $150, depending on the airline and your destination.
  • Pack Smartly: Make sure your golf bag is well-padded and adequately packed. Some airlines may require a hard case for certain destinations.
  • Arrive Early: Give yourself extra time at the airport to check in your clubs and go through security.

2. **Driving with Golf Clubs**

If you’re taking a road trip, traveling with golf clubs can be more manageable:

  • Use a Roof Rack: If you have a roof rack, it’s a great way to transport your clubs without sacrificing space inside your vehicle.
  • Keep Clubs Organized: Use padding in your car to keep the clubs secured and protected from damage.
  • Temperature Control: Avoid leaving your clubs in extreme conditions (hot or cold) as it can affect their performance.

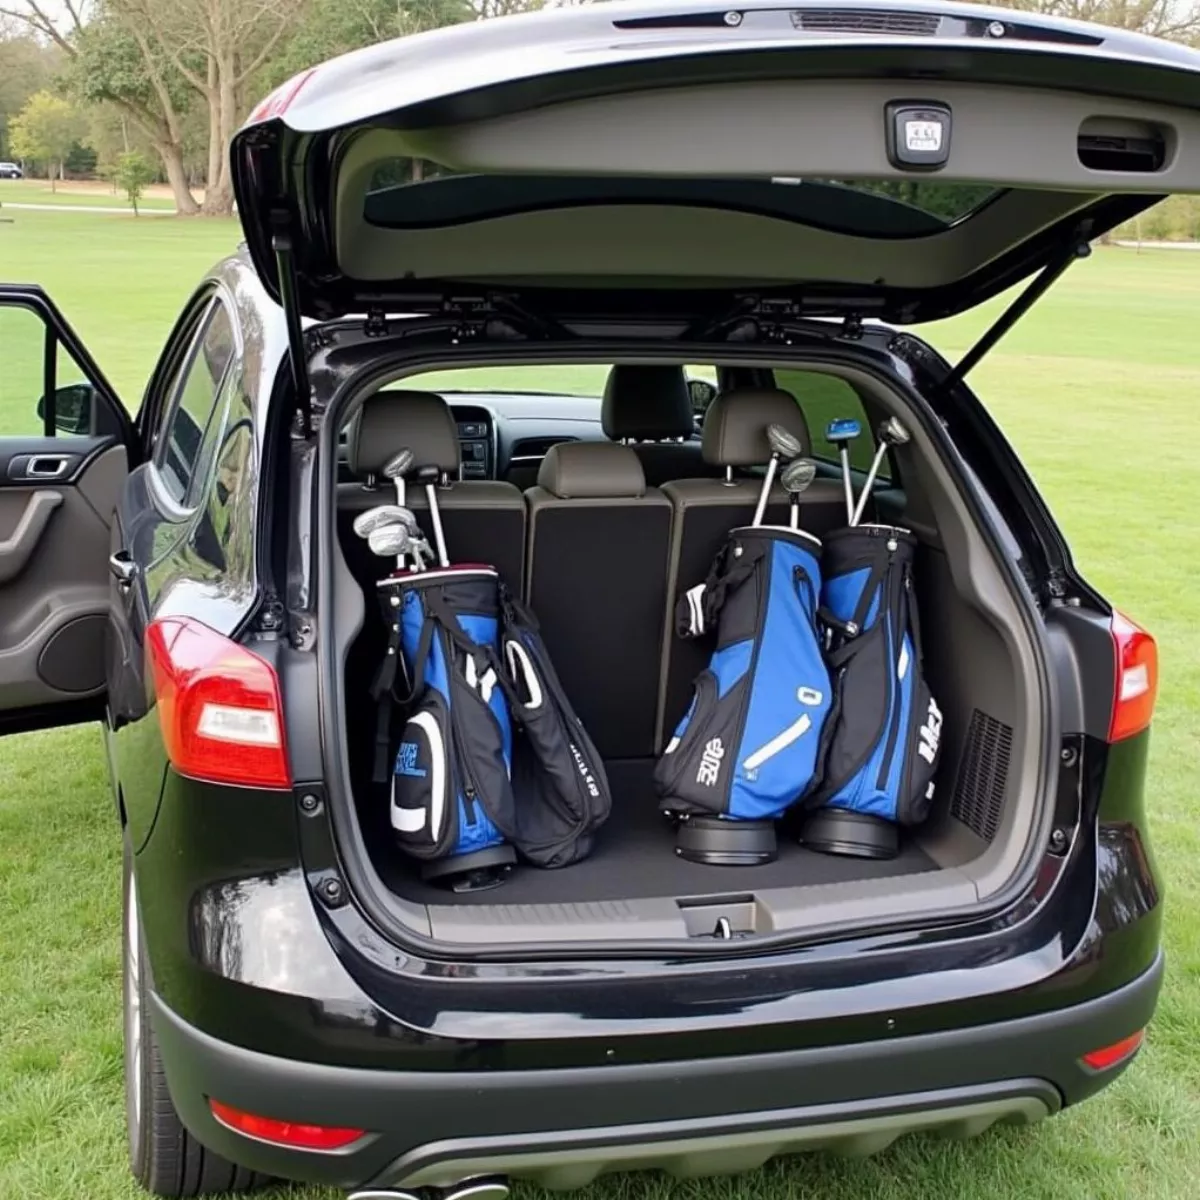
Packing a car for a golf tripPacking a car for a golf trip

Tips for Maintaining Your Clubs While Traveling

Taking care of your clubs while traveling is crucial. Here are some pointers:

  • Clean Your Clubs: Ensure they are cleaned before traveling – dirt and debris can cause damage during transport.
  • Avoid Wet Conditions: Keep them dry to avoid rust, especially if you’re playing in wet climates.
  • Storage: Once you arrive at your destination, store them properly. Avoid leaving them in the car or in direct sunlight.

Finding the Right Golf Courses

After you’ve safely traveled with your clubs, it’s time to enjoy some golf. Here’s how to find the best local courses:

  • Use Online Platforms: Websites like GolfNow or GolfAdvisor allow you to search for golf courses based on user ratings and testimonials.
  • Ask Locals: Recommendations from locals can lead you to hidden gems not listed online.
  • Mobile Apps: There are numerous apps dedicated to helping you find courses nearby.

Using a golf course finder appUsing a golf course finder app

What to Pack for Your Trip

Along with your golf clubs, don’t forget to pack these essentials:

  • Golf Shoes: Comfortable shoes are a must for a long day on the course.
  • Weather Gear: Depending on the climate, pack weather-resistant outerwear and plenty of sunblock.

Packing List Table:

Essential Item Quantity
Golf Tees 10+
Balls 12+
Gloves 2-3
Comfortable Attire As needed
Water Bottle 1-2
Snacks As needed

Bonus Tip: Always have a backup plan—bring extra balls just in case you need to hit a few on the range!

Key Takeaways

  • Choose the Right Bag: Opt for a travel bag that provides adequate protection for your clubs.
  • Pack Smart: Take precautions to prevent damage by using bubble wrap, headcovers, and securing loose parts.
  • Know the Airline Policies: Always research airline regulations regarding golf clubs to avoid surprises.
  • Consider Travel Insurance: It can provide peace of mind about potential damage or loss of your equipment.
  • Keep Clubs Clean: Maintain and care for your clubs throughout your trip to ensure they perform at their best.

Frequently Asked Questions (FAQs)

1. **Can I bring my golf clubs on an airline?**

Yes, but there are specific regulations and fees for carrying sports equipment, including golf clubs. Check with your airline for their specific policies.

2. **What are the fees for checking golf clubs on flights?**

Fees can range from $30 to $150, depending on the airline and destination. Always verify before traveling.

3. **Should I get insurance for my golf clubs while traveling?**

Yes, travel insurance can cover the loss or damage of your clubs, providing you with peace of mind.

4. **What type of golf bag is best for traveling?**

A travel bag with adequate padding and possibly a hard case is recommended for optimal protection.

5. **How can I prevent my golf clubs from getting damaged?**

Use padding, secure loose parts, and pack them carefully in a sturdy travel bag. Avoid exposing them to extreme temperatures.

6. **Can I take my golf shoes in my luggage?**

Yes, you can pack your golf shoes in your luggage. Just ensure they’re clean to avoid any issues at airport security.

7. **Is it better to ship my golf clubs rather than check them on a flight?**

Shipping your clubs can be a good alternative if you’re worried about damage. Just ensure you use a reliable shipping company.

8. **Can I rent golf clubs at my destination?**

Yes, many golf courses offer rental clubs, but it’s best to call ahead and confirm availability.

9. **What should I do if my clubs are lost during travel?**

File a report with the airline and keep your receipts for any high-value items for insurance purposes.

10. **How should I store my clubs once I arrive?**

Find a cool, dry place to store your clubs away from sunlight and extreme temperatures while not in use.

Golfer relaxing after a gameGolfer relaxing after a game

By following this guide, you can rest assured that your journey with your golf clubs will be as smooth as a perfect putt. Enjoy your traveling adventures, and may your next round of golf be one for the books!

Golfer demonstrating proper weight transfer during a swing

how to transfer weight in golf swing

Golf is a game of precision, strategy, and technique. One of the fundamental aspects every golfer must master is weight transfer during the swing. A proper weight shift is crucial for generating power, maintaining balance, and ensuring accuracy in your shots. In this guide, we will break down the art of transferring weight in your golf swing, providing insights, techniques, and tips to help you elevate your game.

Understanding the Basics of Weight Transfer

Weight transfer refers to how you shift your body weight throughout your swing. It impacts not just the power of your shot, but also the accuracy. When done right, carrying your weight properly can lead to longer drives and lower scores.

The Two Main Phases of Weight Transfer

  1. Backswing Weight Transfer: Here, the weight shifts from your front foot to your back foot. This creates potential energy for your downswing.
  2. Downswing Weight Transfer: This involves shifting the weight back to your front foot as you initiate the swing towards the ball leading to a potent strike.

Why Is Weight Transfer Important?

  • Creates power: Proper weight transfer maximizes energy transferred from your body to the club.
  • Enhances balance: A well-timed weight shift keeps your center of gravity aligned, improving shot accuracy.
  • Reduces injury risk: Keeping a balanced stance lessens the strain on your muscles and joints.

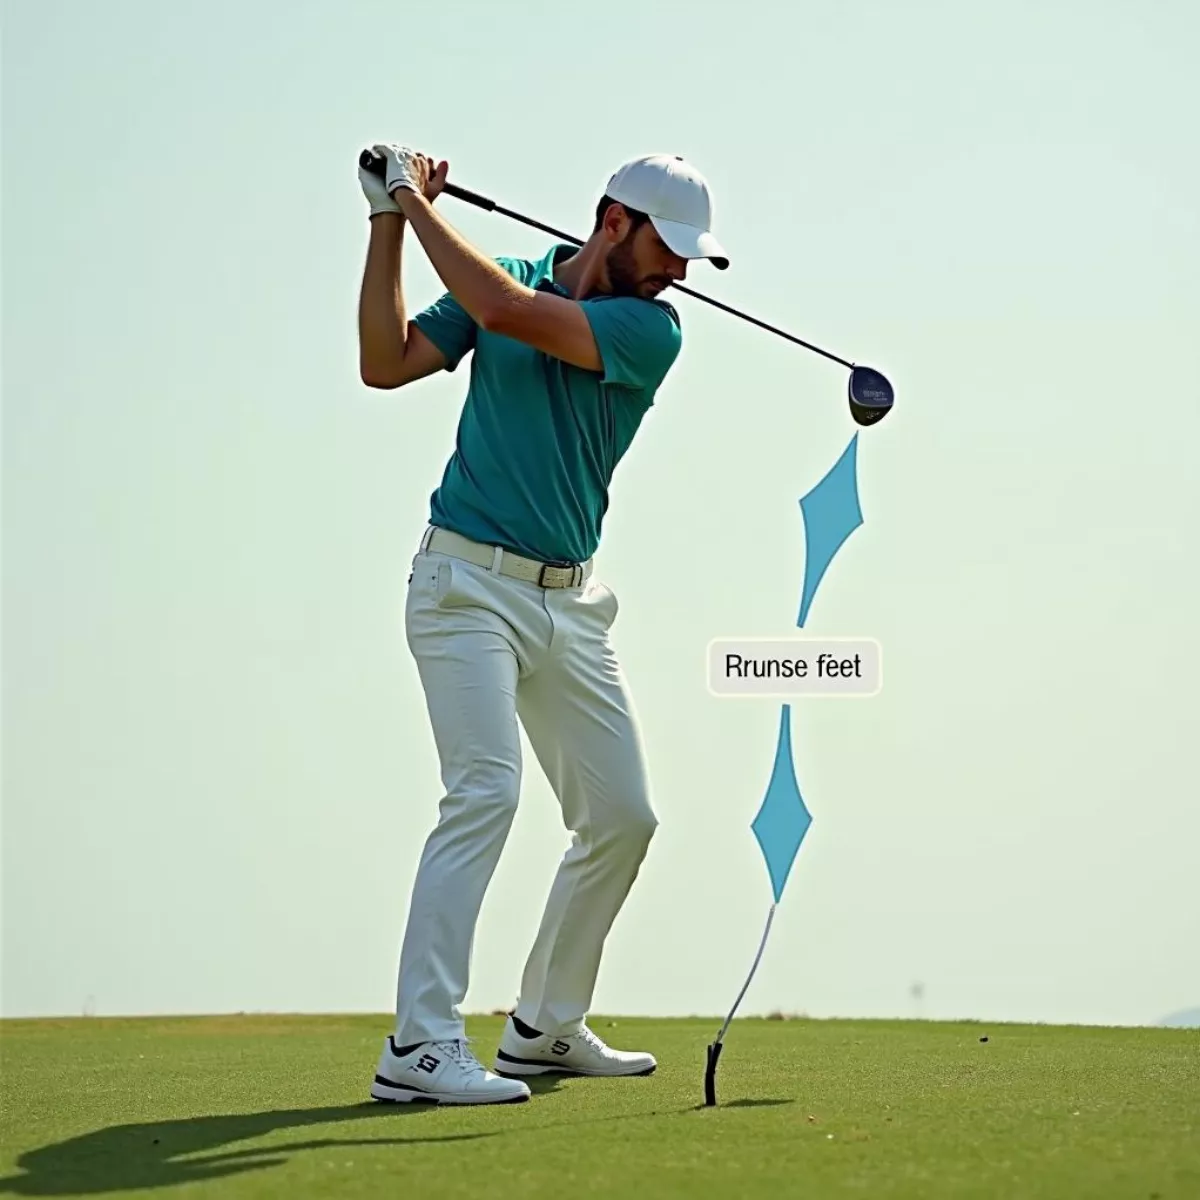
Golfer demonstrating proper weight transfer during a swingGolfer demonstrating proper weight transfer during a swing

Key Elements of Effective Weight Transfer

Adopting the following elements into your swing can greatly enhance your weight transfer:

1. Grip Pressure

  • Maintain a light grip on your club. This allows for a smoother swing and prevents tension in your arms and shoulders.

2. Stance Width

  • Your feet should maintain a shoulder-width stance. Too narrow creates instability, while too wide makes it difficult to shift weight effectively.

3. Flexibility

  • Good flexibility allows a greater range of motion. Incorporate stretching exercises into your routine to aid your swing.

4. Practice the Pivot Motion

  • The pivot involves rotation around your spine. Focus on the front hip moving backward during your backswing, with your rear leg supporting your weight.

5. Utilize the Ground

  • You should always feel in contact with the ground through your feet. This connection is essential for stability and helps with a proper weight shift.

Steps to Practice Effective Weight Transfer

Follow this systematic approach to practice your weight transfer:

  1. Set Up: Start in a balanced, athletic stance.
  2. Initiate the Backswing: As you take your club back, feel the weight shift into your back foot.
  3. Pause and Check: At the top of your backswing, check if most of your body weight is on your back foot.
  4. Begin the Downswing: Shift your weight to your front foot, turning your hips towards the target.
  5. Follow Through: Complete your follow-through by transferring your weight to your front foot, finishing with your weight on your lead side.

Golfer performing a weight transfer drillGolfer performing a weight transfer drill
Drills for Mastering Weight Transfer

Here are a few drills to improve your weight transfer:

  • Toe Tap Drill:
    • Start your swing by tapping your back toe on the ground.
    • Focus on feeling the weight shift to your front foot as you strike the ball.
  • One-Legged Swing:
    • Take a few swings while standing on your back leg. This will force you to focus on transferring your weight correctly.
  • Slow Motion Swings:
    • Practice your full swing in slow motion to really feel the weight transfer.

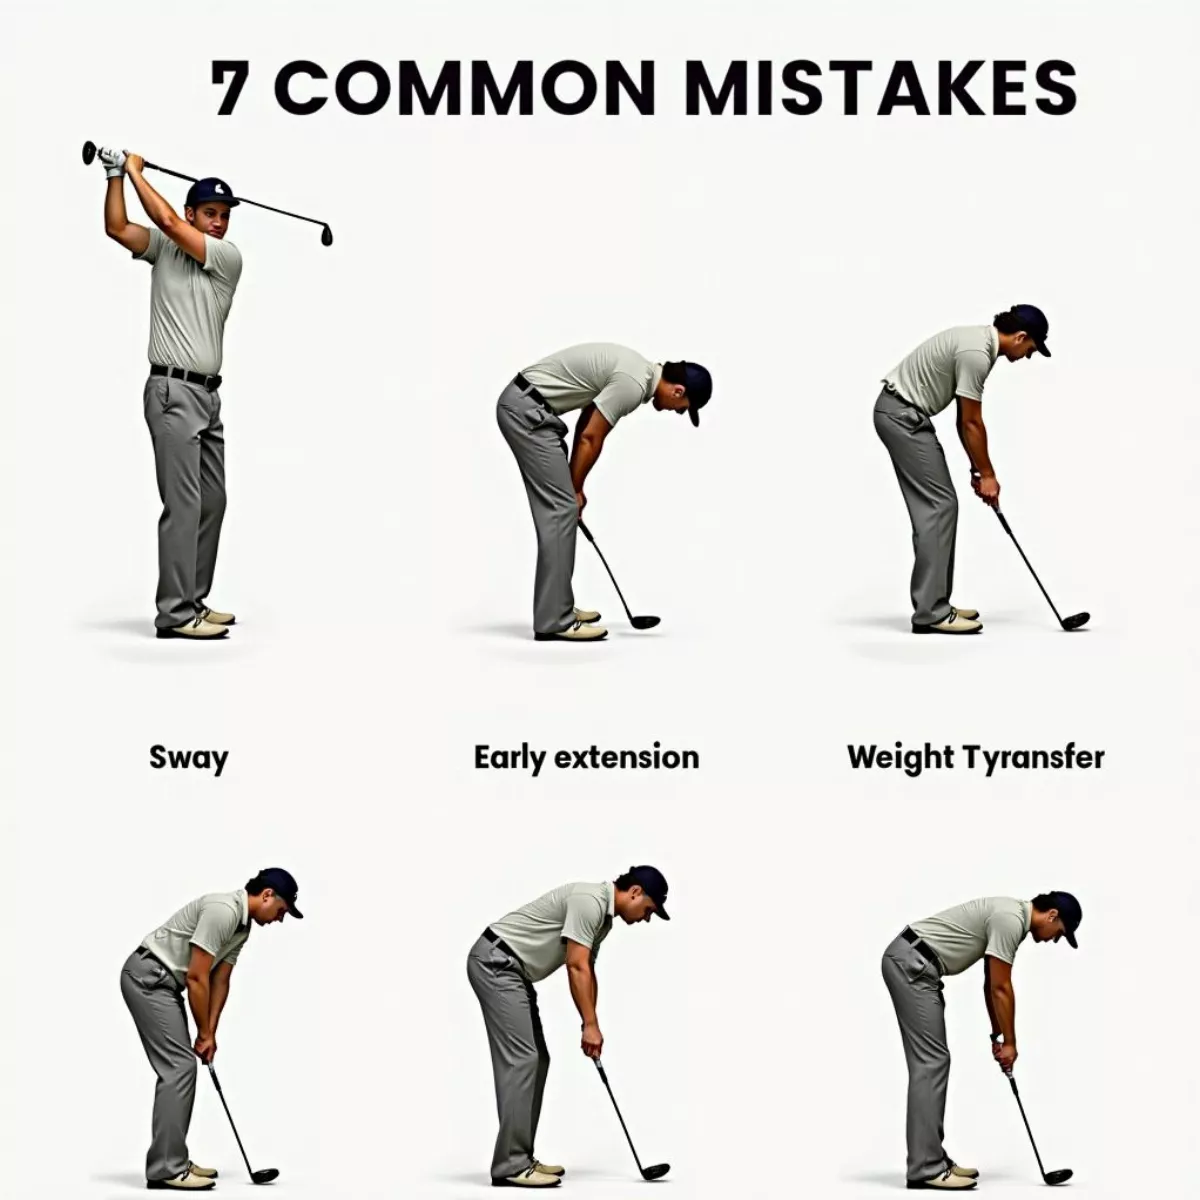
Common Mistakes to Avoid

While practicing weight transfer, be wary of these common pitfalls:

  • Over-Swinging: Many golfers try to generate more power by over-swinging. This disrupts the balance and makes weight transfer difficult.
  • Stiff Arms and Body: Staying rigid inhibits your ability to pivot and shift weight.
  • Poor Hip Motion: Failing to turn your hips appropriately results in ineffective weight transfer.

Illustrations depicting common golf swing errorsIllustrations depicting common golf swing errors


Key Takeaways

  • Balance is essential: Maintain a strong base and ensure proper weight distribution.
  • Practice makes perfect: Use drills to focus on the weight transfer aspect of your swing.
  • Adjust grip pressure: A light grip promotes a more fluid swing.
  • Utilize hip movement: Proper hip rotation plays a vital role in effective weight transfer.
  • Stay flexible: Improved flexibility aids in greater weight shift and thus enhances your swing.

Frequently Asked Questions (FAQs)

1. What is the best stance width for effective weight transfer?

A shoulder-width stance is generally recommended, as it provides stability while allowing for effective weight shift.

2. How can I improve my flexibility for better weight transfer?

Incorporate daily stretching and mobility exercises into your routine focusing on your hips, shoulders, and back.

3. What are some common signs of poor weight transfer?

Signs include slice or hooking the ball, inconsistency in shots, or feeling off-balance during swings.

4. Is there a specific drill to practice weight transfer?

The Toe Tap Drill is a great practice tool to help you feel the shift in weight effectively.

5. How can I tell if I’m transferring my weight correctly?

A good indicator is your ability to complete the swing with your weight shifted to the front foot without losing balance.

6. Why is grip pressure affecting my weight transfer?

Too much grip pressure leads to tension in your arms, which can hinder the fluidity of your motion, disrupting weight transfer.

7. Should I focus on my upper body or lower body during the weight shift?

Both are important, but pay special attention to the hip movements as they facilitate the lower body weight transfer.

8. Can I practice weight transfer indoors?

Absolutely! Practicing with a mirror, or using a swing trainer, can help maintain proper form even in a limited space.

9. Does my club choice affect weight transfer?

Yes, different clubs have varying weights. Heavier clubs may require more controlled weight transfer to maintain balance.

10. What resources can I use to improve my weight transfer?

Consider golf instruction books, lessons from a professional, or online resources like instructional videos.

Conclusion

Transferring weight effectively in your golf swing can significantly impact your performance on the course. By mastering these techniques and maintaining a consistent practice routine, you can enhance both your power and accuracy, leading to lower scores. Remember to stay patient and persistent with your practice, and enjoy the process of improvement. Happy swinging!


Use this guide as your roadmap for mastering weight transfer. With practice and dedication, you’ll see improvements in your game that will leave you eager to hit the course!

Golfer taking a divot

how to take a divot in golf

Taking a divot is an essential skill for any golfer wanting to improve their swing and overall game. If you’ve ever watched professional golfers, you’ve likely noticed how they artfully strike the ground to create a divot while making clean contact with the ball. This technique is crucial for achieving that perfect shot. In this guide, we’ll dive into how to take a divot properly, ensuring you hit those drives more effectively.

What is a Divot?

Before we jump into the mechanics, let’s clarify what a divot is. When you swing your club, especially with an iron or wedge, it’s natural for the clubhead to make contact with the ground after hitting the ball. This contact often results in a piece of turf being cut out, which is what we call a divot. Divots are more common when hitting downward into the ball, promoting a clean strike that contributes to better ball control.

Why Taking a Divot is Important

Understanding when and how to take a divot can significantly improve your game. Here’s why:

  • Improved Contact: A proper divot promotes better contact between club and ball, leading to improved distance and accuracy.
  • Enhanced Spin: Taking a divot helps create the right angle of attack, allowing for the desired spin on the ball.
  • Ball Control: By compressing the ball at impact, you can achieve greater control over your shots—essential for any level of play.

Golfer taking a divotGolfer taking a divot

How to Take a Divot: Step-by-Step Guide

1. Set Up Your Stance

The first step to taking a divot is ensuring proper stance and setup. Follow these tips:

  • Stand shoulder-width apart for balanced footing.
  • Position the ball slightly forward in your stance.
  • Ensure your weight is distributed evenly between both feet.

2. Grip the Club Properly

A proper grip helps you control the club more effectively.

  • Use a neutral grip.
  • Ensure your fingers wrap around the club and your palms face each other.

3. Position the Clubface

The angle of your clubface is critical. Here’s what to remember:

  • Square the clubface to the target.
  • Make sure that the leading edge is positioned slightly down.

4. Focus on the Swing

Now that you’re set up, focus on your swing mechanics:

  • Start with a smooth takeaway, keeping your arms and body in sync.
  • Shift your weight onto your back foot during the backswing.
  • When starting your downswing, transfer your weight back to your front foot.

5. Create the Downward Stroke

This is where the magic happens:

  • From the top of your swing, as you begin to come down, aim to strike just behind the ball.
  • Picture a downward motion towards the ground, ensuring the clubhead enters the turf slightly after making contact with the ball.

Golf club hitting ball and creating divotGolf club hitting ball and creating divot

6. Follow Through

A complete follow-through is vital to maintain balance and ensure a proper divot:

  • Keep your finish high; your arms should extend upward and outward.
  • Be mindful of your body position—a great swing will naturally allow for a clean follow-through.

Common Mistakes to Avoid

Now that you know the steps to take a divot, let’s address some common pitfalls:

  • Hitting Too Early: Striking too far behind the ball can lead to poor shots. Aim to hit just after the ball.
  • Not Following Through: A short follow-through can lead to a suboptimal divot; always ensure you finish strong.
  • Incorrect Weight Shift: Failing to transfer your weight can cause an inconsistent swing and result in poor contact.

Practicing Your Divot Technique

Practice makes perfect. To refine your divot-taking technique:

Practice Drill Description
Divot Drills Use an old towel or turf to visualize your divot spot. Practice hitting the area just behind the towel.
Ball-First Contact Alternate between drills focused on striking the ball first and drills focused on taking a divot.
Professional Lessons Consider lessons from a local pro who can give you personalized feedback.

Golfer practicing divot drillsGolfer practicing divot drills

Key Takeaways

  • A divot is essential for clean, accurate strikes in golf.
  • Proper stance, grip, and swing mechanics are critical for taking a clean divot.
  • Avoid common mistakes such as hitting too early or failing to follow through.
  • Practice regularly to improve your skills and understand how to consistently take a divot.

FAQ Section

1. What’s the purpose of taking a divot?

Taking a divot helps ensure better ball contact, spin, and overall shot control.

2. Do I take a divot with every shot?

Not necessarily. Divots are usually taken with iron and wedge shots but are less common with fairway woods or drivers.

3. Will taking a divot hurt my golf game?

When done correctly, taking a divot improves your performance by promoting clean contact with the ball.

4. How deep should a divot be?

A divot depth of about half an inch is typically effective, but this may vary based on course conditions and club used.

5. Can I take a divot on the tee box?

It’s generally not common to take a divot off a tee, as the tee raises the ball above the ground. However, it may happen with specific types of shots.

6. How can I practice taking divots?

Using visual aids like towels for target practice can help you better visualize where your swing should be.

7. Does a large divot mean a bad swing?

Not necessarily. The size of your divot may vary, but what matters most is consistency and contact with the ball.

8. Is there a specific club that’s better for taking divots?

Shorter clubs like wedges and irons are typically better for creating divots than woods or drivers.

9. Is it okay to replace the divot?

If playing on a course, you should replace your divot to maintain the integrity of the playing surface.

10. When should I consider taking lessons?

If you find it difficult to achieve consistent results or have specific concerns with your swing, lessons from a pro can greatly benefit you.

By [mastering the art](http://golflifewiki.com/why-is-it-so-difficult-to-master-the-art-of-golf/ “mastering the art”) of the divot, you open the door to better accuracy, ball control, and ultimately, a more enjoyable golfing experience. Remember, it’s not just about hitting the ball—it’s about how you strike the ground too! Happy golfing!

Various Plaid Patterns

how to style plaid skirt

Plaid skirts have become a timeless staple in many wardrobes. Their versatility makes them suitable for various occasions—whether you’re dressing up for a night out or keeping it casual for a day of errands. In this article, we’ll explore how to style a plaid skirt with tips on colors, patterns, and accessories. You’ll learn how to make this classic piece work for you in any season.

Understanding Plaid Patterns

Before jumping into styling, let’s recognize the beauty of plaid patterns. Traditionally, plaid refers to a woven fabric with a checkered design, often featuring multiple colors. Here are some popular types:

  • Tartan: A pattern consisting of crisscrossed horizontal and vertical bands in multiple colors.
  • Glen Plaid: A subtle pattern that mixes two different types of checks, often in muted tones.
  • Windowpane: A larger square pattern that gives a modern touch.

Knowing these patterns can help you better pair your plaid skirt with other clothing items, ensuring a cohesive look.

Various Plaid PatternsVarious Plaid Patterns

Styling Your Plaid Skirt

1. Choose the Right Length

The first thing to consider when styling a plaid skirt is its length. Options include mini, midi, and maxi lengths. Here’s how to choose:

  • Mini Skirts: Great for warm weather and night outs. Pair with combat boots or ankle boots.
  • Midi Skirts: Versatile and ideal for both casual and formal settings. They can be dressed up with heels or dressed down with sneakers.
  • Maxi Skirts: Perfect for a boho look. Opt for strappy sandals or espadrilles.

2. Choose Your Top Wisely

The right top can elevate your outfit. Here are some suggestions:

  • Solid Color Tops: When in doubt, a solid color top works wonders. Opt for white, black, or neutral shades to balance the boldness of the plaid.
  • Graphic Tees: For a casual look, a graphic tee adds a playful vibe. Tucking it in creates a polished appearance.
  • Turtlenecks: A fitted turtleneck adds sophistication, especially in colder months.
  • Denim Jackets: Layer with a denim jacket for a laid-back, stylish appeal.

Different Tops Paired with Plaid SkirtsDifferent Tops Paired with Plaid Skirts

3. Accessorize Thoughtfully

Accessories can take your look from ordinary to extraordinary. Here are key pieces to consider:

  • Statement Jewelry: Chunky necklaces or oversized earrings can make a bold statement against the plaid pattern.
  • Belts: A waist belt can define your silhouette—especially with a high-waisted plaid skirt.
  • Scarves and Hats: These can add extra flair. A patterned or solid scarf can enhance texture, while a stylish hat gives a fashion-forward edge.

4. Footwear Choices

Your shoes play a critical role in achieving the right look:

  • Heels: Pair with pencil skirts for a chic office outfit.
  • Flats: Comfortable and stylish, they work well for casual outings.
  • Boots: Ankle and combat boots make your outfit edgier.
  • Sneakers: Perfect for weekend wear, they keep it comfortable.

Footwear Styles for Plaid SkirtsFootwear Styles for Plaid Skirts

5. Layering for Seasons

Layering is key to styling a plaid skirt during different seasons:

  • Winter: Layer with a long coat and knitted gloves.
  • Fall: Try a cardigan or a lightweight jacket.
  • Spring/Summer: A crop top or tank top works beautifully.

What Colors Work Best?

When styling your plaid skirt, the color palette is vital. Here’s a quick breakdown of colors that pair well:

Plaid Color Complementary Colors
Red White, Black, Denim
Blue Beige, Gray, Yellow
Green Brown, Cream, Gold
Black and White Pops of Color (e.g., Red, Blue)

Color Matching Tips

  • Use the Color Wheel: Look for colors that are adjacent or complementary on the wheel.
  • Pick One Dominant Color: Choose one color from your plaid skirt to match with your top or accessories.

Occasions to Wear a Plaid Skirt

Plaid skirts are perfect for various occasions due to their versatility:

  • Casual Outings: Pair with sneakers and a solid tee.
  • Work Attire: Combine with a button-up shirt and heels.
  • Evening Events: Opt for a fitted top and statement jewelry.
  • Weekend Brunch: Style with a graphic tee and ankle boots.

Key Styling Tips for Plaid Skirt

  • Balance Prints: When mixing patterns, keep one piece minimal.
  • Fit Matters: Ensure your skirt fits well. A tailored piece looks polished.
  • Experiment with Layers: Layering textures can bring depth to your outfit.

Key Takeaways

  • Choose the Right Length: Skirt length influences style and occasion.
  • Match Wisely: Pair it with solid colors or simple patterns.
  • Think About Footwear: Heels or boots can completely change the vibe.
  • Accessorize Carefully: Statement pieces enhance your look without overwhelming.
  • Layer for Seasonal Style: Adapt your outfit with seasonal pieces for warmth and style.

FAQs

1. How do I style a plaid skirt for colder weather?

Layer with tights and a long coat or chunky sweater. Boots can keep your feet warm while looking chic.

2. Can I mix patterns with a plaid skirt?

Yes! But keep it subtle. Pair with stripes or florals in similar colors, or wear a patterned top in a smaller scale.

3. What type of top is best with a plaid skirt?

Solid colored tops, graphic tees, or fitted turtlenecks work well.

4. Is a plaid skirt suitable for formal occasions?

Absolutely! Pair with a tailored blouse and heels for a polished look.

5. How do I care for my plaid skirt?

Always check the care label. Usually, machine wash on gentle and hang or lay flat to dry.

6. Can I wear sneakers with a plaid skirt?

Yes, sneakers create a casual and stylish look that’s perfect for weekend outings.

7. What type of plaid skirt is best for summer?

A lightweight, mini plaid skirt can be perfect. Pair it with a breezy tank top and sandals.

8. Do plaids work for all seasons?

Yes! With the right layering and fabric, plaid can transition well from summer to winter.

In conclusion, styling a plaid skirt is all about understanding your personal style, being confident in your choices, and experimenting creatively. Whether you’re going for casual chic or sophisticated elegance, this guide equips you with the necessary tips, tricks, and inspiration to rock your plaid skirt effortlessly.

Let your creativity shine, and you’ll undoubtedly turn heads wherever you go!

Male Penis Anatomy and Sensitivity

how to stroke a dick

When it comes to intimacy, understanding how to pleasure a partner can greatly enhance the experience for both parties. This guide focuses on how to stroke a dick effectively, combining technique with communication and respect. Whether you’re new to this or looking to refine your skills, this article provides a thorough and educational perspective on the topic.

Understanding Anatomy and Sensitivity

Before diving into techniques, it’s essential to understand what you’re working with—every penis is unique, so individual preferences can vary. The penis consists of several areas that can produce pleasurable sensations:

  • Shaft: The primary area that most touching focuses on. It has a range of sensitivity levels.
  • Glans (tip): Often the most sensitive part, this area may require a gentler touch.
  • Frenulum: A band of tissue that connects the glans to the shaft, it is also highly sensitive.

Tip: Communication is key. Always ask your partner what feels good, as they can guide you to their preferences.

Basic Techniques for Stroking

Here are various techniques that can serve as a foundation for pleasuring a partner:

  • The Basic Stroke:
    • Start at the base of the shaft, wrapping your hand around.
    • Move upward towards the glans in a smooth motion.
    • Repeat this movement and adjust speed and pressure based on your partner’s feedback.
  • The Two-Handed Stroke:
    • Use one hand on the shaft and the other hand to cup the balls underneath.
    • Experiment with alternating strokes to increase the sensation.
  • The Twisting Motion:
    • As you stroke upwards, gently twist your hand to add some variability.
    • This can simulate different sensations and might lead to heightened arousal.

Male Penis Anatomy and SensitivityMale Penis Anatomy and Sensitivity

Table: Common Techniques and Tips

Technique Description Tips
Basic Stroke Smooth upward strokes along the shaft Adjust speed and pressure as needed.
Two-Handed Stroke One hand on the shaft, the other stimulating the balls Alternate strokes for more pleasure.
Twisting Motion Twisting your wrist gently while stroking Vary the angle for enhanced sensation.

Enhancing the Experience with Lubrication

Lubrication is crucial to ensure comfort and to reduce friction. Here are some popular types of lubricants:

  • Water-based: Great for use with condoms and easy to clean.
  • Silicone-based: Longer-lasting but can be tricky with some toys.
  • Oil-based: Nice for sensual massages, but avoid with latex condoms.

Tips for Using Lubrication

  • Always start with a small amount and add more as needed.
  • Use your judgment—too much can make it slippery.
  • Keep the lubricant close to avoid awkward pauses.

Various Lubricant Types for IntimacyVarious Lubricant Types for Intimacy

Communicating Your Way to Success

Always remember that every individual’s preferences vary significantly. Here are some tips on how to communicate effectively:

  • Ask Questions: Inquire about their favorite techniques—“How does this feel?”
  • Use Positive Reinforcement: Compliment them and reinforce what feels good.
  • Be Open to Feedback: Listen carefully and adapt your technique accordingly.

Quote: “Pleasure comes from connection and understanding.”

Essential Do’s and Don’ts

Do’s:

  • Experiment with Speed: Some may enjoy slow strokes, while others prefer faster ones.
  • Maintain Eye Contact: It can increase intimacy and trust.
  • Mix Techniques: Change up your strokes and sensations to keep things exciting.

Don’ts:

  • Don’t Rush: Take your time—enjoy the process.
  • Avoid Overstimulation: If your partner seems uncomfortable, dial it back.
  • Don’t Neglect Other Areas: Explore touching the thighs, stomach, or inner arms for added arousal.

Open Communication During Intimate MomentsOpen Communication During Intimate Moments

Key Takeaways

  • Understand Anatomy: Every penis is unique, so communication is crucial in discovering preferences.
  • Explore Techniques: Use a variety of strokes including basic, two-handed, and twisting motions.
  • Utilize Lubricants: They enhance comfort and pleasure, making the experience more enjoyable.
  • Communicate Actively: Ask for feedback, and adjust based on your partner’s reactions.
  • Practice Patience: Take your time, and focus on creating a pleasurable experience.

FAQ Section

  1. What is the best way to start?
    • Start with light touches and strokes, gradually increasing pressure as your partner becomes more aroused.
  2. How can I tell if my partner enjoys it?
    • Look for non-verbal cues (like breathing patterns or body language) and encourage verbal feedback.
  3. Is it okay to ask for guidance?
    • Absolutely! Asking what feels good shows your partner you care about their pleasure.
  4. Should I always use lubricant?
    • It’s generally recommended to use lubricant to reduce friction and enhance pleasure, but communication is key—ask your partner their preference.
  5. What if it feels awkward?
    • If it feels awkward, don’t worry! Laugh it off, communicate openly, and remember that it’s all about learning together.
  6. How often should I change techniques?
    • Regularly switching up techniques can keep things exciting. Pay attention to your partner’s cues.
  7. Can I integrate toys into the experience?
    • Yes! Introducing toys can add variety, but make sure to discuss it with your partner first.
  8. What if my partner prefers no physical stimulation at all?
    • Respect their wishes—exploring other forms of intimacy can be just as satisfying.

Conclusion

Stroking a penis effectively is all about understanding, communication, and practice. By using the techniques outlined in this guide and maintaining an open dialogue with your partner, you can create a unique and pleasurable experience for both of you. Remember, it’s not just about the act itself, but about the connection and intimacy that come with it. Enjoy the journey of exploration and pleasure together!

Feel free to explore other articles on our site for more tips and tricks on enhancing intimate experiences. Happy exploring!

how to stop shanking the ball in golf

Are you tired of watching your golf ball veer off into the rough after a swing? If shanking the ball has become a common occurrence for you, you’re not alone. Many golfers face this frustrating issue, and the good news is that stopping the shank is entirely possible with the right techniques. This guide will walk you through understanding shanking, identifying its causes, and implementing practical solutions to improve your game.

What is a Shank?

Before we dive into how to fix it, let’s clarify what a shank is. A shank occurs when the ball is struck by the hosel of the club (the part of the clubhead where the shaft connects). This mishit sends the ball off at an extreme angle, often to the right for right-handed golfers and left for left-handed golfers. It’s not just an embarrassing mistake; it can severely impact your game.

Common Causes of Shanking

Understanding why you are shanking the ball is the first step to correcting it. Here are some common causes to consider:

  • Improper Setup:

    • Ball positioned too far forward or back in your stance.
    • Incorrect grip pressure.

  • Swing Mechanics:

    • Overactive hands and wrists.
    • A swing path that is too far inside-out.

  • Weight Shift:

    • Failing to transfer your weight properly during the swing can cause the club to approach the ball incorrectly.

  • Mental Blocks:

    • Anxiety about performance can lead to tension and bad swings.

  • Equipment Issues:
    • An ill-fitted club or worn grips may contribute to mishits.

How to Stop Shanking the Ball: 10 Effective Solutions

1. Check Your Setup

A proper setup is crucial for a solid swing. Pay close attention to your posture, alignment, and ball position.

  • Ball Position: It should be just inside your left heel (for right-handed golfers).
  • Grip: Maintain a relaxed grip. A death grip can restrict your swing.

2. Focus on Your Swing Path

Analyze your swing path. To strike the ball cleanly, your club needs to approach the ball on the correct path.

  • Practice inside-out swings on the driving range.
  • Visualize your swing path to reduce any errant movements.

3. Use Drills to Improve Your Technique

Here are a few drills to help:

Drill Name Description
The Towel Drill Place a towel or headcover a few inches outside the ball to train yourself to swing properly. If you hit the towel, you’ll know your swing path is off.
The Impact Bag Hitting an impact bag helps train your hands and arms to strike the ball correctly.
The Gate Drill Set two tees just wider than your clubhead and swing through them without hitting them.

4. Mind Your Weight Shift

Weight transfer is critical. Practice shifting your weight from your back foot to your front foot.

  • A simple drill is to practice swinging while standing on your back foot, then quickly move to your front foot at impact.

5. Overcome Mental Blocks

Developing a strong mental game can significantly improve your performance.

  • Use visualization techniques before swinging.
  • Take slow, deep breaths to calm any anxiety.

6. Get Fitted for Equipment

An ill-fitted club can exacerbate your shanking issue. Consider:

  • Having a professional club fitting session.
  • Ensuring your grips are in good condition and suited to your hand size.

7. Record Your Swings

Sometimes, the best way to learn is through observation.

  • Use your smartphone to record swings. Look for inconsistencies and ask for feedback from experienced players or coaches.

8. Shorten Your Backswing

A shorter backswing can lead to improved control.

  • Focus on a compact and controlled motion. This can prevent over-rotation which often causes shanks.

9. Practice with Purpose

Deliberate practice can lead to improvement.

  • Spend at least 30 minutes at the range each week focusing on different aspects of your swing to develop muscle memory.

10. Consult Professional Help

Sometimes a professional eye is all you need to make adjustments. A golf instructor can provide invaluable insights to correct your swing.

Key Takeaways

  • Check your setup: Ensure your alignment and grip are correct.
  • Focus on swing path: Keep your swing on the right path to hit the ball cleanly.
  • Utilize drills: Incorporate drills like the Towel Drill to train correct technique.
  • Mind your weight shift: Practice shifting your weight properly during your swing.
  • Overcome mental blocks: Visualize your swings, and breathe to calm nerves.

FAQs About Shanking the Ball

Here are some frequently asked questions about shanking the ball, designed to provide additional clarity:

1. Can anyone shank the ball?

Yes, shanking can happen to any golfer, from beginners to experienced players.

2. Is a shank a permanent issue?

No, most golfers can correct a shank with practice and technique adjustments.

3. How do I know if I’m shanking?

If the ball is veering off at an extreme angle and hitting the hosel of your club, you’re likely shanking.

4. Can equipment cause shanks?

Yes, poorly fitted clubs or worn grips can contribute to the issue.

5. Should I adjust my grip to stop shanking?

Yes, a relaxed grip can help prevent shanks. An unnecessarily tight grip can lead to a variety of swing issues.

6. Is it better to practice alone or with a coach?

Both methods can be effective. If you struggle with self-correction, a coach might help more.

7. How long will it take to fix a shank?

It varies by individual, but with consistent practice, many golfers see improvement within a few sessions.

8. Are there specific drills for left-handed golfers?

Yes, the same drills apply, but the setup and resulting mishits will be opposite.

9. What’s the best club to practice with to avoid shanking?

Start with shorter irons, as they are generally easier to control for beginners.

10. Can shanking lead to bad habits?

Yes, frequently shanking the ball can lead to compensatory habits. It’s best to address it early.

By following these tips and understanding the nuances of your swing, you can enjoy a more consistent, exciting game of golf. Remember, practice makes perfect, so don’t get discouraged by shanks—use them as opportunities for improvement. Happy golfing!

how to stop hitting myself

Hitting yourself is a troubling behavior that can stem from various emotional or mental health issues. It often leaves individuals feeling isolated, embarrassed, and frustrated. However, understanding why this happens and learning how to stop can pave the way for healing and a healthier emotional state. In this article, we’ll guide you through effective strategies to overcome self-hitting – not just addressing the behavior but also focusing on the underlying causes.

Understanding Self-Hitting

Self-hitting, also known as self-injury or self-harm, is a way some people cope with emotional pain, trauma, or overwhelming feelings. It may manifest as hitting oneself, cutting, or other forms of self-mutilation. Here are some common reasons behind this behavior:

  • Emotional release: Some individuals hit themselves to express or release pent-up emotions, such as anger, sadness, or frustration.
  • Control: The act of self-hitting can provide a sense of control when everything else feels chaotic.
  • Coping mechanism: For many, it serves as a way to cope with emotional pain, often providing temporary relief.
  • Communication: Some people use self-injury to signal distress when they feel they cannot communicate their feelings verbally.

Recognizing these triggers is the first step toward finding healthier coping mechanisms.

Steps to Stop Hitting Yourself

1. Recognize Triggers

Understanding what leads you to hit yourself is crucial. Consider keeping a journal to identify patterns. Ask yourself:

  • What situations lead to this behavior?
  • How do I feel emotionally when I hit myself?
  • Are there particular people or environments triggering this response?

2. Develop Healthy Coping Mechanisms

Instead of resorting to self-hitting, explore alternative methods to cope with emotional distress. Here are some techniques you can try:

  • Deep Breathing Exercises: Focus on your breath to help ground and calm your emotions.
  • Physical Activity: Engage in exercises like yoga, running, or dancing to release pent-up energy and positive endorphins.
  • Creative Expression: Use art, writing, or music as an emotional outlet.
  • Mindfulness Techniques: Practice being present to decrease overwhelming feelings through meditation or guided imagery.

3. Establish a Support System

Don’t hesitate to lean on friends or family members who can provide understanding and encouragement. Sharing your struggles can alleviate feelings of isolation. Consider joining support groups, either in person or online, where you can connect with others facing similar challenges.

4. Seek Professional Help

If you’re finding it difficult to stop on your own, consider talking to a mental health provider. Therapy options like Cognitive Behavioral Therapy (CBT) can help you unpack and address the root causes of your self-hitting behavior. Here are several types of therapies to consider:

Therapy Type Focus
Cognitive Behavioral Therapy Changing negative thought patterns
Dialectical Behavior Therapy Emotional regulation and mindfulness
Art Therapy Creative expression to explore feelings
Group Therapy Sharing experiences in a safe space

5. Practice Self-Compassion

Instead of punishing yourself for your behavior, practice self-compassion. Acknowledge your pain without judgment, just as you would for a friend. Use positive affirmations to encourage a loving relationship with yourself.

6. Replace the Behavior with Alternatives

If you feel the urge to hit yourself, try replacing that urge with another action. For example:

  • Squeeze a stress ball
  • Use a rubber band on your wrist (snap it gently instead)
  • Engage in a physical activity like punching a pillow

7. Set Goals for Progress

Setting realistic goals can help you track progress. For example, if you typically hit yourself once a day, aim to reduce that frequency to just a few times a week. Celebrate small victories and acknowledge your efforts.

Key Takeaways

  • Recognize triggers and keep a journal.
  • Develop healthy coping mechanisms.
  • Establish a support system.
  • Seek professional help when needed.
  • Practice self-compassion.
  • Replace the behavior with alternative actions.
  • Set realistic goals for progress.

FAQ Section

1. What should I do when I feel the urge to hit myself?

Replace the urge with an alternative action, like squeezing a stress ball or practicing deep breathing exercises.

2. How can I talk to someone about my self-hitting?

Choose a trusted friend or mental health professional and express your feelings openly. It’s okay to ask for support.

3. Are there specific therapy options for self-hitting?

Yes! Cognitive Behavioral Therapy (CBT) and Dialectical Behavior Therapy (DBT) are effective for addressing self-hitting behaviors.

4. Can self-hitting lead to serious injury?

Yes, self-hitting can lead to physical injury, infection, or permanent damage. Seeking help is critical.

5. What if I don’t know my triggers?

Start a journal to log your feelings and actions over a week to help identify potential triggers.

6. Is it common for people to self-harm?

Yes, many individuals experience self-harm as a coping mechanism. You’re not alone.

7. How long will it take to stop hitting myself?

It varies for everyone. With consistent effort and proper support, you can make progress over time.

8. Can mindfulness help with self-hitting?

Absolutely! Mindfulness helps you stay present, reducing overwhelming emotions that may trigger self-hitting.

9. What role does self-esteem play in self-hitting?

Low self-esteem can contribute to self-hitting as individuals may feel they deserve punishment. Building self-worth is essential.

10. Where can I find support resources?

Online platforms, local support groups, and mental health professionals are great resources for support.


Taking the step to stop hitting yourself is a courageous decision. By utilizing the strategies outlined in this guide, you can foster a healthier mindset and emotional resilience. Remember, you are not alone in this journey, and seeking help is always a sign of strength.

For more suggestions on emotional wellness, check out our related articles on mindfulness techniques, Cognitive Behavioral Therapy, and healthy coping strategies. Let’s break the cycle together!

how to stop hitting fat shots in golf

Hitting fat shots in golf can be incredibly frustrating, often leading to poor scores and a lack of confidence on the course. If you’ve ever sliced through the grass behind the ball only to see it dribble a few yards, you know exactly what we mean! This guide is designed to help you understand the causes of fat shots and provide you with practical solutions to eliminate them from your game.

What Are Fat Shots?

First, let’s clarify what we mean by fat shots. A fat shot occurs when the clubhead makes contact with the ground before the ball. Instead of a clean strike, you get that dreaded thud, and the ball barely travels.

While every golfer has experienced fat shots at some point, consistently hitting them can be a sign of technique flaws. Let’s dive into the key components that can help you stop hitting fat shots.

Key Causes of Fat Shots

Understanding the common culprits behind fat shots allows you to fix them effectively. Here are five primary factors that contribute to this issue:

  1. Improper Weight Transfer

    • Failing to shift your body weight correctly can lead to hitting behind the ball.

  2. Inadequate Spine Angle

    • An incorrect spine angle can compromise your swing path, resulting in fat shots.

  3. Poor Posture

    • Slouching or misaligning your posture can affect your swing plane and lead to fat contact.

  4. Late Release of the Club

    • Releasing the club too late can cause the clubhead to drop during your swing, hitting the ground before the ball.

  5. Ball Position
    • Incorrect ball positioning, either too far back or forward in your stance, can lead to fat shots.

Effective Tips to Stop Hitting Fat Shots

Now that we’ve identified the main causes, let’s explore practical tips that can help you fix these issues:

1. Focus on Weight Transfer

  • Practice Weight Transfer Drill:
    • Start by placing a small cone or tee in front of your back foot. During your swing, focus on transferring your weight to your front foot and imagine your weight moving past the cone. This will ensure you shift your weight properly.

2. Maintain Proper Spine Angle

  • Check Your Setup:
    • Before every swing, check your spine angle. You should maintain a straight, stable spine. If you’re unsure, have a friend or instructor watch your setup to ensure you’re not leaning too far for or backward.

3. Work on Posture

  • Practice Good Posture:
    • Stand tall with a slight bend in your knees, feet shoulder-width apart. Aim to bend from your hips rather than your waist. Good posture plays a crucial role in allowing for a smooth swing.

4. Improve Timing and Release

  • Swing Timing Drill:
    • Try using a metronome or counting to ensure your swing is paced correctly. Start slowly and focus on releasing the clubhead naturally in your forward swing rather than forcing it.

5. Adjust Ball Position

  • Ball Position Guide:
    • Follow these simple guidelines for ball placement based on club type:

Club Ball Position (front-to-back)
Driver Inside Left Heel
3-Wood Just Inside Left Heel
Iron Center of Stance
Wedge Slightly Forward of Center

Additional Techniques to Consider

In addition to the above tips, here are advanced techniques that could also help:

Video Analysis

  • Record Your Swing:
    • Use your smartphone or a camera to record your swing. Analyze the footage to catch any mistakes you might not feel during the swing.

Training Aids

  • Use Alignment Sticks:
    • Aligning your body with two sticks can help improve your alignment and posture over the ball.

Professional Lessons

  • Seek Professional Help:
    • Sometimes, a professional instructor can offer insights and corrections you can’t see on your own. A lesson can provide you with personalized feedback and drills.

Key Takeaways

To summarize the core tips discussed in this guide on how to stop hitting fat shots in golf:

  • Weight Transfer: Always shift your weight to your front foot during your swing.
  • Spine Angle: Maintain a proper, stable spine angle at setup.
  • Posture: Stand tall with a good stance to allow for a natural swing.
  • Swing Timing: Focus on a smooth, paced swing with a natural club release.
  • Ball Position: Adjust ball placement depending on the club to facilitate better contact.

Frequently Asked Questions (FAQs)

1. What are the signs that I’m hitting fat shots too often?

Signs include a loud thump on impact, short distance, and consistently landing the ball short of the target.

2. Can fat shots happen on all types of swings?

Absolutely! Fat shots can occur regardless of whether you’re using a driver, iron, or wedge.

3. How can I practice these techniques effectively?

Setting aside dedicated practice time focused solely on addressing fat shots can improve your skills over time.

4. Should I focus more on my swing mechanics or my setup?

Both are important, but starting with a good setup can lead to better mechanics.

5. Are there specific drills to help with fat shots?

Yes, drills focused on weight transfer and stabilization of your spine can be particularly effective.

6. What should I do if I keep hitting fat shots despite trying to fix them?

Consider seeking professional coaching or using video analysis to uncover persistent flaws in your technique.

7. Is it normal to hit fat shots occasionally?

Yes, even experienced golfers hit fat shots from time to time. The goal is to minimize their occurrence.

8. Can my equipment affect fat shots?

Yes, having the wrong club or incorrect club length can negatively impact your swing, contributing to fat shots.

9. How often should I check my ball position?

Regularly evaluate your ball position, especially when switching clubs or if you notice changes in your performance.

10. Is it possible to completely eliminate fat shots?

While it’s unlikely to eliminate them entirely, consistent practice and adjustment will significantly reduce their frequency.


By following these strategies and remaining committed to your practice routine, you can significantly reduce the number of fat shots in your game. Enjoy your time on the course, and remember that improvement takes time! Happy golfing!