Category Archives: FAQs

Golfer putting on the green

happy learned how to putt

Golf, often dubbed as a sport of patience and precision, comes down to the fine line of putting. If you’ve ever played a round of golf, you know that sinking a putt can mean the difference between joy and frustration. So how do you ensure that your putts are consistent and accurate? This guide will take you through everything you need to know about putting, with a focus on techniques, tips, and common pitfalls to avoid.

Why Is Putting Important?

Putting is regarded as the most crucial part of the game. Statistics show that about 40% of your strokes in a round come from the putting green. Mastering your putting skills can drastically improve your overall game and lower your scores. Let’s break down how to putt effectively.

Golfer putting on the greenGolfer putting on the green

The Basics of Putting

1. Grip Your Putter Correctly

Your grip is your first point of contact with your putter. A correct grip can enhance control and consistency.

  • Using the Palm Grip: Hold the putter using your palms, allowing your fingers to wrap around the handle.
  • The Reverse Overlap Grip: Use your left hand to grip the putter firmly while letting your right pinky finger rest on top of your left index finger.

2. Stance and Alignment

Your stance should be comfortable yet stable:

  • Feet Position: Keep your feet shoulder-width apart.
  • Ball Position: Place the ball just inside your left heel.
  • Alignment: Your shoulders, hips, and feet should be aligned with your target line.

3. Finding the Right Stroke

The putting stroke consists of three main components: backswing, impact, and follow-through:

  • Backswing: Keep your arms straight and hinge your wrists slightly.
  • Impact: Make sure to hit the ball with the sweet spot of the putter.
  • Follow-through: Finish your stroke towards your target line.

Golf putting gripsGolf putting grips

Key Techniques to Enhance Your Putting

1. Use a Consistent Routine

Developing a pre-shot routine can enhance focus. Your routine can include:

  • Visualizing the line of the putt
  • Taking practice strokes
  • Focusing on your target

2. Reading the Green

Understanding how to read the green is critical for successful putting. Pay attention to:

  • Slope
  • Grain
  • The speed of the green

3. Practice Distance Control

Distance control is vital for getting the ball close to the hole. Use drills like:

  • The Ladder Drill: Place tees at different distances and practice sinking putts from each tee.
  • The Clock Drill: Place balls around the hole at equal distances and make short putts in succession.

4. Focus on the Speed of Your Putt

A putt that is too hard will miss the hole, while one that is too soft won’t make it. Practice consistently varying your tempo while practicing.

Reading the greenReading the green

Common Mistakes to Avoid

  • Poor Posture: Standing too stiff or hunched over can affect your stroke.
  • Overthinking: Sometimes, putting is about trusting your instincts.
  • Inconsistent Practice: Regular practice is crucial for improvement.

Putting Drills to Improve Your Game

Here are some effective drills that you can practice to refine your putting skills:

Drill Name Description
The Gate Drill Create a gate with two tees, practice putting through them.
The 5-Feet Challenge Place five balls at a distance of 5 feet from the hole and see how many you can make.
The 3-Putt Drill Set up a routine where you intentionally putt from 30, 15, and 5 feet away and track your makes versus misses.

Gear and Equipment

Choosing the Right Putter

Investing in the right putter can enhance your performance. Here’s what to consider:

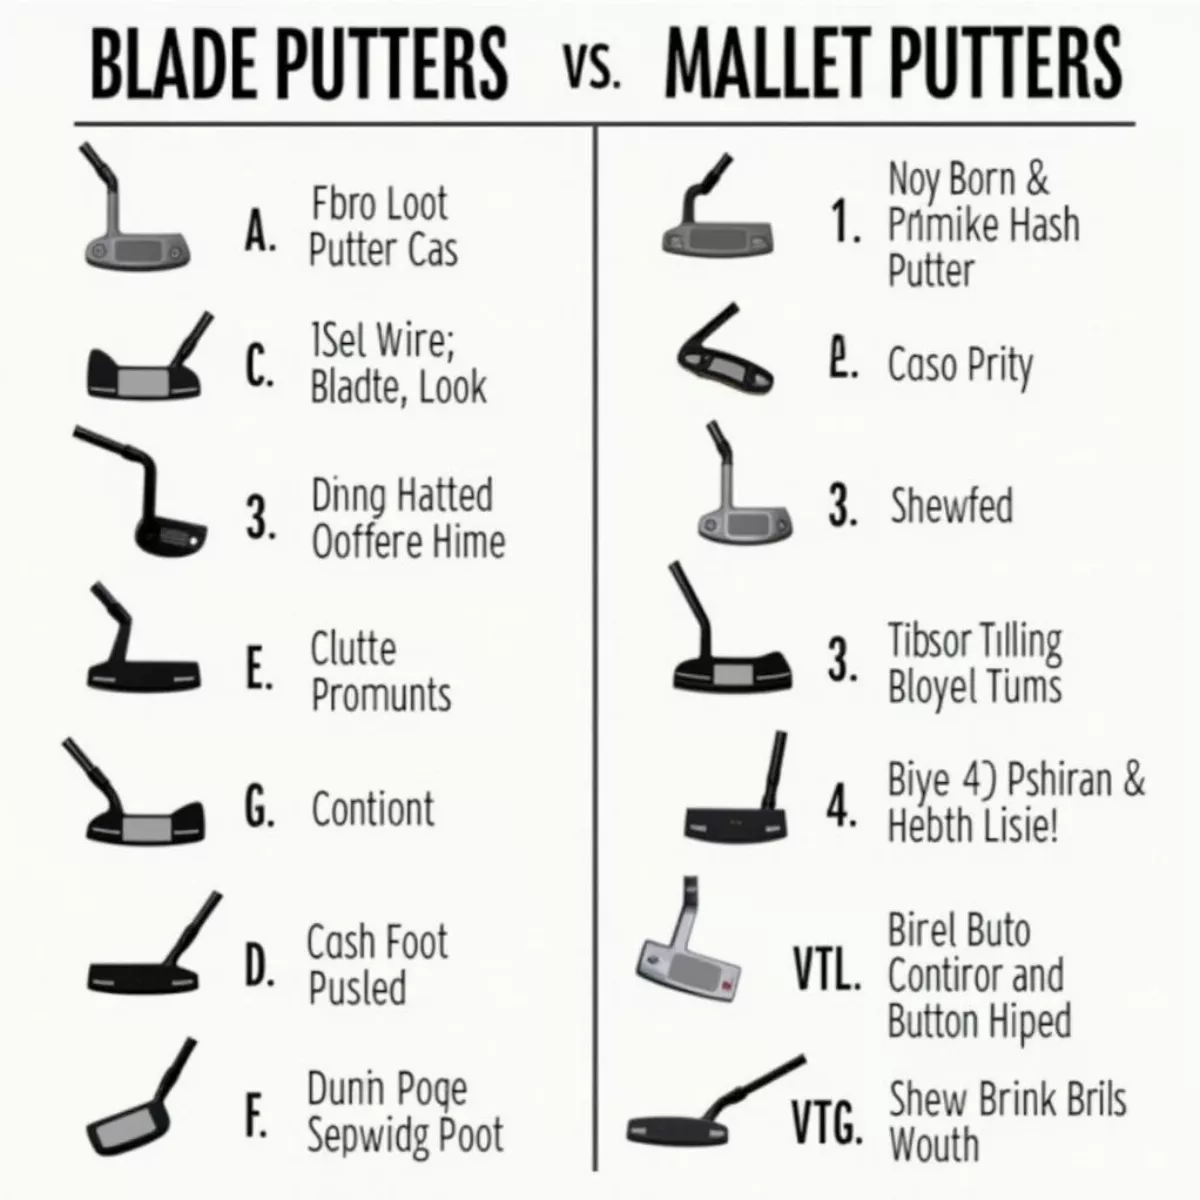
  • Putter Type: Blade vs. Mallet
  • Length: Choose a length that allows for comfortable alignment.
  • Grip Style: Different grips serve different putting styles.

Golf Balls Matter

The type of golf ball you use impacts your putting. Look for balls that provide good feel and control on the greens.

Types of golf puttersTypes of golf putters

Key Takeaways

  • Grip and stance are crucial; practice consistently for improvement.
  • Develop a pre-shot routine and learn to read the green effectively.
  • Regular practicing with drills can significantly enhance your skills.
  • Invest in quality gear that complements your putting style.

FAQs

1. How can I improve my putting accuracy?

Focus on your grip, stance, and alignment. Regular practice and learning to read greens will also improve accuracy.

2. What is the best way to practice putting at home?

Consider using a putting mat. You can also use cups or designated targets to create a mini putting green.

3. How often should I practice my putting?

Aim for at least 20-30 minutes a couple of times a week to see improvements.

4. Should my putt be firm or soft?

It depends on the distance. Longer putts usually require a firmer stroke, while shorter ones can be softer.

5. What type of putt is best for beginners?

A mallet putter is generally more forgiving and easier to align, making it a good choice for beginners.

6. Can I use my driver technique for putting?

While some aspects overlap, putting requires a more delicate touch and a focus on speed and line.

7. How important is reading the green?

Reading the green is essential to understanding slopes and contours, which is necessary for accurate putting.

8. Any tips for managing pressure when putting?

Practice mindfulness or visualization techniques to handle pressure better when you’re on the course.

By incorporating these techniques and committing to regular practice, you’ll find yourself mastering the art of putting in no time. Whether you’re a seasoned golfer or just starting out, every little bit of improvement can make your time on the course much more enjoyable and rewarding. Good luck, and remember: practice makes perfect!

Friday Night Lights Movie Poster

friday night lights movie vs show

When we think about high school football, Friday Night Lights often comes to mind. Originally a book by H.G. Bissinger, this compelling story transitioned into a movie that captured the hearts of many, and later, a television series that expanded the narrative depth. As a fan, you may wonder how these two adaptations compare in terms of themes, characters, and emotional resonance. In this article, we’ll conduct a detailed comparison between the Friday Night Lights movie and the television show, helping you understand which one might be more appealing to you.

A Brief Overview

Before we dive in, here’s a quick summary table to highlight the distinctions between the movie and the show.

Feature Movie (2004) TV Show (2006-2011)
Runtime 118 minutes 5 seasons, 76 episodes
Format Feature film Episodic television
Focus Centralized on the 1988 Permian High School team Broader narrative on various characters’ lives
Tone More dramatic and focused on football Rich character development and subplots
Reception Critically acclaimed, received an Oscar nod Cult classic, won several awards

The Movie: A Snapshot

Plot and Themes

Friday Night Lights, directed by Peter Berg, follows the true story of the Permian High School Panthers in Odessa, Texas. The film explores the pressures of high school football, tackling themes of community, dreams, and personal sacrifices. The narrative centers on Coach Gaines, played by Billy Bob Thornton, and the team’s struggles against both athletic and personal adversities.

Friday Night Lights Movie PosterFriday Night Lights Movie Poster

Key Characters

  • Coach Eric Taylor – A dedicated coach dealing with high expectations.
  • Boobie Miles – A standout player facing injury and hardship.
  • Mike Winchell – The struggling quarterback embodying the pressure to succeed.

Strengths

  • Emotional Power: The film is often praised for its realistic portrayal of the pressures on high school athletes.
  • Cinematography: The cinematography captures the essence of small-town Texas, immersing viewers in the culture of high school football.
  • Resonant Themes: The themes of ambition, failure, and resilience resonate on a personal level.

Inspirational Quotes from the Movie

"There’s a magic in the night. It’s not about winning; it’s about the heart on the field."

The Show: An In-Depth Look

Plot and Narrative Structure

The Friday Night Lights TV series takes the fundamental themes from the movie and expands upon them, turning the spotlight on numerous characters, their struggles, and the environment of a small-town community. With an ensemble cast including Kyle Chandler as Eric Taylor and Connie Britton as Tami Taylor, the series dives deeply into the relationships, dreams, and realities of its characters.

Friday Night Lights TV Show PosterFriday Night Lights TV Show Poster

Key Characters

  • Eric Taylor – The moral backbone of the series, wrestling with team pressures and family dynamics.
  • Tami Taylor – A strong female character balancing her career and family life with grace.
  • Tim Riggins – The quintessential bad boy with a heart, facing his own demons and showcasing character growth.

Strengths

  • Character Depth: The show dives much deeper into the lives of its characters, allowing viewers to form lasting connections.
  • Social Issues: It tackles a broad range of issues such as racism, economic disparity, and teenage struggles.
  • Diverse Storylines: Multiple story arcs unfold simultaneously, making each episode feel rich and immersive.

Noteworthy Quotes from the Show

"It’s not about how you look. It’s about what you believe."

Unique Aspects

  • Realism: The television series is acclaimed for its realistic portrayal of high school life and its complexities.
  • Cultural Impact: It helped to shape the narrative around American football and its cultural significance, paving the way for discussions surrounding sports and youth.

Movie vs. Show: A Comparative Analysis

Key Differences

  1. Length and Depth:
    • The film is tightly woven with a singular focus, while the TV series expands the narrative across many characters and subplots.
  2. Character Development:
    • The movie presents a few characters in a deep manner, while the show allows for expansive exploration of many different characters, making them relatable and multi-dimensional.
  3. Pacing and Structure:
    • The movie has a swift pacing that leads directly to the climax, while the show takes a slower, episodic approach, savoring small details and character backstories.
  4. Themes and Issues:
    • The film focuses primarily on sports, while the series intertwines personal struggles and social commentary more prominently.

Friday Night Lights Movie vs ShowFriday Night Lights Movie vs Show

Audience Reception

Both adaptations have received critical acclaim but cater to different audiences:

  • Fans of Sports Drama: May find the movie more approachable due to its digestible runtime and focus on the sport itself.
  • Character-Driven Viewers: May prefer the series for its slow-burn character arcs and immersive storytelling that extends beyond the football field.

Conclusion

In the debate of Friday Night Lights: Movie vs. Show, there’s no clear winner—each has its distinct charm and appeal depending on what you are looking for. If you crave a short, impactful sports drama, the movie provides a heartfelt story that doesn’t overstretch its bounds. Conversely, if you’re interested in character exploration and social issues interwoven with the world of high school football, the series offers a more comprehensive and immersive experience.

Key Takeaways

  • Format Matters: The movie is a single, focused narrative, whereas the show provides an encompassing view of various characters and their journeys.
  • Character Depth: The TV series excels in character development, giving you a richer experience and allowing you to connect with a wider range of personalities.
  • Themes: Both adaptations explore important themes but cater to them in different depths and angles, with the movie focusing more on the sport itself and the show delving deeper into personal and societal issues.
  • Choose Based on Mood: Your preference may depend on whether you prefer a quick emotional punch or a seasoned exploration of life through characters.

FAQ Section

1. Is the movie based on a true story?

Yes, the movie and the series are based on the true story of the 1988 Permian High School Panthers, though they take creative liberties in their storytelling.

2. Which is better: the movie or the TV show?

It depends on your taste. The movie offers a compact and impactful narrative; the series gives you a broader and more immersive exploration of characters and themes.

3. How many seasons does the TV show have?

The TV show has a total of five seasons.

4. Are the characters the same in both adaptations?

Some characters exist in both adaptations, but their development and storylines often differ significantly to fit the different formats and focuses of the movie and the TV show.

5. What age is appropriate to watch Friday Night Lights?

It is generally suitable for teens and older viewers, though some mature themes and content may require discussion and parental guidance.

6. Can I watch the show without seeing the movie?

Absolutely! The show stands on its own and can be enjoyed without prior knowledge of the movie, though there may be some references or Easter eggs that fans of the film will appreciate.

7. Is Friday Night Lights available for streaming?

Yes, it is available on various streaming platforms depending on your region. Check your local listings to find out where you can watch it.

8. What are the key themes addressed in the series?

The series delves into family dynamics, community, identity, ambition, social issues, and the pressures and triumphs of small-town life, all set against the backdrop of high school football.

9. Does the show cover any social issues?

Yes, it touches on complex social issues such as racism, classism, economic disparity, and personal identity, using the microcosm of a small Texas town to explore these themes in a nuanced and thought-provoking way.

10. Are there any spin-offs or related content?

As of now, no official spin-offs exist, but the legacy of Friday Night Lights continues to impact sports and drama storytelling, and its realistic portrayal of high school life and the power of community continues to resonate with audiences today.

In conclusion, the debate between Friday Night Lights the movie and the show will depend largely on your viewing preferences and what you are looking for in a story. Dive into either one, and you’ll find a rich world filled with heart, struggle, and the pursuit of dreams. Happy viewing!

Eisenhower Park Golf Driving Range

eisenhower park golf driving range

If you’re a golf enthusiast or just starting out, Eisenhower Park Golf Driving Range offers a fantastic environment to improve your skills, unwind, and connect with fellow golfing fans. Nestled in the beautiful Eisenhower Park, this driving range is more than just a place to hit balls—it’s a destination to learn, socialize, and enjoy the sport you love. In this guide, we’ll delve into what makes this driving range a must-visit, discuss tips for making the most of your experience, and answer some commonly asked questions.

What Is Eisenhower Park Golf Driving Range?

Eisenhower Park’s Golf Driving Range is a state-of-the-art facility located in East Meadow, Long Island, New York. Named after President Dwight D. Eisenhower, the park spans over 930 acres, including lush landscapes and various recreational facilities. The driving range itself features:

  • Well-maintained grass tees
  • Covered hitting stations
  • Target greens at varying distances
  • A practice bunker and chipping area
  • Golf lessons for beginners to advanced players

Why Choose Eisenhower Park Golf Driving Range?

Eisenhower Park Golf Driving Range stands out for numerous reasons:

  1. Accessibility: Located within a spacious park, it’s easily reachable and offers ample parking space.
  2. Quality Facilities: The driving range is renowned for its excellent conditions—similar to playing on a real golf course.
  3. Affordability: Options to pay for buckets of balls make it budget-friendly for everyone.
  4. Family-Friendly: Facilities accommodate golfers of all ages, making it an ideal spot for family outings.

Eisenhower Park Golf Driving RangeEisenhower Park Golf Driving Range

Preparing for Your Visit

Before you go, it may help to prepare. Consider the following tips:

  • What to Bring:
    • Your own clubs (rentals are available)
    • Comfortable clothing and proper footwear
    • Sunscreen and water to stay hydrated
  • What to Expect:
    • A friendly atmosphere
    • Opportunities to meet other golf lovers
    • Professional coaching if you’re looking for guidance

Tips for Maximizing Your Driving Range Experience

1. Set Your Goals

Whether you’re looking to perfect your swing, improve your short game, or just enjoy hitting a few balls, setting specific goals can enhance your experience. Start with SMART goals—Specific, Measurable, Achievable, Relevant, Time-bound.

2. Practice Correct Techniques

Utilize the range’s practice bunker and chipping area to hone your technique. This is the perfect opportunity to refine your swing mechanics.

  • Take your time: There’s no rush!
  • Focus on accuracy, not just distance.
  • Experiment with different clubs and shots.

Golfer Practicing Bunker ShotGolfer Practicing Bunker Shot

3. Take a Lesson

If you’re serious about your game, consider booking a lesson with a professional instructor. Individual attention can offer tailored feedback, instantly improving your performance.

4. Use Video Analysis

Some ranges offer video analysis of your swing. This can provide powerful insights into areas of improvement.

5. Play Golf Games

To make practice fun, try various golf games. Challenge yourself:

  • Long Drive Contest: See how far you can hit!
  • Target Practice: Aim for specific targets on the range.
  • Taking turns with friends: It promotes camaraderie and can make practice enjoyable.

6. Follow-Up

After your practice session, jot down a few notes about what worked, what didn’t, and what you’ll focus on next time. Keeping a golf journal may help you track your progress consistently.

Friends Enjoying Golf Game at Driving RangeFriends Enjoying Golf Game at Driving Range

FAQs about Eisenhower Park Golf Driving Range

Q1: What are the hours of operation?

A: The range generally opens at 8 AM and closes at sunset. Check the official website or call for specific hours based on the season.

Q2: Are there golf lessons available?

A: Yes! They offer lessons for all skill levels—contact the facility for more information.

Q3: Can I rent clubs?

A: Yes, rentals are available, but it’s always best to bring your own if you can.

Q4: Is there a fee to use the driving range?

A: Yes, there’s a fee, but it’s very affordable. The cost usually depends on the size of the bucket of balls you choose.

Q5: Are there any age restrictions?

A: No, golfers of all ages are welcomed! There are family-friendly options available.

Q6: Is there food or drink available?

A: Yes, there’s usually a concession stand offering refreshments to keep you energized.

Q7: Can I bring my own drinks?

A: Bringing your own drinks is allowed, but please check specific park rules regarding open containers.

Q8: Is there a dress code?

A: While there isn’t an official dress code, it’s advisable to wear comfortable golf attire.

Q9: What if it rains?

A: The driving range may close during inclement weather. Always call ahead to confirm.

Q10: Can I host a party or event at the driving range?

A: Yes, inquire about group lessons or event hosting options with the management.

Key Takeaways

  1. Eisenhower Park Golf Driving Range is a well-maintained and accessible facility perfect for golfers of all skill levels.
  2. Set specific goals to enhance your practice experience and maximize improvement.
  3. Taking lessons and utilizing video analysis can dramatically accelerate your progress.
  4. Make practice enjoyable by playing games and challenging friends.
  5. Always stay prepared—bring the right equipment, wear appropriate clothing, and stay hydrated.

In conclusion, Eisenhower Park Golf Driving Range is not just a space to hit golf balls; it’s an environment to develop your skills, enjoy the sport, and make new friends. Whether you are a seasoned golfer or just picking up the game, you will find welcoming staff, excellent facilities, and a joyful atmosphere that ensures your experience will be memorable. So, grab your clubs, head out to Eisenhower Park, and begin your golfing journey today!

Golfer Driving The Ball

drive for show putt for dough

Golf is a game rich with strategy, precision, and mental fortitude. One phrase often echoes among players, both amateur and professional: “Drive for show, putt for dough.” This adage encapsulates an essential truth in golf: while a strong drive can impress onlookers, it’s the finesse and skill around the greens that truly determine a player’s success. In this article, we will dive deep into understanding this saying, how to enhance your putting game, and why it’s vital to ranking in golf.

The Importance of the Drive

Driving is often the first impressive spectacle of golf. A long, straight drive can set the tone for success on a hole. This makes it understandable why so many players focus on developing this skill early in their golfing journey.

  • Key Factors for an Effective Drive:
    • Grip: A proper grip helps in controlling the ball’s direction.
    • Stance: A balanced stance creates stability during the swing.
    • Swing Path: A consistent swing path affects ball flight and distance.

Golfer Driving The BallGolfer Driving The Ball

However, the drive is merely a tool, not the entire toolbox. Consider a round of golf: the drive gets you to the fairway, but the second shot gets you closer to the hole. If you’re hoping to lower your score, focusing just on the long game may lead to disappointment.

The Real Game-Changer: Putting

Putting is where the magic happens. It’s where players often make or break their game. While many players dream of bomb drives, the truth is that most strokes are taken on the greens. In fact, the average golfer spends approximately 40% to 50% of their round putting.

Understanding Putting

To fully comprehend the importance of putting, it can be helpful to break down its components:

  • Green Reading: Understanding the layout and slopes of the green.
  • Alignment: Ensuring your body and putter are aligned correctly toward the hole.
  • Stroke Mechanics: Developing a consistent and repeatable stroke.

Golfer Lining Up A PuttGolfer Lining Up A Putt

Why Putt for Dough?

The phrase “putt for dough” emphasizes that while you may impress with long drives, it’s the putting that leads to scoring.

  • Critical Stats: Research shows that the lower your putts per round, the lower your scores. Many professionals have outright stated that when they focus on their putting, they perform immeasurably better.
  • Scoring Potential: In tournaments, it’s not uncommon for a player who excels in putting to overtake someone who drives well but misses numerous short putts. As the old saying in golf goes, “Drive for show; putt for dough.”

Putting Strategies to Improve Your Game

Here are some actionable strategies to enhance your putting and take your golf game to the next tier.

1. Develop a Consistent Routine

Creating a consistent pre-putt routine can help in building confidence.

  • Visualize Your Line: Stand behind the ball and visualize how you want the ball to roll towards the hole.
  • Alignment: Ensure your feet, hips, and shoulders are aligned to your target line.

Golfer Practicing Putting DrillsGolfer Practicing Putting Drills

2. Practice Distance Control

Good putting isn’t just about sinking the ball in the hole; it’s also about controlling how far it goes.

  • Drills to Try:
    • Ladder Drill: Place tees at various distances (1, 2, 3, etc. feet) and try to putt to each, noticing how much speed you need.
    • Circle Drill: Place balls in a circle around the hole and practice making putts from various angles.

3. Read the Greens Like a Pro

Understanding how to read the greens is crucial to successful putting.

  • Look for Breaks: This is where the green slopes, and the ball will naturally move in that direction.
  • Watch Other Players: Observe how the ball reacts on the green when others putt ahead of you.

4. Invest in Quality Equipment

Using a quality putter can significantly impact your game.

  • Putter Types:
    • Blade Putters: Offers more feel and control.
    • Mallet Putters: Provides more stability for off-center hits.

Golf Putters CollectionGolf Putters Collection

5. Mental Game

The mind plays a pivotal role in putting. It’s as much a mental game as it is physical.

  • Stay Calm and Focused: Take a deep breath and clear your mind before each putt.
  • Positive Visualization: Imagine the ball rolling smoothly into the hole.

Key Takeaways

  • Balance Your Skills: While driving impressively is vital, focus primarily on improving your putting.
  • Consistent Practice: Allocate time for putt practice to elevate your game and score.
  • Understand Your Greens: Developing a keen sense of reading the greens will lead to more successful putts.
  • Mental Fortitude: Work on mental strategies to maintain focus and calm during your rounds.
  • Quality Equipment: Choose the right putter that suits your style of play.

FAQ Section

1. Is driving more important than putting in golf?
While driving can create excitement, putting is statistically more critical for lowering scores.

2. How can I practice putting at home?
Use a carpet or a smooth floor to create a mini-golf practice area. Roll balls toward a target.

3. What putter is best for beginners?
Beginner-friendly mallet putters often provide more forgiveness on off-center hits.

4. How often should I practice my putting?
Aim to practice your putting at least 2-3 times a week to see improvement.

5. How can I overcome nerves while putting?
Develop a consistent pre-putt routine to calm your nerves, ensuring you focus on your target.

6. What’s more important, speed or accuracy in putting?
Both are important. Strive for a balance between making the putt and controlling the speed.

7. Should I watch the ball or the hole when putting?
Most pros suggest focusing on the hole or the target line, especially for short putts.

8. How do I know if my grip is correct?
Your grip should feel comfortable, with your palms facing each other and your hands working together.

9. Can I improve my putting with visual aids?
Yes, using alignment aids or even contrast colors can help in enhancing your aiming and focus.

10. What is the average number of putts per round for amateurs?
Most amateur golfers average between 30 to 40 putts per round.

In summary, the phrase “drive for show, putt for dough” serves as a reminder of the true heart of the game: putting. By focusing on putting and practicing effectively, you can turn your golf game around and start seeing tangible improvements in your results. Remember, excellence in golf is more about consistency and finesse than mere distance. So grab your putter, hit the greens, and practice your way to better scores!

New England Clam Chowder

clam chowder in a can

When you think about comfort food, what comes to mind? For many, clam chowder is a delicious choice that warms both the belly and the heart. For those who might not have the time—or the culinary skills—to whip up a pot from scratch, clam chowder in a can is the next best thing. In this article, we’ll explore what clam chowder is, its varieties, the perks of canned versions, and some culinary tips to elevate your canned clam chowder experience.

What is Clam Chowder?

Clam chowder is a creamy soup that originated from the coastal regions, particularly New England. Traditionally made with clams, potatoes, onions, and sometimes bacon, this dish embodies a rich, savory goodness. Over time, various regional twists have emerged, leading to different varieties of clam chowder.

Popular Varieties of Clam Chowder

  1. New England Clam Chowder:
    • Description: Creamy, rich, and smooth, this version is often thicker and made with dairy.
    • Common Ingredients: Clams, potatoes, onions, butter, and heavy cream.
  2. Manhattan Clam Chowder:
    • Description: A tomato-based version that is less creamy and has a tangier flavor.
    • Common Ingredients: Clams, tomatoes, celery, carrots, and spices.
  3. Rhode Island Clam Chowder:
    • Description: A clear broth version that, like Manhattan chowder, is not creamy.
    • Common Ingredients: Clams, water, potatoes, and herbs.
  4. Long Island Clam Chowder:
    • Description: Combines elements from both New England and Manhattan styles.
    • Common Ingredients: Cream, tomatoes, and clams.

New England Clam ChowderNew England Clam Chowder

The Rise of Canned Clam Chowder

In the busy world we live in, convenience is king. That’s where canned clam chowder shines. Here are some advantages of opting for canned versions:

  • Quick and Easy: Ready-to-eat in minutes—simply heat it and serve.
  • Consistent Taste: Canned chowders offer a reliable flavor profile.
  • Long Shelf Life: Stocking up on canned chowder allows you to have this comfort food on hand any time.
  • Affordable: Often more budget-friendly than freshly made chowder.

The Best Canned Clam Chowders

When selecting a canned clam chowder, it can be helpful to know which brands stand out. Below are some top options to consider:

Brand Variety Flavor Profile Price Range
Chunky New England Thick & Creamy $$
Campbell’s New England Classic & Savory $
Progresso New England Bold & Flavorful $
Campbell’s Manhattan Tomato-based & Zesty $
Clam Chowder Ru Various flavors Rich & Wholesome $$

Key Tip: Always check the ingredients label! Look for chowders with fewer preservatives and real ingredients.

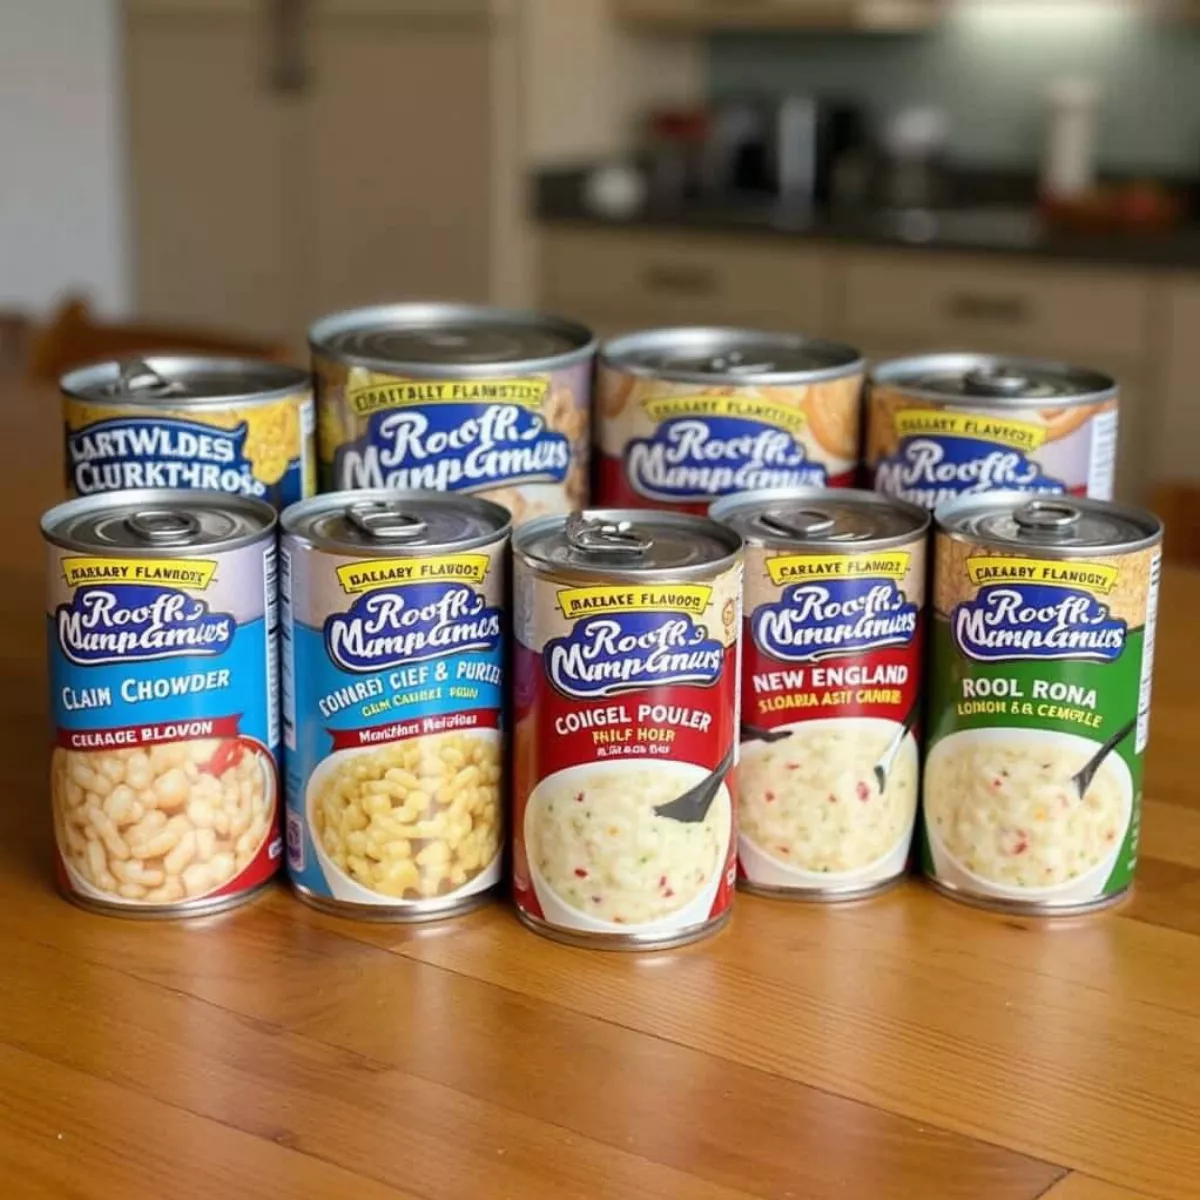
Assortment of Canned Clam Chowder BrandsAssortment of Canned Clam Chowder Brands

Personalizing Your Canned Clam Chowder

While canned clam chowder is delightful on its own, you can easily enhance it to make it even more scrumptious. Here are some tips:

  • Add Fresh Ingredients: A handful of fresh herbs (like parsley or thyme) can elevate the flavor. You might also include some diced celery or carrots for added texture.
  • Tweak the Creaminess: If you love a creamier texture, consider adding a splash of heavy cream or milk.
  • Spice It Up: For those who enjoy a bit of heat, a dash of red pepper flakes or hot sauce can do wonders.
  • Top It Off: Crumbled bacon, oyster crackers, or a squeeze of lemon just before serving adds a punch!

A Simple Recipe Idea: Clam Chowder with a Twist

Here’s a fun and easy recipe to kick up your canned clam chowder game:

Ingredients:

  • 1 can of New England clam chowder
  • 1 cup of fresh spinach
  • 1 small diced potato
  • 1 tablespoon of olive oil
  • ½ cup heavy cream
  • Salt and pepper to taste

Instructions:

  1. Heat the Olive Oil: In a pot, heat olive oil over medium-high heat.
  2. Cook the Potato: Add the diced potato and sauté for about 5 minutes.
  3. Add Canned Chowder: Pour in the canned clam chowder and stir well.
  4. Incorporate Spinach: Add the spinach and cream, and allow to simmer for an additional 5-10 minutes.
  5. Season to Taste: Adjust seasoning with salt and pepper, serve hot, and enjoy!

Personalized Canned Clam ChowderPersonalized Canned Clam Chowder

Clam Chowder in Culture

Clam chowder has more than just a place in our stomachs—it’s woven into American culture. From chowder festivals in Massachusetts to its role in seafood restaurants across the country, this dish is a symbol of coastal cuisine. In fact, many chefs experiment with variations, creating unique spins that embrace local flavors and cultures.

Quote: “Clam chowder isn’t just food; it’s a hug in a bowl.”

Clam Chowder Nutrition

While clam chowder is delicious, understanding its nutritional value can help you incorporate it wisely into your diet. General values (based on a serving of canned New England clam chowder):

  • Calories: 250–300
  • Proteins: 10–15 grams
  • Carbohydrates: 30–40 grams
  • Fats: 10–15 grams

Key Reminder: Always check specific nutritional labels, as variations exist between brands.

Key Takeaways

  • Variety Matters: Explore different types of clam chowder—New England, Manhattan, etc.
  • Canning Convenience: Canned chowders offer excellent convenience with a long shelf life.
  • Customization is Key: Enhance your canned clam chowder with fresh ingredients to suit your taste.
  • Nutritional Awareness: Be mindful of the nutritional content in canned soups.

FAQ

1. Is canned clam chowder healthy?

Canned clam chowder can be part of a healthy diet, but it’s essential to check for sodium and preservative levels.

2. How long does canned clam chowder last?

Unopened canned chowder can last for several years, while opened cans should be refrigerated and consumed within 3-4 days.

3. Can I freeze leftover clam chowder?

While it’s not recommended, you can freeze clam chowder, but it may change its texture upon thawing.

4. What should I serve with clam chowder?

Consider serving clam chowder with crusty bread, a simple salad, or even a side of sautéed vegetables.

5. How do I thicken canned clam chowder?

You can thicken clam chowder by adding a slurry of cornstarch and water, or by including some grated cheese.

6. Can I make clam chowder from scratch?

Absolutely! There are numerous recipes available for making clam chowder from scratch if you’re interested in a homemade version.

7. Are there vegan options for clam chowder?

Yes! Many brands offer plant-based versions or you can create your own using plant-based ingredients.

8. What’s the best way to heat canned clam chowder?

Heat it on the stove over low to medium heat, stirring regularly, or in the microwave for 2-3 minutes.

9. Can I add other seafood to my clam chowder?

Certainly! Feel free to experiment by adding shrimp, scallops, or fish to your chowder for extra flavor.

10. How do I store unused clam chowder?

Store unused clam chowder in an airtight container in the refrigerator for up to four days.

Enjoying Clam Chowder on a Cold DayEnjoying Clam Chowder on a Cold Day

In conclusion, clam chowder in a can is a delightful, convenient option that can easily fit into your busy lifestyle. With some creative touches and a little love, you can enjoy this comforting dish anytime. So, open a can, heat it up, and indulge in the goodness!

Woman Wearing an Oversized Sweater

ask me how big it was sweater

When it comes to fashion, few pieces are as versatile and timeless as the sweater. Among the variety of styles available, there’s a specific wave of designs that have taken the fashion world by storm—oversized sweaters known for their comfort and trendiness. Recently, one particular phrase has started to capture attention: “ask me how big it was.” This catchy slogan is not merely an attention-grabbing motto; it symbolizes the grandeur and charming aesthetics of oversized sweaters. Today, we’ll dive deep into why this trend is booming, how to style these sweaters, and why you should consider adding one to your wardrobe.

The Comeback of Oversized Sweaters

Why the Hype?

Oversized sweaters are back, and they’re bigger than ever! But why this sudden resurgence?

  • Comfort Meets Style: The oversized look celebrates comfort while ensuring you don’t compromise on aesthetics. It’s the best of both worlds!
  • Tailored for All: Sweaters of this kind can be worn by anyone, regardless of body type, and work well for various occasions—from casual outings to cozy movie nights at home.
  • Social Media Influence: Platforms like Instagram and TikTok showcase influencers and everyday folks alike wearing cozy, oversized sweaters, driving demand for this style.

Woman Wearing an Oversized SweaterWoman Wearing an Oversized Sweater

Different Styles to Explore

When you hear “ask me how big it was,” you might wonder about the options available. Here are several popular styles:

Style Description Best For
Chunky Knit Bulky, warm, makes a bold statement. Cold weather, casual days
Cardigan Style Open or button-up, versatile and adjustable. Layering, office, or casual
Cowl Neck Features a slouchy neck for added comfort. Dressy casual occasions
Hooded Sweater Combines warmth of a hoodie with a stylish twist. Casual outings
Turtleneck Offers elegance and warmth; great for layering. Formal settings, layers

These various styles offer ample room for creativity and personalization in your wardrobe.

Styling Your Oversized Sweater

So, how do you rock this fashion-forward trend? Here are several tips to help you master the oversized silhouette:

1. Pair with Fitted Bottoms

To balance the oversized top, consider pairing your sweater with fitted bottoms—think skinny jeans or tailored trousers. This creates a harmonious look with structured lines.

2. Layer for Depth

Oversized sweaters also work well with layers. Opt for a fitted long-sleeve shirt underneath, or add a light, structured jacket to add dimension.

Outfit Ideas with Oversized SweatersOutfit Ideas with Oversized Sweaters

3. Accessorize Wisely

Accessories can make or break an outfit. A chunky belt can accentuate your waist when wearing an oversized sweater, while a beanie can enhance the cozy vibe.

4. Footwear Matters

Your choice of footwear can set the tone for your look. Pair oversized sweaters with ankle boots for casual outings or sleek sneakers for a laid-back day.

5. Play with Patterns and Textures

Feel free to mix and match textures and patterns. A striped oversized sweater paired with textured skinny jeans can create an eye-catching, layered appearance.

How to Care for Your Oversized Sweater

Proper Washing Techniques

  • Follow Care Labels: Always check the washing instructions to ensure longevity.
  • Use Gentle Cycle: Machine washing on a gentle cycle can prevent stretching and distortions.
  • Cold Water: Opt for cold water to maintain color vibrancy and fabric integrity.

Drying Best Practices

  • Air Dry: It’s best to air dry your oversized sweater to prevent shrinkage.
  • Lay Flat: Laying the sweater flat helps it maintain its shape.

Storing Tips

  • Avoid Hangers: Store oversized sweaters folded instead of hanging to prevent unwanted stretching.
  • Breathable Storage: Use breathable storage containers to keep your sweater in top condition.

Key Takeaways

  • Oversized Sweaters blend comfort and style, making them a must-have.
  • Pairing with fitted bottoms can balance your silhouette.
  • Proper care and maintenance extend the life of your sweater.
  • Experiment with different styles, textures, and accessories to keep your overall look chic.

Frequently Asked Questions (FAQs)

1. What sizes should I buy if I want an oversized sweater?

You generally want to size up from your normal size, but many brands offer specific oversized sizing. It’s best to check their sizing guides.

2. Can I wear oversized sweaters in warmer weather?

Absolutely! Look for lightweight fabrics and breathable materials to keep cool.

3. Do oversized sweaters suit all body types?

Yes! The beauty of oversized styles is their versatility; they look flattering across various body shapes.

Women with Different Body Types Wearing Oversized SweatersWomen with Different Body Types Wearing Oversized Sweaters
4. How can I style an oversized sweater for work?

Pair it with tailored trousers and heeled boots for a smart-casual look. Layer with a structured blazer for a polished finish.

5. Are there any occasions where oversized sweaters are inappropriate?

While generally agnostic to occasion, it’s best to avoid them in very formal settings unless styled appropriately.

6. How do I know if the oversized sweater fits well?

A good fit should allow you to comfortably move your arms while the length comfortably covers your hips or thighs.

7. Can oversized sweaters be dressed up?

Definitely! With the right accessories, fitted bottoms, and a chic pair of shoes, your oversized sweater can transition into a dressed-up look.

8. What should I avoid when styling an oversized sweater?

Avoid pairing with overly baggy bottoms; the goal is to achieve a balance.

9. How do I choose colors for my oversized sweater?

Stick to neutral colors for versatility. If you’re feeling bold, vibrant hues or patterns can make a statement!

10. What type of accessories pair well with oversized sweaters?

Chunky jewelry, scarves, and belts work wonderfully to enhance your sweater outfit.

By incorporating these insights into your wardrobe, you’ll master the art of styling an oversized sweater, allowing you to flaunt the trendy “ask me how big it was” look with confidence. Don’t hesitate—dive into the oversized sweater trend today!

Allen Edmonds Shoes

allen edmonds how to lace

When it comes to style and elegance, Allen Edmonds shoes are in a league of their own. Known for their craftsmanship, durability, and classic designs, these shoes deserve the utmost attention—not just when it comes to choosing the right pair but also in how to lace them. Lacing techniques can make a significant difference in both the fit and appearance of your shoes. In this guide, we’ll explore various lacing methods, tips, and best practices that will have you stepping out in style.

Why Proper Lacing Matters

Lacing your shoes properly ensures a comfortable fit and can significantly impact your foot’s health. Poorly laced shoes can lead to discomfort, reduced support, and even foot ailments. Plus, the right lacing technique can elevate your shoe game and transform a polished look.

The Benefits of Proper Shoe Lacing

  • Improved Comfort: A well-laced shoe will provide better support and reduce the risk of blisters.
  • Enhanced Style: The right lacing technique can complement the aesthetic of your Allen Edmonds shoes.
  • Increased Longevity: Proper lacing can help maintain the structure of your shoes, ensuring they last longer.

Allen Edmonds ShoesAllen Edmonds Shoes

Getting Started: Types of Shoelaces

Before diving into lacing techniques, it’s essential to understand that Allen Edmonds typically comes with high-quality waxed laces. Here’s a quick guide on the types of laces that are ideal for these shoes:

Type of Lace Description
Waxed Laces Durable, less prone to fraying, and holds knots well. Ideal for a polished look.
Flat Laces Often used in casual styles, provides a laid-back vibe.
Round Laces Adds a more casual touch and is often less formal.

Tip: Choose your lace material based on both the intended use and the style of your shoe.

Different Lacing Techniques for Allen Edmonds

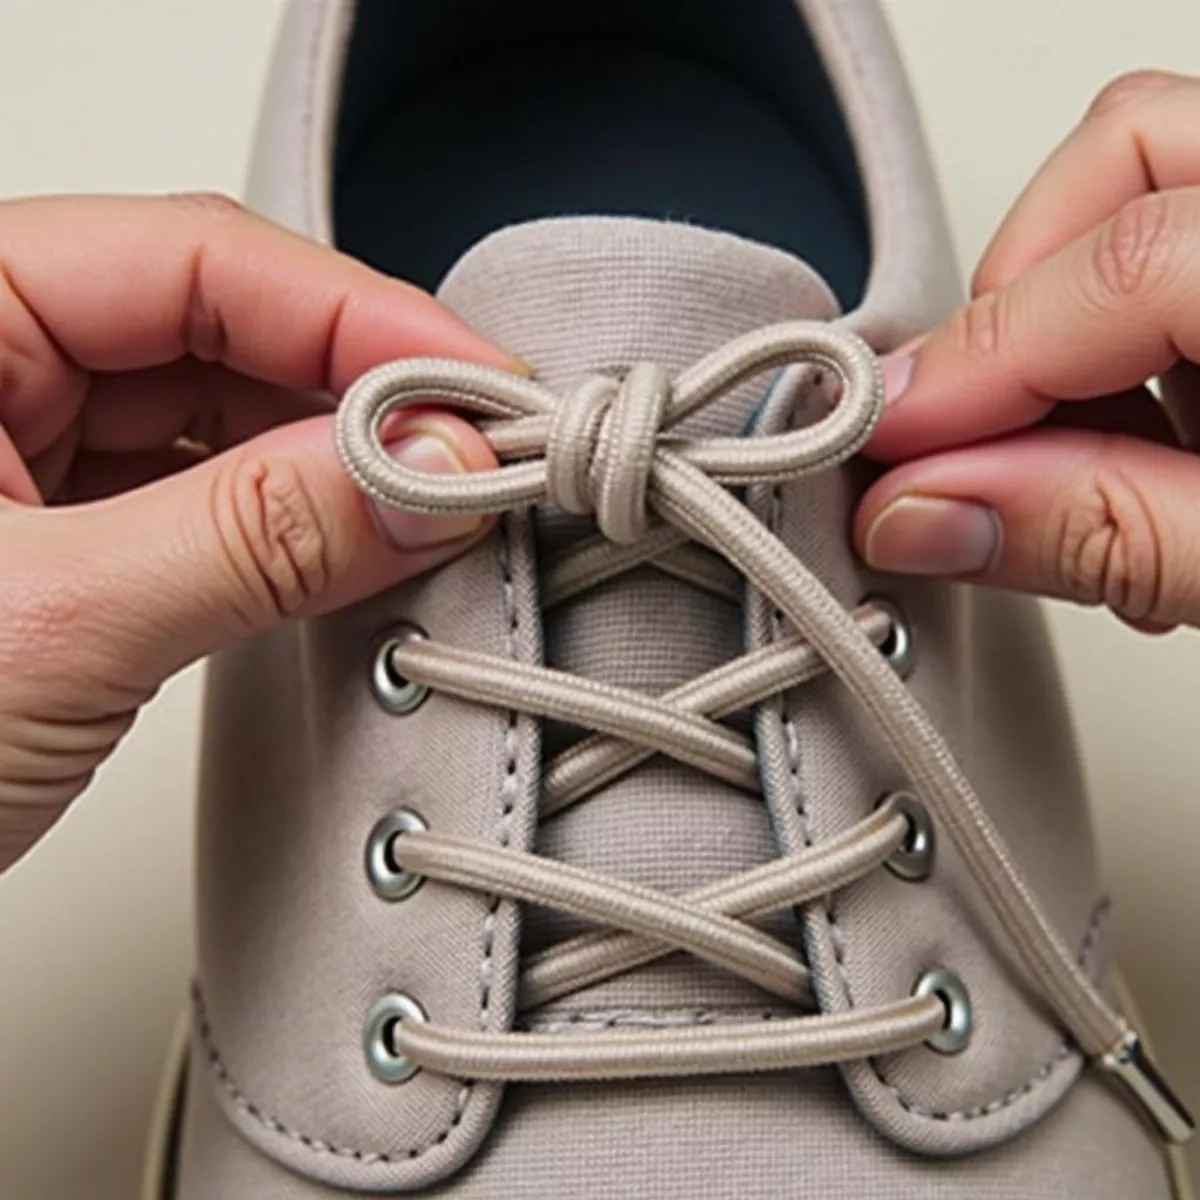
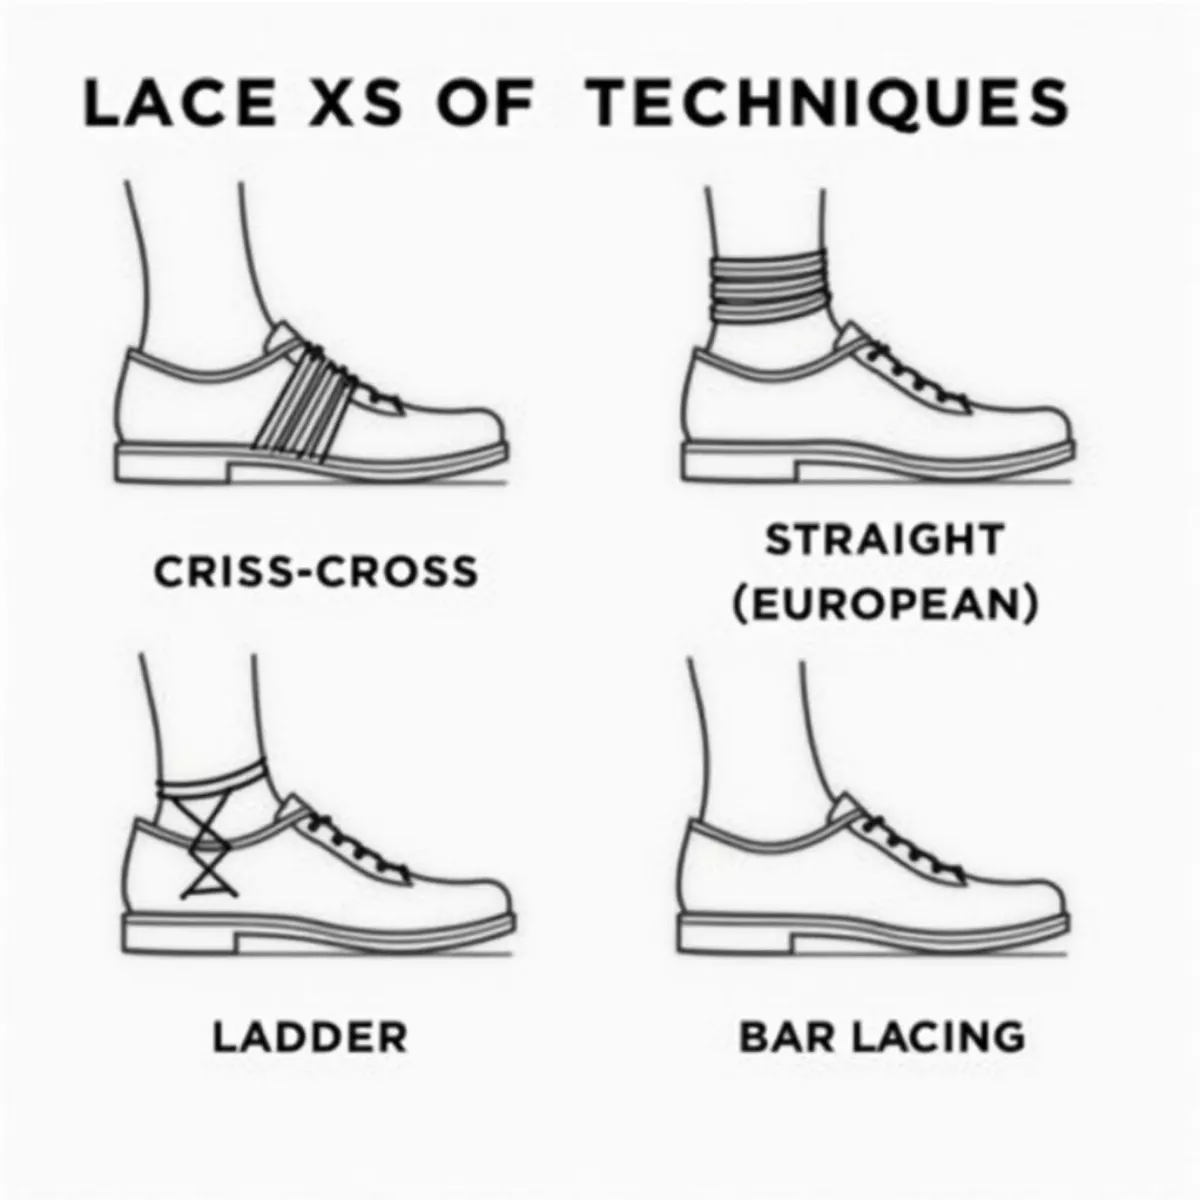
1. Criss-Cross Lacing

This is the most common method for lacing shoes and suits all styles of Allen Edmonds.

How to do it:

  1. Start by feeding the lace through the bottom eyelets from the outside in.
  2. Take the right lace end over to the left eyelet and feed it from the outside in.
  3. Repeat this process, crossing over each time until you reach the top.

Benefits: Simple, effective, and universally flattering.

2. Straight (European) Lacing

Ideal for a more streamlined look, straight lacing can often be seen in fashion-forward styles.

How to do it:

  1. Thread each lace through the bottom eyelets.
  2. Instead of crossing over, feed the lace directly up to the next eyelet on the same side.
  3. Alternate sides as you move up the shoe.

Benefits: Minimizes bulk on the shoe’s exterior for a cleaner, sleeker appearance.

Different Shoe Lacing TechniquesDifferent Shoe Lacing Techniques

3. Ladder Lacing

Ladder lacing is great for those who want a unique aesthetic.

How to do it:

  1. String each lace vertically through the bottom eyelets.
  2. For every lace, go horizontal to the next eyelet on the opposite side.
  3. Repeat until you reach the top.

Benefits: Offers a distinct look, perfect for those wanting to stand out.

4. Bar Lacing

This elegant method gives a more refined look and is often used with formal shoes.

How to do it:

  1. Feed the lace through the bottom eyelets.
  2. Rather than crossing, take the left lace across to the next top eyelet on the right side.
  3. Repeat for the other side.

Benefits: Creates an elegant and tidy appearance, perfect for formal occasions.

5. Bow Tie (Double Bow) Lacing

A twist on the classic bow, this method is not just functional but adds flair to your shoes.

How to do it:

  1. Start lacing the shoe as usual until you reach the last hole.
  2. Tie a standard bow.
  3. Take the loops and pull them through an additional knot for security.

Benefits: Keeps laces secure while offering a unique look.

Bow Tie Shoelace KnotBow Tie Shoelace Knot

Quick Lacing Tips

  • For Allen Edmonds’ loafers and slip-ons, consider using the criss-cross method for a traditional appeal.
  • When lacing work or casual shoes, don’t hesitate to experiment with different styles until you find the perfect fit.
  • Always ensure that laces are even on both sides after lacing. It achieves a harmonious look and ensures better comfort.

How to Care for Your Shoelaces

Keeping your laces in good shape is just as important as how you lace your shoes. Here are quick tips:

  • Regular Washing: Clean your shoe laces regularly to prevent dirt and grime buildup. You can do this by hand washing them in warm water with soap.
  • Replace When Worn: Don’t hesitate to replace frayed or worn-out laces. They impact the overall appearance of your shoes.
  • Store Flat: When storing, keep laces flat to avoid knots and twists.

Key Takeaways

  • Proper lacing improves comfort, style, and longevity.
  • Explore various lacing techniques like criss-cross, straight, ladder, bar, and bow tie to find what best suits your Allen Edmonds.
  • Take care of your laces through proper cleaning and timely replacements for optimal performance.

FAQs: Lacing Allen Edmonds Shoes

Q1: What type of laces do Allen Edmonds shoes come with?

A1: Most Allen Edmonds shoes come with high-quality waxed laces that are durable and maintain a polished look.

Q2: How do I know which lacing technique to choose?

A2: Consider the occasion and your personal style. For formal settings, try bar lacing; for casual outings, criss-cross or ladder lacing works well.

Q3: Can I use different types of laces?

A3: Yes! You can customize your Allen Edmonds with different laces, but always think about the occasion and shoe style.

Q4: How do I properly maintain my shoelaces?

A4: Regularly wash them, replace worn ones, and store them flat to avoid knots.

Q5: Do lacing techniques impact comfort?

A5: Absolutely! Proper lacing provides better support and minimizes discomfort.

Q6: How should I lace my Allen Edmonds for a secure fit?

A6: Use criss-cross lacing or a double bow technique to ensure your shoes stay snug.

Q7: Can wrong lacing cause foot problems?

A7: Yes, improperly laced shoes can lead to blisters, discomfort, and foot alignment issues.

Q8: What if my laces keep coming undone?

A8: Consider using a double knot technique or perhaps replace your laces with a more secure type if they frequently come undone.

In conclusion, lacing techniques for Allen Edmonds shoes not only fulfill a functional purpose but also provide an opportunity to express personal style. Whether you prefer a classic or modern look, the right lacing method can enhance the overall appearance and comfort of your shoes. Happy lacing!


Feel free to explore other articles on [shoe care](insert link) and [fashion tips](insert link) for more insights!

Weekly income calculation table

750 a week is how much a year

Have you ever wondered how to convert your weekly income into a yearly figure? Many people receive income on a weekly basis, and knowing how much that amounts to over a year can be crucial for budgeting and financial planning. If you earn $750 a week, how much does that equal in a year? Let’s break it down step by step, ensuring you grasp the calculations and their implications.

Understanding Weekly to Yearly Income

Basic Calculation

To find out how much $750 a week is in a year, we simply need to multiply it by the number of weeks in a year.

Here’s the formula:
Yearly Income = Weekly Income × Number of Weeks in a Year

In this case:
Yearly Income = $750 × 52 (since there are 52 weeks in a year)

Calculating that gives us:

Calculation Value
Weekly Income $750
Number of Weeks in a Year 52
Yearly Income (750 × 52) **$39,000**

So, $750 a week equates to $39,000 a year.

Weekly income calculation tableWeekly income calculation table

Considering Variations

Monthly Breakdown

To ensure a broader understanding, it helps to break it down into monthly figures as well. There are approximately 4.33 weeks in a month (52 weeks / 12 months).

Monthly Income = Weekly Income × Average Weeks in a Month

Monthly Income = $750 × 4.33 ≈ $3,247.50

So, if you earn $750 weekly, your estimated monthly income would be roughly $3,247.50.

Essential Expenses and Budgeting

Knowing your yearly income of $39,000 allows you to budget effectively. Below are some expense categories you might consider in your monthly budgeting:

  • Housing: Mortgage or rent
  • Utilities: Electricity, water, internet
  • Groceries: Food and household essentials
  • Transportation: Car payments, gas, insurance
  • Health Insurance: Medical coverage
  • Savings: Emergency funds, retirement savings
  • Entertainment: Leisure activities

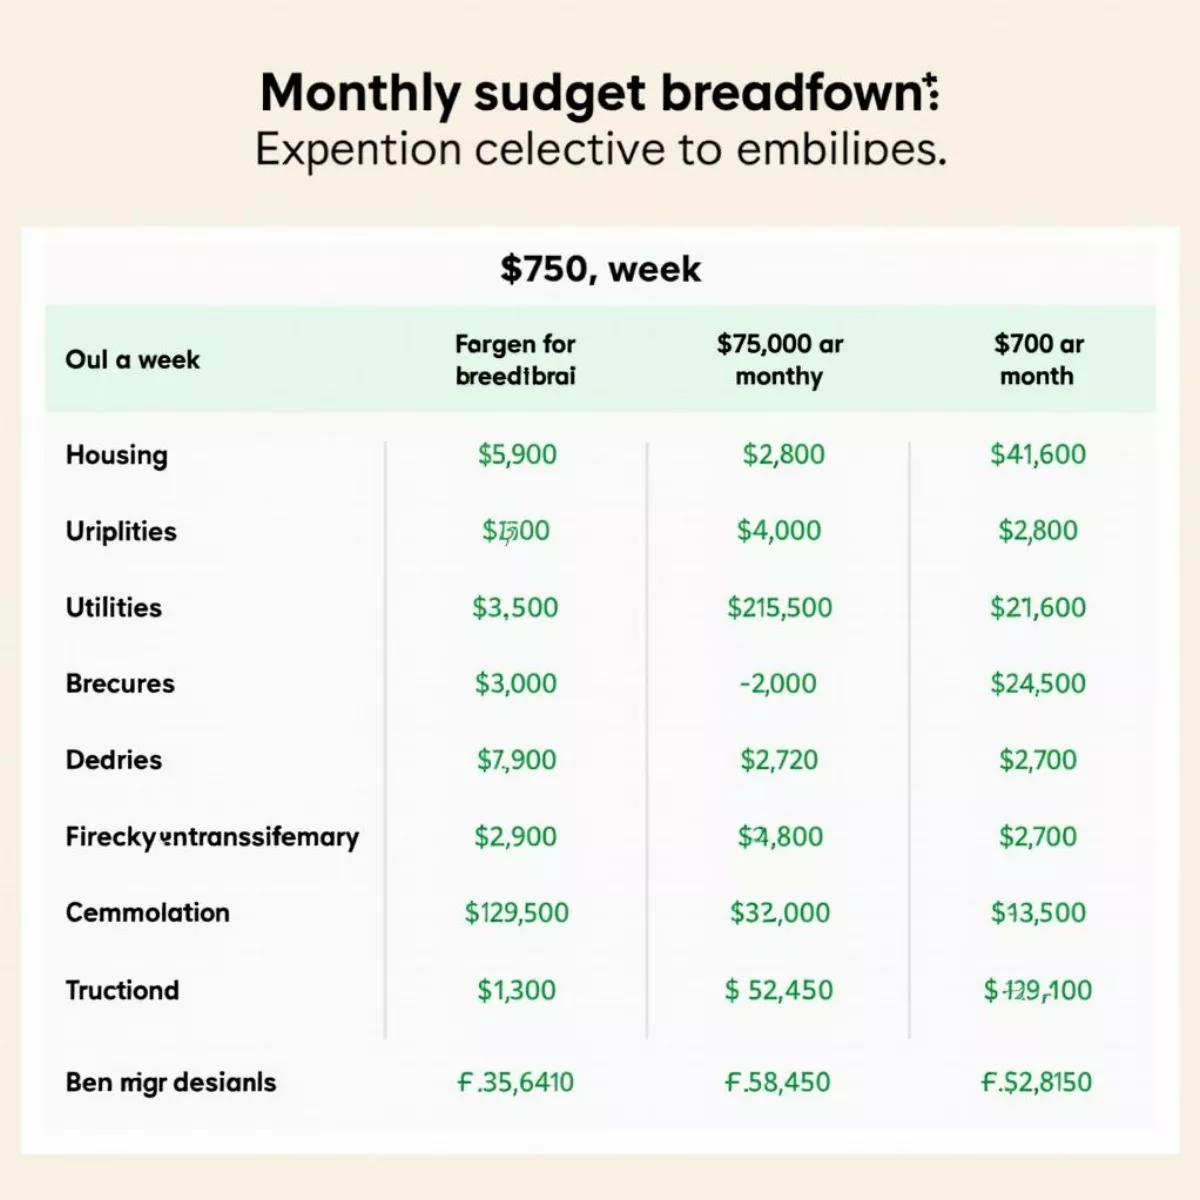
Here’s a simple budgeting table for the $750 a week income:

Expense Category Estimated Monthly Cost
Housing $1,000
Utilities $300
Groceries $400
Transportation $500
Health Insurance $200
Savings $300
Entertainment $200
**Total** **$2,900**

Monthly budget breakdown tableMonthly budget breakdown table

This table shows that if you maintain these expenses, you would have about $3,247.50 – $2,900 = $347.50 left over each month, which can further be allocated to either savings or discretionary spending.

Key Takeaways

  • $750 a week translates to $39,000 a year.
  • Monthly earnings are approximately $3,247.50.
  • Understanding your yearly and monthly income helps in setting a budget.
  • Break down your expenses to manage your finances effectively.
  • Always consider unexpected costs to maintain a healthy financial outlook.

Frequently Asked Questions (FAQ)

  1. How do I calculate my yearly salary from a different weekly income?
    • Simply multiply your weekly income by 52 for the annual total. For example, if you earn $500 a week, then $500 × 52 = $26,000 a year.
  2. What if I don’t work every week of the year?
    • In that case, adjust the number of weeks in your calculation. For instance, if you work 48 weeks a year, then multiply your weekly income by 48 instead of 52.
  3. Is $39,000 a decent salary?
    • This depends on various factors such as location, cost of living, and personal circumstances. Research average salaries in your area to make a comparison.
  4. Can I afford to save with this income?
    • Yes, by budgeting effectively and minimizing expenses, you can allocate a portion of your income to savings.
  5. What expenses should I prioritize?
    • Prioritize essential expenses like housing, utilities, health insurance, and necessary transportation before budgeting for discretionary spending.
  6. How can I increase my weekly income?
    • Consider side jobs, freelance work, or pursuing further education and certifications that could lead to higher-paying positions.
  7. What is the best way to track my spending?
    • Use budgeting tools like apps or spreadsheets to categorize and monitor your expenditures. Setting up a monthly review can also help.
  8. How much should I save?
    • A common rule of thumb is to save at least 20% of your income, but it can vary based on your financial goals and obligations.
  9. Are there tax implications I should consider?
    • Yes, be sure to account for taxes which will affect your net income. Consult a tax advisor for personalized advice.
  10. What if my income varies?
    • If your income fluctuates, calculate your average weekly income over a few months to get a better estimate for budgeting purposes.

Conclusion

Understanding how to convert your weekly income to a yearly figure is a valuable skill for budgeting and financial planning. With $750 a week, you’re looking at a yearly income of $39,000, which could provide a solid foundation for your financial health. By keeping track of both your income and expenses systematically, you can ensure that you live within your means, save adequately, and potentially enjoy some of the finer things in life.

Feel free to refer back to this guide as you continue your financial journey, and remember to adjust your budgeting as your circumstances change. Happy budgeting!

Financial planning concept imageFinancial planning concept image

This article provides a comprehensive understanding of converting weekly income to annual figures, along with practical tips to help you manage your finances. If you need further guidance, check out our other articles on budgeting and personal finance for deeper insights.

Yards to Miles Conversion Chart

400 yards is how many miles

When it comes to understanding distance, converting units can often feel overwhelming. Whether you’re a student trying to grasp the math behind it, a runner planning your next workout, or someone just curious about measurements, the question often arises: how many miles are in 400 yards? In this article, we will explore this conversion in an easy-to-understand manner while providing insightful information and helpful tips.

Understanding the Basics of Measurement

Before we dive into the conversion, let’s clarify what yards and miles are:

  • Yard: A yard is a unit of length in the customary system used in the United States and the United Kingdom. It equals 3 feet or 36 inches.
  • Mile: A mile is a larger unit of distance in the customary system, equal to 5,280 feet or 1,760 yards.

With this foundational knowledge, we can now tackle how to convert 400 yards to miles.

Conversion Made Simple

To convert yards to miles, you can use the following formula:

Miles = Yards / 1760

Now, let’s apply this to our specific question:

Miles = 400 yards / 1760 ≈ 0.2273 miles

So, 400 yards is approximately 0.23 miles when rounded to two decimal places.

Quick Reference Table

Yards Miles
400 0.2273
800 0.4545
1200 0.6818
1600 0.9091
1760 1

Why Knowing the Conversion Matters

You might wonder why it’s essential to understand this conversion. Here are some practical applications:

  • Running: If you track your running distance in yards, knowing how far you’ve traveled in miles can motivate you to reach running goals.
  • Sports: In sports like athletics, knowing the yards to miles conversion can be critical for event planning and competition.
  • Everyday Use: Whether you’re measuring the distance in your local park or planning your next hike, having a direct grasp of these measurements can come in handy.

Yards to Miles Conversion ChartYards to Miles Conversion Chart

Fun Fact About Yards and Miles

Did you know that the term “mile” comes from the Latin word “mille,” which means “one thousand?” The mile was originally defined as 1,000 paces by the Roman army. In the same vein, a yard was historically based on the measurement of a human body.

Illustrating the Concept

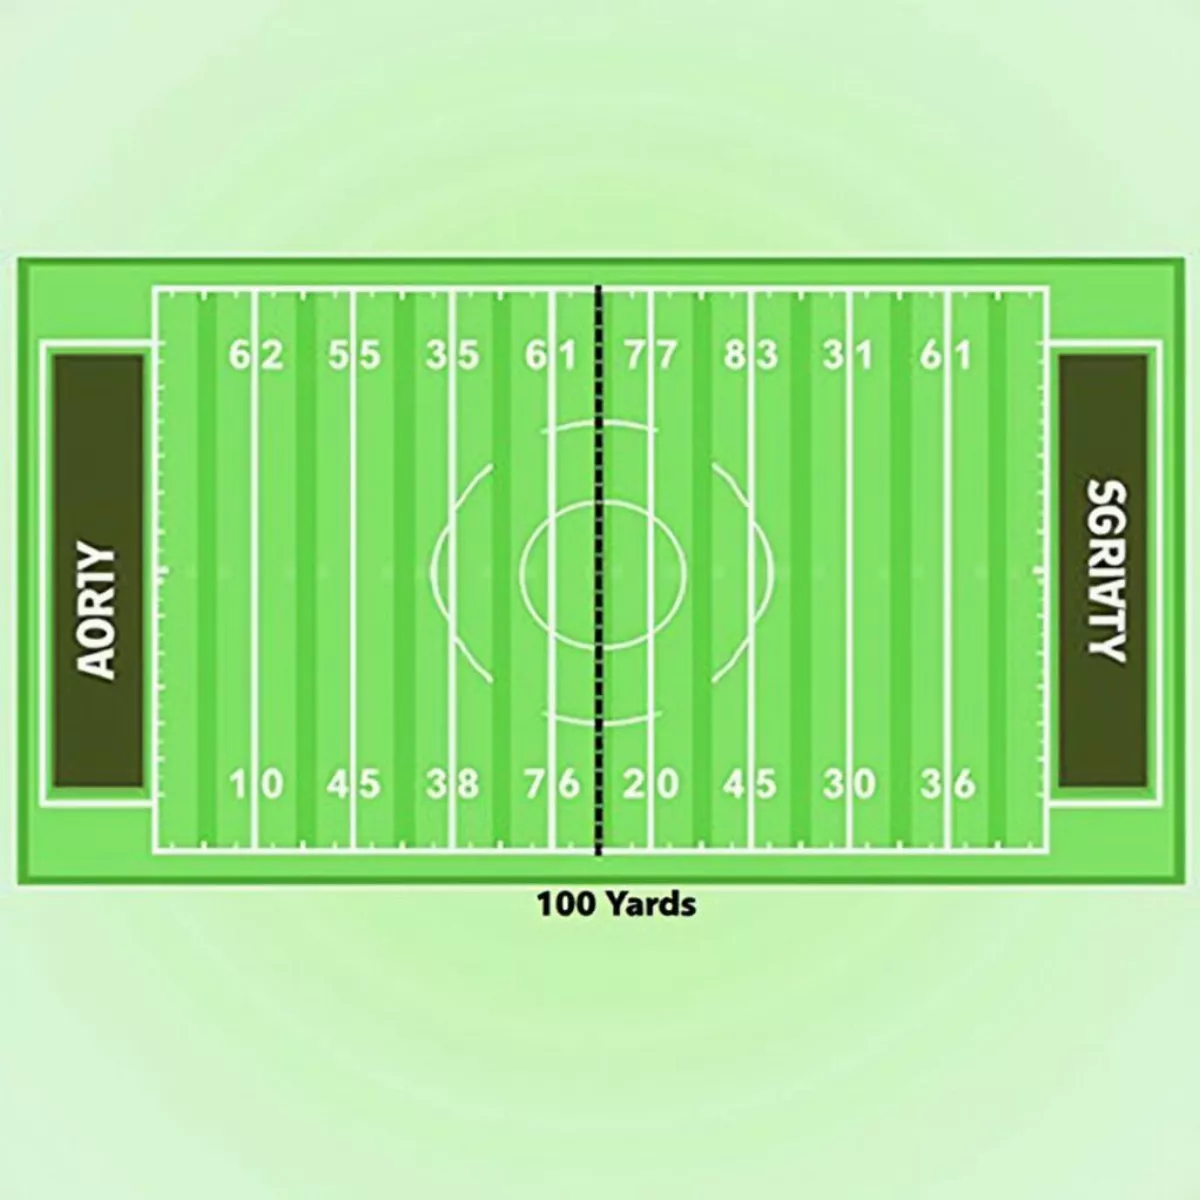
To visualize this concept, think about a football field. A typical football field is 300 feet long (not including the end zones), which equates to 100 yards. Therefore, if you were to run 400 yards, you’d traverse a little more than one-third of a football field.

Football Field Dimensions with Yard MarkingsFootball Field Dimensions with Yard Markings

Tips for Measurement Conversion

Here are some essential tips to keep in mind when converting yards to miles:

  • Divide by 1760: Always remember that there are 1760 yards in a mile when converting.
  • Use Online Calculators: If you’re unsure, using an online conversion tool can be a quick and accurate way to get the answer.
  • Keep Practicing: The more you practice these conversions, the easier they will become. Try converting different yard measurements into miles for a better grasp.

Key Takeaways

  • 400 yards is approximately 0.23 miles.
  • Remember the formula: Miles = Yards / 1760.
  • Understanding these conversions can enhance your sports performance and enrich your daily life.
  • Practice converting different measurements for better retention.

FAQ Section

Q1: How many miles are 500 yards?

A1: To convert 500 yards to miles, divide by 1760. So, 500 yards is approximately 0.2841 miles.

Q2: Is it quicker to convert yards to meters instead of miles?

A2: It depends on your familiarity with the units. If you’re dealing with distances in yards often, stick with the mile conversion. For metrics, use the formula Meters = Yards × 0.9144.

Q3: What are yards commonly used for?

A3: Yards are often used in sports like football, golf, and track events. They’re also used in sizing fabrics and measuring short distances in construction.

Q4: How can I measure 400 yards?

A4: You can use a measuring wheel or a tape measure. Alternatively, many running tracks are precisely 400 meters around, which can help you visualize the distance!

Measuring Wheel in Use on TrackMeasuring Wheel in Use on Track

Q5: How does a yard compare to a meter?

A5: One yard is approximately 0.9144 meters. To convert yards to meters, you can use the formula Meters = Yards × 0.9144.

Q6: What other distances are commonly converted?

A6: Many people commonly convert feet to meters, yards to kilometers, or miles to kilometers depending on their needs.

Q7: Can I find conversion charts online?

A7: Yes! Many websites provide conversion charts and calculators that can simplify all sorts of unit conversions.

Q8: Why are these conversions necessary in sports?

A8: Sports often use specific measurements for distances, and understanding these conversions can improve performance, strategy, and gameplay.

Q9: Can I round the results of my conversions?

A9: Yes, rounding is commonly accepted. Just ensure that for precise requirements, you provide exact numbers.

Q10: What unit is better for measuring long distances, yards or miles?

A10: For longer distances, miles are typically preferred as they convey greater lengths in fewer numbers, making it simpler to understand distances.

By familiarizing yourself with conversions, you can engage more meaningfully in activities that rely on precise measurements. So the next time you hear about distances in yards, you’ll know just how far it really is in miles. Happy measuring!

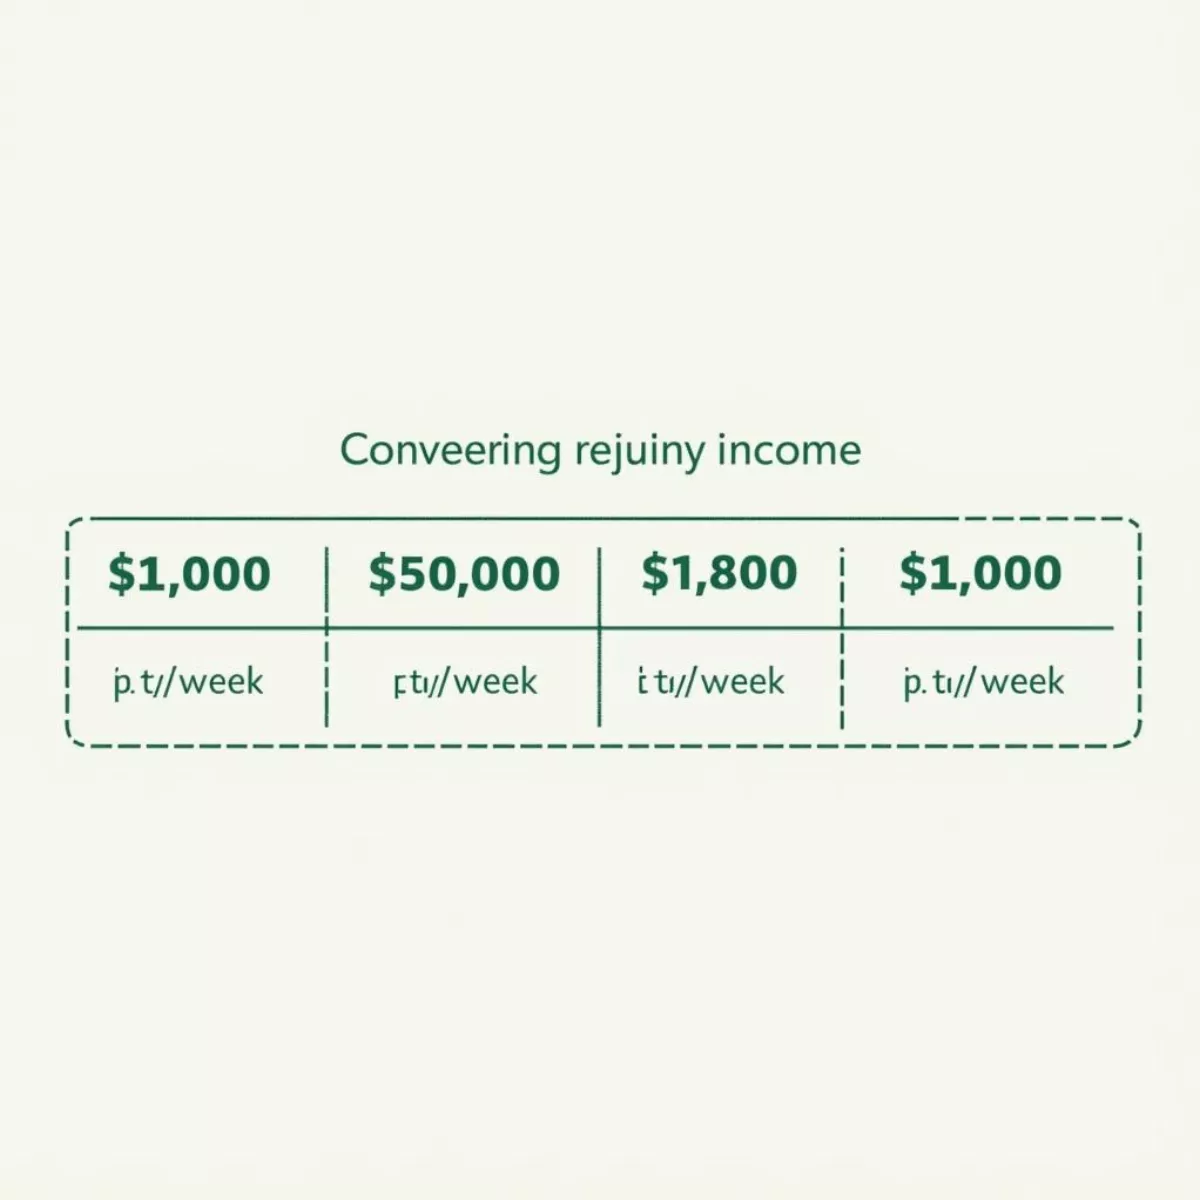
Weekly to Annual Income Conversion Table

1400 a week is how much a year

When it comes to managing our finances, one of the crucial aspects is understanding our income. Specifically, many people wonder how much their weekly earnings translate into an annual salary. For instance, if you’re earning $1,400 per week, have you calculated what that means for your yearly income?

In this guide, we’ll break down the math and explore different perspectives on this figure, as well as how it fits into broader financial planning. You will also find helpful tips, a FAQ section, and key takeaways to help synthesize the information. Let’s dive in!

Understanding Weekly to Annual Income Conversion

To find out how much $1,400 a week is in terms of annual income, you simply need to perform a straightforward calculation. The equation is:

Annual Income = Weekly Income × Number of Weeks in a Year

Considering there are usually 52 weeks in a year, you would calculate:

  • $1,400 × 52 = $72,800

So, if you’re earning $1,400 per week, your annual income would be $72,800.

Weekly to Annual Income Conversion TableWeekly to Annual Income Conversion Table

Detailed Breakdown of Weekly Income Calculation

Such a breakdown can help you understand where your current salary stands compared to other figures in the market.

Why Knowing Your Annual Salary Matters

Understanding your annual salary not only helps with budgeting but is also essential for long-term financial planning. Here’s why:

  • Budgeting for Expenses: Knowing your annual salary can help you create a more accurate budget. This way, you can plan for rent or mortgage, utilities, groceries, and discretionary spending.
  • Savings Goals: Having a clear figure aids in establishing your savings goals, whether for retirement, a house, or emergency funds.
  • Tax Planning: Different income levels can place you in different tax brackets, influencing how much you owe in taxes.
  • Loan Applications: Banks and lenders often require annual income when assessing loan applications.

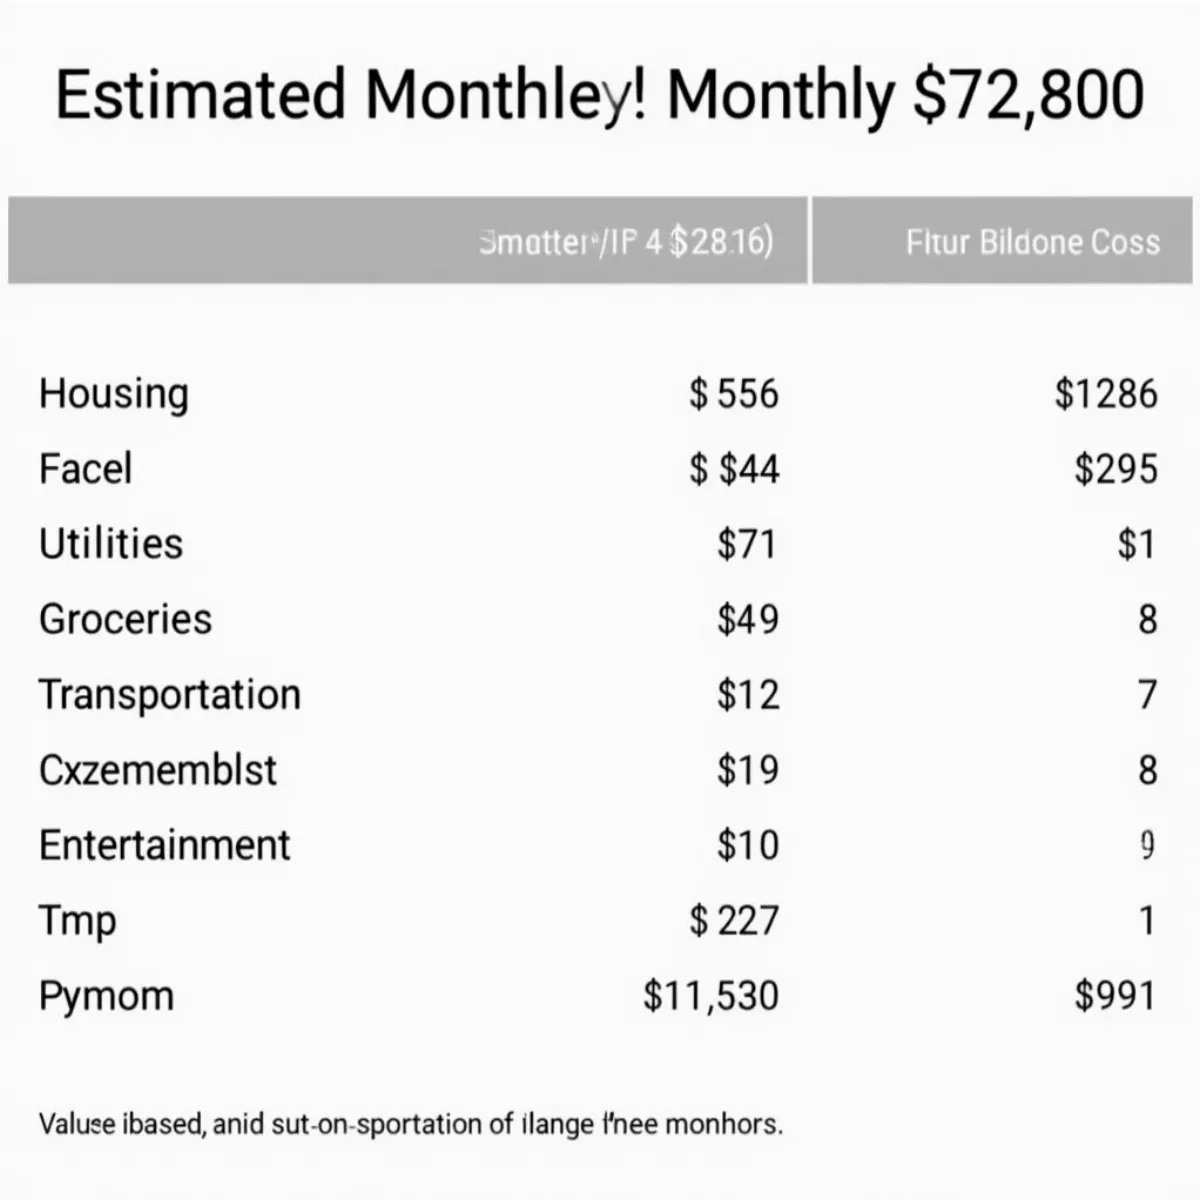
Annual Salary and Lifestyle Choices TableAnnual Salary and Lifestyle Choices Table
The Bigger Picture: Lifestyle Choices

With an annual income of $72,800, your lifestyle choices may vary significantly. Here’s a breakdown of what you might be able to afford:

Note: These values can differ based on location and personal spending habits.

Adjustments for Taxes and Deductions

While an annual income of $72,800 may seem substantial, it’s important to consider taxes and other deductions. Your take-home pay may be significantly less than this amount once you factor in:

  • Federal Income Tax
  • State Income Tax
  • Social Security and Medicare Taxes
  • Health Insurance Premiums

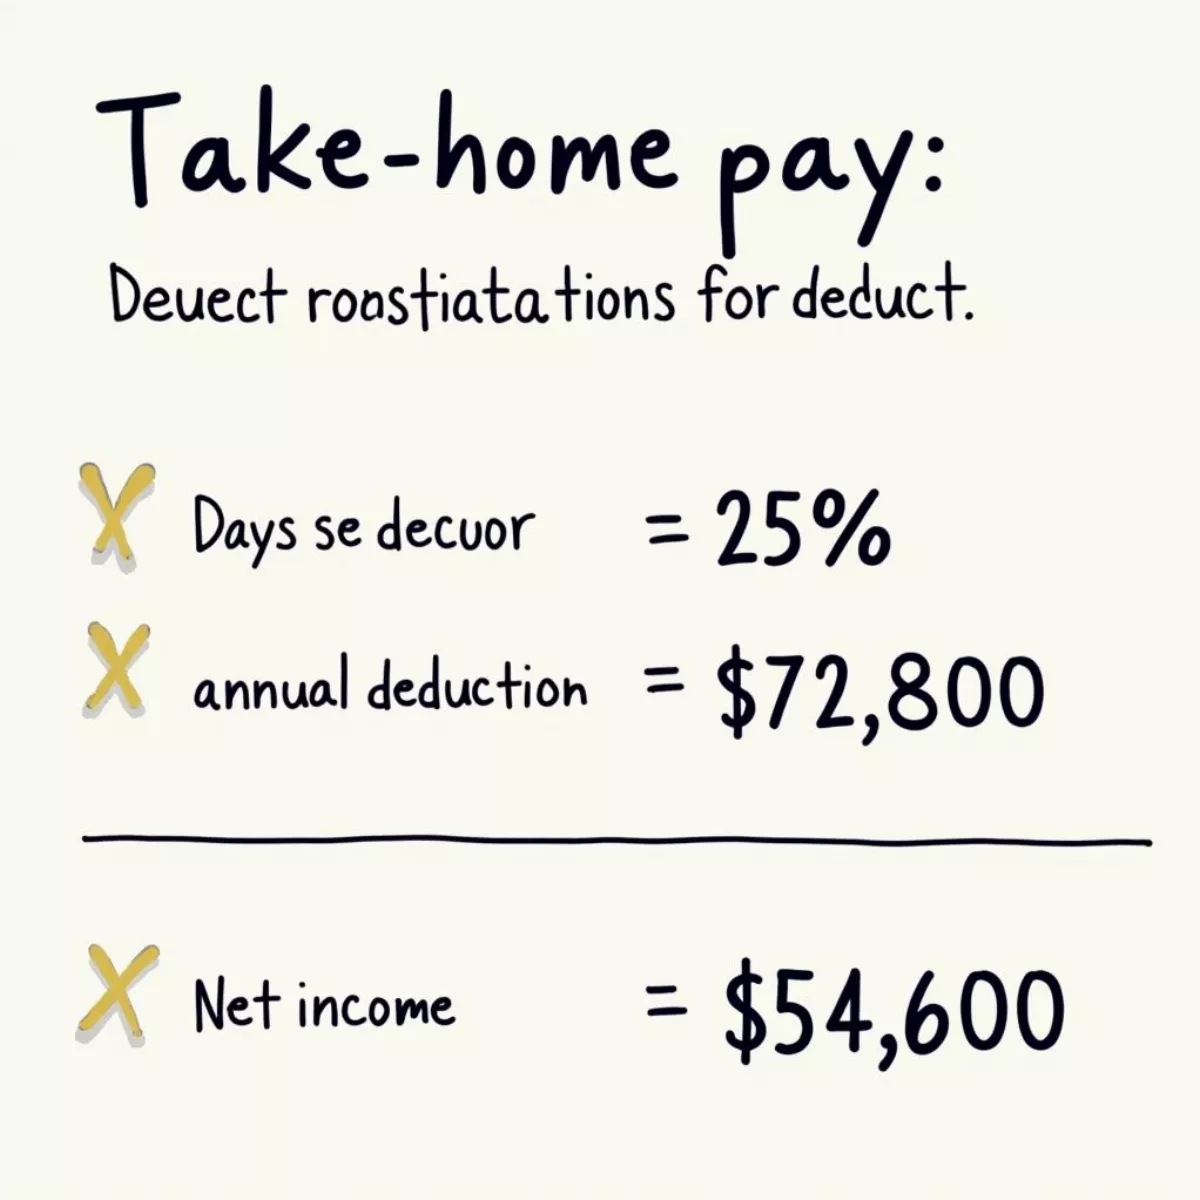
For example, let’s assume a combined deduction of roughly 25%:

  • Take-Home Pay = Annual Income – (Deductions Percentage × Annual Income)
  • Take-Home Pay = $72,800 – (0.25 × $72,800)
  • Take-Home Pay = $72,800 – $18,200 = $54,600

This leaves you with a monthly take-home pay of approximately $4,550.

Income Tax Deductions CalculationIncome Tax Deductions Calculation

Tips to Maximize Your Income

To make the most out of your $1,400 weekly earnings, consider the following tips:

  • Save First: Aim to save at least 20% of your income before addressing other expenses.
  • Invest: Consider investing in stocks, bonds, or a retirement fund to grow your wealth over time.
  • Limit Discretionary Spending: Identify areas where you can cut back, such as excessive dining out or subscription services.

Key Takeaways

  • $1,400 weekly equals $72,800 annually.
  • Understand tax deductions that affect your take-home pay.
  • Create a detailed budget based on your annual income.
  • Consider long-term financial goals like saving and investing.
  • Adjust lifestyle choices based on your net income for smarter financial planning.

FAQs

Here are some frequently asked questions about converting weekly income to annual salary:

1. How do I calculate my annual income from my weekly paycheck?

Simply multiply your weekly income by 52 (the number of weeks in a year).

2. What is considered a good salary for living in the U.S.?

A salary of $72,800 is above the median household income in the U.S., making it generally considered a good salary.

3. What should I do with my take-home pay?

Focus on saving, investing, and ensuring you cover all necessary expenses while allowing for discretionary spending.

4. Does overtime pay count towards my annual income?

Yes, any additional earnings like overtime or bonuses should be included when calculating your annual income.

5. How can I lower my taxable income?

Consider contributing to a retirement account or taking advantage of tax deductions and credits available to you.

Gross vs. Net Income ComparisonGross vs. Net Income Comparison

6. What’s the difference between gross and net income?

  • Gross Income is your total earnings before deductions.
  • Net Income is what you take home after taxes and other deductions.

7. What happens if I have unpaid debts?

Unpaid debts can affect your financial health and credit score. Make sure to prioritize paying them off as part of your budgeting plan.

8. Can I negotiate my salary?

Absolutely! If you feel your contributions at work warrant a higher salary, be prepared to discuss this with your employer.

9. How often should I review my budget?

Aim to review your budget monthly or quarterly to ensure you’re tracking your income and expenses accurately.

10. What resources can I use for financial planning?

Consider using apps like Mint, YNAB (You Need a Budget), or consulting with a financial advisor for personalized guidance.


By understanding how to translate your weekly earnings into an annual income, you can make informed decisions about budgeting, saving, and investing. Regularly assessing your financial situation can also help you adapt to changing circumstances, ensuring you stay on the path towards financial health and security.