Category Archives: How to

How To Make A Mini Golf Course

how to make a mini golf course

Mini golf is a fun activity that combines creativity, outdoor entertainment, and a touch of friendly competition. Building your own mini golf course provides a fantastic opportunity for family bonding, social gatherings, or even a unique backyard business venture. In this guide, we’ll take you through all the steps needed to create an engaging, interesting, and enjoyable course right in your backyard!

Why Build a Mini Golf Course?

Before we dive into the how-to, let’s discuss why you might want to create a mini golf course.

  • Fun for All Ages: Mini golf appeals to everyone, from kids to adults.
  • Customization: You have the freedom to design holes to fit your personal style or theme.
  • Physical Activity: Encourages movement and exercise without being overly strenuous.
  • Entertainment: Great way to host parties or family get-togethers.

Planning Your Mini Golf Course

1. Determine Your Space

First, you need to assess your backyard or available area:

  • Size Consideration: How much space do you have? Ideally, you want at least 600 to 800 square feet.
  • Terrain Type: Is your ground flat, sloped, or uneven? This will affect your design.

2. Set a Budget

Your budget will dictate the materials and complexity of your course. Consider:

  • Basic Budget: $100-$500 for simple designs.
  • Advanced Budget: $1,000 and above for elaborate setups.

3. Design Your Course Layout

Draft a plan for your course. Here are some points to consider:

  • Hole Count: Aim for 9 to 18 holes. A standard course has 18 holes.
  • Hole Themes: Use whimsical designs (like pirates or jungle themes) to enliven the experience.

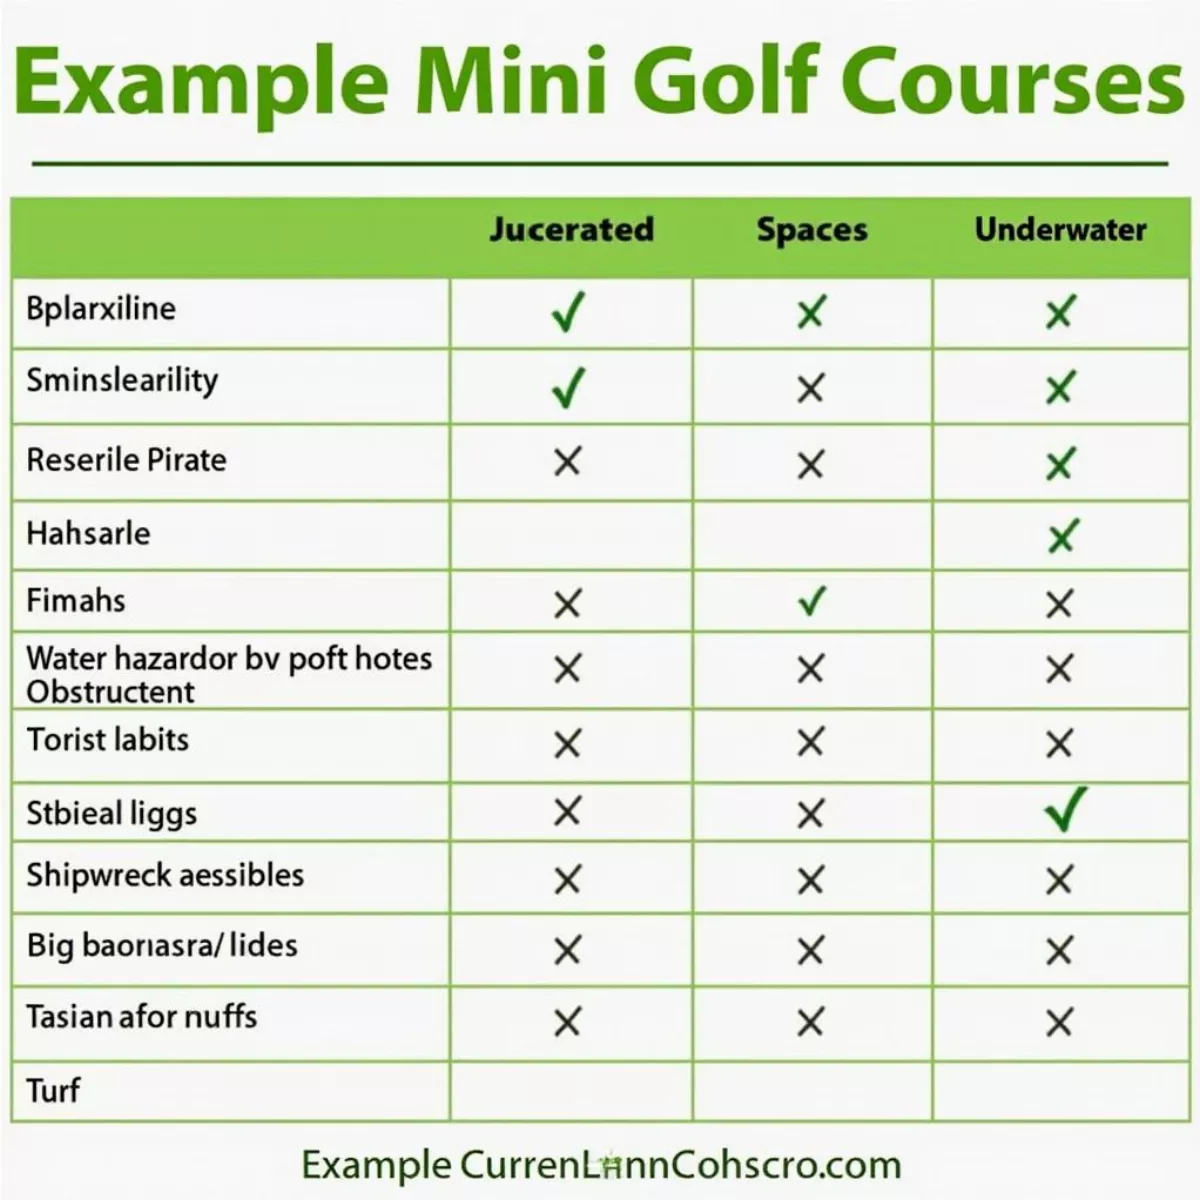
Example Layout

Hole Theme Features
1 Jungle Tunnel, water hazard
2 Pirate Shipwreck obstacle
3 Space Galaxy lights, star-shaped hole
4 Underwater Blue turf, fish decorations

4. Gather Materials

Here’s a quick list of materials you might need:

  • Turf: Synthetic lawn or carpeting for a smooth putting surface.
  • Wood or PVC pipes: To create barriers or obstacles.
  • Paint: For creative designs.
  • Tools: Hammer, screws, saw, drill, and measuring tape.

Constructing the Mini Golf Course

1. Mark Your Holes

Once your design is finalized, the next step is to get the markers out.

  • Use cones or chalk to mark out where each hole will be located.

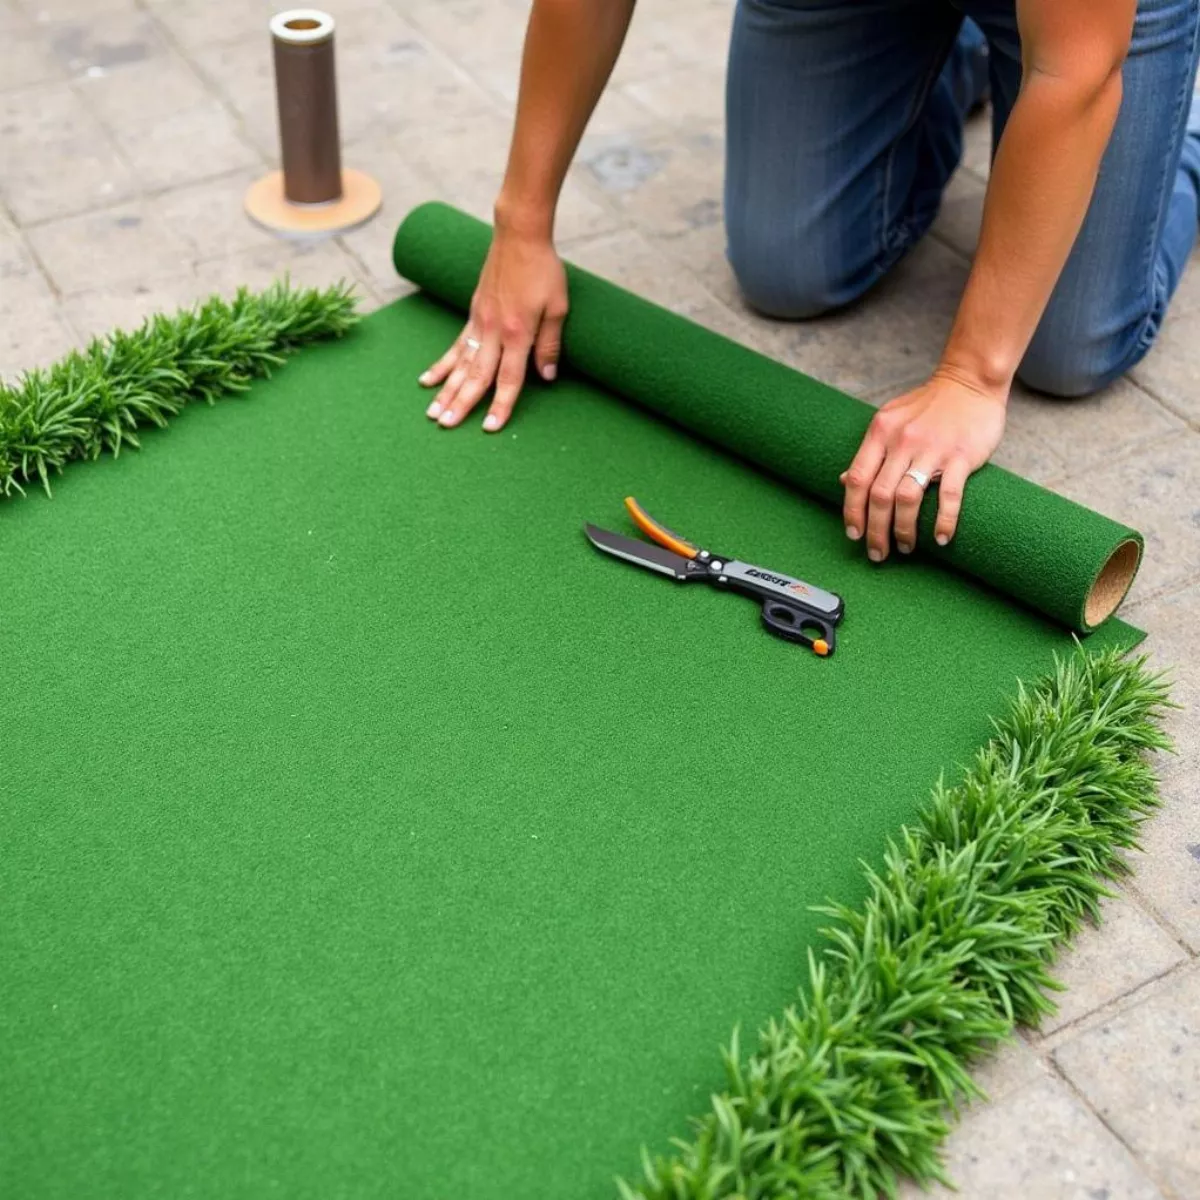
2. Create the Greens

Lay down your putting surface:

  • If using synthetic turf, roll it out and cut to desired sizes.
  • Ensure it’s smooth without any rough patches, as this will affect gameplay.
3. Build the Obstacles

Now it’s time to add challenges:

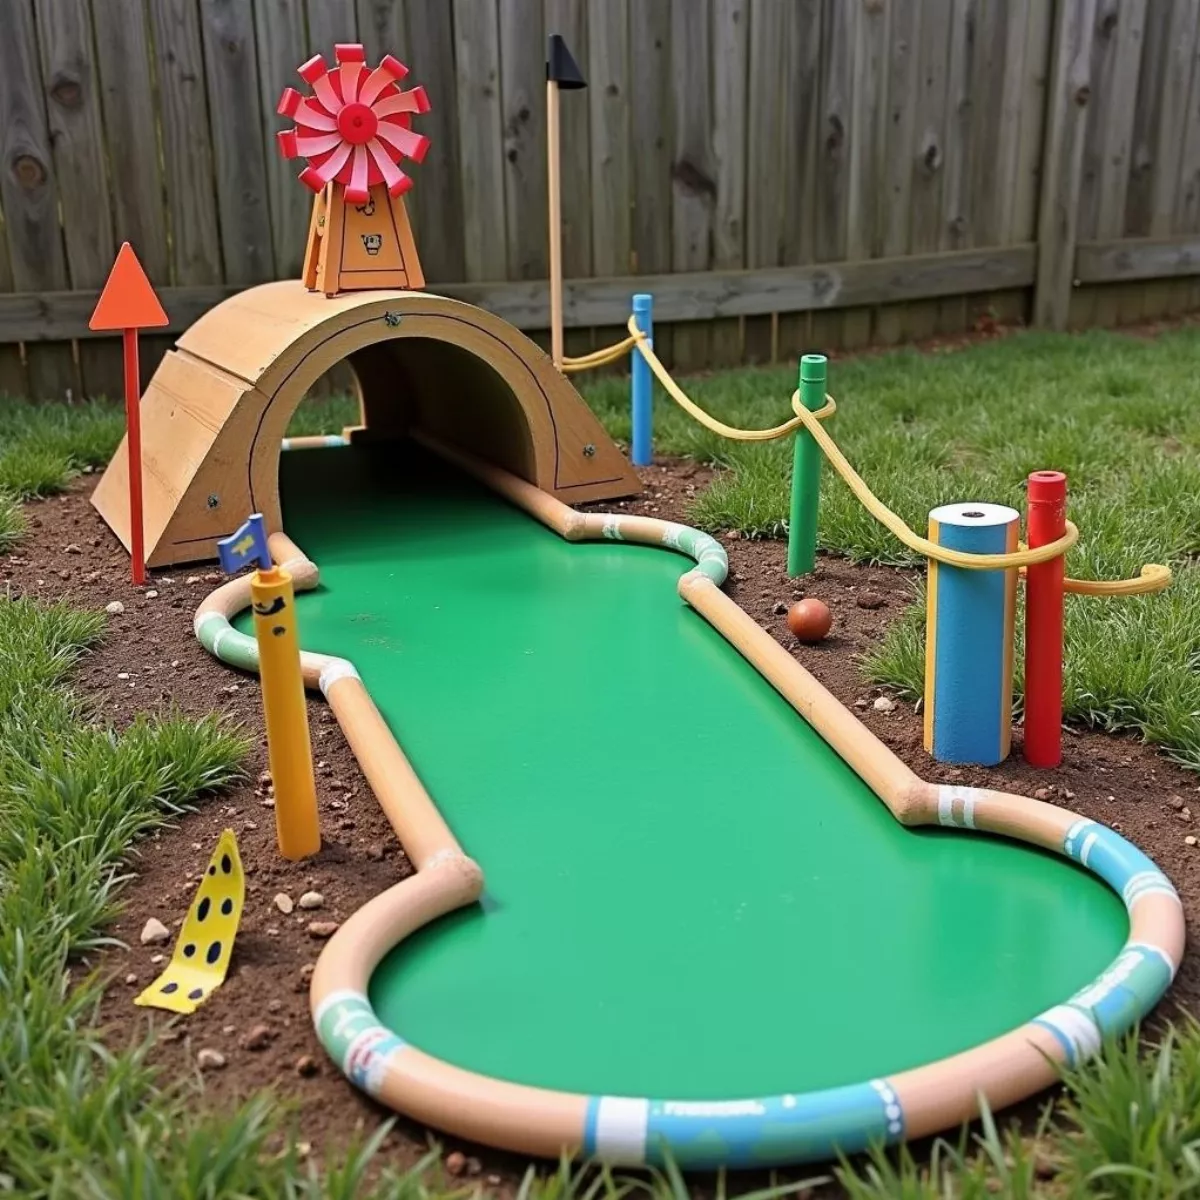
  • Ramps: Create slopes using wood and angle them.
  • Tunnels: Use PVC pipes or cardboard tubes for fun obstacles.
  • Borders: Use wood, bricks, or stones to define each hole.

4. Paint and Decorate

Get creative with your obstacles!

  • Colors: Use bright paint for a vibrant, inviting course.
  • Themes: Add decorative items like flags, signs, or funny props related to your themes.

5. Add Finish Touches

  • Lighting: If you plan to play in the evening, consider solar lights.
  • Signage: Clearly mark each hole with numbers or fun names.
Maintaining Your Mini Golf Course

Your work doesn’t end after the construction. Regular maintenance will ensure both safety and enjoyment.

  • Check for Wear and Tear: Regularly inspect for damages.
  • Turf Cleaning: Remove leaves, debris, and check for any tears.
  • Repairs: Fix obstacles or surfaces as needed to maintain playability.

Playing on Your Mini Golf Course

To grab the most fun out of your mini golf course, consider these tips:

  • Set Rules: Before starting, agree on rules and scoring to keep it fair.
  • Invite Friends: Nothing beats a little friendly competition.

Key Takeaways

Creating your mini golf course can be both a joyful and rewarding experience. Here are the essential steps to remember:

  • Assess Available Space: Determine how much area you have.
  • Set a Budget: Know your financial limits to guide your decisions.
  • Design Thoughtfully: Come up with engaging themes and obstacles.
  • Use Quality Materials: Ensure a smooth surface and sturdy obstacles.
  • Regularly Maintain: Keep the course enjoyable by addressing wear and tear.

FAQ Section

1. How much space do I need for a mini golf course?

You ideally need 600 to 800 square feet for an engaging experience.

2. What materials are best for constructing obstacles?

Common materials include wood, PVC pipes, cardboard, and paint for decoration.

3. How do I maintain the mini golf course?

Regular cleaning, inspection for damages, and upkeep of turf are essential.

4. Can I make a mini golf course for under $100?

Yes, a basic DIY course with simple obstacles can be made within this budget.

5. What’s a good age for kids to start playing mini golf?

Generally, children aged 3 and above can enjoy mini golf with adult supervision.

6. Can I incorporate technology?

Yes! You can look into using scorekeeping apps or fun analytics to track players’ progress.

7. How long does it take to build a mini golf course?

This depends on the complexity of your course but generally ranges from one weekend to several weeks.

8. Is it okay to use my mini golf course for events?

Absolutely! It’s a fun way to elevate gatherings and is generally well-received.

9. Should I have a theme for my course?

Themes can enhance the experience, making it more visually appealing and fun for players.

By following this guide, you’ll be well on your way to crafting a memorable mini golf experience that your friends and family will cherish. Have fun planning, building, and playing!
Golf Cart Batteries Bubbling When Charging

golf cart batteries bubbling when charging

Golf carts are a delightful mode of transportation whether you are cruising around a golf course or navigating a large property. But, as with any electric vehicle, understanding the batteries that power them is critical for maintenance and safety. One phenomenon that may alarm owners is bubbling in golf cart batteries during charging. This article will delve into the causes, implications, and solutions for bubbling golf cart batteries, ensuring you are well-informed to tackle this common issue.

What Causes Golf Cart Batteries to Bubble When Charging?

Bubbling in a golf cart battery can come from a few different factors, and understanding these can help keep your cart performing optimally.

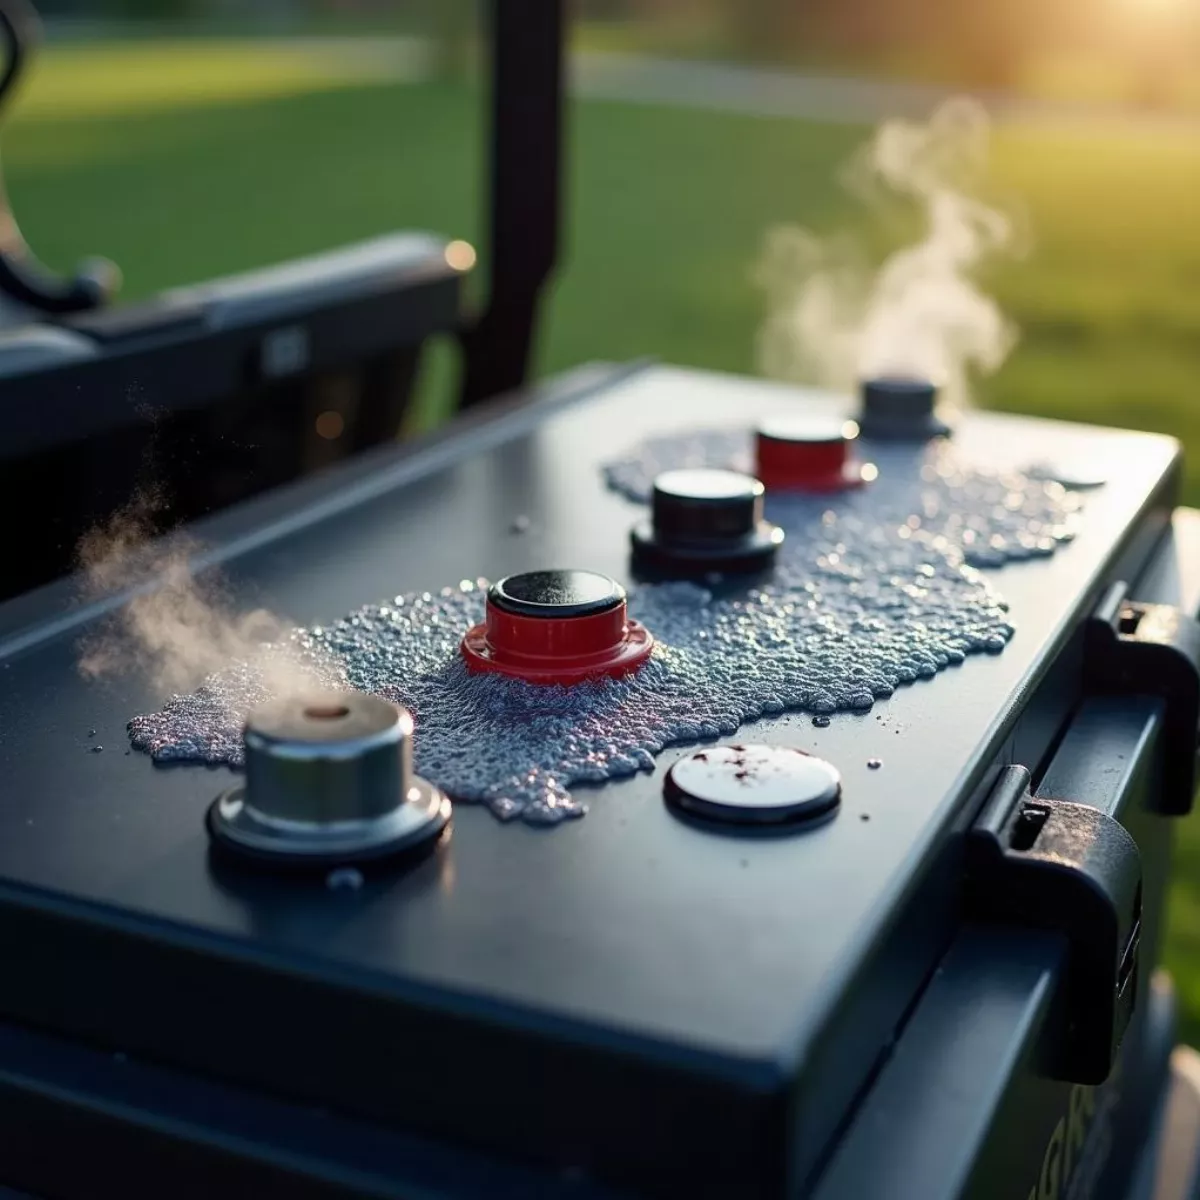
1. Electrolyte Boiling

  • Reason: A significant cause of bubbling is the boiling of the electrolyte solution. Lead-acid batteries, commonly found in golf carts, contain a liquid solution of water and sulfuric acid. When charging, the chemical reactions generate heat, which can cause the water portion to boil.
  • Impact: Excessive boiling can result in battery damage and decreased performance.

2. Overcharging

  • Reason: Overcharging can lead to excessive bubbling due to high voltage levels during the charging process. When the charging current exceeds the battery’s capacity, it causes the electrolyte to heat up and bubble excessively.
  • Impact: Overcharging not only leads to bubbling but can also release hydrogen gas, which poses safety hazards.

3. Low Electrolyte Levels

  • Reason: If the electrolyte level is too low, it can lead to localized heating and boiling. Water in the electrolyte mixes with sulfuric acid, and when this concentration changes, it may create hotspots.
  • Impact: This can lead to premature battery failure if not addressed quickly.

4. Faulty Charger

  • Reason: A malfunctioning charger can also lead to excessive voltage output, causing bubbling during charging. A charger that isn’t suitable for your specific battery type may exacerbate the issue.
  • Impact: Continuous use of a faulty charger can damage the battery significantly.

5. Temperature Effects

  • Reason: Temperature plays a critical role in battery efficiency. High ambient temperatures during charging can cause electrolyte to boil, increasing bubbling.
  • Impact: Operating in high heat can reduce the lifespan of your battery.

What Does Bubbling Mean for Your Battery?

While a moderate amount of bubbling can be normal during the charging process, excessive bubbling can be an indicator of a problem. Here are a few things to consider:

  • Normal vs. Abnormal Bubbling

    • Normal Bubbling: Light bubbling at the end of a charge cycle.
    • Abnormal Bubbling: Continuous heavy bubbling or boiling at the beginning of charging.

  • Potential Damages:
    • Reduced battery lifespan
    • Risk of electrolyte spillage
    • Increased hazard of gas emissions, especially hydrogen

How to Address Bubbling in Golf Cart Batteries

If you notice bubbling in your golf cart batteries, here are some steps you can take:

Step 1: Check Electrolyte Levels

  • Remove the battery caps (if applicable)
  • Inspect the fluid level—ensure it’s above the plates
  • If low, carefully add distilled water

Step 2: Inspect Your Charger

  • Ensure your charger is compatible with your battery type.
  • Look for any signs of malfunction or wear. If necessary, replace it.

Step 3: Control Charging Duration

  • Avoid overcharging by monitoring the time.
  • Use smart chargers that automatically switch off once the battery is fully charged.

Step 4: Maintain Proper Temperature

  • Store and charge the battery in a cool, dry place.
  • Avoid charging in extreme temperatures to prevent exacerbating the bubbling issue.

Step 5: Consult a Professional

  • If bubbling persists or you are unsure about the battery’s status, consult a professional for a thorough inspection.

Best Practices for Golf Cart Battery Maintenance

Maintaining your golf cart batteries can prevent many issues, including bubbling. Here are some best practices:

  • Regular Inspections: Regularly check electrolyte levels, terminal connections, and the external condition of the battery.
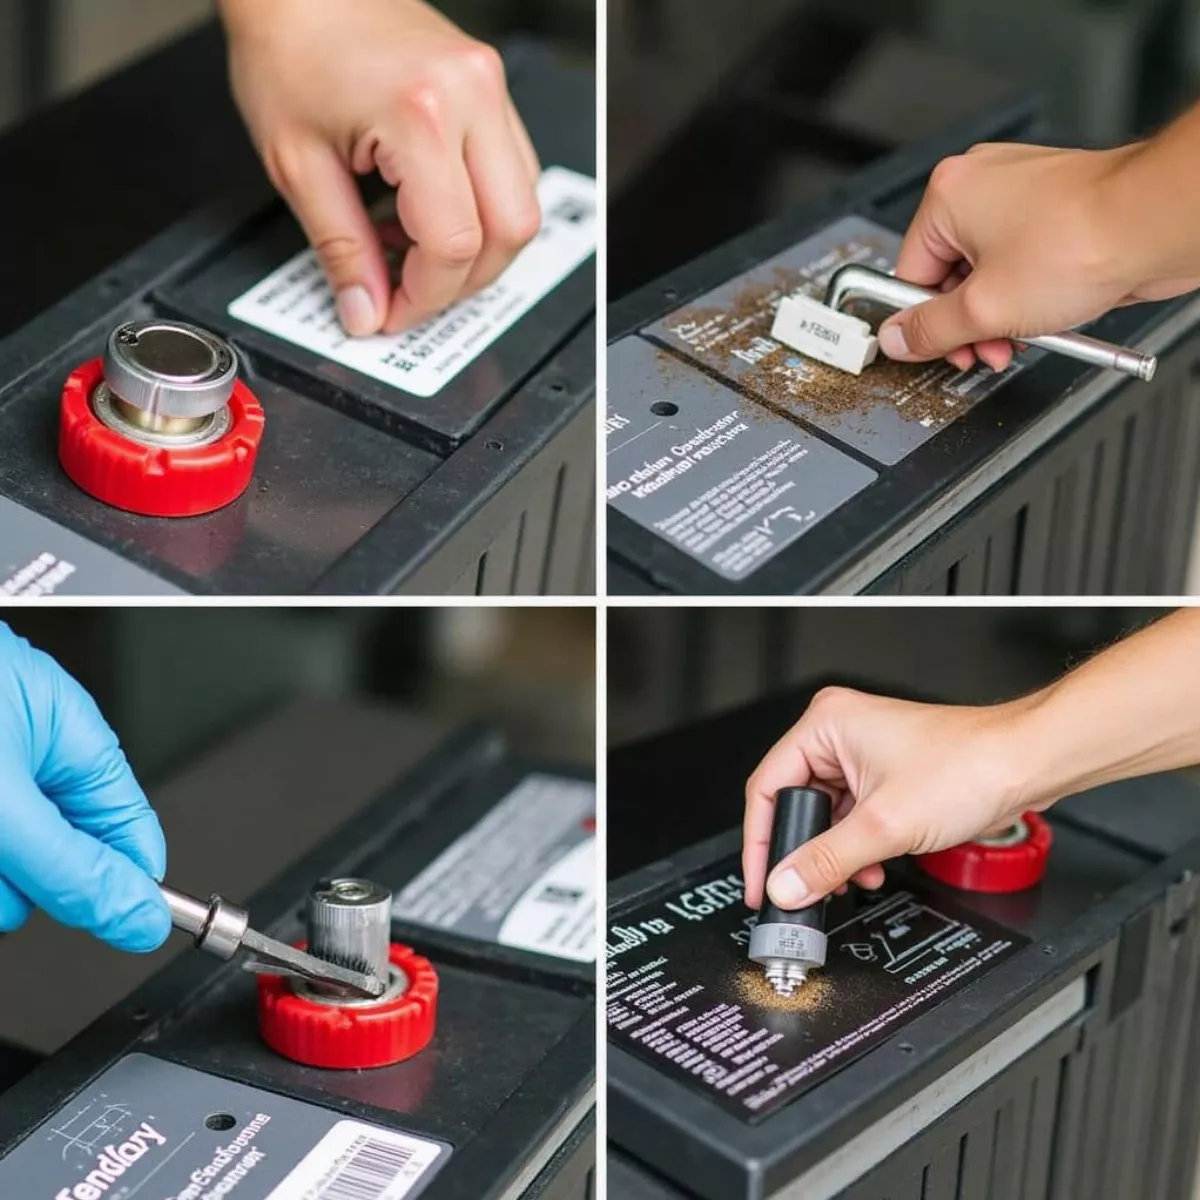
  • Clean Maintenance: Keep the battery terminals clean to prevent corrosion that can affect performance.
  • Use the Right Charger: Always use chargers certified for your battery type to avoid mismatching voltages.
  • Safely Store Batteries: If not in use for extended periods, store your golf cart batteries properly to prolong lifespan.

Key Takeaways

  • Bubbling in golf cart batteries can result from several factors: boiling electrolyte, overcharging, low electrolyte levels, faulty chargers, and high temperatures.
  • Moderate bubbling during the charging process may be normal, while excessive bubbling could indicate a problem.
  • Address bubbling by checking electrolyte levels, inspecting your charger, controlling charging duration, maintaining proper temperature, and consulting professionals if needed.
  • Regular maintenance can prevent battery issues and extend lifespan.

Frequently Asked Questions (FAQs)

Q1: What is the normal bubbling behavior during charging?

A: Light bubbling at the end of the charging cycle is typically normal. Continuous heavy bubbling indicates a potential problem.

Q2: How can I tell if my battery is overcharging?

A: Signs of overcharging include excessive bubbling, overheating, and a swollen battery case. If you suspect overcharging, check your voltage output.

Q3: What type of water should I add to my golf cart battery?

A: Always use distilled water to maintain the electrolyte levels in your batteries.

Q4: How often should I check my battery’s fluid levels?

A: It’s recommended to check your battery fluid levels at least once a month, or more frequently during heavy use.

Q5: Can bubbling lead to battery replacement?

A: Yes, if bubbling is severe, it might indicate that the battery is deteriorating, necessitating a replacement.

Q6: What should I do if I smell a strong odor during charging?

A: If you smell sulfur or any strong odor, disconnect the charger immediately and consult a professional, as this could indicate a gas leak.

Q7: How can I prolong the life of my golf cart battery?

A: Regular maintenance, proper charging practices, and avoiding extreme temperatures can significantly prolong the life of your golf cart battery.

Q8: What charger should I use for my golf cart batteries?

A: Use a charger specifically designed for your battery type to prevent damage and ensure optimal performance.

Q9: How often should I replace my golf cart battery?

A: With proper care, golf cart batteries typically last between 4 to 6 years, but this can vary based on usage and maintenance.

Q10: Is it safe to charge a bubbling battery?

A: While slight bubbling can be normal, serious bubbling should not be ignored. If in doubt, consult a technician before continuing to charge.

Understanding your golf cart batteries is essential for their longevity and performance. By staying informed and practicing diligent maintenance, you can enjoy your golf cart for many pleasant rounds ahead!

Electric Golf Cart Wonʼt Start

electric golf cart wonʼt start

Electric golf carts are an essential part of many courses and communities, providing a fun and convenient way to get around. However, like any vehicle, they can encounter problems. If your electric golf cart won’t start, don’t worry! This guide will explore the common reasons for this problem and provide step-by-step troubleshooting advice.

Why Your Golf Cart Won’t Start

Before you start tinkering, it’s crucial to understand the various components of your electric golf cart and what could be causing the problem.

Common Causes

Here are some frequently seen issues:

  • Dead Batteries: The most common culprit behind a non-starting cart.
  • Faulty Charger: If the charger is malfunctioning, the batteries won’t get charged.
  • Loose Connections: Worn or loose battery terminals can prevent power transfer.
  • Controller Issues: The controller might be malfunctioning, blocking power from reaching the motor.
  • Motor Problems: The electric motor could burn out or have internal faults.
  • Faulty Key Switch: A defective key switch can prevent the cart from starting.

Let’s dive deeper into these issues!

Step-by-Step Troubleshooting

Step 1: Check the Batteries

Since batteries are fundamental to your electric cart’s operation, they should be your first stop.

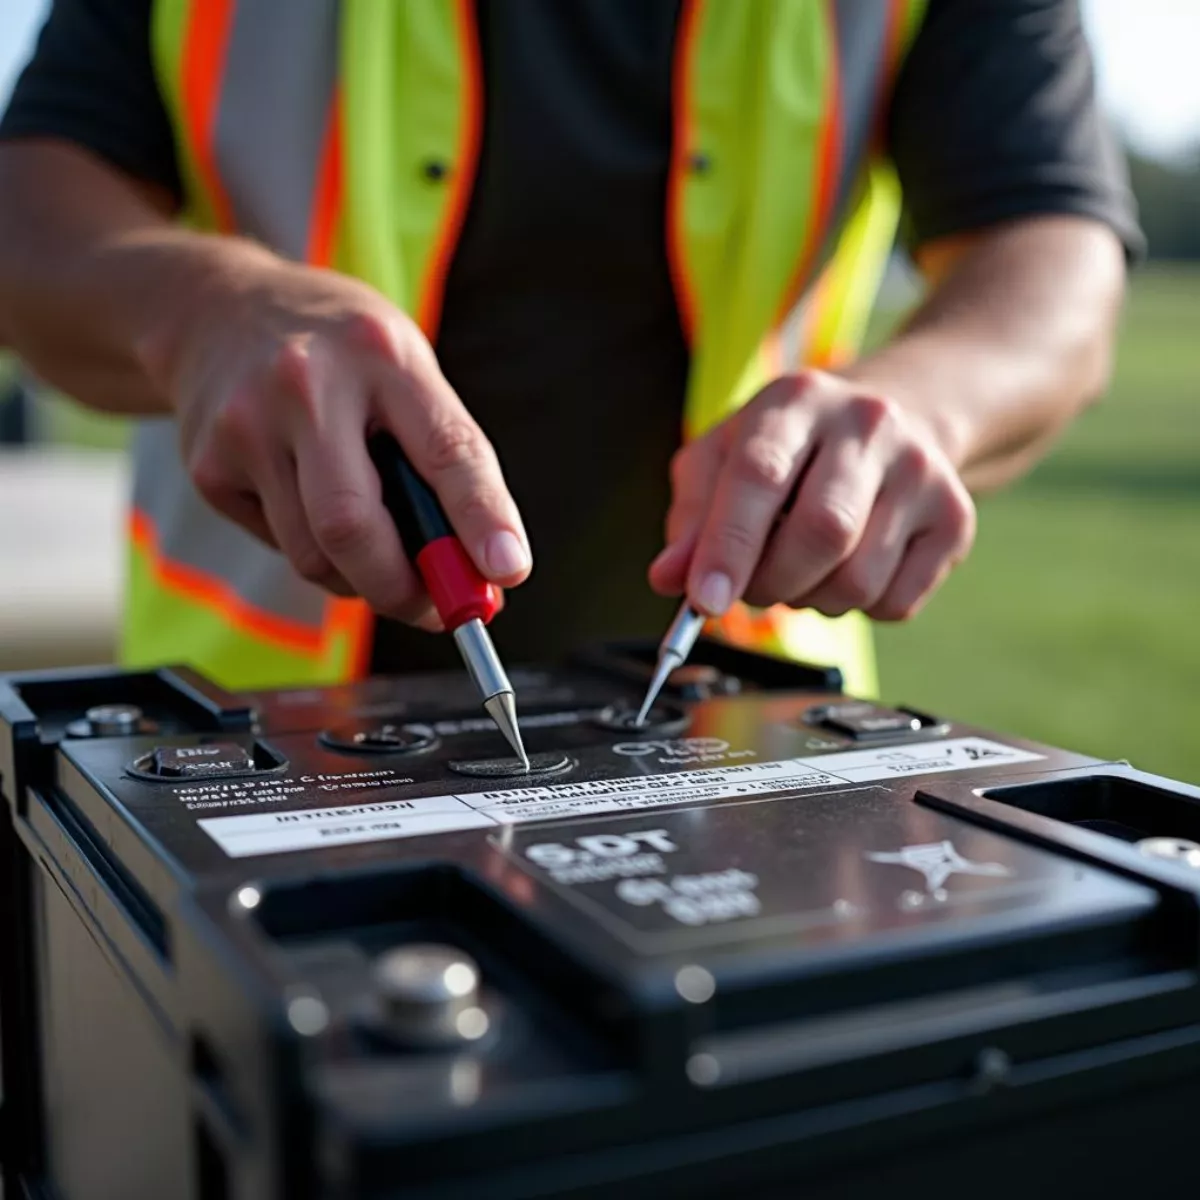
  • Visual Inspection: Look for signs of corrosion on terminals, or swelling in the battery case.
  • Voltage Testing: Use a multimeter to check the voltage. A fully charged battery should show about 6 volts for each 6V battery or 12 volts for a 12V battery.

Step 2: Inspect the Charger

If the batteries appear fine, check the charger.

  • Check the Charger Indicator: Most chargers have an LED indicator. Make sure it lights up when plugged in.
  • Test Charging: After a full charge cycle, measure the battery voltage again. If it did not rise, you may need a new charger.

Step 3: Examine Battery Connections

Loose or corroded connections can cause starting issues.

  • Tighten Connections: Ensure all battery terminals are tight and secure.
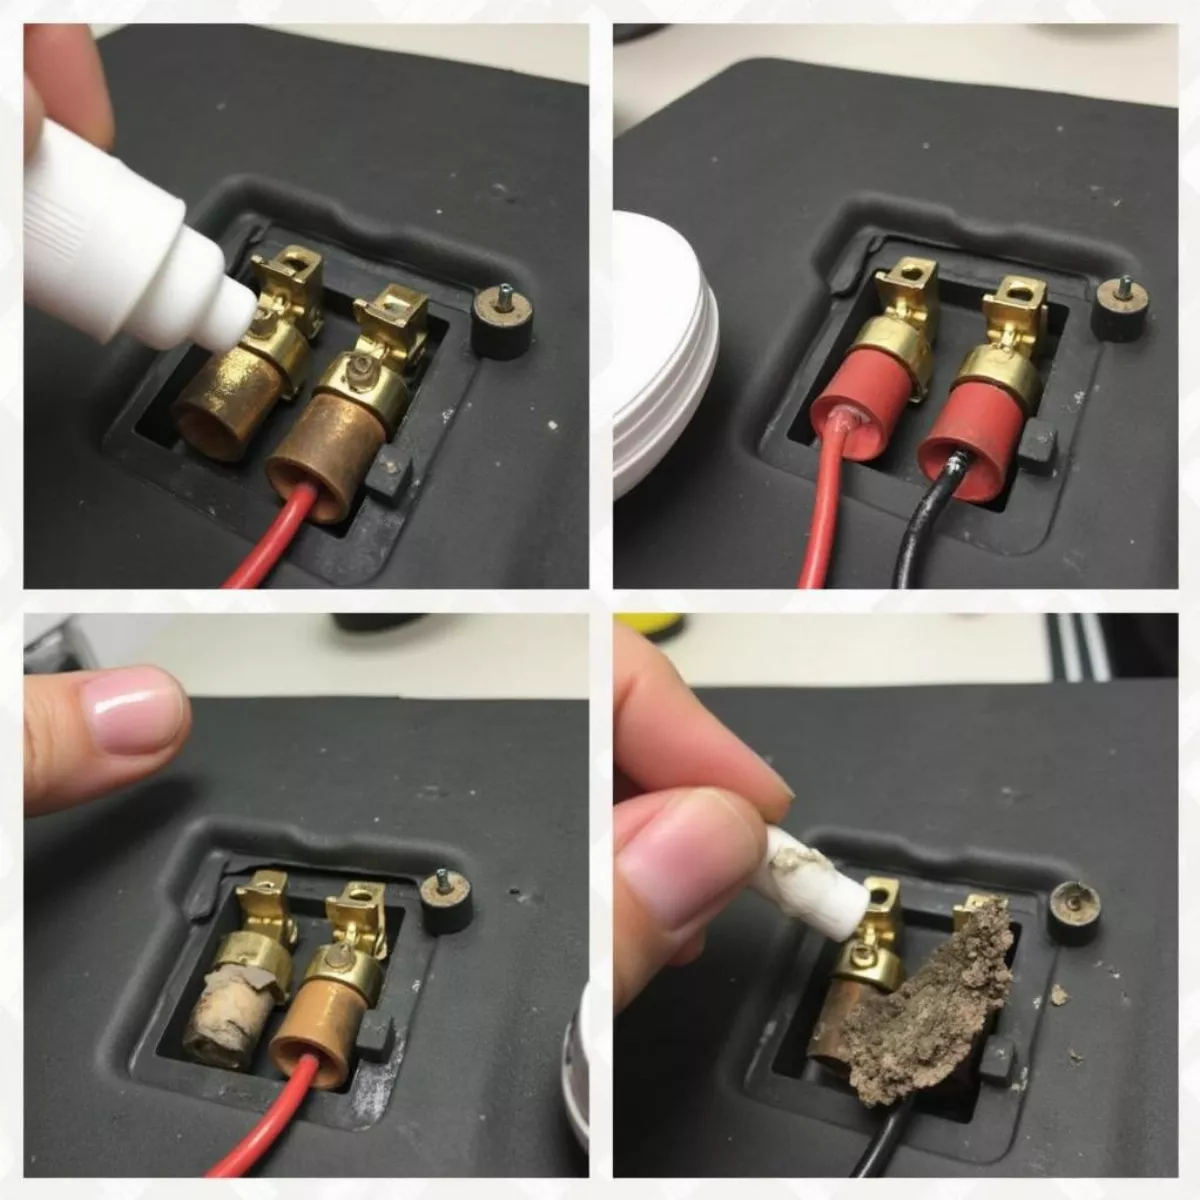
  • Clean Terminals: If you see corrosion, clean the terminals with a solution of baking soda and water.

Step 4: Inspect the Controller

The controller is crucial for managing the power flow.

  • Check for Fault Codes: Some controllers have diagnostic lights that will blink in a sequence to indicate issues.
  • Inspect Wiring: Look for signs of wear or loose connections.

Step 5: Review the Motor

If all else fails, the motor may be the issue.

  • Listen for Unusual Sounds: When you try to start the cart, are there any strange noises from the motor?
  • Check Motor Wiring: Look for frayed or damaged wires.

Step 6: Test the Key Switch

A faulty key switch can prevent your cart from starting.

  • Ensure the Key is in the Right Position: It sounds trivial, but make sure you’re turning the key to the “on” position.
  • Test the Switch: If possible, use a multimeter to ensure it’s functioning.

Additional Tips for Preventing Starting Issues

To keep your electric golf cart running smoothly, consider these tips:

  • Regular Maintenance: Check batteries and connections at least once a month.
  • Use Quality Batteries: Invest in high-quality batteries that ensure optimal performance.
  • Keep It Clean: Dirt and grime can cause issues. Regular cleaning helps maintain function.
  • Store Properly: If storing your cart for a season, follow proper storage recommendations to prevent battery drain.

Key Takeaways

  • Check batteries first; they’re often the root of the issue.
  • Inspect the charger and connections.
  • Confirm the controller and motor are functioning.
  • Regular maintenance prevents future issues.

FAQ

Here are some frequently asked questions regarding electric golf carts that won’t start:

1. How do I know if my golf cart batteries are dead?

Check their voltage with a multimeter; a reading below 6 volts indicates they need charging or replacing.

2. What should I do if my charger isn’t working?

Try another outlet or charger to identify if the charger itself is the issue.

3. How often should I maintain my electric golf cart?

Perform a monthly inspection to ensure everything is in working order.

4. Is it safe to clean battery terminals with water?

Yes, but make sure the batteries are disconnected. Use a mix of baking soda and water for corrosion.

5. Why does my golf cart make a clicking sound but won’t start?

A clicking sound often indicates a weak battery or poor connection.

6. Can the key switch be repaired?

In many cases, it can be repaired. However, it’s often more reliable to replace a malfunctioning key switch.

7. How long do electric golf cart batteries typically last?

With proper care, they can last 4-6 years, depending on usage and maintenance.

8. What is the purpose of the golf cart’s controller?

The controller regulates the speed and power delivered to the motor.

9. How should I store my electric golf cart?

Fully charge the batteries, store in a cool, dry place, and check on them periodically.

10. Can I use my golf cart charger for other battery types?

No, chargers are specifically designed for certain battery types. Always use the correct charger to avoid damage.

Conclusion

Your electric golf cart provides convenience and enjoyment, but a failure to start can be frustrating. Follow these steps to diagnose and fix the common reasons behind a non-starting electric golf cart. Remember, regular maintenance plays a pivotal role in ensuring your cart continues to perform at its best! Happy golfing!

How To Get Out Of A Bunker In Golf

how to get out of a bunker in golf

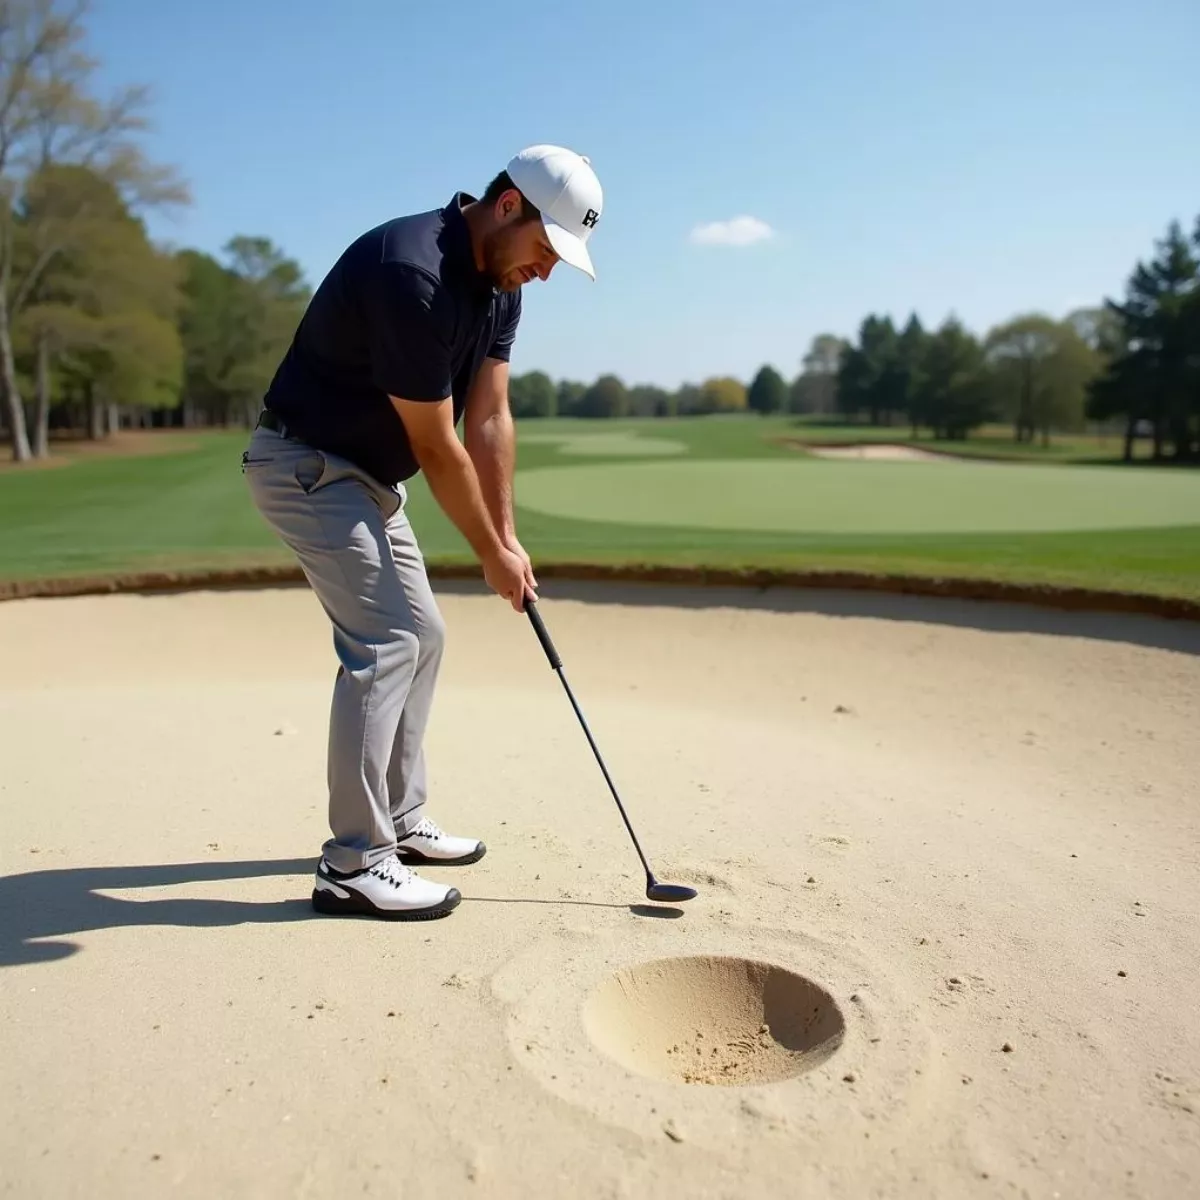
Golf is a game of precision and finesse, and getting stuck in a bunker can be one of the most daunting challenges a golfer faces. However, understanding the techniques and strategies to exit those sand traps can transform your game from frustrating to fabulous! In this comprehensive guide, we will walk you through everything you need to know about getting out of a bunker like a pro. Whether you’re a beginner or a seasoned golfer, read on to improve your bunker play and lower your scores.

Understanding the Bunker

Before we jump into techniques, it’s essential to understand what a bunker is in golf. The bunker is a sand-filled trap designed to challenge players. It serves two purposes: it tests a player’s skill and keeps the game interesting.

  • Types of Bunkers:
    • Fairway Bunkers: Located near the fairway, typically not too deep.
    • Green-side Bunkers: Positioned close to the green, often deeper and more challenging.

Tools for Your Bunker Play

Selected gear can significantly improve your performance:

  • Bunker Wedge: A club specifically designed for getting out of bunkers.
  • Sandy Glove: This can help you grip the club better in a sandy environment.
  • Ball Marker: To mark your ball position before entering the bunker.

1. Assess the Situation

First and foremost, assess the conditions:

  • Ball Position: Is it buried, sitting up, or on the lip?
  • Sand Quality: Is it fluffy, wet, or compact?
  • Distance to the Flag: How far do you need to hit the ball?

Situational Awareness

These questions will guide your approach. You must use different techniques for each scenario:

Situation Recommended Technique
Buried Ball Open the clubface and hit with a steep swing.
Ball Sitting Up Take a normal swing with minimal clubface opening.
Ball Near the Lip A delicate touch with an open clubface.


2. Choose the Right Club

The right club can make all the difference. Here’s a quick breakdown:

  • Sand Wedge (54-56 degrees): Ideal for most bunker shots; great for getting under the ball.
  • Lob Wedge (58-60 degrees): Useful for short, high shots; perfect for green-side bunkers.
  • Gap Wedge (50-52 degrees): Sometimes effective in fairway bunkers when you need more distance.

Selecting Your Club

Choose your club based on the distance you need to travel and your comfort level:

  • For short shots: Sand or lob wedge.
  • For longer shots: Consider using a gap wedge.

3. Master Your Setup

Getting into the correct setup is crucial:

  1. Stance Width: Stand with a slightly wider stance than normal.
  2. Ball Position: Place the ball slightly forward in your stance.
  3. Weight Distribution: Favor your lead foot (left foot for right-handed golfers).
  4. Open Stance: Angle your feet slightly to the left (for right-handers) to align your shoulders.

Body Alignment

Here’s a simple checklist for your setup:

  • Feet anchored in the sand
  • Knees slightly flexed
  • Hands ahead of the ball


4. Perfecting Your Swing

The Swing Mechanics

To effectively escape a bunker, focus on the following:

  • Clubface Angle: Open it to allow for better lift.
  • Swing Path: Follow through with an exaggerated upward motion to avoid hitting the ball directly.
  • Follow through: Keep your head down and maintain your balance.

Practice Your Swing

  • Visualize the shot: Picture the desired trajectory.
  • Practice with purpose: Use drills focusing on sand shots to build confidence.

Drills to Boost Your Skills

  • Footprint Drill: Practice leaving your footprint while hitting sand to improve your angle.
  • Half Swing Drill: Focus on feeling the right impact to avoid over-hitting.

5. Mental Game

Your mind plays a crucial role in your performance. Here’s how to keep it in check:

  • Stay Positive: Focus on what you can control and visualize success.
  • Breathe: Take deep breaths to maintain calm and clarity.
  • Stay Committed: Trust your instincts and commit to your shot.

6. Common Mistakes to Avoid

Identifying typical pitfalls can help you improve faster:

  • Hitting Too Hard: Resist the urge to muscle the shot; you’ll likely make more mistakes.
  • Incorrect Club Selection: Always assess your distance and angle before choosing a club.
  • Poor Setup: A bad stance can lead to a subpar shot.

Key Takeaways

  • Assess before acting: Understanding the bunker conditions is key.
  • Choose the right club: Use a sand or lob wedge for optimal performance.
  • Master your setup: Ensure a proper stance for better swings.
  • Focus on swing mechanics: Open the clubface and follow through smoothly.
  • Maintain a positive mental attitude: Visualize success and remain calm.


FAQ Section

1. What is the best club to use in a bunker?

The best club to use is typically a sand wedge or lob wedge, depending on the distance you need to travel.

2. How do I prevent my ball from getting stuck in the sand?

To avoid the ball getting stuck, ensure the clubface is open and focus on making solid, controlled contact with the sand about two inches behind the ball.

3. Can I use a regular iron for bunker shots?

Generally, a sand wedge is more effective due to its design, but you can use a gap wedge if you’re in a fairway bunker, provided the distance and situation permit it.

4. How do I practice bunker shots at home?

Practice hitting into a bucket filled with sand, using a similar swing to what you’d use on the course.

5. How can I improve my bunker play?

Regular practice, focusing on your setup, and understanding swing mechanics will continuously enhance your bunker skills.

6. Is it legal to touch the sand in a bunker before hitting?

Yes, but only with your club. Touching it with your hand is illegal and incurs a penalty.

7. What should I do if the sand is very hard?

In harder sand, you may need to make more of a precision shot with a steeper angle while utilizing less clubface opening.

8. How can I get more lift on my bunker shots?

Open your stance and clubface while making a sweeping motion; this will help get the ball airborne.

9. Should I practice bunker shots regularly?

Yes, regular practice in bunkers will greatly improve your comfort and skill in sand play.

10. What is the "footprint drill"?

The footprint drill involves practicing your swing in the sand to ensure you’re making proper contact without changing your setup.

Continue practicing these techniques, and soon, you’ll find yourself navigating bunkers with ease. Remember, practice makes perfect, and understanding the nuances of bunker play is crucial to your golf success. Happy golfing!

how to chip and pitch in golf

Golf is not just a game of power; it’s an art of finesse. Among the essential skills that can significantly lower your scores is mastering the techniques of chipping and pitching. In this guide, we will dive deep into these crucial short-game skills, helping you improve your performance around the greens.

Whether you’re a beginner or have been playing for years, improving your chip and pitch game can enhance your overall golfing experience. Get ready to uncover crucial tips, techniques, and drills that will transform your short game.

Understanding Chipping and Pitching

Before we head into techniques, let’s clarify the difference between chipping and pitching:

  • Chipping: This involves hitting the ball from a short distance, typically around the green, to get it to roll towards the hole. Chips are usually low, with a focus on rolling the ball on the green.

  • Pitching: This requires a higher shot, usually taken from a little further away, aiming to land the ball softly on the green. Pitching involves more carry and less roll.

Key Situations for Chipping and Pitching

  • Chipping: Close to the green with short grass.
  • Pitching: Further from the green, often requiring more carry over obstacles.

Essential Equipment

  • Clubs for Chipping:

    • PW (Pitching Wedge): Great for short chips where control is key.
    • SW (Sand Wedge): Ideal for softer shots and bunkers.
    • GW (Gap Wedge): Perfect for slight elevation.

  • Clubs for Pitching:
    • PW or 9-iron: For standard pitch shots.
    • SW or LW (Lob Wedge): For high pitch shots requiring delicate touch.

Tips for Equipment Selection

  • Choose a club based on the lie of the ball and the distance to the hole.
  • Practice with several clubs to find which works best for you in different situations.

Key Techniques for Chipping

1. Grip and Stance

  • Use a neutral grip. Your hands should feel comfortable and relaxed.
  • Keep your stance narrow and your weight forward, shifting 60% on your lead foot.
  • Ball position: Place the ball slightly back in your stance.

2. Swing Mechanics

  • Think of a pendulum motion. Move your arms and shoulders together while keeping your wrists firm.
  • Focus on a small takeaway, using your shoulders to control the swing.

3. Follow-through

  • Ensure a short follow-through. It shouldn’t surpass the height of your backswing.
  • This will help you control the distance effectively.

4. Practice Drills

To hone your chipping skills, try these drills:

Drill Description
Target Chipping Set up targets within 10-20 feet of the green and aim for them.
One-hand Chipping Practice chipping with only your lead hand to improve feel.
Obstacle Course Place objects to navigate around while practicing chipping.

Key Techniques for Pitching

1. Grip and Stance

  • Use a slightly stronger grip with more fingers wrapped around the club.
  • Stance should be wider than a chip, with more balanced weight distribution (50/50).

2. Ball Position

  • Place the ball in the middle of your stance or slightly forward for better loft.

3. Swing Mechanics

  • Start low and finish high. Focus on making a full turn with your upper body.
  • Ensure your wrists hinge upward at the top of the backswing, allowing for a clean strike.

4. Follow-through

  • Ensure your follow-through is balanced and finishing high, allowing the ball to rise and land softly.

5. Practice Drills

Here are some effective practice drills for pitching:

Drill Description
Pitching Lace Drill Draw a line on the green to visualize your landing area. Aim for that line.
Progressive Distance Start close and gradually back away to practice pitch accuracy at varying distances.
Lob vs. Chip Challenge Alternate between lob and chip shots at the same target to gain versatility.

Mental Approach to Chipping and Pitching

  • Focus: Visualize your shot before executing it. Imagine the ball’s trajectory and landing.
  • Relax: It’s easy to get tense; take deep breaths and maintain a relaxed grip.
  • Confidence: Each time you practice, build confidence in your ability to execute the shot.

Key Takeaways

  • Chipping is about control and rollout, while pitching focuses on elevation and soft landing.
  • Use the right clubs based on your shot distance and lie.
  • Maintain correct grip, stance, and swing mechanics for each shot type.
  • Regular practice drills can significantly improve your short-game performance.
  • Don’t underestimate the mental aspect; confidence and focus are crucial.

Frequently Asked Questions (FAQs)

1. What is the best club for chipping?

The pitching wedge is commonly used, but a sand wedge can help with softer and more precise shots.

2. How do I prevent chunked chips?

Focus on your weight distribution and keep your hands ahead of the ball at impact.

3. Should my stance be wider for pitching?

Yes, a wider stance will provide better balance and stability during your swing.

4. How can I improve my pitching accuracy?

Practice set distances to get the feel of the shot and work on your follow-through to ensure consistent strikes.

5. How do I judge the right amount of swing for distance control?

Start by making small swings for short pitches and gradually increase your backswing as you gauge the needed distance.

6. What is the difference between a chip and a pitch shot?

Chips are usually low with a focus on roll, while pitches require more height and softer landings.

7. Can I chip with a 7-iron?

Absolutely! A 7-iron is a versatile club that can be used for longer chips, depending on your comfort level.

8. How can I practice chipping alone?

Set up targets on the green at varied distances and challenge yourself to hit those targets from different lies.

9. Should I use a putting stroke for chipping?

Yes! A putting stroke helps keep control; however, the swing will vary in terms of speed and elevation.

10. How often should I practice my short game?

Aim for 20-30% of your practice time dedicated solely to the short game for optimal improvement.

By mastering the art of chipping and pitching, you’ll not only see improved scores but also enjoy the game more. Now it’s time to hit the practice green and put these tips into action. Remember, every golfer was once a beginner, so keep grinding and watch your skills evolve!

Happy golfing!

How To Fix A Slice In Golf

how to fix a slice in golf

Are you tired of watching your golf ball veer off to the right, ruining your scorecard and your mood? If you’ve ever wondered how to fix a slice in golf, you’re not alone. A slice is one of the most common problems faced by golfers from beginners to seasoned players. In this guide, we’ll delve into the causes of a slice and, more importantly, how to fix it. Grab a cup of coffee, settle in, and let’s work on a solution together!

What is a Slice in Golf?

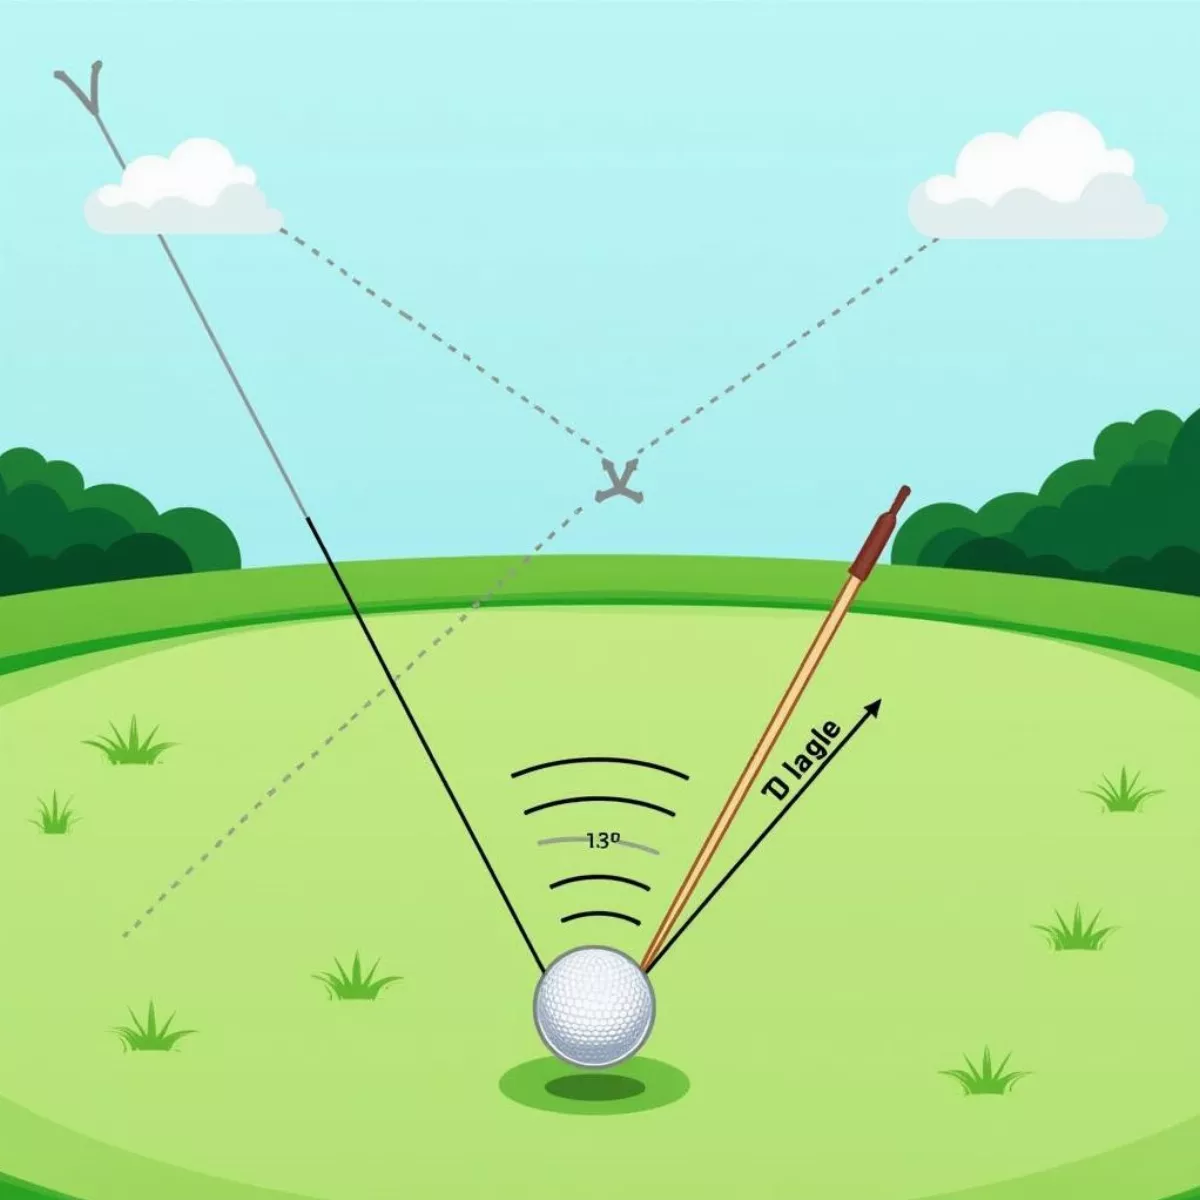
Before we get into the fixes, let’s clarify what a slice actually is. A slice occurs when the ball curves dramatically from left to right for right-handed golfers and right to left for left-handed golfers. This unintended shot shape can lead to serious issues on the course, including hitting the ball into hazards, out of bounds, or into the rough.

Why Do You Slice?

Understanding the causes of a slice is crucial. Here are some of the most common reasons why players slice the ball:

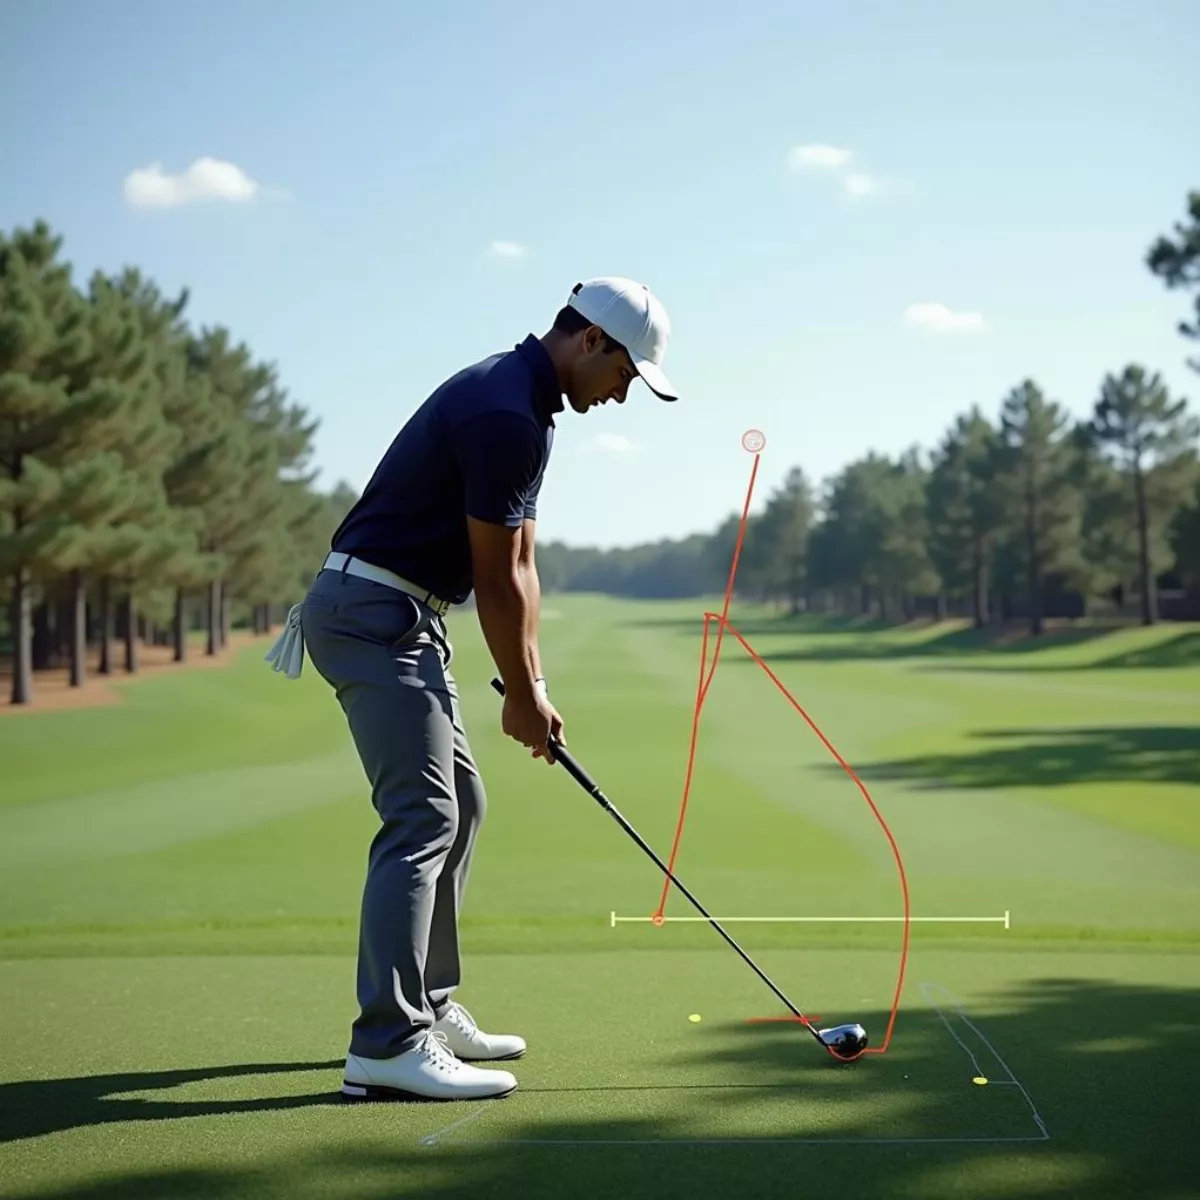
  • Open Clubface at Impact: If your clubface is pointing right during impact, the ball will slice.
  • Outside-In Swing Path: Swinging from outside to inside can create sidespin that causes a slice.
  • Poor Grip: A weak grip can lead to an open clubface.
  • Lack of Body Rotation: Failing to rotate your body can result in a compromised swing plane.

Now, let’s explore how to address these issues!

How to Fix a Slice in Golf: Step-by-Step

1. Adjust Your Grip

Fixing your grip can be an easy way to start correcting your slice.

  • Strengthen Your Grip: Rotate your hands slightly to the right (for right-handed players) on the club. This can help close the clubface at impact.
  • Check Your Knuckles: When you grip the club, you should be able to see two to three knuckles on your left hand.

2. Improve Swing Path with the Right Set-Up

Your setup might need tweaking to correct your swing path.

  • Alignment: Make sure your feet, hips, and shoulders are aligned with your target. Aim slightly left of your intended target to compensate for slicing.
  • Ball Position: Place the ball slightly forward in your stance. Keeping the ball more toward your left foot can promote an inside-out swing path.

3. Practice the Inside-Out Swing

The inside-out swing is often the key to correcting a slice.

  • Feel the Different Path: When practicing, swing the club along your body line rather than outward.
  • Drills: Set up an object (like a head cover or a tee) outside the ball’s line to encourage your club to come from the inside. Swing towards that object instead of the target.

4. Focus on Body Rotation

Engaging your body rotation can help deliver a more accurate and powerful swing.

  • Use Your Hips: Focus on initiating your downswing with your hips, not your arms. This helps keep the club on the right path.
  • Follow-Through: Ensure you complete your swing nicely, letting your hips turn towards the target.

5. Work on Your Clubface Angle

Managing the clubface angle at impact is essential to eliminate a slice.

  • Check Your Equipment: Sometimes, switching to a driver with a more closed face can help.
  • Impact Position Drills: Practice hitting swings that keep the clubface square or slightly closed at impact.

6. Make Use of Technology

If you’re serious about fixing your slice, consider leveraging modern technologies.

  • Launch Monitors: They provide detailed feedback on your swing path, club speed, and face angle.
  • Swing Analysis Apps: Use mobile applications to analyze your swing and provide corrective suggestions.

7. Seek Professional Help

If you cannot shake your slice, it might be time to get a professional lesson.

  • Find a Local Pro: They can provide personalized feedback and targeted drills to fit your unique swing tendencies.
  • Group Clinics: These can often be more affordable and provide camaraderie while learning.

Common Myths about Slicing

There are many misconceptions about fixing slices. Let’s debunk a few:

  • Myth: You Need to Hit Harder: Over-trying often leads to more slices. Focus on technique.
  • Myth: Slices Are Just Part of Golf: Many golfers don’t need to accept a slice. Most can be fixed with practice.

Key Takeaways

  • Grip and setup can significantly impact your slice.
  • The inside-out swing path is your friend!
  • Make sure to engage your body rotation for a more powerful hit.
  • Professional lessons can offer guidance tailored to your specific challenges.

FAQs About Fixing a Slice in Golf

1. What causes my slice?

Your slice is often caused by an open clubface at impact and an outside-in swing path.

2. Can equipment cause a slice?

Yes, the type of club you’re using can affect your slice. A driver with a closed face may help.

3. Will changing my grip help?

Absolutely! A stronger grip can help square the clubface at impact.

4. What drills should I use to fix my slice?

Focus on inside-out swing drills, body rotation practice, and alignment checks.

5. Is it possible to completely eliminate a slice?

Yes! While it may take time and practice, most golfers can fix their slice.

6. How can I tell if I’m slicing?

If your ball consistently travels right (for right-handers) or left (for left-handers) after contact, you likely have a slice.

7. Do I need professional help to fix my slice?

While not always necessary, a few lessons from a golf pro can help speed up your improvement.

8. Can a slice affect my game?

Yes, a slice can lead to poor scores and frustration on the course.

9. What if I still slice after making changes?

Be patient; adjustments take time. Consider seeking feedback from a golf instructor.

10. Is a draw better than a fade?

Both can be effective; it all comes down to individual preference. Learning how to hit a draw can be beneficial if you’re trying to correct a slice.

By focusing on correcting your grip, swing path, and body mechanics, you can move from slicing the ball to hitting great shots down the fairway. So, go out there, practice these tips, and enjoy the game of golf—good luck, and happy golfing!

how to hit a golf ball further

Golf is a sport rooted in precision, patience, and practice. While many players focus on perfecting their swing or mastering the short game, one crucial aspect often overlooked is distance. Want to know how to hit a golf ball further? Look no further! We’ve got you covered with insightful tips, techniques, and strategies designed to add valuable yards to your drive. Grab a club, and let’s swing into action!

Understanding the Fundamentals of Distance

1. The Importance of Swing Mechanics

Your swing is the heart of your game. To maximize distance, you need to perfect the following components of your swing:

  • Grip: A neutral grip promotes better control.
  • Stance and Posture: A solid base provides power.
  • Backswing: Rotate your shoulders; keep a smooth rhythm.
  • Downswing: Maintain speed; focus on the hip rotation.

Quote: “The greatest player is not the one who hits the ball the farthest, but the one who knows how to harness his potential.”

2. Leverage Your Body

Distance isn’t just about the arms. Your whole body should work in harmony.

  • Leg Strength: Strong legs help generate power during your swing.
  • Core Stability: A strong core aids in balance and rotational strength.
  • Upper Body: Keep your arms relaxed to achieve better flow.

3. Highlighting Equipment Choices

Choosing the right equipment can make a world of difference.

  • Drivers: Opt for a driver with a larger sweet spot – likely a low-lofted club for added distance.
  • Ball Selection: Use a ball designed for distance, generally 3-piece or 4-piece balls.


Key Techniques to Increase Distance

1. Practice Your Timing

Improving your timing can yield longer drives. Focus on the following:

  • Tempo Drills: Practice swinging slowly at first, then gradually increase speed.
  • Backswing Length: Find what works for you; a longer backswing can generate more speed.

2. Maximize Clubhead Speed

Increased swing speed translates to distance. Here are ways to achieve that:

  • Use Your Legs: Push off during your downswing to use leg muscles.
  • Maintain a Fluid Motion: Keep your swing smooth; jerky motions lead to energy loss.

3. Optimize Your Launch Angle and Spin Rate

Your ball’s trajectory contributes to distance.

  • Launch Angle: Aim for 12-15 degrees for maximum distance.
  • Spin Rate: A low spin rate helps the ball travel farther.

Launch Angle Spin Rate Distance Effect
10-12 degrees Low (1800-2200) Maximizes roll after landing
12-15 degrees Optimal (2500) Ideal balance of carry and roll
15+ degrees High (3000+) Reduces total distance significantly

4. Work on Flexibility and Strength

Regular stretching and strength training can unlock more distance.

  • Flexibility: Yoga or dynamic stretching enhances your range of motion.
  • Strength Training: Focus on full-body workouts emphasizing major muscle groups.

5. Understand the Mental Game

Golf isn’t just physical; mental strategies can enhance your power.

  • Focus on Targets: Visualize where you want the ball to land.
  • Stay Relaxed and Confident: Tension can limit performance, so stay calm during your swings.


Skills Enhancement with Drills

Here are some drills that can significantly help you hit the ball further:

  • Tee Drill: Place the ball on a tee and focus on hitting it directly; this builds confidence with your driver.
  • The One-Handed Drill: Practice hitting shots with just your dominant hand to strengthen muscles and improve control.

Always remember: Professionals didn’t get to where they are overnight. Consistent practice is key.


Key Takeaways

  • Focus on mechanics: A solid grip, stance, and swing can make a big difference.
  • Leverage your body: Strengthening legs, core, and upper body will improve your power.
  • Choose the right gear: Optimizing your driver and golf ball can enhance your distance.
  • Perfect your timing: Work on swing tempo and backswing length.
  • Maintain flexibility and strength: Incorporate flexibility exercises and strength training into your routine.
  • Don’t ignore the mental aspect: Stay focused and relaxed for better performance.


FAQ Section

1. How does my grip affect my distance?

Your grip influences club control and swing path. A neutral grip allows for better accuracy and power generation.

2. What is the ideal launch angle for maximum distance?

Aim for a launch angle of 12-15 degrees to ensure optimal distance and trajectory.

3. Can my golf ball choice really make a difference?

Absolutely! Balls designed for distance provide lower spin rates and optimized aerodynamics.

4. How important is flexibility when hitting the ball further?

Flexibility is crucial; it allows for a fuller range of motion in your swing, which can generate more power.

5. What drills can I do to improve my swing distance?

Try the Tee Drill and the One-Handed Drill to enhance control and strength in your swing.

6. Does core strength affect my distance?

Yes! A strong core stabilizes your body during the swing, contributing to more powerful shots.

7. How often should I practice to see improvement?

Aim for consistent practice, ideally 2-3 times a week, focusing on various drills and techniques.

8. What is the best way to avoid tension while swinging?

Stay relaxed, practice slow swings, and visualize successful shots to keep tension-free.

9. Should I adjust my swing based on the conditions?

Definitely! Wind and course conditions may dictate which adjustments are necessary for optimal execution.

10. Is it common for recreational players to struggle with distance?

Yes, many recreational players hit shorter distances. It often takes practice and understanding of proper techniques to gain distance.


By focusing on these strategies and practicing diligently, you’ll be well on your way to hitting the golf ball further. Remember, hitting a long drive is about more than just raw power; it requires technique, practice, and mental focus too. Now go put these tips to the test – your next long drive awaits!

How To Practice Golf At Home

how to practice golf at home

If you’re an avid golfer looking to improve your game without heading to the course, congratulations! Practicing golf at home is not only possible but can be incredibly effective. In this article, we’ll explore various golf practice techniques you can implement in your living space, provide tips on creating a practice-friendly environment, and outline the key elements that will enhance your golf skills—all without ever leaving home!

Why Practice Golf at Home?

Practicing at home offers convenience and flexibility, making it easier to fit in a few swings during your busy day. Furthermore, home practice can help you focus on specific aspects of your game, such as:

  • Swing mechanics
  • Short game techniques
  • Putting skills
  • Physical conditioning

In this guide, we’ll break down effective practice methods and tools to elevate your game.

Creating Your Home Golf Practice Space

1. Choose the Right Location

Identifying an appropriate space in your home is essential. Consider setting up in:

  • A spacious room: Living rooms or basements can work well.
  • An outdoor area: Balconies or backyards are great for full swings and chipping.
  • Garages: If you’re limited on space, a garage can be an ideal location.

2. Clear the Area

Make sure your practice area is free from any clutter. Clear out furniture, decor, and any items that could be damaged during your practice.

3. Invest in Essential Equipment

While you don’t need every gadget on the market, investing in a few key pieces can enhance your practice sessions:

Putting Mat

  • Helps improve your putting stroke from the comfort of your home.
  • Look for mats with alignment guides to ensure proper setup.

Chipping Net

  • Practice your chipping skills with a target.
  • Easily collapsible, making it perfect for small spaces.

Golf Simulator

  • For a more immersive experience, consider a golf simulator.
  • Great for full swings and can provide feedback on shot data.

4. Utilize Technology

Incorporating technology into your practice can yield impressive results. Consider these tools:

  • Golf training apps for swing analysis.
  • Launch monitors to track ball speed, spin rate, and distance.
  • Video recording to review and analyze your swing technique.

Effective Home Practice Techniques

1. Swing Mechanics

Practicing swing mechanics at home is about repetition. Here are a few techniques to consider:

Air Swings

  • Make air swings in your chosen practice area, focusing on your form and follow-through.
  • Use a mirror to check your alignment and mechanics.

Slow Motion Swings

  • Practicing in slow motion can enhance muscle memory.
  • Focus on key aspects of your swing, like grip, stance, and impact.

2. Putting Practice

Putting is a critical part of any golfer’s game. Here’s how to get better without stepping onto the green:

Distance Control Drills

  • Set up various targets on your putting mat, practicing different lengths.
  • Focus on getting the ball to stop near each target.

Alignment Drills

  • Use tape or markers on your mat for alignment practices.
  • Ensure your putter face is square to your target line.

3. Chipping Drills

Improving your chipping can greatly reduce your score. Here are some useful drills:

Target Practice

  • Set up nine buckets or holes in the ground as targets and try chipping into each.
  • Vary your distances to mimic on-course scenarios.

Uphill and Downhill Lies

  • If you have an inclined surface, practice chipping from different lies.
  • Use pillows or other items to mimic varying grass heights.

4. Mental Practice

Don’t forget about the mental aspect of golf. Visualization can be just as beneficial as physical practice. Try these techniques:

  • Imagery: Imagine yourself on the course, visualizing successful shots.
  • Breathing Techniques: Practice calming techniques to stay focused during play.

5. Fitness and Flexibility

Incorporate a fitness routine that complements your golf training, emphasizing flexibility and strength. Here are some exercises to consider:

  • Squats: Builds leg strength important for your swing.
  • Torso Rotations: Enhances hip and core mobility.
  • Stretching: Focus on shoulders, back, and legs for flexibility.

The Importance of Routine

Creating a consistent practice schedule can help maintain commitment to improvement. Consider the following steps:

  • Dedicate specific times each week for practice.
  • Set achievable goals for each session.
  • Keep a practice journal to track progress and notes.

Key Takeaways

  1. Choose the Right Location: Find a safe space for practice, indoors or outdoors.
  2. Invest in Equipment: Essential tools like putting mats and chipping nets can vastly improve practice quality.
  3. Focus on Techniques: Incorporate drills for swing mechanics, putting, and chipping.
  4. Integrate Mental Practice: Use visualization and breathing techniques to improve focus.
  5. Create a Routine: Establish regular practice sessions and maintain a journal.

FAQ Section

1. Can I practice golf indoors?

Yes! Using equipment like putting mats and chipping nets, you can effectively practice indoors.

2. What equipment is essential for home practice?

A putting mat, chipping net, and possibly a golf simulator are great starters for home practice.

3. How often should I practice golf at home?

Aim for at least 2-3 times per week. Consistency is key to improvement.

4. Is it better to practice on a simulator?

Simulators provide valuable feedback and can replicate course conditions, making them an excellent addition to your practice routine.

5. What is the best way to improve my putting at home?

Use a putting mat with alignment guides and practice various distances to develop consistency.

6. How important is fitness for my golf game?

Extremely important! Strength and flexibility contribute to better performance on the course.

7. Can I use regular balls for practice?

It’s best to use practice or foam balls for indoor practice to avoid damage.

8. What drills can I do without equipment?

Focus on air swings, slow-motion swings, and mental visualization techniques.

Conclusions

Practicing golf at home can be a fun and productive way to improve your skills, even when you can’t make it to the course. By creating a dedicated practice space, incorporating essential tools, and establishing a routine, you can take significant steps towards becoming a better golfer. Remember that persistence and creativity are your best allies in this journey.


Use this guide as your roadmap to sculpting yourself into the golfer you aspire to be, all from the comfort of your home. Happy practicing!

how to play golf in the wind

Golf is often touted as a game of precision and skill. But what happens when the weather takes a turn and strong winds are in the forecast? Playing golf in the wind can be challenging, but it is an essential skill for any golfer. This guide will give you the tips and techniques you need to conquer the golf course even when the gusts are howling.

Understanding Wind Effects on Golf

Before diving into specific strategies, it’s crucial to understand how the wind influences your game. Wind can affect:

  • Ball Trajectory: Strong winds can either lift your shot or cause it to drop prematurely.
  • Distance: Into the wind, your ball will not travel as far; conversely, it can get a much longer carry with the wind at your back.
  • Stability: When hitting your ball, even slight changes in posture can result in major directional changes.

The Types of Wind Effects

  1. Headwind: This wind blows directly against your shot, reducing distance.
  2. Tailwind: This wind blows from behind, giving extra distance.
  3. Crosswind: This wind blows across the fairway, pushing your ball sideways.

Strategies for Playing Golf in the Wind

Navigating the wind requires a combination of technique and mindset. Here are some strategies to help you play effectively when Mother Nature turns up the breeze:

1. Adjust Your Grip and Stance

  • Wider Stance: A wider stance helps lower your center of gravity, improving balance against gusts.

  • Grip Pressure: Maintain a firmer grip to maintain control but avoid excessive tension in your hands. Too much grip pressure can hinder your swing.

2. Choose the Right Club

  • Use Lower-lofted Clubs: When hitting into the wind, a lower-lofted club like a 3-iron or 5-wood will keep the ball trajectory lower and reduce the wind’s effect.

  • Hit Less Club: If you usually hit a 7-iron from 150 yards, consider using a 6 or 5-iron instead.

3. Flight Your Ball

  • Punch Shots: For strong winds, a punch shot can help keep the ball down. This technique involves a shorter, more compact swing.

  • Knockdown Shots: To execute this shot, take less club and hit with a more descending blow to create a lower ball flight.

4. Aim and Calculate

  • Aim Downwind: When dealing with crosswinds, aim further away from your target to account for the wind’s push.

  • Understand the Distance Reduction Factor: Add at least 10% more distance for every 10 mph of headwind. For example, if you normally hit 150 yards, expect it to fly about 135 yards with a strong headwind.

5. Practice Wind-specific Shots

  • Chipping and Putting: Work on your short game in windy conditions. Being able to adapt your chip shots and putts can save strokes.

  • Course Management: Know when to play conservatively and when to take risks. Sometimes, it’s smarter to aim for the safe part of the green instead of the flag.

Mental Game: Stay Focused

Wind can be distracting and may lead to frustration. Maintaining a positive mindset in difficult conditions is vital. A few strategies include:

  • Stay Calm and Patient: Accept that the conditions may lead to higher scores.

  • Visualization: Visualize your shots and feel the flow of your swing despite the wind.

  • Focus on the Process: Concentrate on your fundamentals rather than the outcome.

Key Equipment Considerations

  • Wind Jacket: Ensure you’re dressed for the elements. A lightweight, wind-resistant jacket can help keep you warm without restricting your swing.

  • Hat with a Brim: A hat can shield your eyes from wind and reduce distraction during your swing.

Table: Quick Reference for Wind Conditions

Wind Type Effect on Ball Club Adjustment
Headwind Reduces distance; ball flies high Use lower-lofted clubs
Tailwind Increases distance; ball flies lower Consider less club
Crosswind Pushes ball sideways Aim to the opposite side

Key Takeaways

  • Use a wider stance and maintain firm grip pressure for better control.
  • Utilize lower-lofted clubs and adjust your aim to account for wind.
  • Embrace punch and knockdown shots for more stability.
  • Keep a positive mindset and focus on the process rather than outcomes.

FAQ

1. How do I know how much the wind will affect my shot?

You’ll need to gauge the wind’s speed and direction. A good rule is to estimate that a 10 mph headwind reduces distance by about 10%.

2. Should I change my swing in the wind?

Yes, a shorter swing with a more compact follow-through can help you control your shots better.

3. What should I do if it’s very windy during putting?

Aim for larger targets, like the middle of the green, and adjust your stroke to accommodate the wind.

4. Can I play golf in extremely windy conditions?

Yes, but it’s essential to assess your comfort level and prioritize safety, especially if it’s also stormy.

5. Is there a specific time for windy conditions?

Wind tends to be stronger in the afternoon; mornings are generally calmer.

6. How can I practice for windy conditions?

Head to the range on a windy day and practice different shots focusing on trajectory and distance.

7. What do I wear when playing in the wind?

Dress in layers with a windproof jacket to stay warm while allowing ease of movement.

8. How does wind affect my putting?

Wind can move your ball on the green—consider this when lining up your shots.

Conclusion

Playing golf in the wind can be a daunting task, but with the right strategies, you can turn adversity into opportunity. Utilize proper techniques, maintain focus, and embrace the challenge. Whether you’re a novice or a seasoned player, mastering the wind will enhance both your skillset and enjoyment on the course. Now, grab your clubs and get out there—let the wind be your ally, not your adversary!

For more resources on improving your golf game, check out our articles on golf techniques and mental game strategies. Happy golfing!

How To Maintain Your Golf Equipment

how to maintain your golf equipment

Golf is more than just a game; it’s a passion for many. And like any sport, ensuring that your equipment is in top shape will help enhance your performance on the course. Proper golf equipment maintenance can prolong the life of your clubs, balls, and other accessories, ensuring that you play your best every time you step onto the green.

In this guide, we’ll dive deep into how you can maintain your golf equipment effectively, providing you with practical tips and techniques to keep your gear in peak condition. Whether you’re a seasoned pro or just starting, these insights will keep you swinging with confidence!

The Importance of Golf Equipment Maintenance

Maintaining your golf clubs and other equipment not only improves your performance but also saves you money in the long run. Just like any investment, taking care of your equipment ensures that you maximize its value. Here’s why regular maintenance should be part of your routine:

  • Enhanced Performance: Well-maintained clubs will deliver better results.
  • Cost-Effective: Regular upkeep prevents costly replacements down the line.
  • Improved Lifespan: Proper care extends the life of your gear.
  • Safety: Faulty or damaged equipment can lead to accidents or injuries on the course.

How to Maintain Your Golf Clubs

Golf clubs are the heart of your game. They require specific care to keep performing optimally.

1. Regular Cleaning

Your clubs encounter dirt, grass, and moisture regularly. Here’s how to clean them effectively:

  • Tools Needed: Soft-bristled brush, warm water, mild soap, towel
  • Process:
    • Soak the clubheads in warm soapy water for a few minutes.
    • Use a soft-bristled brush to gently scrub dirt or debris from the grooves.
    • Rinse with plain water and dry thoroughly with a towel.

2. Inspect for Damage

After cleaning, check for signs of damage:

  • Look for: Dents, scratches, or rust spots
  • Action: If the damage is severe, consider taking your clubs to a professional for repair.

3. Store Properly

Proper storage can significantly impact your club’s longevity:

  • Use a golf bag with dividers** to keep clubs from clanking together.
  • Store in a cool, dry place to prevent moisture build-up.
  • Avoid extreme temperatures and humidity—this can warp or weaken your clubs.

4. Grip Care

Your grips are critical for maintaining control over your swing. Ensure they are clean and intact:

  • Clean regularly with a damp cloth and mild soap.
  • Check for wear; replace grips that feel slick or have cracks.

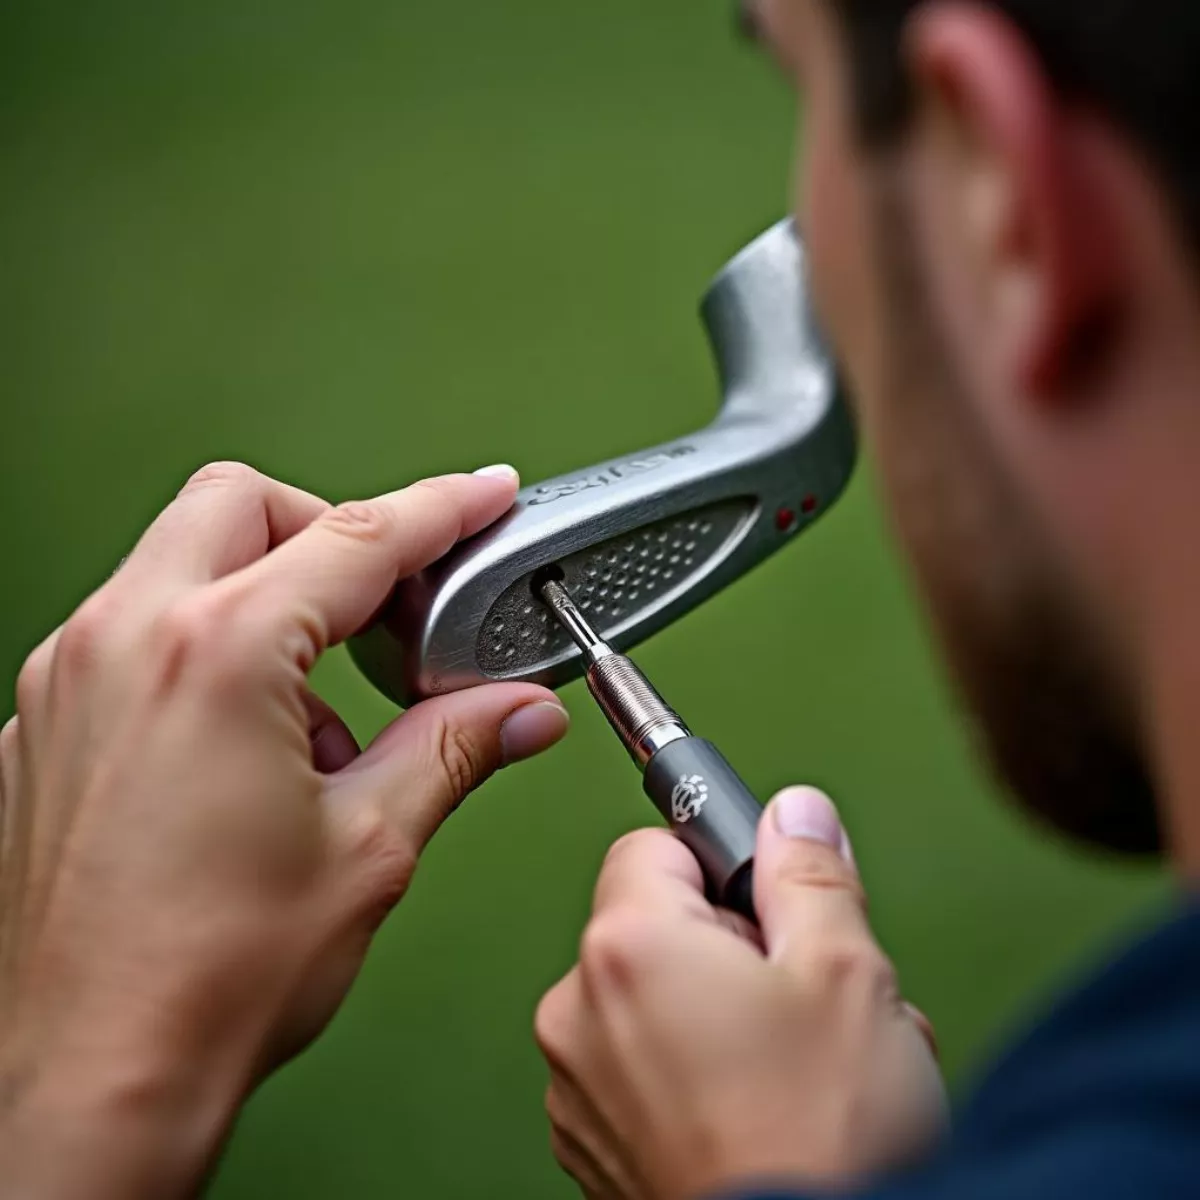
5. Club Adjustments

If your clubs are adjustable, make use of that feature:

  • Tweak loft and lie angles to suit your swing style.
  • Consult with a professional or use a fitting kit for accuracy.

Maintaining Golf Balls

Golf balls are often overlooked but keeping them clean and properly stored is essential.

1. Regular Inspection

Check your golf balls for dings or scuffs. A damaged ball can affect your spin and control:

  • Replace any balls that show wear or deformation.

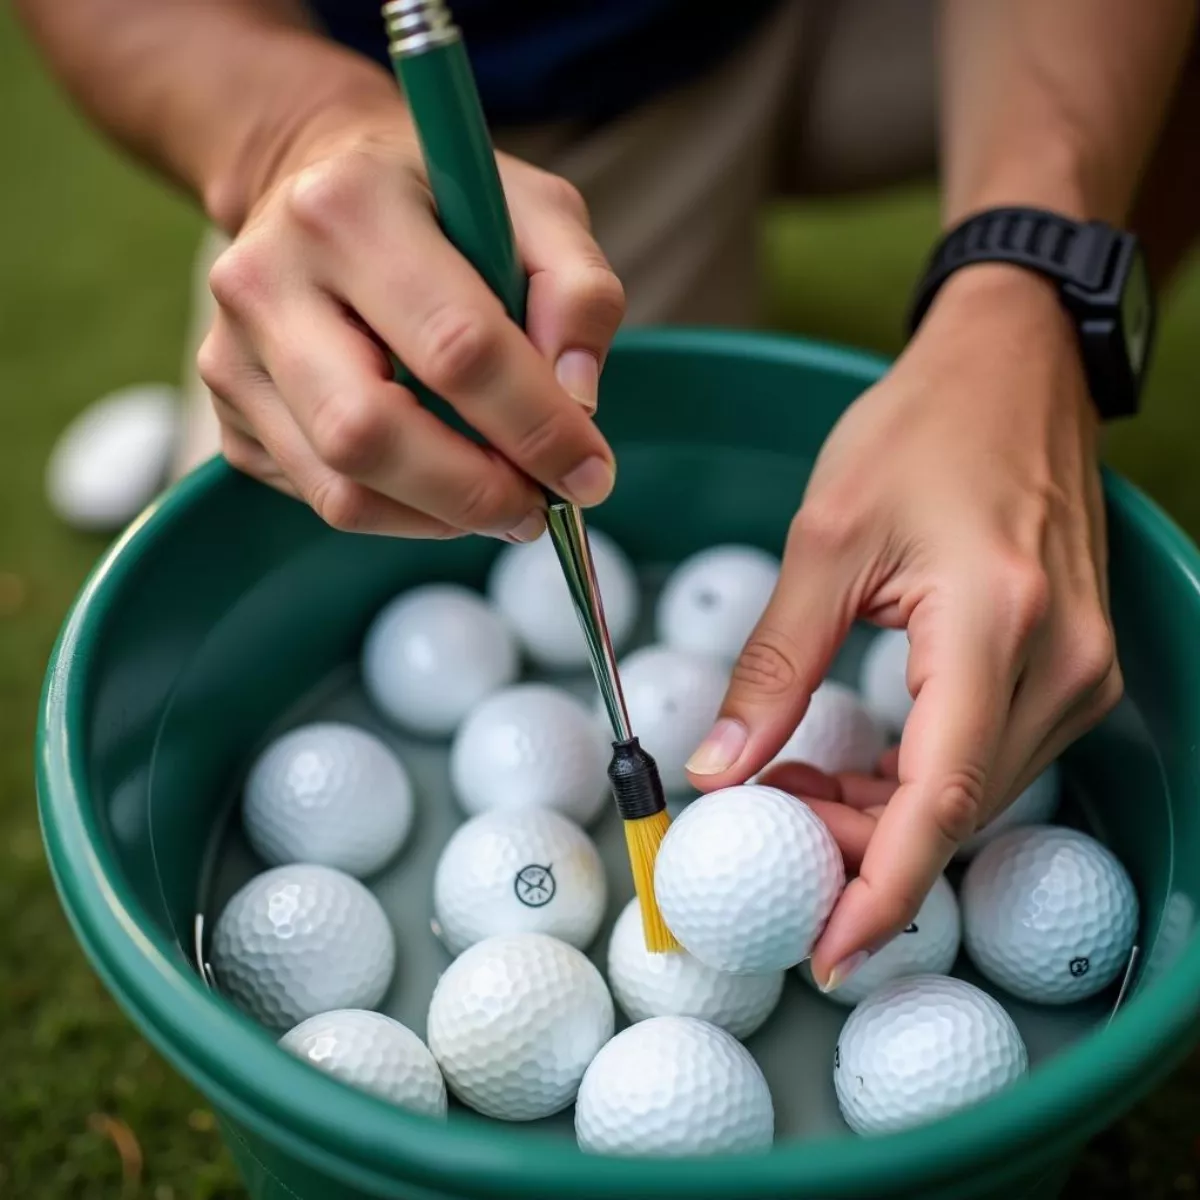
2. Cleaning Your Balls

A dirty ball can lead to poor performance:

  • Method: Use warm water and a soft-bristled brush to scrub away mud or debris.
  • Dry them off before placing them back in your bag.

3. Storage

Keep your golf balls in a temperature-controlled environment:

  • Avoid storing them in a hot or humid place.

Caring for Your Golf Shoes

Your golf shoes provide the grip and comfort necessary for a good game. Here’s how to care for them:

1. Cleaning

  • After every round, clean off mud and grass from the shoes with a soft, damp cloth.
  • Remove insoles and air them out to prevent odor build-up.

2. Use Shoe Bags

Store your golf shoes in a bag to keep them protected during travel.

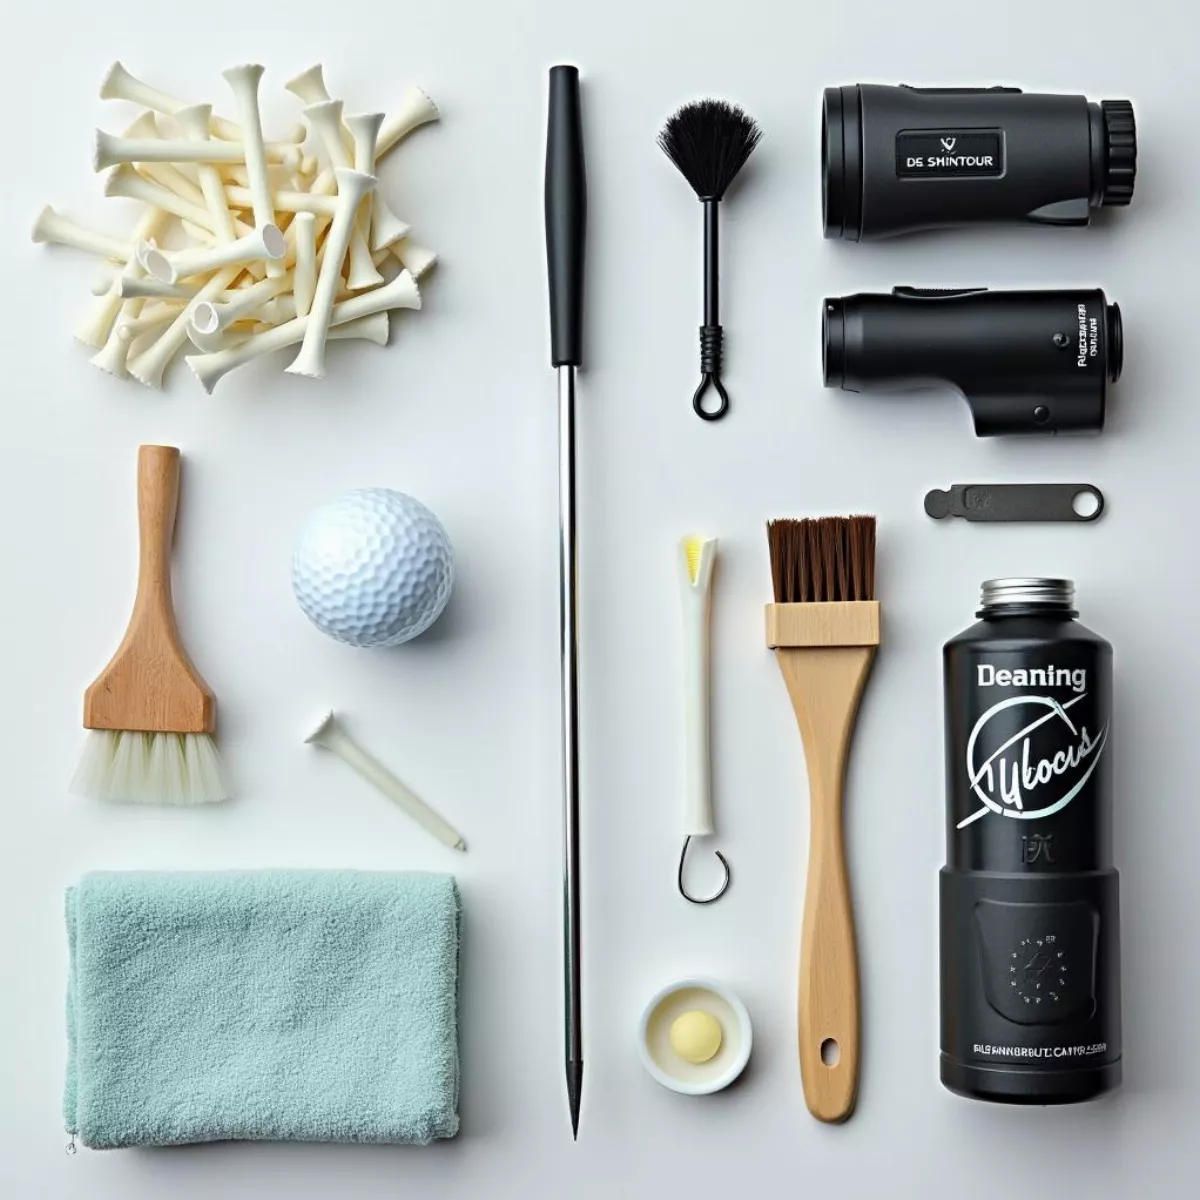
Golf Accessories Maintenance

Don’t forget about your accessories! Golf tees, towels, and rangefinders also require maintenance.

1. Golf Tees

  • Use wooden tees sparingly, as they can splinter; switch to plastic if you often break them.
  • Consider using a tee storage box to keep them organized.

2. Golf Towels

  • Wash your golf towels after each use to prevent mildew.
  • Keep a separate towel for your hands and your clubs to avoid cross-contamination of dirt and oils.

3. Rangefinders and GPS Devices

  • Clean screens regularly with a microfiber cloth.
  • Store in a padded case to avoid scratches and damage.

Key Takeaways

  • Clean and inspect your golf clubs and balls regularly for optimum performance.
  • Store your gear properly to prolong its life and maintain quality.
  • Regular grip checks and maintenance can greatly enhance your control during play.
  • Don’t forget accessories like shoes and towels – they need care too!

FAQs About Golf Equipment Maintenance

1. How often should I clean my golf clubs?

  • Clean your clubs after every round to prevent dirt build-up.

2. When should I replace my golf grips?

  • Replace grips every 40-50 rounds or sooner if they feel slick.

3. Can I wash my golf balls in the dishwasher?

  • It’s not recommended. Use warm soapy water and a soft brush instead.

4. How do I know if my golf clubs need adjusting?

  • If your shots are consistently off-target, it may be time for an adjustment.

5. What’s the best way to store my golf shoes?

  • Keep them in a cool, dry place, preferably in a shoe bag.

6. Can weather conditions affect my golf equipment?

  • Yes, extreme temperatures and humidity can damage your clubs and balls.

7. Should I get my golf clubs fitted?

  • Yes, a proper fitting can enhance your performance and comfort.

8. How do I remove stubborn stains from my golf shoes?

  • Use a damp cloth and mild soap; for tough stains, a soft brush might be necessary.

9. Are there products specifically for golf equipment cleaning?

  • Yes, there are many specialized cleaning products available for both clubs and balls.

10. How can I protect my golf bag during travel?

  • Consider using a travel cover or hard case for protection.

In conclusion, maintaining your golf equipment not only enhances your game but also empowers you to enjoy the sport to its fullest. So take care of your gear, and it will take care of you out on the links! Happy golfing!