Category Archives: How to

How To Read A Golf Green

how to read a golf green

Reading a golf green can often feel like deciphering a secret code. The subtle slopes, grass types, and environmental factors all influence how your ball rolls once it leaves the putter. With a bit of insight, though, you can transform your instincts into smart, informed decisions. In this guide, we’ll explore how to read a golf green, helping you improve your game and make more successful putts.

Understanding the Basics of a Golf Green

Before diving into the specifics, let’s outline some essential concepts related to golf greens.

Key Features of a Golf Green

  • Slope: The incline of the green. A slope can cause your ball to break to one side or the other.
  • Grain: The direction in which the grass grows. This affects how smoothly the ball rolls.
  • Speed: This refers to how fast the green is. Faster greens require a lighter touch.
  • Undulations: These are subtle hills and valleys on the green that can redirect your shot.

Understanding these key features will help you more accurately assess how your ball will behave once it reaches the green.

Steps to Reading a Golf Green

1. Evaluate the Surrounding Environment

Start at a distance and take in the entire hole. Look at where the hole is cut, the slope of the terrain leading to it, and how the grass appears around the green.

  • Wind Direction: Check for any wind that may affect your putt.
  • Sunlight: The areas receiving more sunlight may dry out faster and affect speed.

2. Inspect the Green’s Surface

As you approach, it’s important to study the surface of the green.

  • Grass Type: Familiarize yourself with the type of grass as different grasses can behave differently. Common types include:

    • Bermudagrass (often quicker),
    • Bentgrass (soft and responsive).

  • Surface Texture: Look for inconsistencies in the texture. Smooth patches roll quicker, while rough patches can slow the ball down.

3. Identify the Slope

Once you’re on the green, feel the slope by walking around. Check for high and low points and the general contour.

  • Low Point: Balls will tend to roll toward this area.
  • High Point: Consider this when planning your break.

Using the minimum effective distance as a reference can make slopes easier to visualize.

4. Notice the Breaks

This is where your skill in reading breaks will shine. As you make your assessments:

  • Watch for Consistent Lines: See if there are any noticeable imperfections in the green.
  • Visualize Your Line: Imagine a straight line from your ball to the hole, then adjust according to the slope and grain.

5. Assess the Grain

Grass grain can be counterintuitive. When the grain grows towards the hole, it will speed up your putt. Conversely, a grain growing away can slow it down.

  • Testing the Grain: Use your finger to lightly brush against the grass in the direction you believe the grain aligns.

6. Consider Speed and Distance

Lastly, understand how hard you need to hit the ball based on the green’s speed.

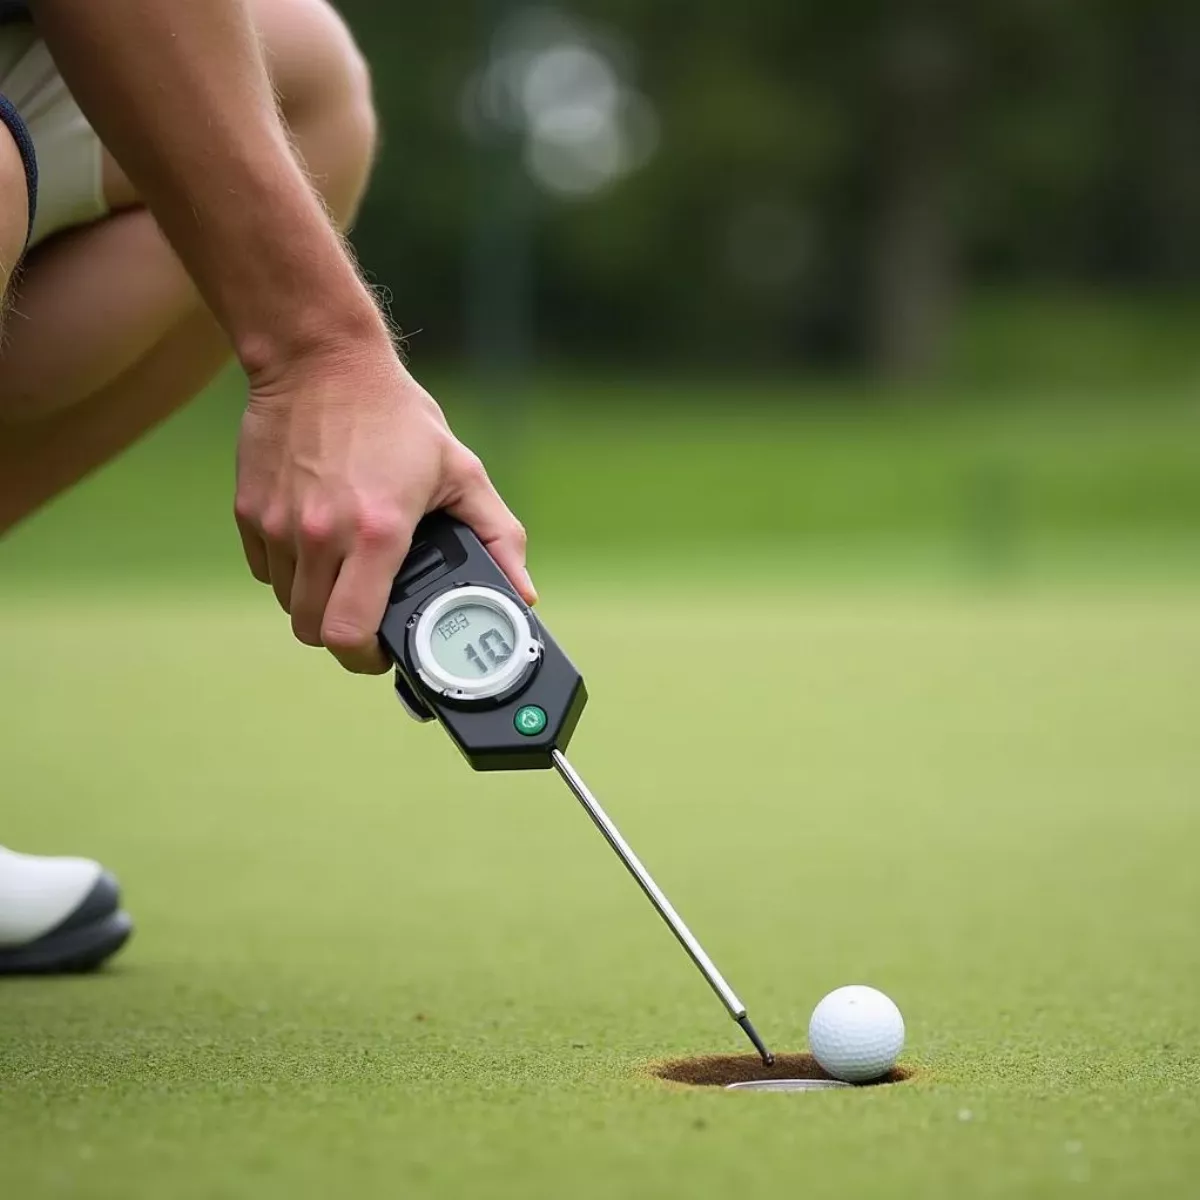
You can determine the speed of the greens using the stimp meter. Here’s a simple gauge:

Speed Rating Stimp Reading Putting Style
Slow 6-7 ft Gentle strokes
Medium 8-9 ft Standard stroke
Fast 10+ ft Firm, confident hit

Pro Tip!

Bring a putting measurer to get an accurate idea of the distance you need to cover for the perfect putt.
Practice Makes Perfect

Reading greens is a skill that comes with practice. Spend time on different courses to familiarize yourself with various green conditions, grass types, and slopes.

Practice drills:

  • Use a putting aid that emphasizes line and distance.
  • Play practice rounds with the goal of only focusing on your green reads.

Key Takeaways

  • Evaluate the Surrounding Environment: Wind and sunlight matter.
  • Inspect the Green’s Surface: Know the grass type and surface texture.
  • Identify the Slope: Walk around to visualize the high and low points.
  • Notice the Breaks: Keep an eye out for inconsistencies.
  • Assess the Grain: Understand how the grass affects your putt.
  • Consider Speed and Distance: Get familiar with the green’s pace.

Frequently Asked Questions (FAQ)

1. How do I know which way the ball will break?

Start by looking at the slope. A ball will always break toward the lowest point of the green.

2. What does "reading the green" mean?

It refers to analyzing the contours, grain, and surfaces of the green to predict how the ball will respond when putted.

3. What is the importance of grain on a golf green?

Grain affects how the ball rolls. Understanding whether the grain is growing towards or away from the hole is crucial for putting success.

4. How can I practice reading greens?

Spend time on the putting green, using various angles and scenarios to improve your ability to assess breaks and speed.

5. What’s the best way to gauge a green’s speed?

Use a stimp meter. An alternative is to practice putting first on a known speed green and then compare it to the new green.

6. Can different types of grass affect putting?

Yes, different grass types have unique characteristics affecting speed and control. Familiarity is key.

7. How can I tell if a green is fast or slow?

Look for signs of old vs. new grass, check for moisture levels, and observe the surface texture.

Conclusion

Reading a golf green may seem complex, but understanding its basics and nuances can enhance your mental game significantly. Always remember to evaluate your environment, inspect the surface, identify the slope and grain, and practice consistently to refine your skills. The more familiar you become, the better your putting will be.

So, get out there, give it a try, and happy putting!

Make sure to check out our other articles on enhancing your golf game for more tips and tricks!
how to choose the right golf club

Golf is a game of both precision and passion. Every swing counts, and picking the right golf club can significantly influence your performance on the course. With various clubs designed for specific purposes, the process of choosing the right one can feel overwhelming, even for experienced players. Fear not! In this detailed guide, we’ll walk you through the essential factors to consider when selecting golf clubs that resonate with your playing style.

Understanding the Basics of Golf Clubs

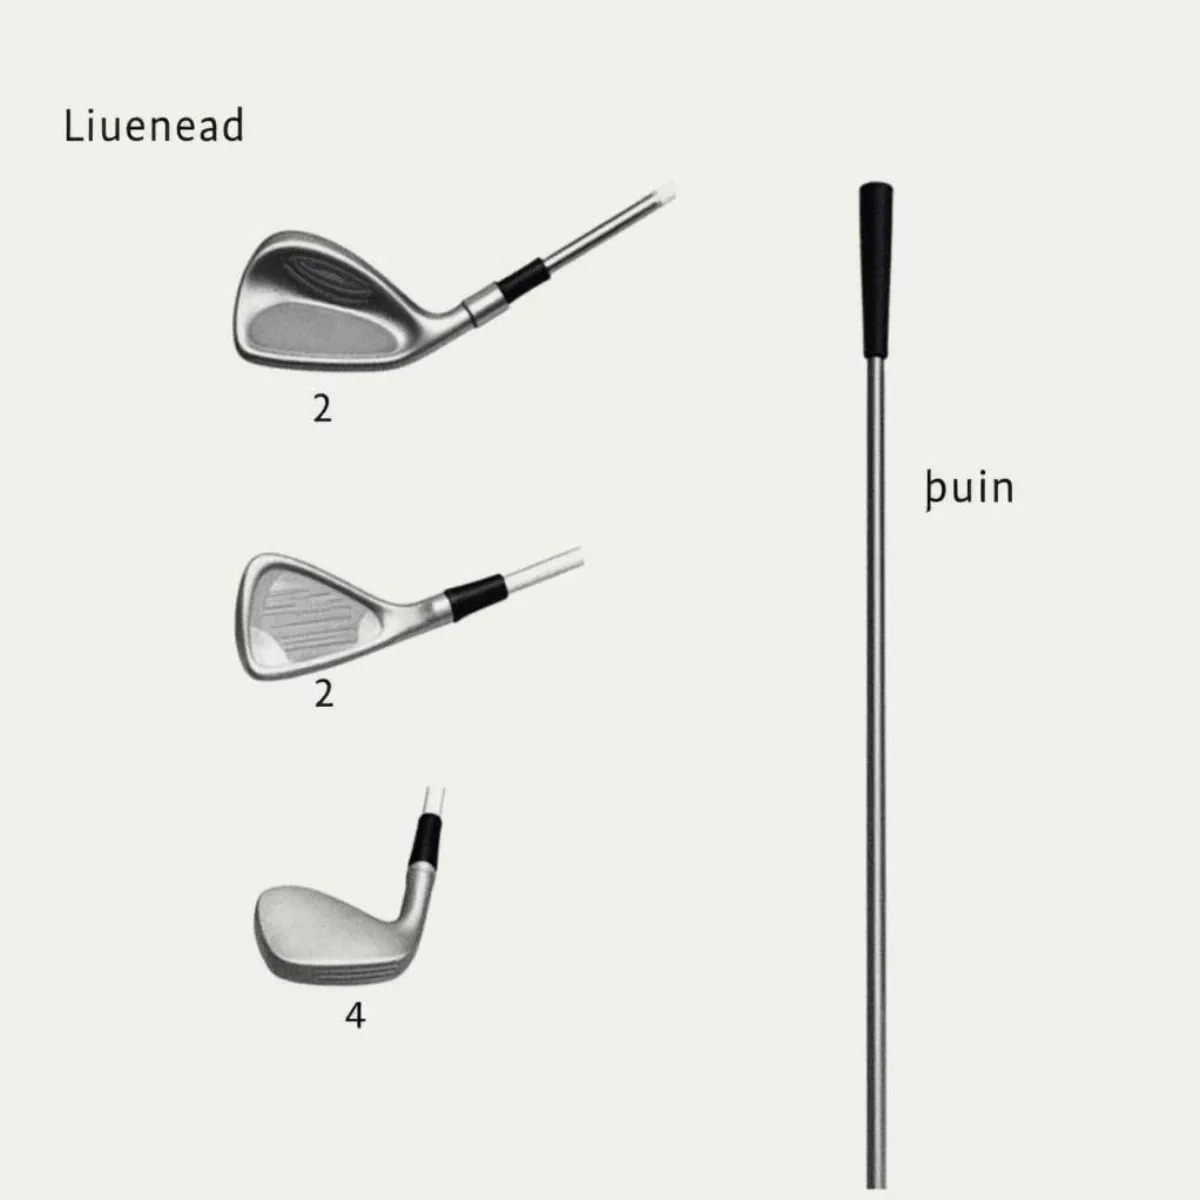
Before diving deep into selection strategies, it’s essential to comprehend what makes a golf club effective. Each club comprises three crucial elements: the clubhead, shaft, and grip.

1. Clubhead

The clubhead is the business end of the golf club. It comes in various shapes and sizes, each impacting your game in different ways:

  • Drivers: Large heads for maximum distance off the tee.
  • Irons: Intermediate size with a flat face; ideal for accuracy and control.
  • Wedges: Specialized for short approaches and getting out of tricky lies.
  • Putters: Designed for precision on the greens.

2. Shaft

The shaft impacts the club’s flex and overall performance. The flexibility of the shaft can dramatically affect your swing:

  • Stiff Flex: Best suited for faster swing speeds.
  • Regular Flex: Ideal for moderate swing speeds.
  • Senior/Flex Shaft: Perfect for slower swing speeds.

3. Grip

The grip affects your control and feel with each swing. Different grips can dictate not only comfort but also performance:

  • Standard: Offers a good balance for most players.
  • Oversized: Provides more cushioning and is easier on the hands.
  • Corded Grips: Great for sweat absorption during humid conditions.

Factors to Consider When Choosing Golf Clubs

Choosing the right club isn’t merely about preference; it involves a blend of personal style, physical attributes, and playing conditions. Here are the critical factors to consider:

1. Skill Level

Your experience on the course will significantly alter your choice.

  • Beginner: Look for more forgiving clubs that have larger sweet spots, like cavity-back irons and super game improvement drivers.
  • Intermediate/Advanced: You may want to explore traditional blades or forged clubs for better control.

2. Playing Style

Understanding your playing traits can guide your club choices:

  • Power Hitter: Opt for lower-lofted drivers and long irons.
  • Accuracy Player: High-lofted woods and forgiving short irons might be your best bet.

3. Club Setup

Getting fitted for clubs can make a notable difference in your game. Consider factors like:

  • Lie Angle: Should align with your setup to achieve optimal ball flight.
  • Length of Clubs: Taller players usually need longer clubs, while shorter players may require adjustments.

4. Terrain and Conditions

Different courses can call for specialized equipment. Consider:

  • Links Courses: Generally harder and lacking trees; consider low-lofted drivers.
  • Parkland Courses: Typically lush with trees; look for more versatile clubs to navigate.

How to Test Golf Clubs

Once you’ve narrowed down your options, it’s time to test them out. Here are effective ways to try out clubs:

1. Driving Range

Spending time at a driving range allows you to experiment with different clubs. Pay attention to:

  • Consistency in ball flight.
  • Feel and control during swings.

2. Demo Days

Many golf shops and brands hold demo days. Avail these opportunities to:

  • Try various clubs side by side.
  • Get expert guidance from certified fitters.

3. Fitting Sessions

A custom fitting is the gold standard for club selection. Benefits include:

  • Perfectly matched shaft flex and length.
  • Adjustments based on swing path and impact.

Customizing Your Golf Clubs

If you want the most tailored approach to your game, consider customizing your clubs, which may encompass:

  • Changing the grip size.
  • Adjusting the lie angle.
  • Selecting specific shaft materials.

Sample Club Selection Table

Here’s a simple table to help you visualize some options based on skill level and playing style:

Skill Level Club Type Characteristics
Beginner Cavity Back Irons Large sweet spots, easier to hit
Intermediate Mid-Handicap Irons Balance of forgiveness and control
Advanced Bladed Irons Precision, feel, and shot shaping capability
Power Hitter Low Lofted Woods Designed for maximum distance
Accuracy Player High Lofted Irons Enhanced control for approaches

Key Takeaways

  • Assess your skill level and choose clubs accordingly.
  • Understand your playing style to make informed decisions.
  • Factor in terrain and conditions of your usual courses.
  • Test clubs at a driving range or during a demo day.
  • Consider custom fitting for optimal performance.

Frequently Asked Questions (FAQs)

1. How do I know which shaft flex is right for me?

Shaft flex should correspond to your swing speed—stiff for fast swings and regular for moderate speeds. Getting fitted can help make this decision easier.

2. Can I mix and match brands for my golf clubs?

Absolutely! Many golfers successfully use clubs from various brands to optimize their set according to performance and comfort.

3. What is the difference between a forged and cast club?

Forged clubs are made from a single piece of metal and offer better feel, while cast clubs are produced in molds and are generally more forgiving.

4. Should I invest in a complete set or individual clubs?

A complete set is cost-effective and suitable for beginners. However, experienced players often invest in individual clubs tailored to their specific needs.

5. How often should I replace my golf clubs?

It depends on usage. If clubs start to feel less effective or show wear, it’s usually time to consider replacements.

6. Can I adjust the loft of my clubs?

Many modern clubs allow for loft adjustments. Consult with a professional club fitter for optimal results.

7. Is it beneficial to have a professional fitting?

Yes! Professional fittings ensure your clubs are tailored to your swing and body type, leading to improved performance.

8. What type of putter should I use?

Choose a putter that feels comfortable to you. Generally, a mallet style suits those who prefer stability, while blades offer a traditional feel.

By focusing on the essentials of choosing the right golf club, whether you’re a beginner or a seasoned expert, you can enjoy a fulfilling golfing experience, leading to improved scores and overall satisfaction on the course. Happy golfing!

How To Improve Your Golf Swing

how to improve your golf swing

Golf is not just a sport; it’s a passion for many. And at the heart of golfing success is the golf swing. A good swing can make a substantial difference in your game, leading to lower scores and increased enjoyment. Whether you’re an amateur eager to lower your handicap or a seasoned player looking for a refresher, this guide is here to help you refine and improve your swing.

Understanding the Basics of Your Golf Swing

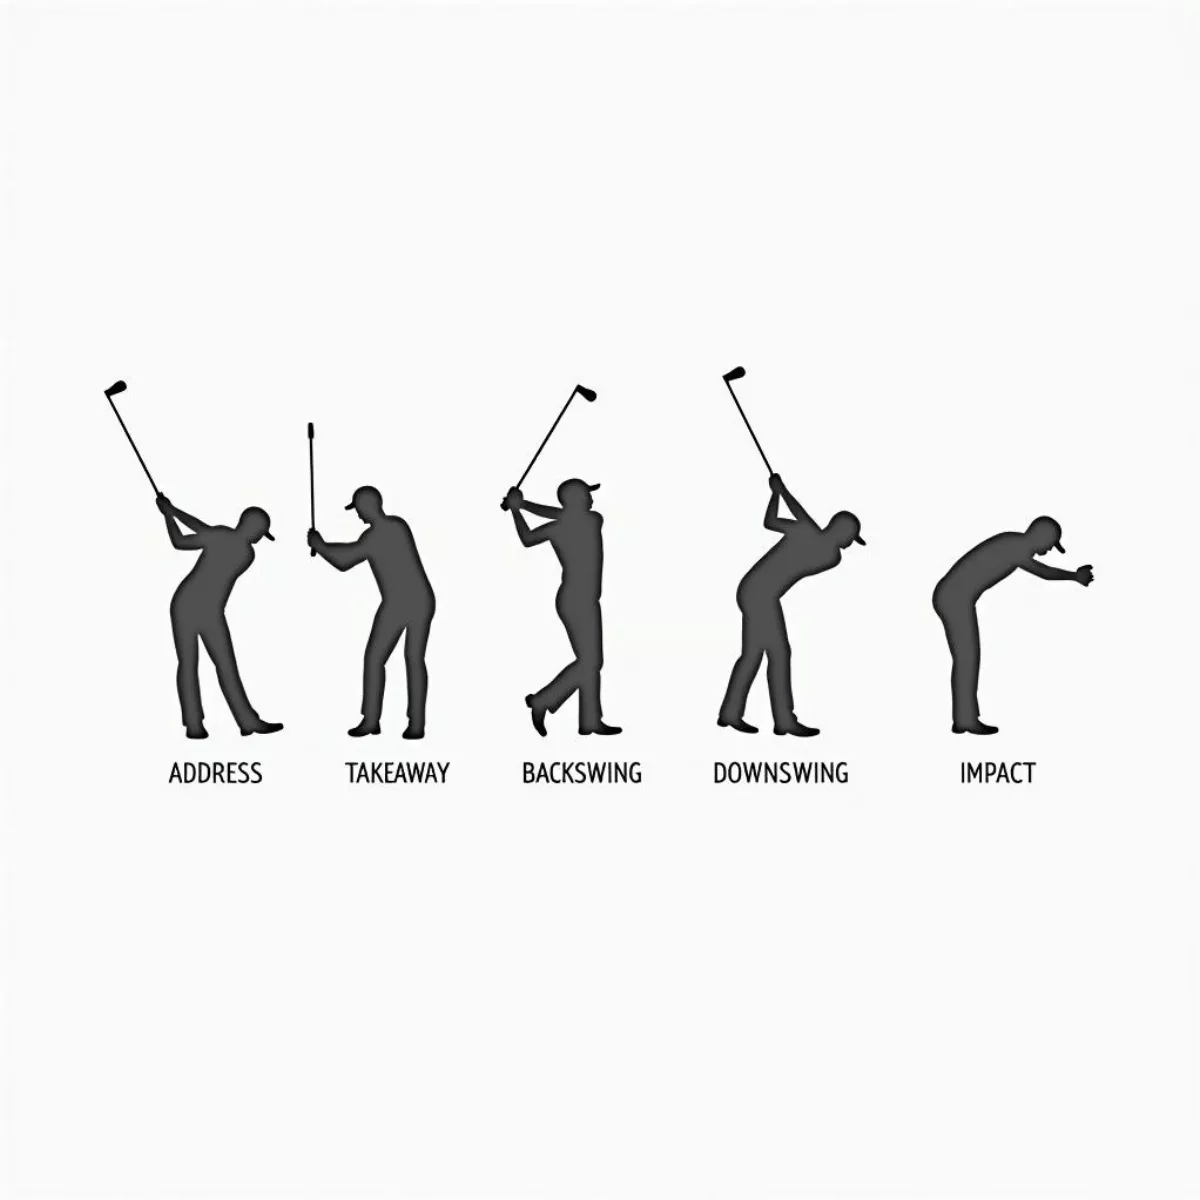
Before diving into improvement tips, it’s essential to understand the components of a golf swing. A standard swing consists of several phases:

  • Address: Setting your stance and grip before the swing.
  • Takeaway: The initial movement of the club away from the ball.
  • Backswing: The ascent of the club away from the ground.
  • Downswing: The movement of the club back toward the ball.
  • Impact: The moment the club contacts the ball.
  • Follow-through: The continuation of the swing after impact.

Each stage is critical, and enhancing your swing involves focusing on these elements.

Key Tips to Improve Your Golf Swing

Here are some actionable tips to help you take your swing to the next level. Regular practice, mindfulness, and technique enhancement will help you on your journey to a more effective golf swing.

1. Stance and Posture

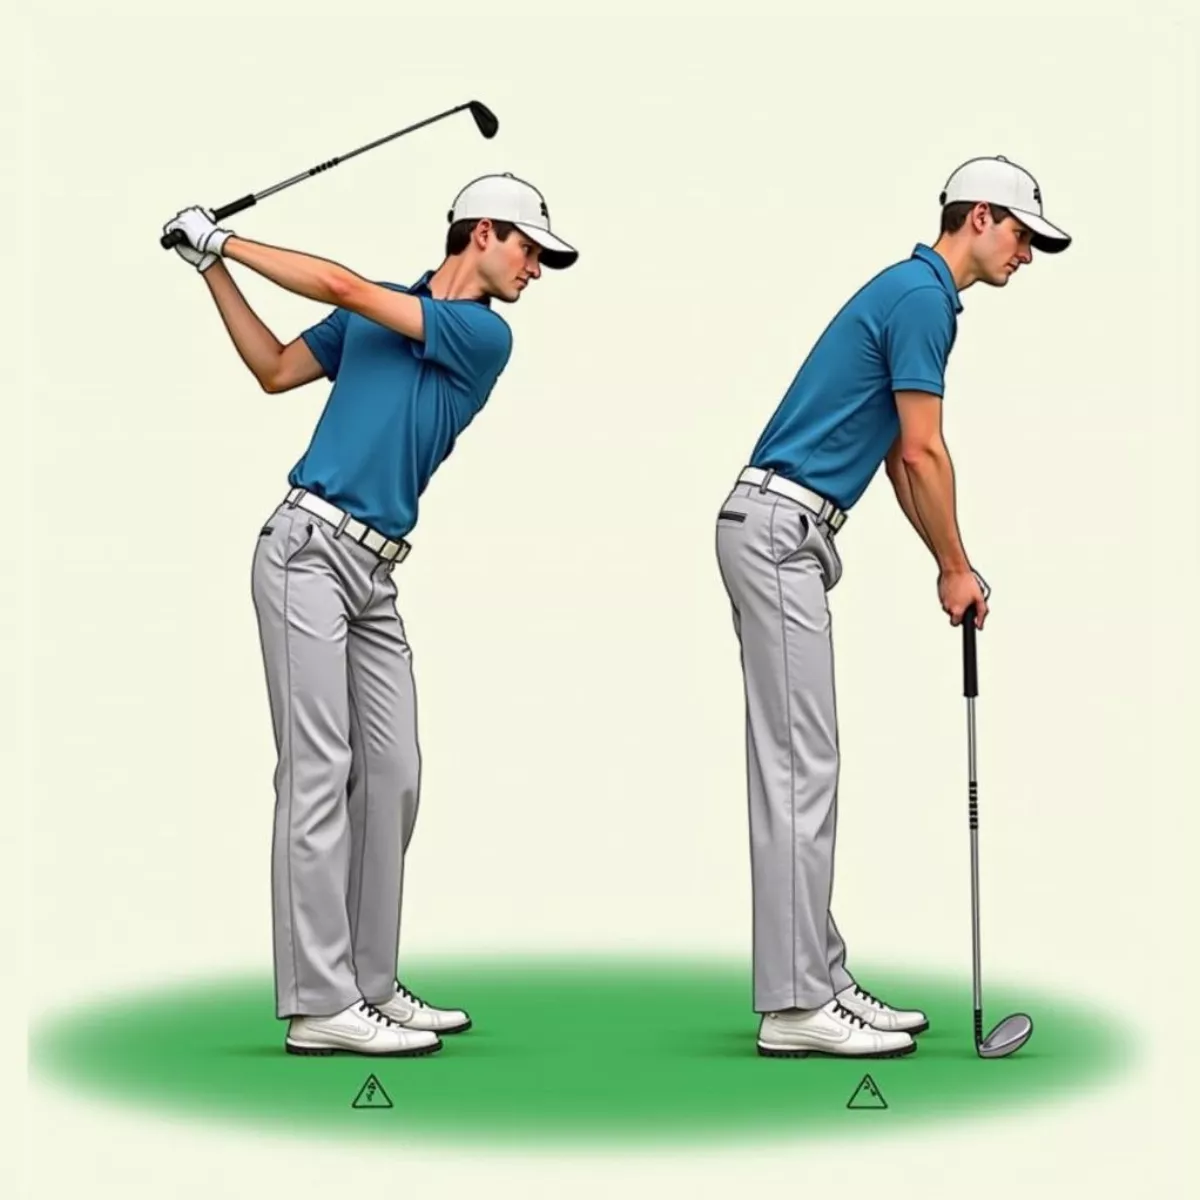
Great swings start with proper stance and posture. Follow these tips:

  • Feet Position: Your feet should be shoulder-width apart for balance. Adjust according to the club you’re using (a wider stance for drivers, a narrower stance for wedges).
  • Knees: Slightly flex your knees to promote balance.
  • Back: Maintain a straight back, bending slightly at the hips.

2. Grip Technique

Your grip impacts how the clubface strikes the ball. Here’s how to hold it right:

  • Interlocking Grip: Good for smaller hands.
  • Overlapping Grip: More common for average-sized hands.
  • Baseball Grip: Can be useful for beginners.

Make sure to keep a neutral grip. An overly strong or weak grip can cause hooks or slices.

3. Swing Path

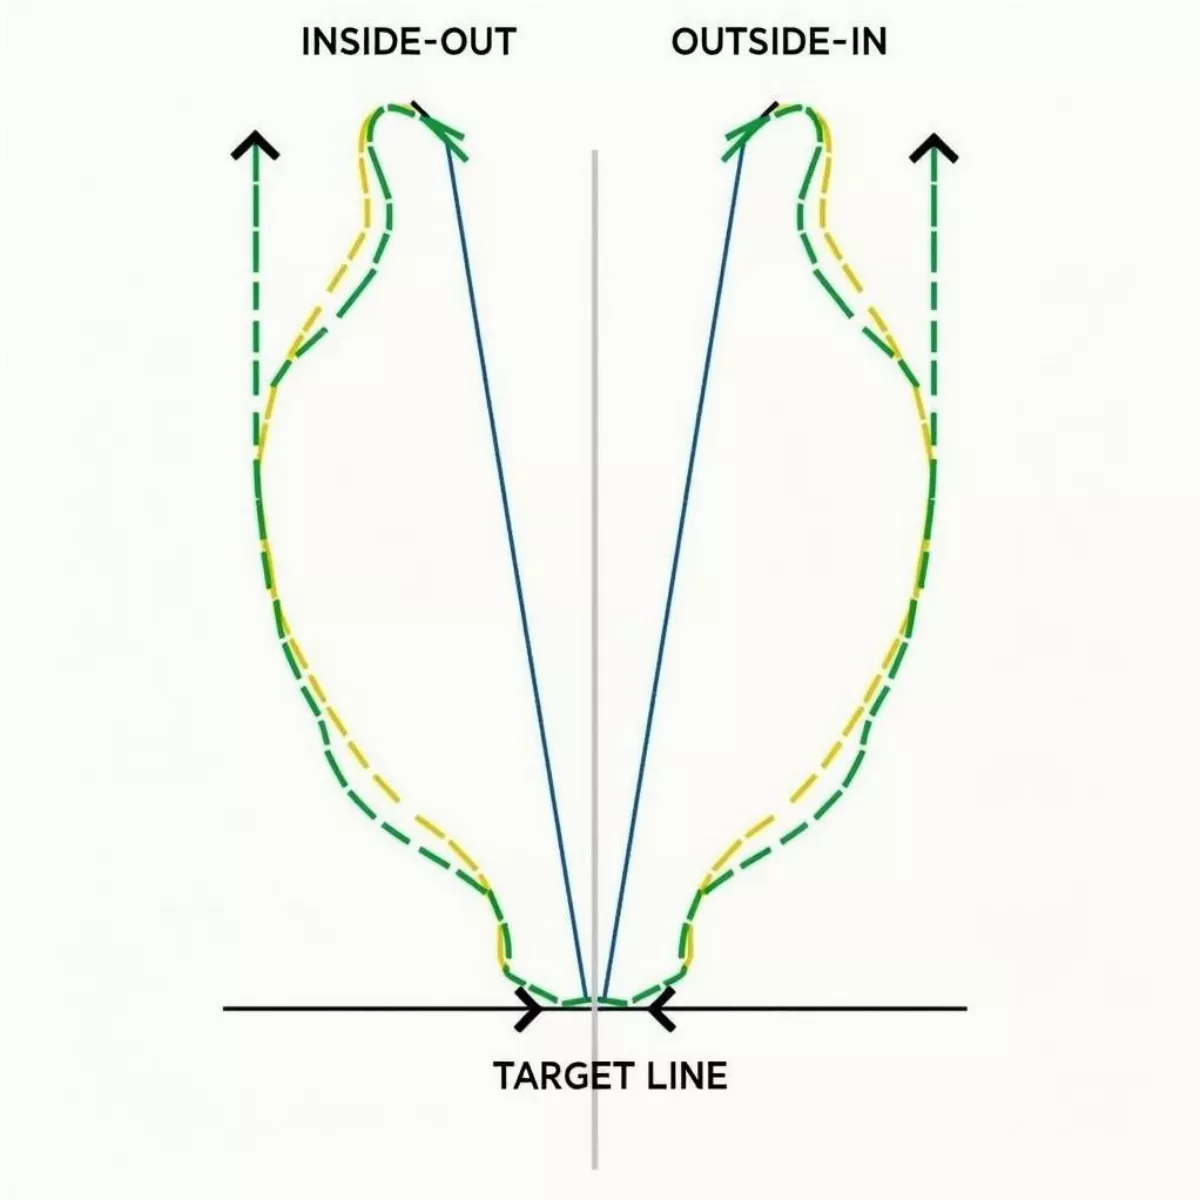
The path the club follows during the swing is crucial for accuracy and distance.

  • Inside-Out Path: Ideal for a draw, where the club moves inside the target line on the backswing and follows out to the right on the downswing.
  • Outside-In Path: Often leads to a slice, where the club moves outside the line on the backswing and across the ball on the downswing.

Tip: Use alignment sticks during practice to visualize and maintain your swing path.

4. Tempo and Rhythm

A smooth tempo is more effective than brute force. Focus on:

  • Backswing Duration: A good rule of thumb is a 3:1 ratio (three seconds of backswing for every second of downswing).
  • Breathing: Inhale as you take your stance; exhale as you swing to release tension.

5. Weight Transfer

Proper weight transfer enhances power and control.

  • Backswing: Shift your weight to your back foot.
  • Downswing: Transfer your weight to your front foot, engaging your hips first, followed by your shoulders.

6. Practice Drills

Incorporate these drills for tangible improvements:

  • The One-Handed Drill: Practice swings with one hand at a time to build strength and coordination.
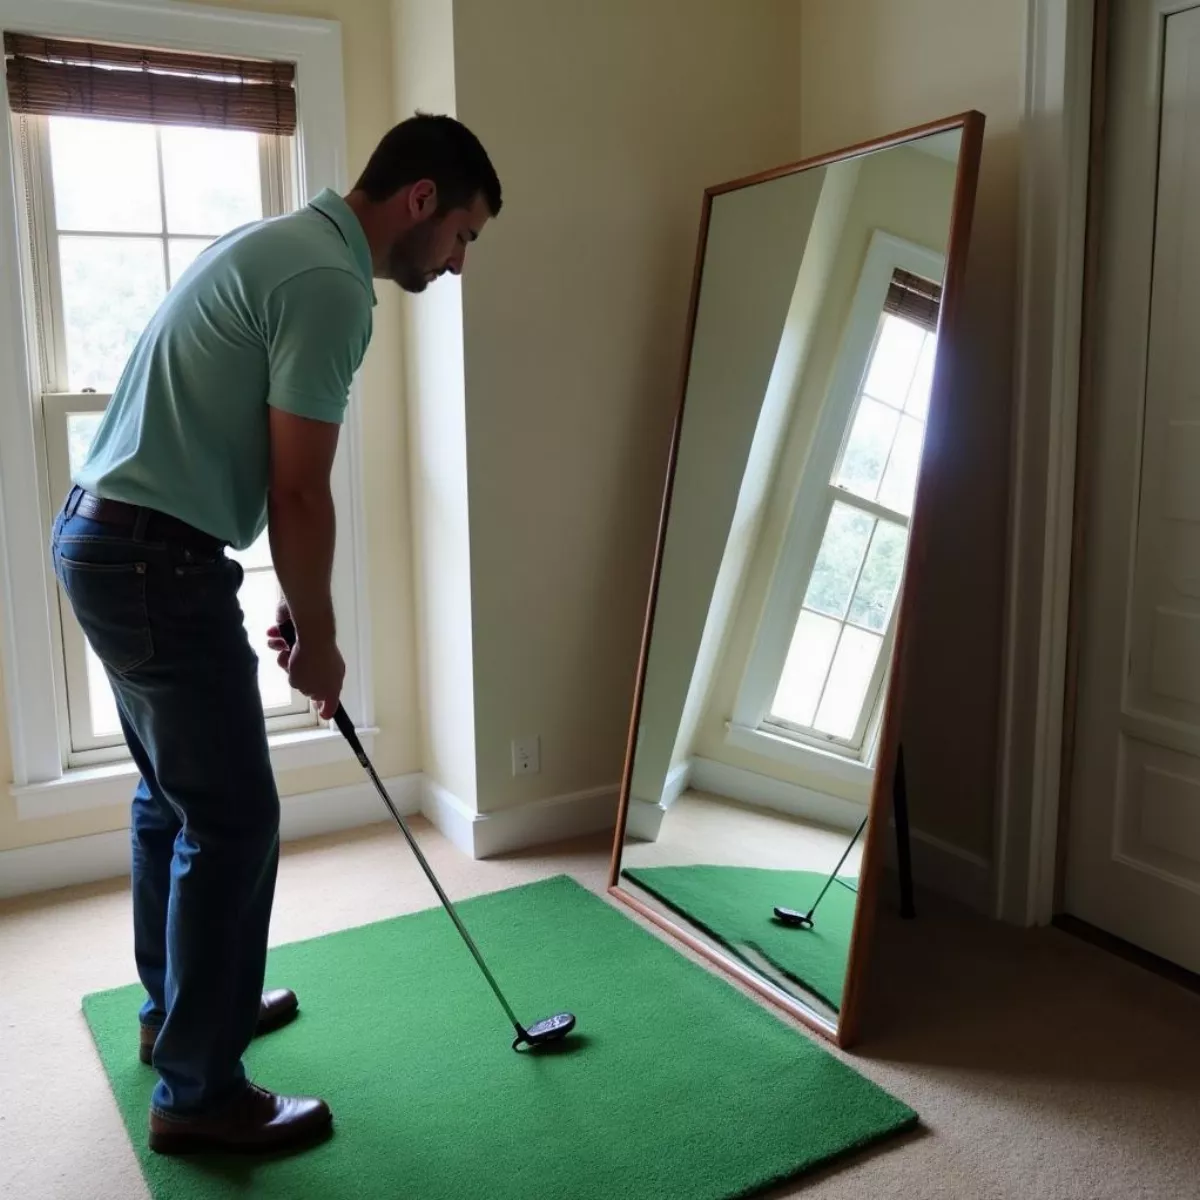
  • Mirror Drill: Use a mirror to visually confirm that your form aligns with the ideal swing shape.

7. Video Analysis

Recording your swings can provide insights into areas that need improvement.

  • Focus on: The positions of your arms, clubface angle, and overall body alignment.
  • Tip: Use apps or websites dedicated to golf analysis to break down your swing frame by frame.

8. Seek Professional Guidance

Sometimes, an expert eye is all you need. Consider taking lessons from a certified golf instructor. They can identify flaws and help you implement correction techniques more efficiently.

Key Takeaways

  • Focus on your stance and posture: Ensure a solid base.
  • Grip technique is vital; find what works best for you.
  • Pay attention to your swing path for accuracy.
  • Maintain a proper tempo and rhythm for a smoother swing.
  • Master weight transfer for better power.
  • Incorporate practice drills to build muscle memory.
  • Utilize video analysis to refine your technique.
  • Don’t hesitate to seek professional guidance for faster improvements.

FAQs

1. What is the most common mistake in a golf swing?

The most common mistake is improper grip, which can lead to inconsistent ball striking.

2. How long should my backswing be?

A good backswing typically lasts 3 seconds, creating a proper rhythm and balance.

3. Can I fix my golf swing on my own?

While self-diagnosing can be beneficial, working with a professional can provide more accurate feedback.

4. How often should I practice my swing?

Aim for 2-3 practice sessions a week, focusing on different aspects each time.

5. What should I focus on when practicing?

Concentrate on muscle memory for stance, grip, and swing path.

6. Are golf swing aids effective?

Yes! Training aids, like alignment sticks or weighted clubs, can help refine your technique.

7. How can I improve my swing speed?

Incorporate strength training, plyometrics, and flexibility exercises to enhance your speed.

8. How important is mental focus in a swing?

Mental focus is crucial. Visualizing your shots and staying calm can significantly enhance your performance.

9. Should I use different swings for different clubs?

Absolutely! Different clubs require slightly modified swings for optimal results.

10. Can anyone improve their golf swing?

Yes, with dedication, practice, and the right guidance, anyone can improve their golf swing.


Improving your golf swing is a journey, not a destination. By focusing on the right techniques and practicing regularly, you’ll see progress that not only enhances your game but makes it even more enjoyable. Remember, the road to improvement is paved with patience and persistence. Happy golfing!

How To Use A Putting Mirror

how to use a putting mirror

If you’re looking to improve your putting skills, one of the best tools you can incorporate into your practice routine is a putting mirror. It’s an effective way to enhance your stroke, alignment, and overall consistency on the green. In this article, we’ll delve into how to use a putting mirror effectively and maximize your performance. Let’s get started!

What is a Putting Mirror?

A putting mirror is a specialized training aid used by golfers to improve their putting stance, alignment, and stroke. It typically consists of a flat, reflective surface that allows you to see your position relative to the putter and the ball. This visual feedback helps you make real-time adjustments to your technique.

Why Use a Putting Mirror?

Utilizing a putting mirror offers several benefits:

  • Visual Feedback: It provides immediate visual feedback on your alignment and stroke.
  • Corrects Bad Habits: It helps identify and correct common putting errors, such as improper eye alignment or inconsistent stroke paths.
  • Improves Focus: It encourages greater focus during practice, allowing you to concentrate on specific aspects of your putting.
  • Convenience: You can use it conveniently at your home, office, or backyard.

Getting Started with Your Putting Mirror

1. Choose the Right Putting Mirror

When selecting a putting mirror, consider the following factors:

  • Size: A larger mirror offers a wider view, allowing you to see more of your setup and putt path.
  • Features: Some mirrors come equipped with alignment lines, while others have targets etched onto them for precision practice.
  • Portability: If you plan to take it to the golf course or practice range, consider a lightweight option.

2. Setting Up for Practice

  • Find a Flat Surface: Place your putting mirror on a flat surface, such as a putting mat or smooth floor.
  • Position the Ball: Set the golf ball on the mirror, in line with the center of your body.

3. Aligning Your Body

Proper alignment is key to a successful putt. Follow these steps:

  • Stand Behind the Mirror: Position yourself behind the mirror, ensuring you can see the reflection of the ball and your body.
  • Adjust Your Feet and Shoulders: Your feet should be shoulder-width apart, and your shoulders should align parallel to the target line.
  • Check Your Eyes: Your eyes should be directly over the ball or slightly inside it. Use the mirror to ensure proper positioning.

4. Practice Your Stroke

  • Making the Stroke: Gradually take your putter back while maintaining a straight path. Watch your reflection to ensure you maintain alignment.
  • Follow Through: After striking the ball, observe your follow-through. It should mirror the same path as your backswing.

5. Incorporate Drills

Here are some effective drills to incorporate while using a putting mirror:

Alignment Drill

  • Position the mirror on the ground.
  • Stand so that your eyes are directly above the line of the putt.
  • Adjust your stance until you see proper alignment in the mirror.

Stroke Path Drill

  • Use a practice ball and make several putts while focusing on your stroke path reflected in the mirror.
  • Aim to keep the putter head on the intended path without lifting your head or breaking your stance.

Drill Objective Duration
Alignment Drill Improve body alignment 10 minutes
Stroke Path Drill Maintain putter path 15 minutes
Distance Control Enhance distance control 10 minutes

6. Tracking Your Progress

After each practice session, note your observations. This helps track improvements and identify areas for further work. You can use a journal or a digital app to keep track of your practice times, drills used, and outcomes.

7. Consistency is Key

Consistency in practice is crucial. Set a routine that includes time with your putting mirror. Regular sessions (3-4 times a week) will yield the best results in your putting performance.

Key Takeaways

  • A putting mirror is a powerful tool for improving putting skills.
  • Proper alignment, stroke path, and follow-through are critical aspects to focus on.
  • Incorporate repetition and drills focused on alignment and stroke path.
  • Track your progress to ensure you’re continuously improving.
  • Consistency in practice leads to continued improvement in your putting game.

Frequently Asked Questions (FAQs)

1. What is a putting mirror used for?

A putting mirror is used to check and improve alignment, stroke path, and overall putting technique through visual feedback.

2. Can I use a putting mirror at home?

Yes, putting mirrors are portable and can be set up on flat surfaces at home, in your backyard, or at a practice facility.

3. How often should I practice with a putting mirror?

It’s recommended to practice regularly, around 3-4 times a week, to see significant improvements in your putting skills.

4. Do putting mirrors have different features?

Yes, some mirrors come with alignment lines, while others include targets or specific drills to assist with your practice.

5. Can using a putting mirror help with my mental game?

Yes, seeing your alignment and stroke can build confidence and improve your mental approach by familiarizing you with your setup and stroke mechanics.

6. Is a putting mirror suitable for beginners?

Absolutely! A putting mirror benefits golfers at all skill levels by helping create a solid foundation in alignment and technique.

7. How do I clean my putting mirror?

Use a soft cloth or microfiber towel along with a gentle cleaner to keep your mirror free from smudges and dirt.

8. Can I use a putting mirror for my short game?

While primarily designed for putting, a putting mirror can also be helpful for short game practice to ensure proper stance and alignment.

9. What should I focus on when using the putting mirror?

Pay attention to body alignment, eye position, stroke path, and follow-through to enhance your overall putting game.

10. Are there other training aids I should consider?

Along with a putting mirror, you can explore putting mats, alignment sticks, and weighted putters for a comprehensive improvement strategy.

By integrating the putting mirror into your practice routine and being mindful of your stance, alignment, and stroke, you’ll be well on your way to improving your putting skills and lowering your scores. Don’t underestimate the power of visual feedback in refining your game!


Let’s hit the greens with confidence! With these tips, tools, and a little practice, you’ll be turning those three-putts into birdies in no time. Happy putting!

How To Buy A Driver Golf

how to buy a driver golf

Golf can be a challenging sport, but having the right equipment can make all the difference in your game. One of the most essential clubs in a golfer’s bag is the driver. With countless options on the market, selecting the perfect driver golf club can feel overwhelming. Don’t worry—I’m here to help! In this guide, we’ll explore everything you need to know about buying a driver and help you make an informed decision.

Why You Need a Good Driver

The driver is typically the first club used on a golf hole. It’s designed for distance, allowing you to hit the ball as far down the fairway as possible. A good driver can:

  • Improve your accuracy
  • Increase your distance
  • Provide better control over your shots
  • Boost your confidence on the tee

Key Factors to Consider When Buying a Driver

When it’s time to buy a driver golf club, keep the following factors in mind:

1. Loft

Loft refers to the angle of the clubface, affecting the ball’s launch. Most drivers have lofts ranging from 8 to 12 degrees. A higher loft generally offers better control, especially for beginners.

  • Low Loft (8-9 degrees): Ideal for advanced players who can generate higher swing speeds.
  • Mid Loft (10-11 degrees): Suitable for average players seeking a balance between distance and control.
  • High Loft (12+ degrees): Great for beginners and slower swing speed players to promote higher launch angles.

2. Shaft Flexibility

The flexibility of the driver’s shaft impacts your swing speed and the ball’s trajectory.

  • Extra Stiff (X): Best for players with high swing speeds.
  • Stiff (S): Ideal for advanced players who can generate good speed.
  • Regular (R): Suitable for average-speed golfers.
  • Senior (A): Designed for slower swing speeds, often seen in older players.
  • Ladies (L): Specifically made for female golfers, usually with a lighter and more flexible design.

3. Head Design

Driver heads come in two primary designs:

  • Traditional: These drivers have a more classic shape and are often preferred by skilled players for better control.
  • Oversized: These clubs feature a larger sweet spot, making them forgiving for beginners and casual players.

4. Weight

The driver’s overall weight affects swing speed and control:

  • Lighter drivers can help golfers with slower swing speeds.
  • Heavier drivers may be beneficial for stronger players who can generate more power.

5. Adjustable Features

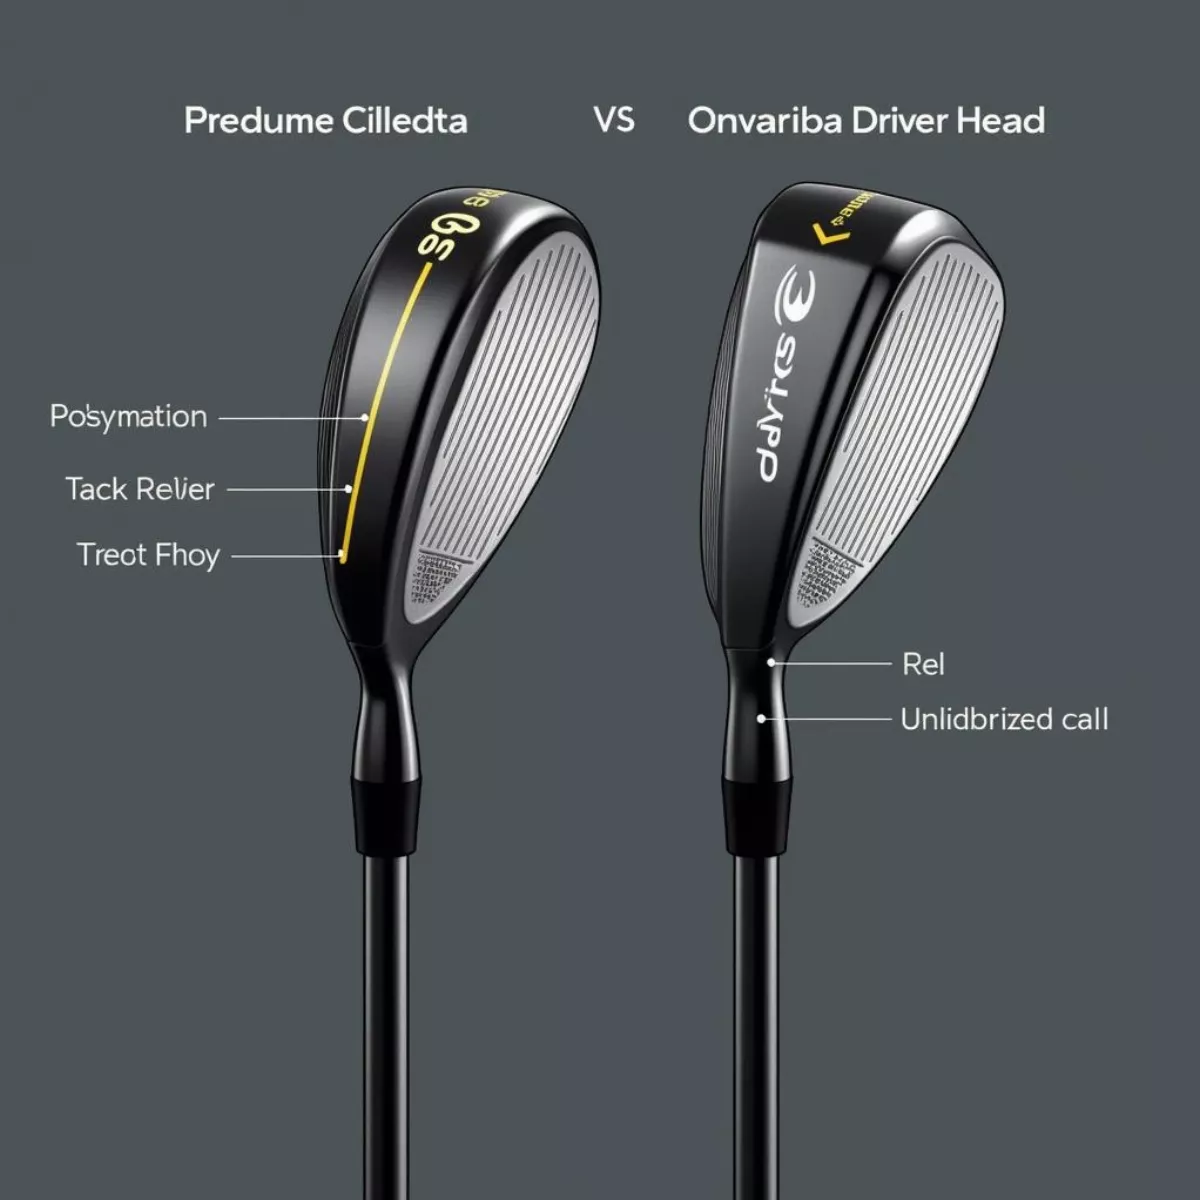
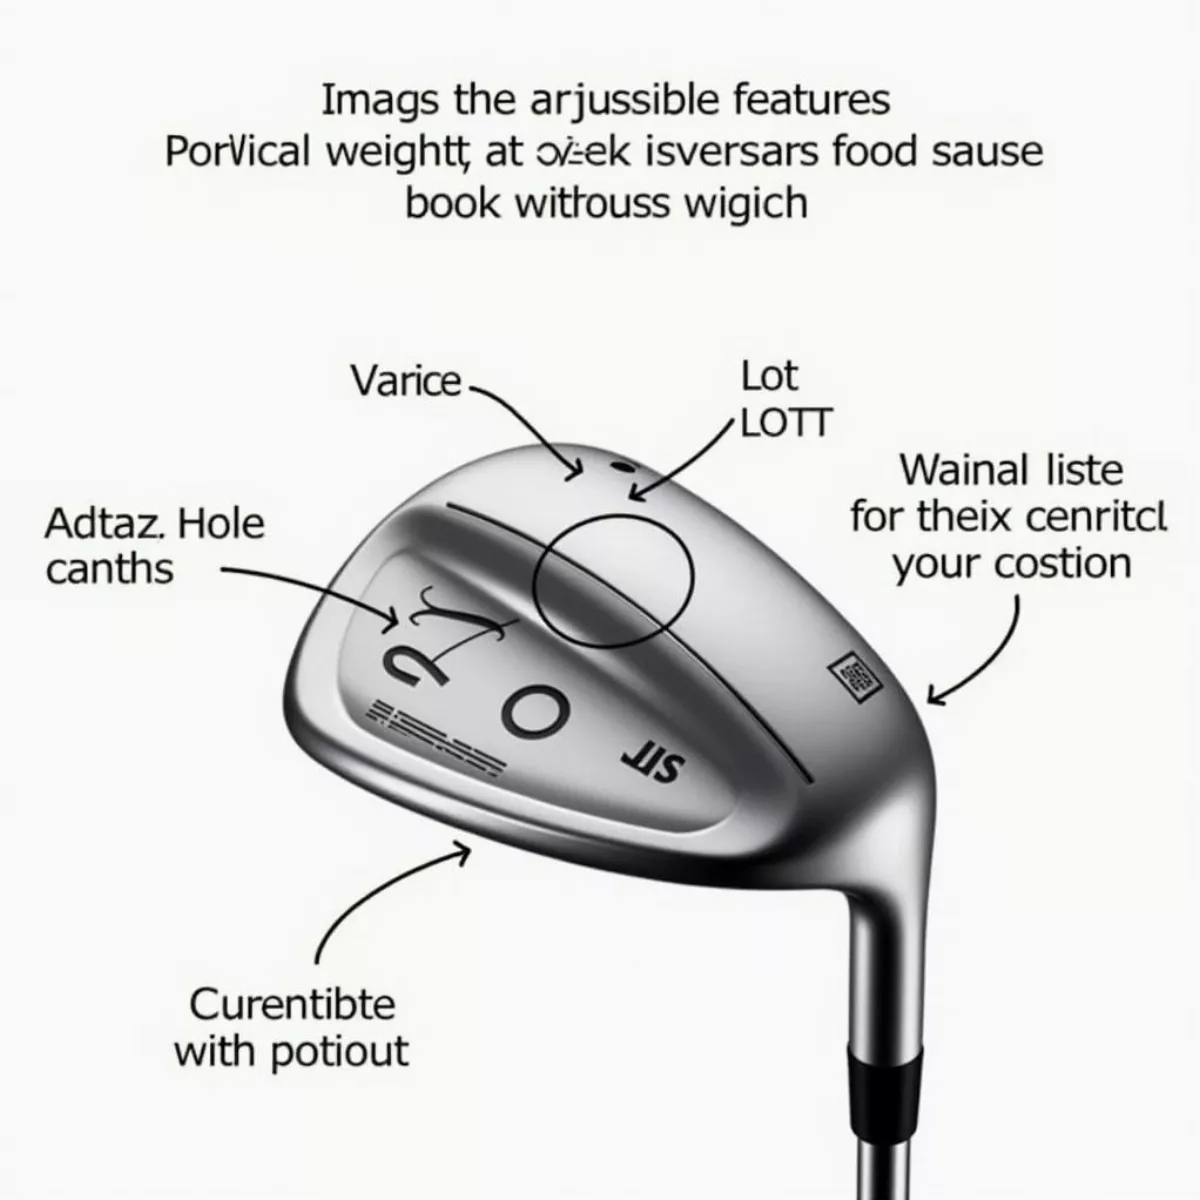
Many modern drivers offer adjustable features that allow you to customize weight, loft, and face angle.

  • Interchangeable weights can balance for a draw or fade.
  • Loft adjustments help optimize launch angles.

6. Brand Reputation and Model Reviews

When investing in a new driver, consider the brand reputation and gather feedback from reviews. Some of the most reputable brands in the golf industry include:

  • Callaway
  • TaylorMade
  • Ping
  • Titleist
  • Cobra

Check out online forums, videos, and golf reviews to gauge performance and satisfaction levels for specific models.

Understanding Your Swing

Before making a purchase, it’s essential to analyze your swing. You might consider scheduling a fitting session at a local golf shop or pro shop where they can evaluate your swing characteristics and recommend the best driver for you.

During the session, they’ll assess factors like:

  • Swing speed
  • Ball flight
  • Impacts with different lofts

Setting a Budget

You can find a driver golf club at various price points. Here’s a basic guideline:

Price Range Quality
$150 – $300 Good for beginners
$300 – $500 Mid-range for average players
$500 and above High-end for serious golfers

If you’re just starting, you don’t need to invest heavily in a driver. Consider buying something mid-range until you’re more committed to the sport.

Try Before You Buy

Whenever possible, try beforehand. Most golf stores offer demo clubs you can test out. Pay attention to how the driver feels in your hands and how it performs on the golf course.

Some Tips for Testing Drivers:

  • Take several swings with each driver.
  • Pay attention to distance and accuracy.
  • Make sure you feel comfortable with the club.

Key Takeaways

  • Consider loft, shaft flexibility, head design, weight, and adjustability when choosing a driver.
  • Research brands and read model reviews to inform your decision.
  • Try various drivers before buying to find the best fit for your swing.

FAQs About Buying a Driver Golf Club

1. What is the best driver for a beginner?

Most beginners benefit from a higher loft (10-12 degrees) and a more oversized clubhead for a larger sweet spot.

2. How do I know what shaft flex I need?

Your swing speed is the best indicator of the right shaft flex. A fitting session can help determine this.

3. Is it worth investing in an adjustable driver?

Absolutely! It allows you to fine-tune the club to match your evolving game and can lead to better performance across various courses.

4. Should I buy a new or used driver?

If you’re just starting, a quality used driver can save you money while you learn the game. If you’re more experienced, investing in a new driver might be worthwhile for the latest technology.

5. How often should I replace my driver?

Drivers can last several years, but if you notice significant changes in performance or technology, it may be time for an upgrade.

6. What’s the recommended loft for drivers used in windy conditions?

A lower loft (around 8-9 degrees) may help keep the ball trajectory lower in windy conditions, while more loft can help balance out high winds.

7. How do I clean my driver club?

Use warm water, mild soap, and a soft brush to gently clean the clubhead. Avoid using harsh chemicals.

8. Can I get a custom fit for my driver?

Yes! Many golf stores and professionals offer custom fitting sessions. It’s recommended for serious golfers.


Now that you’re equipped with the knowledge to choose the perfect driver, hit the course with confidence! Remember, the right driver can transform your game, making those long tee shots feel effortless. Happy golfing!

How To Select A Golf Ball

how to select a golf ball


Golf balls may seem trivial in the grand scheme of your game, but choosing the right one can enhance your performance and enjoyment on the course. With so many options available, selecting the perfect golf ball may feel overwhelming. But worry not! This extensive guide will walk you through the criteria you need to consider, helping you find that ideal ball suited to your playing style. So let’s dive into the world of golf balls!

Understanding Golf Ball Basics

Before you start shopping, it’s essential to understand the basics of golf balls. They come in various types, construction styles, and features. Here are key terms and components to familiarize yourself with:

Types of Golf Balls

  • Two-Piece Balls: These are beginner-friendly. They consist of a solid core and a simple cover, making them durable and affordable. Perfect for those just starting out.

  • Three-Piece Balls: Offering more spin and control, three-piece balls have a core, a layer, and a cover. Ideal for intermediate to advanced players.

  • Four-Piece Balls: These boast an inner core, outer core, a layer for spin, and a cover. They provide superior control and spin, catering to experienced golfers.

Factors to Consider

  • Compression: The degree to which a ball compresses when struck. Higher compression balls are best for players with faster swing speeds, while lower compression suits slower swings.

  • Cover Material: Golf balls come with different cover materials, mainly urethane and ionomer. Urethane covers offer better spin control but are usually more expensive.

Ball Color and Visibility

Color: Most golf balls are white, but you’ll find options in yellow, orange, and even pink. Choose a color that enhances visibility on the course.

Evaluating Your Needs

To find the right golf ball, first evaluate your skill level and playing style. Let’s explore these aspects.

Skill Level

  • Beginner: Look for two-piece balls. They provide distance, straight shots, and durability.

  • Intermediate: If you’re honing your skills and want a balance of distance and control, consider three-piece balls.

  • Advanced: For those with higher swing speeds and refined techniques, four-piece balls will help you improve

Playing Style

Your swing style and overall approach to the game influence the type of ball that will suit you best:

  • Power Hitters: If you drive the ball long distances, focus on lower compression three-piece or four-piece balls for exceptional control and feel.

  • Control Seekers: If you prioritize accuracy and control, consider three-piece balls with a softer feel and excellent spin rates.

Shopping for Golf Balls

Now that you understand your personal needs, it’s time to hit the shops! Here’s a checklist to keep you focused:

Key Features to Look For

Feature Beginner Intermediate Advanced
Type Two-Piece Three-Piece Four-Piece
Compression Low Medium High
Material Ionomer Urethane Urethane
Spin Control Low Medium High
Price Range Affordable ($20-$30) Moderate ($30-$45) Premium ($45+)

Price Points

  • Budget Golf Balls: Generally within the $20-$30 range. Great for beginners.

  • Mid-range Options: Typically between $30-$45. Suitable for improving players.

  • Premium Golf Balls: Priced above $45. Ideal for low handicappers seeking the best performance.

Testing Your Golf Balls

Once you’ve narrowed down your choices, it’s critical to test them. Here’s how:

  1. Hit Different Shots: Practice your drives, approach shots, and putts with each option.

  2. Play a Round: Take them for a spin during a casual round to see how they perform under pressure.

  3. Evaluate the Feel: Notice how each ball feels off the clubface. Control and comfort are crucial.

Maintaining Your Golf Balls

To ensure they last, proper care of your golf balls is essential:

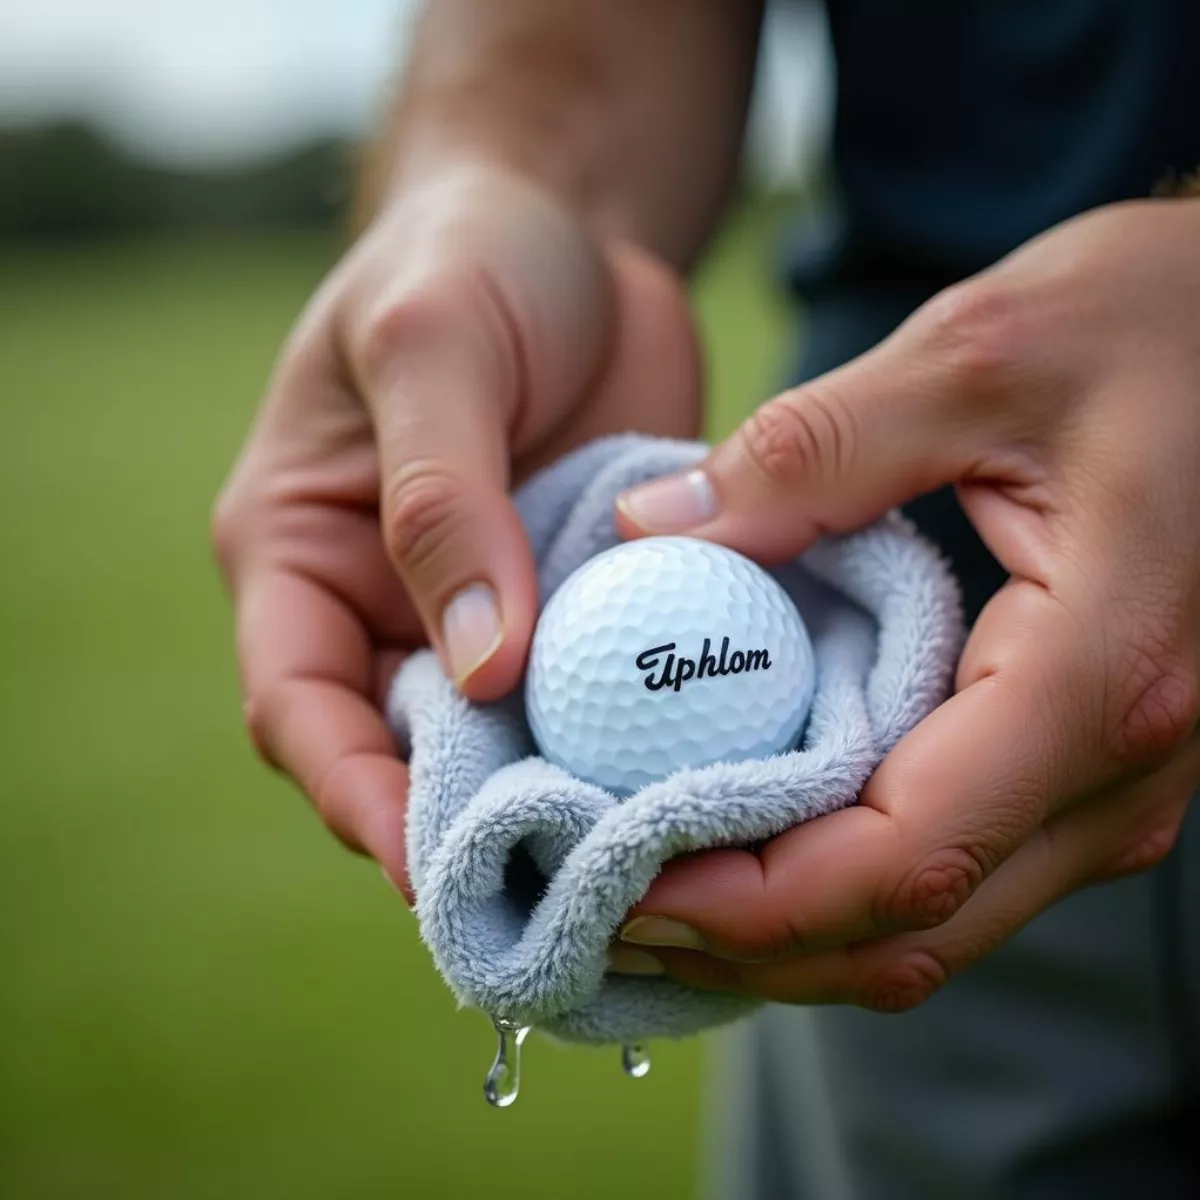
  • Clean Regularly: Use a wet towel or soft brush to remove dirt and debris.

  • Store Properly: Keep them in a cool, dry place. Avoid extreme temperatures.

  • Check for Damage: Inspect them for cuts or scrapes before play.

Key Takeaways

  • Know Your Skill Level: This will determine the type of golf ball that suits you best.

  • Consider Compression: Match the ball’s compression to your swing speed for optimal performance.

  • Test Different Balls: The best way to find your favorite is simply to try them out.

  • Maintain Your Balls: Keeping them clean and in good condition will extend their life.

  • Pay Attention to Price: Don’t overspend; find a ball that meets your needs without breaking the bank.

FAQ Section

Here are some frequently asked questions about selecting golf balls:

Q1: What is the best golf ball for beginners?

A1: Two-piece golf balls are typically best for beginners because they offer distance and durability.

Q2: How does swing speed affect golf ball choice?

A2: Faster swing speeds benefit from higher compression balls, while slower swings favor lower compression options.

Q3: Are more expensive golf balls worth it?

A3: Generally, premium balls provide better performance, spin, and distance. However, it varies by individual needs.

Q4: Do I need different golf balls for different courses?

A4: Not necessarily, but you may want to adjust your choice based on course conditions (windy, soft, etc.).

Q5: Can I use colored golf balls in tournaments?

A5: Yes, as long as they are approved by the governing body of the tournament.

Q6: How often should I change my golf balls?

A6: Change your balls when they show signs of wear or if you lose them during play.

Q7: What’s the difference between soft and hard golf balls?

A7: Soft balls typically offer more control and spin, while hard balls provide distance.

Q8: Can I mix different types of balls in a single round?

A8: You can, but it’s generally better to stick to one type for consistency.

Q9: How does the cover material affect performance?

A9: Urethane covers provide more spin and feel, while ionomer covers are more durable and less expensive.

Q10: Should I buy a dozen of the same ball?

A10: It’s recommended to have a dozen of the same model for consistency, especially while you’re honing your skills.

By utilizing this guide to select the right golf ball, you’re well on your way to improving your game. Whether you’re just starting out or fine-tuning your skills, knowing how to choose the best golf ball for your needs makes all the difference. Happy golfing!


This guide aims to be informative and friendly, engaging readers while providing them with the essential knowledge to select golf balls effectively. Enjoy your next round on the green!

How To Cut A Graphite Shaft

how to cut a graphite shaft

Cutting a graphite shaft may sound intimidating, but with the right tools, knowledge, and a bit of patience, you can do it yourself. Whether you’re customizing your golf clubs, tinkering with a fishing rod, or adjusting a racquet, knowing how to cut a graphite shaft properly can lead to improved performance and a personalized experience. In this guide, we’ll walk you through the step-by-step process of cutting a graphite shaft while offering tips, tricks, and all the key information you need.

Why Cut a Graphite Shaft?

Before we dive into the nitty-gritty, let’s discuss why you might want to cut a graphite shaft in the first place.

  • Personalization: You may want to tailor the length of your equipment to match your height and playing style.

  • Performance: A shorter shaft can enhance control and potentially improve your performance.

  • Repair: If a shaft is damaged, cutting it can sometimes be a reliable way to salvage the equipment.

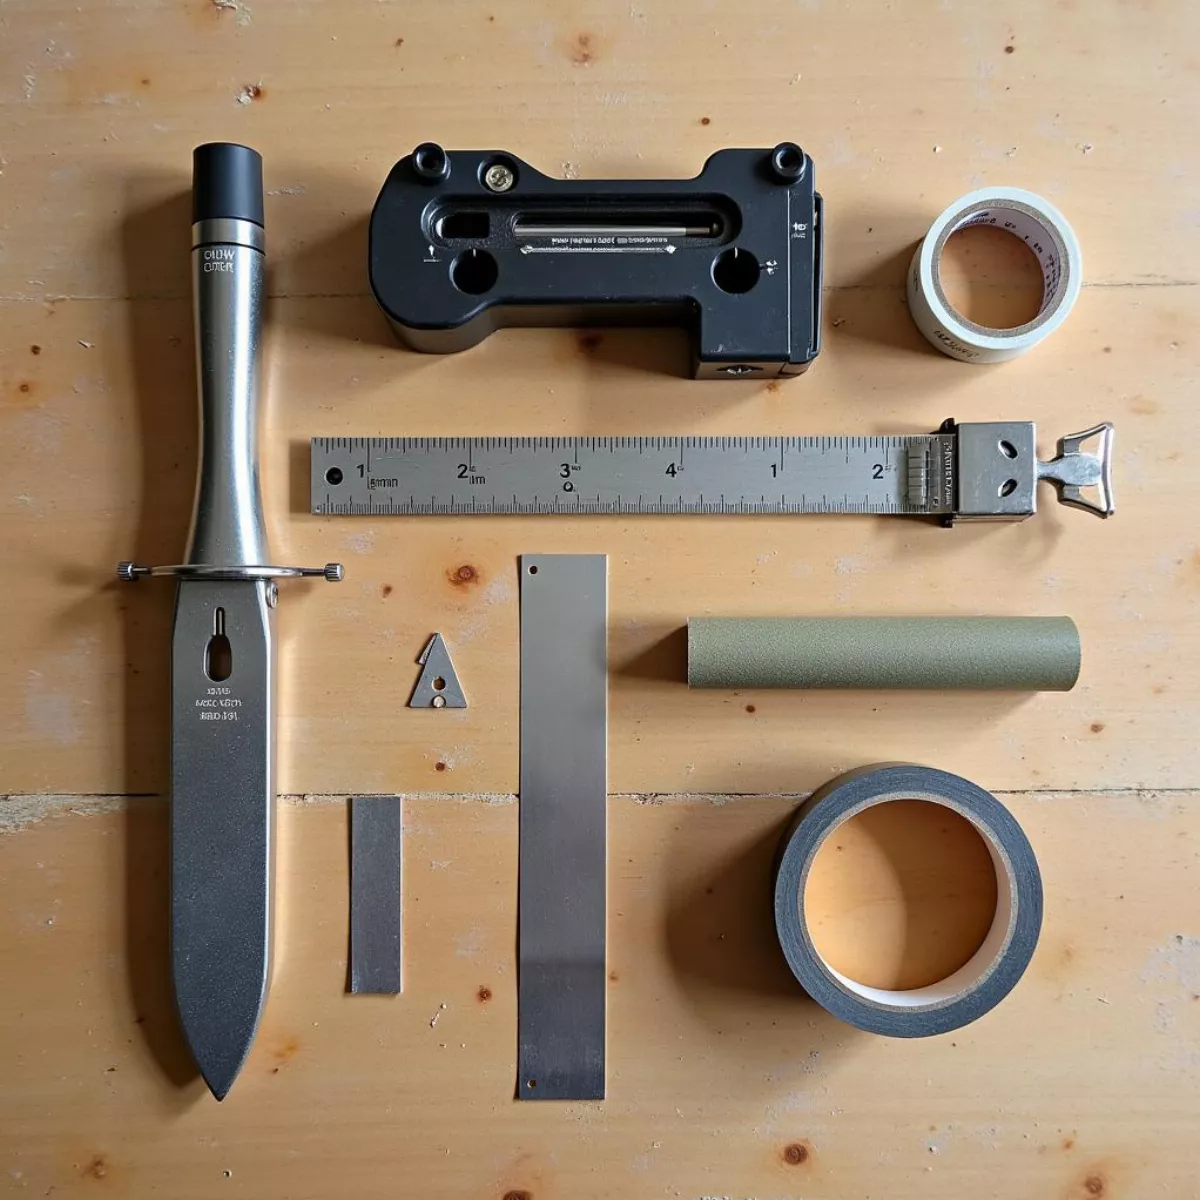
Tools Needed for Cutting Graphite Shafts

Having the right tools can make the cutting process seamless. Here’s a list of necessary items:

  • Graphite shaft cutter: This specialized tool minimizes damage while cutting.

  • Measuring tape: Accurate measurements are crucial for achieving the desired length.

  • Masking tape: Use this to mark your cutting line and prevent fraying.

  • Sandpaper: To smooth out the edges after cutting.

  • Safety goggles: Always prioritize safety when working with sharp tools.

  • Work surface: A stable and flat work table helps ensure precision during the cutting process.

Optional Tools

  • Dremel tool with a cutting wheel: For those with a little more experience, this can provide cleaner cuts.

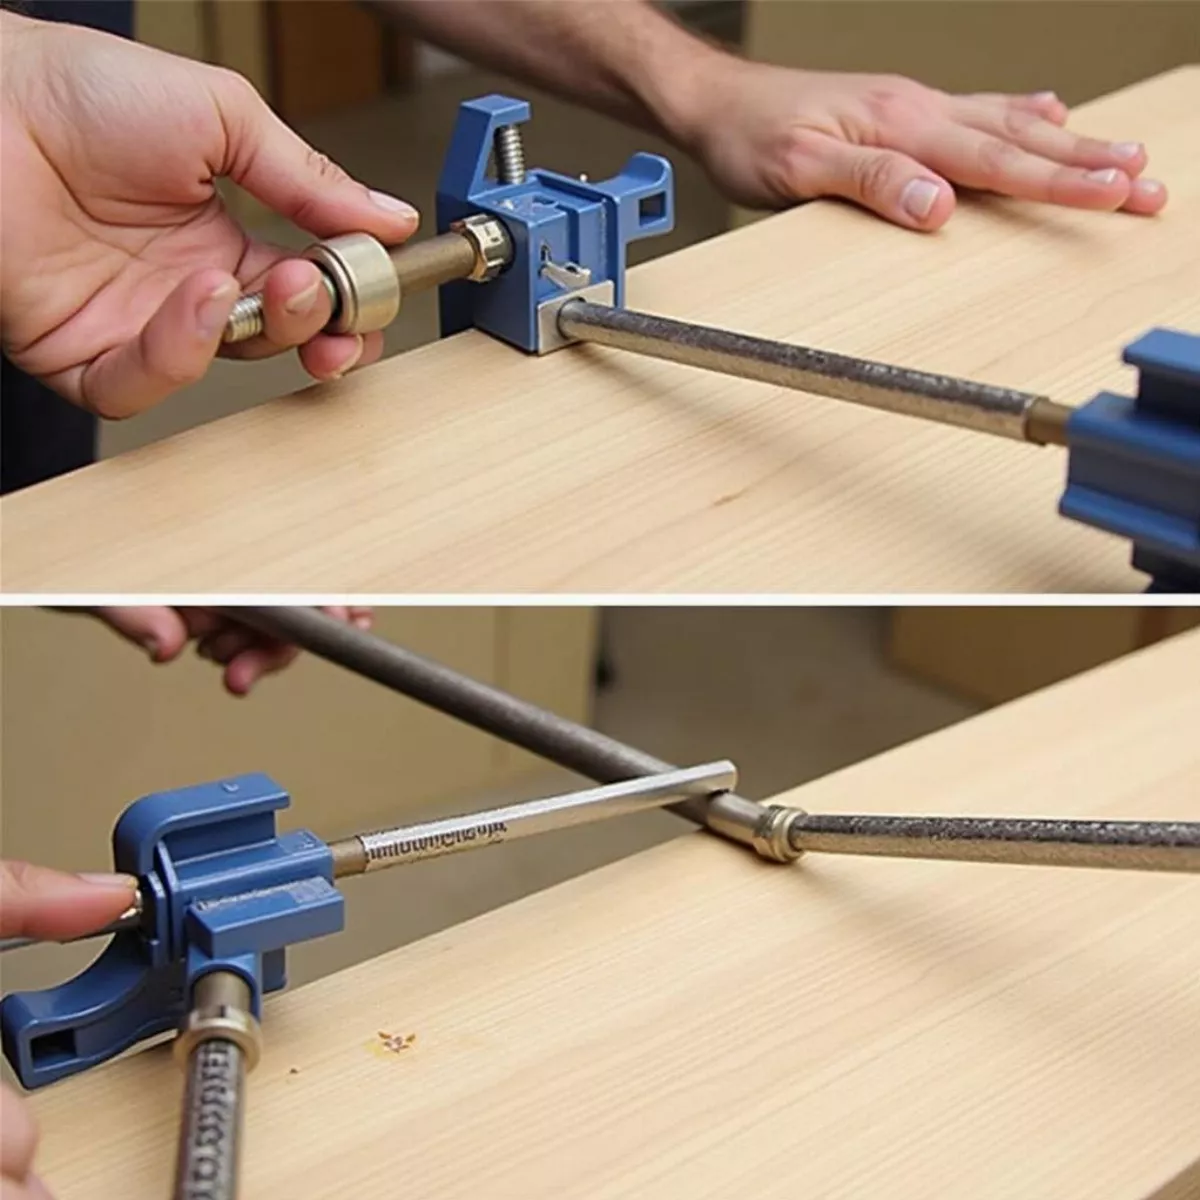
  • Clamps: To hold the shaft securely in place while you work.

Step-by-Step Guide to Cutting a Graphite Shaft

Now that you’ve gathered your tools, let’s get into the step-by-step process of cutting a graphite shaft.

Step 1: Measure the Length

Start with a firm measurement.

  1. Decide on the Desired Length: Consider your height, swing style, and preferences.

  2. Use the Measuring Tape: Measure from the butt end of the shaft to the point you plan to cut.

  3. Mark the Cutting Point: Use a piece of masking tape to clearly mark the exact location. This tape also helps to reduce fraying.

Step 2: Secure the Shaft

To ensure precision, you want to keep the shaft stable.

  • If you have clamps, secure the shaft to your work surface.

  • If not, hold it firmly by hand, making sure to keep it steady throughout the cutting process.

Step 3: Make the Cut

Using your graphite shaft cutter:

  • Position the cutting tool at the tape mark.

  • Apply gentle pressure while starting the cut, ensuring that you maintain a straight line.

  • Avoid rushing; a slow, steady approach will yield the best results.

"Patience is key! A rushed cut can lead to a rough edge or an improper measurement."

Step 4: Smooth the Edge

Once you’ve cut through the shaft:

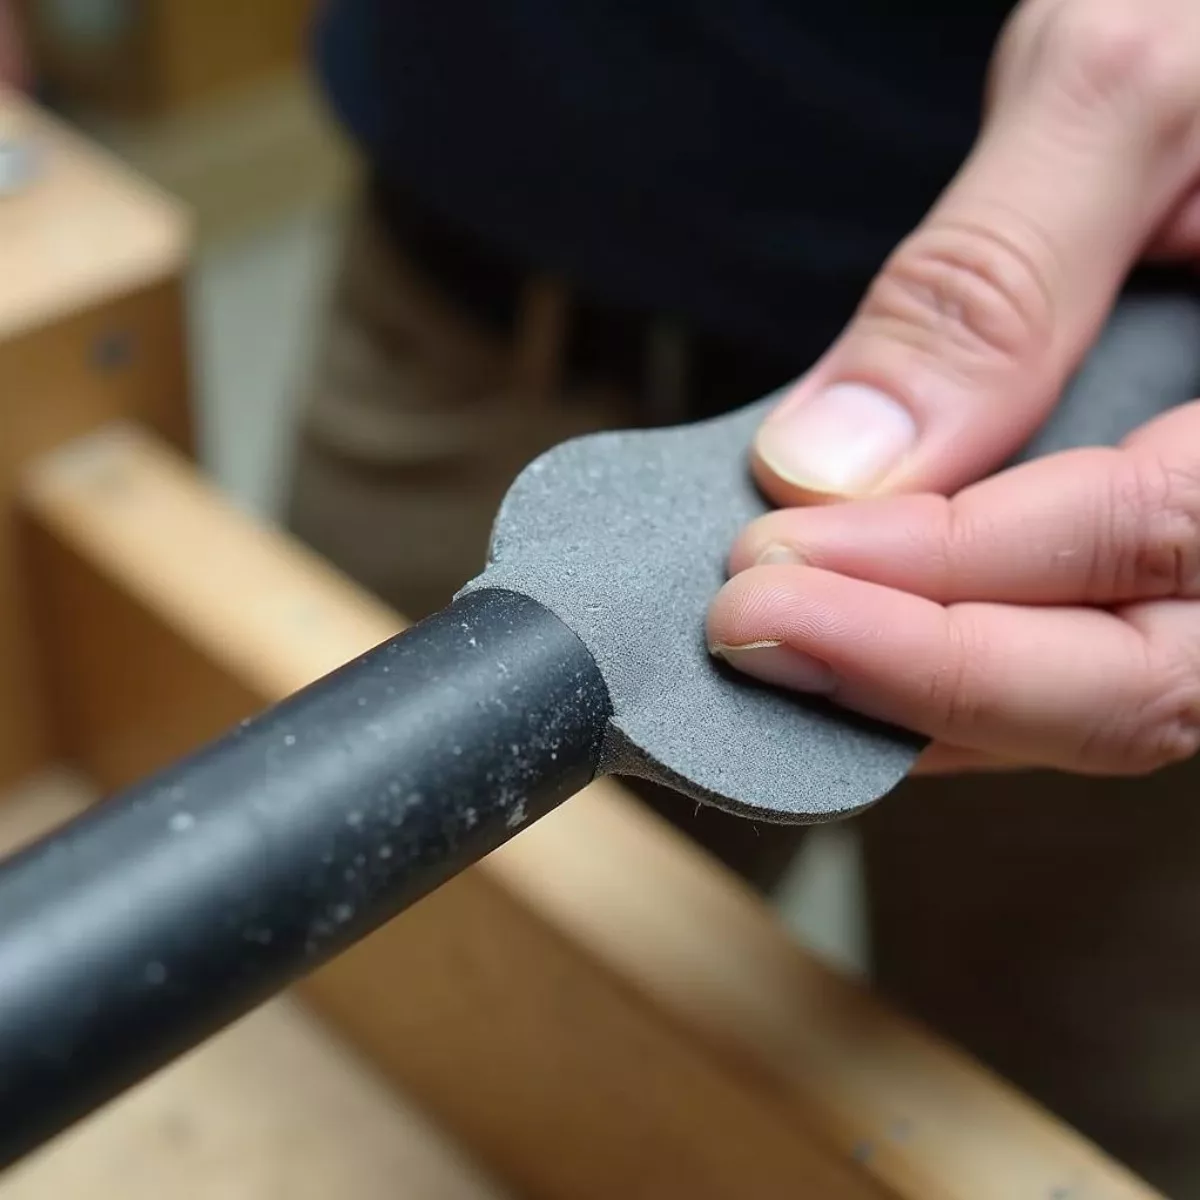
  • Use sandpaper to smooth the cut edge. This will not only make it more comfortable to handle but will also provide a cleaner finish.

Step 5: Inspect Your Work

Check the shaft for any imperfections.

  • Look for Fraying: Ensure that there aren’t any fibers sticking out. If you notice any, sand them down.

  • Measure Again: Confirm that you’ve reached the desired length. If not, small adjustments can be made with further cutting or sanding.

Additional Tips for Cutting Graphite Shafts

  • Use the Right Tools: As mentioned, a graphite shaft cutter is ideal because it’s specifically designed for this material.

  • Work Slowly: You’ll want to take your time to prevent damage or measurement errors.

Key Takeaways

  • Measure Twice, Cut Once: Proper measurements are crucial for a successful cut.

  • Use Masking Tape: This not only marks your cut but minimizes fraying.

  • Smoothing Matters: Don’t skip this step; it can enhance comfort and performance.

  • Safety First: Always wear safety goggles and handle your tools with care.

  • Practice Makes Perfect: If you’re new to cutting, consider practicing on a scrap piece before attempting your final cut.

FAQ: Cutting a Graphite Shaft

1. How do I know how much to cut off my graphite shaft?

Measure your height and swing style. A general rule is that the longer the shaft, the more you may need to adjust depending on your comfort.

2. Will cutting my graphite shaft affect its strength?

If done properly, cutting should not significantly affect the strength, but avoid cutting too close to the tip as it may compromise the integrity.

3. Can I cut my graphite shafts at home?

Absolutely! With the right tools and technique, you can perform this task yourself.

4. What happens if I cut too much off?

If you cut too much, the shaft will be too short to be effective. In this case, you may need to consider using extensions or purchasing a new shaft.

5. Can I use a regular saw to cut the shaft?

While you could use a regular saw, it’s not recommended. A specialized graphite shaft cutter is designed to minimize damage.

6. How can I smooth out the cut edge?

Use fine-grit sandpaper carefully to smooth out any rough edges after cutting.

7. Is it necessary to wear protective gear?

Yes, safety goggles are important to protect your eyes from graphite dust or shards.

8. How do I know if the shaft is right for me after cutting?

Once cut, take it for a test swing or use it to ensure it feels comfortable and practical for your playing style.

9. Can I replace a tip after cutting a shaft?

Yes, you can replace tips or extensions, but making sure your cut is clean will ease the process.

10. How can I prevent fraying when cutting?

Using masking tape to mark your cutting line will significantly reduce fraying at the cut.

Making the decision to cut a graphite shaft can be a rewarding DIY project. With the right tools, techniques, and a little patience, you’re set to enhance your performance and enjoy a personalized piece of equipment. Now, go ahead and make that precise cut—you’ve got this!

How To Fit Golf Irons

how to fit golf irons

Golf is a game where precision meets artistry. Fitting golf irons is a crucial step for every golfer who wants to improve their game and enjoy their time on the course. Whether you’ve just picked up a club or you’re a seasoned player, understanding how to properly fit your golf irons can significantly impact your performance.

In this guide, we will explore the various aspects of golf iron fitting, share tips, and provide answers to frequently asked questions. Let’s dive in!

Why Fitting Golf Irons Matters

Understanding the importance of fitting golf irons begins with recognizing how versatility and correctness can elevate your game.

  • High Accuracy: Well-fitted clubs lead to better shot consistency.
  • Improved Comfort: Feeling comfortable and confident with your iron can boost your confidence.
  • Enhanced Performance: A proper fit helps you achieve optimal distance and control.

The Basics of Golf Irons

Before we jump into the fitting process, let’s briefly explore the components of golf irons you should consider:

  1. Length: Longer irons can lead to greater distance but might reduce control.
  2. Lie Angle: This affects the direction your shots will travel.
  3. Grip Size: The thickness and texture of your grips matter for comfort and control.
  4. Flexibility: Shaft flexibility affects how much the club can bend during a swing.

How to Fit Golf Irons

Fitting golf irons is not just about measurements; it’s about finding the right balance between comfort and performance. Here’s a step-by-step guide to help you through the fitting process.

1. Measure Your Height and Wrist to Floor Length

To get started, you’ll want to measure your height and the distance from your wrist to the floor:

  • Height: Stand barefoot against a wall and mark your height.
  • Wrist to Floor: With your arms relaxed, measure the distance from your wrist to the floor.

This data will help determine the club length that works best for you.

2. Assess Your Current Swing Mechanics

Understanding your swing is crucial. Whether you are a beginner or a pro, getting a professional to analyze your swing can provide valuable insights. Here’s what to observe:

  • Swing Speed: Faster swing speeds often necessitate stiffer shafts.
  • Shot Dispersion: Take note of how spread out your typical shots are.

3. Determine Your Lie Angle

The lie angle of the club affects the trajectory of your shots. It’s best to check the lie angle with a fitting professional or at a fitting session. Generally, a lie angle adjustment may be needed if:

  • Shots consistently go left or right.

4. Choose the Right Shaft Flex

Choosing the appropriate shaft flex is pivotal in optimizing your performance. The common flex types include:

  • L – Ladies Flex
  • A – Senior Flex
  • R – Regular Flex
  • S – Stiff Flex
  • X – Extra Stiff Flex

Consider your swing speed and playing style when deciding on these options.

5. Test Grip Size

Grip size should feel comfortable. Different folks hold the club differently. To get the right grip size:

  • Standard Grip: For regular hands.
  • Midsize Grip: For larger hands.
  • Jumbo Grip: Best for oversized hands or players with grip issues.

6. Try Different Clubs on the Range

Once you have a baseline from the previous steps, it’s time to try various irons at a driving range. Take note of:

  • Feel and Comfort: Do you feel in control of the club?
  • Shot Trajectory: Are your shots consistently going straight?
  • Distance Control: Are you hitting the expected distances?

Working with a Professional Fitter

While this guide gives you a strong foundation, working with a professional club fitter is often beneficial. A professional can tailor the fitting process to your individual needs, finding the perfect combination of components for your game.

Best Practices During the Fitting Process

  • Bring Your Current Irons: This helps the fitter understand what you currently play with.
  • Communicate Your Goals: Be open about what you hope to achieve with your new fitting.
  • Be Patient: Finding the right fit is a process. Take your time to ensure the best results.

Equipment You Might Need

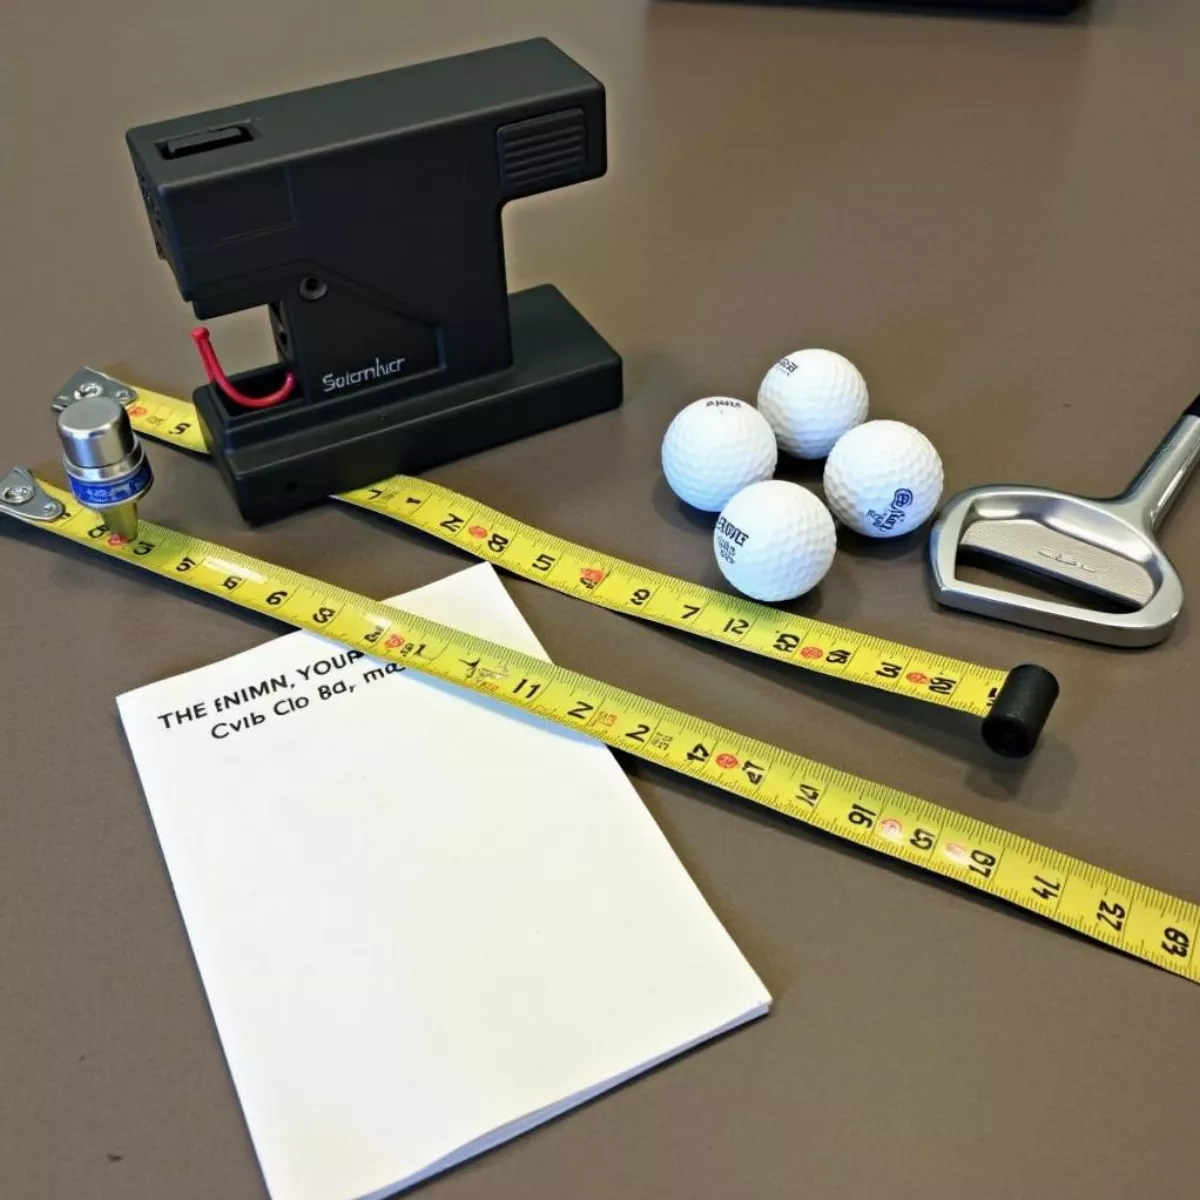
Here’s a quick reference table to what you’ll need during a fitting:

Equipment Purpose
Measuring Tape To measure height and wrist-to-floor length
Golf Balls For testing various irons
Club-Swing Analyzer Analyzes swing speed and mechanics
Notepad Take notes during the fitting session

Key Takeaways

  • Properly fitted golf irons can greatly enhance your game.
  • Measure your height and wrist length for accurate club length.
  • Assess your swing mechanics to tailor the fitting process.
  • Choose the best flex and lie angle suited to your playstyle.
  • Consider getting help from a professional for optimal results.

Frequently Asked Questions (FAQ)

1. How often should I get my golf irons fitted?

It’s recommended to get fitted every few years, especially if you notice a change in your swing or physical condition.

2. Can I fit my golf irons myself?

While you can start the process yourself, professional fitting usually yields the best results.

3. What’s the difference between Standard and Custom golf irons?

Custom irons are tailored based on your specifications, whereas standard models are mass-produced and may not fit all players.

4. What can affect the flex of my golf shaft?

Your swing speed, technique, and playing style are the main factors affecting shaft flex.

5. How do I know if the lie angle of my clubs is correct?

If your shot patterns consistently go to one side of the fairway, it’s a sign your lie angle may need adjustment.

6. Does my skill level matter in fitting?

Yes, fitting is essential for all skill levels. Beginners benefit from proper fittings to establish a good foundation.

7. What should I expect from a fitting session?

You can expect personalized recommendations based on your measurements, swing analysis, and testing different club specifications.

8. Where can I find a professional club fitter?

Local pro shops at golf courses or stores like Golf Galaxy often have certified club fitters.

9. Can I use my old grips on my new irons?

It’s advisable to get new grips fitted to the new clubs, as the texture and size matter greatly for comfort and control.

10. What’s the average cost of a professional fitting?

Fittings can range from $50 to $300 depending on location, store, and level of service provided.

In Conclusion

Fitting golf irons is an essential part of enhancing your game. By taking the time to assess your needs and work with professionals, you will find the right combination that supports your playing style and goals. So why wait? Get started on fitting your golf irons today and unlock your potential on the course!


If you have any further questions or need personalized assistance, feel free to reach out! Happy golfing!

How To Make Golf Grips Tacky

how to make golf grips tacky

If you’re a golfer, you know how vital a good grip is to your game. A tacky grip can enhance your control, improve your swing, and ultimately lead to better performance on the course. However, golf grips can lose their stickiness over time due to sweat, dirt, and general wear and tear. Thankfully, making your golf grips tacky again is easier than you might think! In this guide, we’ll explore various methods to restore that coveted tackiness, ensuring you can play your best golf every time you hit the course.

Why Tacky Golf Grips Matter

Before we dive into the how-tos, let’s take a moment to explore why having tacky golf grips is essential:

  • Enhanced Control: Tacky grips allow for a firmer hold, reducing the chances of slippage during your swing.
  • Increased Comfort: A tacky grip feels better in your hands, making your rounds more enjoyable.
  • Improved Performance: With better control and comfort, you’re likely to see immediate performance improvements.

Methods to Make Golf Grips Tacky

1. Clean Your Grips

One of the simplest ways to restore tackiness is to clean your grips. Dirt and sweat can build up over time, leading to a loss of grip. Follow these steps:

  • Materials Needed:

    • Mild soap
    • Warm water
    • Soft cloth or a bristle brush
    • Towel

  • Step-by-Step Instructions:
    1. Mix mild soap with warm water in a bowl.
    2. Dip the cloth or brush in the soapy water.
    3. Gently scrub the grips, focusing on areas with visible dirt and grime.
    4. Rinse the grips with water to remove soap.
    5. Dry the grips thoroughly with a towel.

2. Use Grip Enhancers

Consider using commercial grip enhancers, which are specially designed to restore tackiness to golf grips. Here’s how to use them:

  • Types of Grip Enhancers:

    • Sprays: Quick application for immediate results.
    • Lotions/Gels: Provide a longer-lasting tacky feel.

  • Applying Grip Enhancers:
    1. Follow the manufacturer’s instructions for application.
    2. Spray or rub the enhancer onto the grip.
    3. Allow it to dry for a few minutes before using the club again.

3. DIY Grip Solutions

If you prefer natural solutions, you can create your own tacky grip enhancer at home.

  • DIY Grip Recipe:
    • Mix a solution of equal parts water and white vinegar.
    • Spray onto grips, then wipe off with a cloth.

This can help reduce the slickness and recover some grip traction.

4. Consider Grip Tape and Resurfacing

If your grips are beyond just a simple cleaning, you might consider re-gripping your clubs. This step is crucial if the grips are severely worn or damaged.

  • Materials Needed:

    • New grips
    • Grip tape
    • Solvent (like rubbing alcohol)

  • Steps for Re-Gripping:
    1. Remove the old grips and tape from the shaft.
    2. Clean the shaft thoroughly.
    3. Wrap grip tape around the shaft.
    4. Apply solvent to the tape and the inside of the new grip.
    5. Push the new grip onto the shaft until it’s seated correctly.

5. Regular Maintenance

To keep your grips tacky over time, establish a routine:

  • Maintenance Tips:
    • Clean grips after usage with a damp cloth.
    • Store your clubs in a cool, dry place.
    • Inspect grips regularly for wear and consider re-gripping every year.

Key Takeaways

  • Clean your grips regularly to maintain their tackiness.
  • Use commercial grip enhancers for quick solutions.
  • DIY solutions, like vinegar and water, can be effective and inexpensive.
  • If in doubt, consider professional re-gripping when grips are too worn out.
  • Establish a regular maintenance routine to prolong grip life.

FAQs About Tacky Golf Grips

  1. How often should I clean my golf grips?

    • It’s recommended to clean your grips every 5 to 10 rounds or whenever they look dirty.

  2. What if my grips are worn out?

    • If they’re severely worn, it’s best to re-grip them or replace them entirely.

  3. Will using grip enhancer damage my grips?

    • Generally, no, but always follow the manufacturer’s guidelines. Test on a small area first.

  4. Can I use household cleaners on my grips?

    • Avoid harsh chemicals. Stick to mild soap or vinegar solutions for safe cleaning.

  5. How do I know when to re-grip?

    • If you notice significant wear, cracks, or if the grips feel slick even after cleaning, it’s time to re-grip.

  6. Are there different types of grips?

    • Yes, grips come in various textures, materials, and sizes that can suit different preferences and conditions.

  7. What materials should I avoid when cleaning?

    • Avoid any harsh chemicals and abrasive scrubbers that could damage the grip material.

  8. How do I store my clubs to keep grips tacky?

    • Store them in a cool, dry place away from direct sunlight to prevent material degradation.

  9. Is there a difference between men’s and women’s grips?

    • Yes, women’s grips are often smaller in diameter to accommodate different hand sizes.

  10. Can I apply tack spray after every round?
    • It’s generally unnecessary; periodic use can maintain grip without compromising it.

Remember, maintaining tacky golf grips is crucial not just for performance but for enjoying your time on the course. With these methods, you’ll keep your clubs in top condition and step up your game, swing after swing. Happy golfing!

How To Place Clubs In Golf Bag

how to place clubs in golf bag

Golf is a game of precision, strategy, and technique, and a well-organized golf bag can greatly enhance your experience on the course. Whether you’re a seasoned golfer or just starting out, knowing how to place clubs in your golf bag effectively can make a big difference in performance and convenience. In this guide, we will offer you valuable tips on organizing your golf clubs, ensuring that you are always prepared for your next swing.

Why Organizing Your Golf Bag Matters

Keeping your golf bag organized may seem trivial, but there are several benefits that come with it:

  • Easier Access: Finding the right club quickly can save you time on the course.
  • Better Club Protection: A well-organized bag reduces the chances of clubs hitting each other and getting damaged.
  • Improved Focus: A tidy bag can help you mentally prepare for your game, giving you one less thing to worry about.

Understanding the Components of a Golf Bag

Before we dive into how to organize your golf clubs, let’s break down the components of a standard golf bag:

  • Dividers: Most golf bags come with dividers that help separate your clubs. This is crucial for preventing clubs from clanking together.
  • Pockets: Different compartments for accessories, gloves, balls, and valuables help keep your bag tidy.
  • Straps: Comfortable carrying straps are essential for easy transport, especially if you walk the course.

Choosing the Right Golf Bag

Depending on your playing style and preferences, there are several types of golf bags to consider:

Type of Bag Description Best For
Stand Bag Lightweight with legs that extend for stability. Walkers, casual rounds.
Cart Bag Larger with more pockets, designed for push/pull carts. Riders, frequent players.
Staff Bag Heavy-duty with maximum storage and luxurious finish. Professional golfers and amateurs.

Step-by-Step Guide: How to Place Clubs in Your Golf Bag

1. Start with a Clean Slate

Before placing your clubs in the bag, make sure everything is clean and organized. Remove any old scorecards, receipts, and unnecessary items. This ensures you have nothing weighing you down while you’re out on the course.

2. Identify Your Clubs

Your set might include the following clubs:

  • Drivers
  • Fairway Woods
  • Hybrids
  • Irons (3-9)
  • Wedges (Pitching, Sand, Lob)
  • Putter

3. Strategies for Club Placement

Here are some tips on how to place clubs in a way that maximizes efficiency:

  • Longest to Shortest: Start by placing your longest clubs (driver, woods) at the top of the bag. This allows for easier access and transportation.

  • Categorize by Type: Group similar types of clubs together. Keep all woods in one section, and all irons and wedges in another.

  • Weight Distribution: Place heavier clubs like the driver and woods toward the bottom to maintain balance.

  • Accessibility: Keep the clubs you use most frequently (usually your putter and specific wedges) toward the top or the outer pockets for quick access.

  • Use Dividers Wisely: If your bag has multiple dividers, utilize them to separate different types of clubs. For example, drivers in the first divider, fairway woods in the second, and hybrids in the third.

Example of Club Placement

Here’s a simple breakdown of how to arrange the clubs:

Section Clubs
Top (1st Divider) Driver
2nd Divider 3-Wood & 5-Wood
3rd Divider Hybrids (3 & 4)
4th Divider Irons (5 through 9)
5th Divider Wedges (Pitching, Sand, Lob)
Bottom (6th divider) Putter

4. Organize Additional Items

Make use of additional pockets for accessories. Here’s a list of items you might want to store:

  • Balls: Keep at least a few extra balls in a side pocket.
  • Tees: Store these in a dedicated compartment to prevent them from getting lost.
  • Gloves: Most bags have a pocket for gloves that can keep them dry.
  • Towel: Attach a towel to the outside for easy access.
  • Scorecard and Pencil: Keep these handy in a pocket that’s easy to reach.

5. Regular Maintenance

Once you have organized your golf bag, it is essential to maintain it. After each game, check for any minor damages and clean your clubs. A routine check can save you much hassle later on and ensure you’re always ready for your next round.

6. Consider Changing Your Layout

Don’t hesitate to modify your arrangement from time to time. Depending on the courses you play and your game improvement, different layouts may work better. Always keep experimenting until you find what feels best for you.

Key Takeaways

  • Organizing your golf bag enhances accessibility and reduces damage to clubs.
  • Start with longest clubs at the top for efficient weight distribution.
  • Group similar clubs together to streamline your choices on the course.
  • Use pockets wisely for storing balls, tees, gloves, and other accessories.
  • Regular maintenance ensures equipment longevity and readiness.

FAQ Section

1. How many clubs can I fit in a golf bag?

Most golf bags can accommodate up to 14 clubs, which is the maximum allowed in a round of golf.

2. What should I do if my clubs keep clanking together?

Make sure to use a bag with proper division and consider adding headcovers for your woods and putter to prevent damage.

3. Should I keep my golf bag in the trunk of my car?

It’s best to store your golf bag inside to prevent temperature fluctuations that can harm the equipment.

4. How often should I clean my golf clubs?

Regular cleaning after every round is recommended, but at least once every few rounds is essential.

5. Can I use any bag to store my clubs?

Ideally, you should use a proper golf bag. Using other types of bags can lead to club damage and difficulty in organization.

6. Can I store anything other than clubs in my golf bag?

Yes! Golf bags can hold various accessories—like balls, tees, gloves, towels, and personal items—which helps keep everything organized.

7. What if my bag doesn’t have enough dividers?

You can purchase an aftermarket divider system to install within your bag, allowing for better organization.

8. Is there a best way to carry my golf bag?

Use both straps to evenly distribute weight across your shoulders, or utilize the built-in carry handle for short distances.

9. How should I arrange my putter?

Your putter should be easily accessible, either at the top or in a side pocket designed specifically for putters.

10. Should I go for a lightweight or heavy bag?

It depends on your playing style. If you walk the course often, a lightweight stand bag is a good option. For use with golf carts, a heavier bag with more storage is suitable.

By following these guidelines, you’ll not only improve your efficiency on the course but also enhance your overall golfing experience. Happy golfing!