Removing Governor Weight

how to remove the governor on a golf cart

Golf carts are not just for the greens anymore; they’re becoming popular for neighborhood cruising and off-road adventures! However, many golf carts come with governors—devices designed to limit speed and ensure safety. If you’re looking to remove the governor for better performance, you’re in the right place. This article will guide you step by step while ensuring you stay safe and informed.

What is a Governor?

Before diving into how to remove a governor from a golf cart, let’s clarify what it is. A governor is a mechanical device that restricts the engine’s speed. It’s included by manufacturers to promote safety and avoid accidents, especially for inexperienced drivers.

While these devices have their place, you might feel limited in your golf cart’s speed and performance. Whether you’re taking it to the golf course or using it for general transport, removing the governor can enhance your driving experience significantly.

Why Remove the Governor?

There are several reasons why one might want to remove the governor from a golf cart, including:

  • Increased Speed: Removing the governor can give your golf cart a needed speed boost, allowing it to reach up to 25 MPH or more.
  • Performance Upgrade: Removing speed limits can improve acceleration and overall performance, useful for towing or off-road driving.
  • Customization: A lot of golf cart owners enjoy customized experiences; removing the governor can be part of that.

Important Consideration

Before proceeding, understand that removing the governor can impact your cart’s warranty and compliance with local regulations. Always check your local laws to ensure your golf cart modifications are legal.

Step-by-Step Guide to Remove the Governor

Tools You May Need

Before you start, gather the tools listed below:

  • Wrench set
  • Socket set
  • Screwdriver
  • Pliers
  • Safety goggles
  • Work gloves

Removal Process

Step 1: Safety First

Ensure the golf cart is on a flat surface and the power is turned off. Disconnect the battery for added safety.

Step 2: Locate the Governor

  • For many golf cart models, the governor is located on the engine. Common types like Club Car, Yamaha, and EZGO have their governors situated differently.
  • Club Car: Check near the rear end of the engine.
  • Yamaha: Look at the throttle side of the carburetor.
  • EZGO: Generally found on the rear of the engine or near the accelerator.

Step 3: Disconnect the Governor

  • Remove the clutch cover: Use your wrench to disconnect any bolts holding the cover.
  • Detach governor arm: Locate and carefully pull off any linkages or arms connected to the governor.

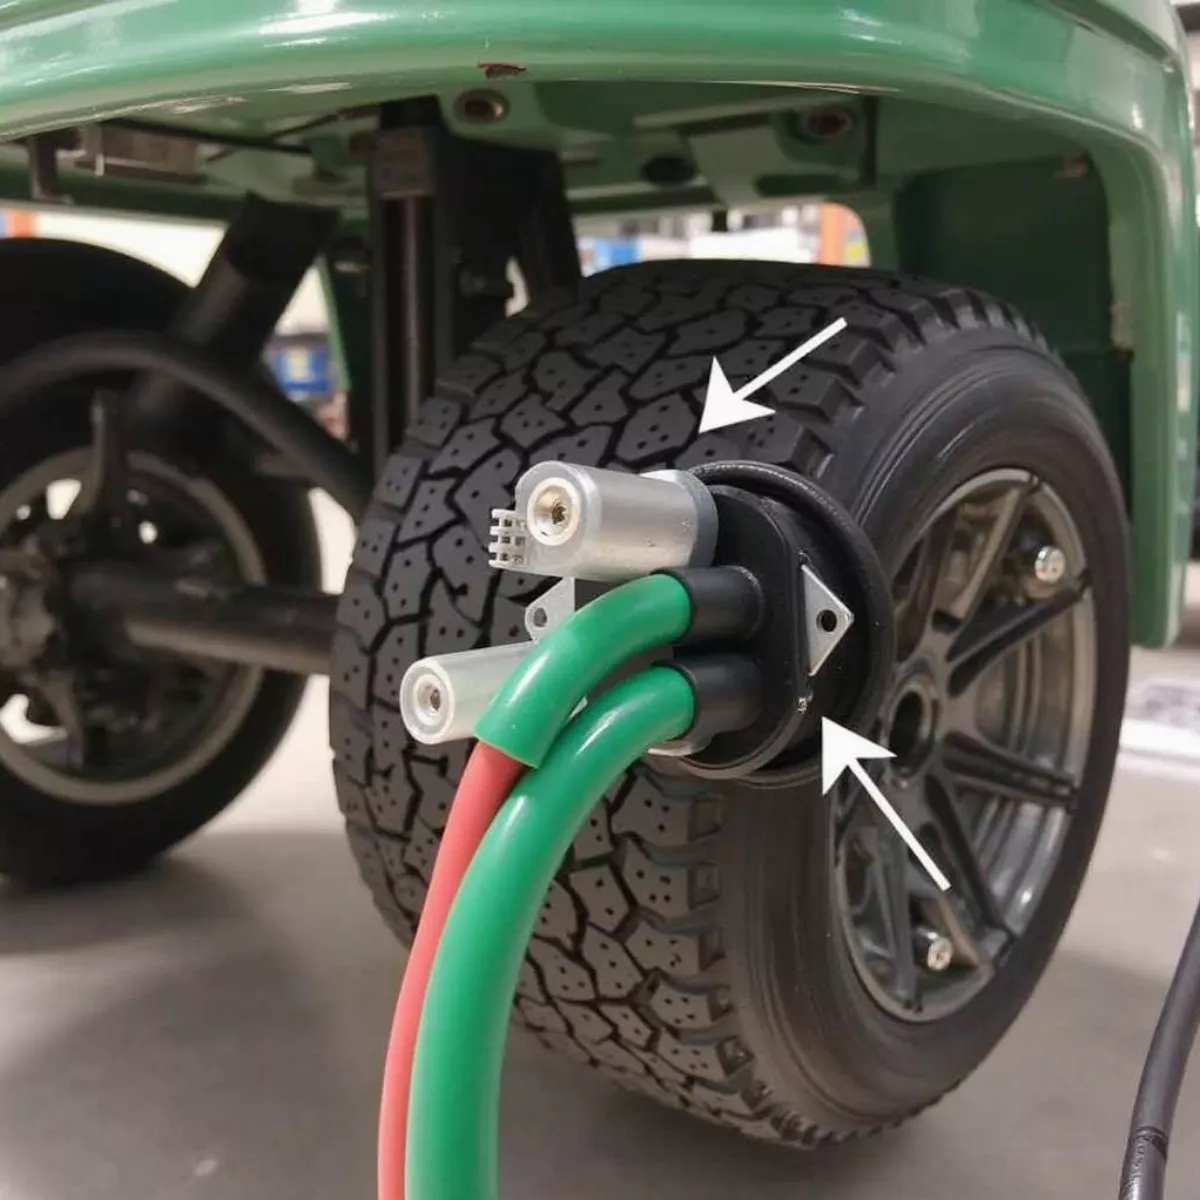
Step 4: Remove the Governor Weight

  • For carts with a centrifugal governor, you will need to remove weights attached to the governor. Carefully unscrew and detach them.
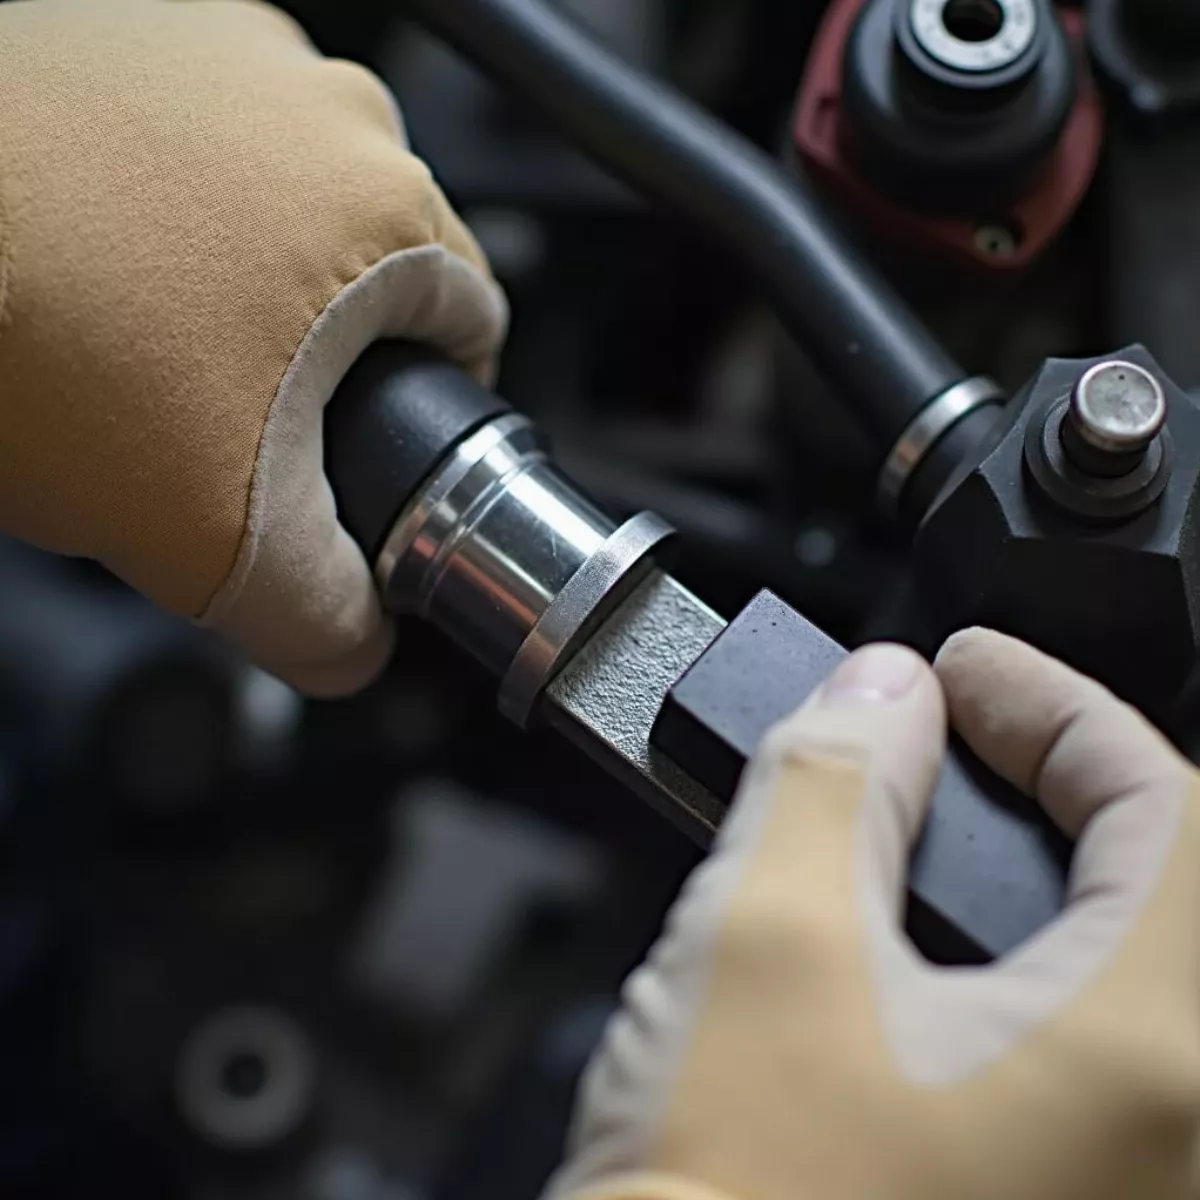
Removing Governor WeightRemoving Governor Weight

Step 5: Reassemble

  • After confirming everything is removed, reassemble the engine components, ensuring no loose parts are left unaccounted for.

Step 6: Reconnect the Battery

Once everything is securely in place and looks good, reconnect the battery cables.

Step 7: Test Drive

Take your golf cart for a spin! Start at a slow speed to ensure everything is functioning properly. Gradually accelerate to test the increased speed capabilities.

Key Tips for Success

  • Consult Your Manual: Always refer to your golf cart’s owner manual for detailed instructions tailored to your specific model.
  • Consider Professional Help: If you’re uncomfortable performing the steps yourself, consider hiring a professional mechanic who specializes in golf carts.

Key Takeaways

  • Golf cart governors limit speed for safety; removing them can boost performance.
  • Ensure legal compliance and safety before removal.
  • Gather necessary tools and follow a systematic approach.
  • Test drive your modified cart to ensure optimal performance.

Golf Cart Off-RoadingGolf Cart Off-Roading

Frequently Asked Questions (FAQ)

  1. Is it legal to remove the governor on a golf cart?

    Answer: It depends on your local laws. Always check your local regulations before making any modifications.

  2. Will removing the governor void my warranty?

    Answer: Yes, tampering with manufacturer equipment like governors often voids warranties.

  3. Can I put the governor back after removal?

    Answer: Yes, most governors can be reinstalled if needed, though you may need to retain all removed parts.

  4. How much speed can I gain by removing the governor?

    Answer: Typically, you can gain between 5-15 MPH, depending on the model and the modifications made.

  5. Can I safely drive my golf cart faster?

    Answer: Yes, but be mindful of safety and the cart’s ability to handle higher speeds. Make sure the brakes and tires are capable.

  6. What are the risks of removing the governor?

    Answer: Risks include compromised safety, higher chances of accidents, and potential mechanical failures.

  7. Will this modification affect battery life?

    Answer: Yes, higher speeds may lead to increased battery drain, requiring more frequent recharges.

  8. Do I need to change any other parts for better speed?

    Answer: It’s a good idea to consider upgrading tires or the motor for improved performance alongside governor removal.

  9. Are there any aftermarket options for speed enhancement?

    Answer: Yes, many aftermarket speed chips or performance kits are available specifically for golf carts.

  10. What’s the best way to maintain speed after governor removal?

    Answer: Regular maintenance, such as checking the battery, ensuring tire pressure, and tuning the engine, will help maintain speed.

By following this guide, you should now be equipped with all the information to remove the governor from your golf cart safely and effectively. Whether you’re looking to enhance your speed for joyrides or off-road adventures, remember to prioritize safety above all else. Happy driving!

Vistas Course Overview

vistas course at westbrook village golf club

Nestled in the heart of Arizona, Westbrook Village Golf Club shines as a premier golfing destination. Among its stellar offerings, the Vistas Course stands out with its breathtaking views, challenging layout, and welcoming atmosphere. Whether you’re a seasoned golfer or just starting, this course promises an enjoyable yet rigorous golfing experience. Let’s dive into everything you need to know about the Vistas Course!

Overview of the Vistas Course

The Vistas Course at Westbrook Village is renowned for its picturesque landscapes and exceptional course conditions. Designed by the acclaimed architect Robert Trent Jones II, it first opened its fairways in the late 1980s.

Course Features

  • Par: 61
  • Length: 4,270 yards
  • Designer: Robert Trent Jones II
  • Terrain: A combination of lush, rolling hills and challenging water features.

Here’s what makes the Vistas Course unique:

  • Challenging Design: Various tee options cater to all skill levels, making it inclusive for everyone.
  • Scenic Views: Gorgeous vistas of nearby mountains, vibrant sunsets, and serene water features make each round visually captivating.
  • Well-Maintained Greens: The greens are known for being fast and true, providing an enjoyable challenge for putters.

Vistas Course OverviewVistas Course Overview

Course Layout

The Vistas Course features 18 holes, each with its character. Below is a brief breakdown of some key holes:

Hole Par Length (Yards) Highlights
1 4 350 A gentle opener with a scenic view of the mountains.
4 3 150 A picturesque par 3 surrounded by water.
9 5 485 Features a dogleg left that challenges your accuracy and strategy.
18 4 400 A stunning par 4 that concludes your round with great views.

Course Amenities

The Vistas Course is not just about golf; it’s about the overall experience.

  • Pro Shop: Stocked with the latest golf gear and apparel.
  • Dining Options: After your round, enjoy a meal at the clubhouse with panoramic views of the course.
  • Practice Facilities: A driving range and putting greens are available to fine-tune your skills.

Golf Course AmenitiesGolf Course Amenities

Tips for a Great Round at the Vistas Course

Whether you’re a first-time visitor or a regular player, keeping these tips in mind may help you enjoy your experience even more:

  1. Play Smart: Understanding the course layout is crucial. Take time to study the scorecard and plan your strategy.
  2. Be Prepared for Weather Changes: Arizona weather can be unpredictable. Bring sun protection and an umbrella, just in case.
  3. Stay Hydrated: Arizona can be hot, especially during summer. Keep a water bottle handy to stay refreshed.
  4. Arrive Early: Getting to the course at least 30-60 minutes before your tee time allows you to warm-up and check in without rushing.
  5. Respect Course Etiquette: Maintain pace of play and respect fellow golfers to ensure that both you and your peers enjoy the day.

What To Expect on the Course

As you take your first swing at the Vistas Course, you can expect an experience that challenges both your skill and mental game. The beautiful landscapes frame each hole, while strategically placed bunkers and water hazards add a discerning element to your play.

Playing Conditions

The Vistas Course is known for its excellent playing conditions. Here’s what you can typically expect:

  • Greens: Smooth and fast; putting requires precision.
  • Fairways: Well-maintained offering ample room for misses but with charming opportunities for shot shaping.
  • Rough: Grows thick in certain areas, so keep your shots straight!

Golfer Putting On The Green At Vistas CourseGolfer Putting on the Green at Vistas Course

Key Takeaways

  • The Vistas Course at Westbrook Village Golf Club offers a unique golfing experience for all levels of players.
  • Expect scenic views, a well-thought-out course design, and excellent amenities.
  • Arrive prepared with hydration, practice time, and strategic game plans to make the most of your visit.

Frequently Asked Questions (FAQ)

1. How difficult is the Vistas Course?

The Vistas Course offers various tee options, making it accessible to players of all skill levels. Intermediate players will find it challenging enough to test their skills, while more experienced golfers can enjoy the strategic play required.

2. What type of amenities are available at the club?

The club features a pro shop, dining options, practice facilities, and locker rooms for golfers.

3. Are there any tournaments held at the Vistas Course?

Yes, the Vistas Course regularly hosts various golf tournaments and events. Check the club’s calendar for upcoming tournaments.

4. What is the best time of year to play?

Spring (March to May) and Fall (September to November) are considered the best times to play due to milder temperatures and beautiful scenery.

5. Can I book a tee time in advance?

Absolutely! You can easily book tee times online through the club’s website or directly over the phone.

6. Does the club offer golf lessons?

Yes, professional instruction is available, whether for beginners or advanced players looking to refine their game.

7. What is the average pace of play?

A typical 18-hole round at the Vistas Course takes about 4 to 4.5 hours, depending on the size of the group and traffic on the course.

8. Is there a dress code?

Yes, the club maintains a casual yet respectful dress code. Collared shirts and appropriate golfing attire are expected.

9. Are pull carts or riding carts available?

Both pull carts and riding carts are available for rent at the pro shop.

10. Can I host an event at the club?

Certainly! The club offers facilities for hosting events, from corporate gatherings to private parties.

Conclusion

The Vistas Course at Westbrook Village Golf Club is more than just a place to play golf; it’s a destination where passion meets picturesque beauty. Armed with this knowledge, you’re equipped to enjoy a round that combines challenge, scenery, and satisfaction.

So, whether you’re perfecting your swing or enjoying a casual day out, the Vistas Course is sure to impress. Head on over and experience the beauty and challenge for yourself—your next memorable golfing adventure awaits!

Golfers Finishing Round At SunsetGolfers Finishing Round at Sunset


By highlighting the essential details and creating engaging content, this guide is designed to be both informative and accessible. It encourages readers to explore and discover all that the Vistas Course has to offer while optimizing it for SEO to reach a wider audience.

Taylormade Golf Clubs

taylormade golf club giveaway 2024

Are you an avid golfer dreaming of upgrading your equipment? Or perhaps you’re just starting in the game and want the best tools to help you enjoy every swing? Well, you’re in luck! The Taylormade Golf Club Giveaway 2024 is just around the corner, and it’s an incredible opportunity for golfers of all skill levels. This event promises to deliver high-quality gear that can enhance your game and provide that competitive edge on the greens.

In this detailed guide, we’ll explore everything you need to know about the giveaway, from how to enter and what the prizes are to tips on maximizing your chances of winning. So, grab your clubs, and let’s dive in!

What is the Taylormade Golf Club Giveaway 2024?

The Taylormade Golf Club Giveaway is an annual event that allows participants to win various golf-related prizes, with a focus on Taylormade’s top-of-the-line equipment. This year, 2024, promises an even more exciting slate of offerings, including drivers, irons, putters, and even apparel.

Taylormade is known for its innovation in golf technology, so you can expect that the prizes will be some of the best products in the industry. The giveaways often attract thousands of participants, making it not only a chance to win big but also a community event where golfers come together.

Why Taylormade?

Before we delve into the giveaway details, let’s briefly highlight why Taylormade is a preferred choice among golfers.

  • Innovation: Taylormade is at the forefront of golf technology, continually pushing boundaries with new materials and designs.
  • Performance: Whether you’re hitting from the tee or within 10 feet of the hole, Taylormade clubs are built for consistent performance.
  • Community: Taylormade promotes a sense of community by supporting events, sponsorships, and initiatives that bring golfers together.

With these factors in mind, the Taylormade Golf Club Giveaway 2024 is an event that you won’t want to miss!

Taylormade Golf ClubsTaylormade golf clubs

How to Enter the Taylormade Golf Club Giveaway 2024

Getting involved in the giveaway is simple and straightforward. Here’s a step-by-step guide on how to enter:

  1. Visit the Official Website: Go to the Taylormade website or any promotional site associated with the giveaway.
  2. Find the Giveaway Section: Look for the specific tab that mentions the 2024 Golf Club Giveaway.
  3. Fill Out the Entry Form: Provide the necessary details such as your name, email address, and other requested information.
  4. Follow on Social Media: Many giveaways require participants to follow Taylormade on platforms like Instagram, Facebook, or Twitter as a condition for entry.
  5. Share and Tag: Increase your chances of winning by sharing the giveaway post and tagging friends. This often leads to additional entries, giving you a better shot at snagging those prizes!
  6. Stay Connected: Sign up for newsletters to receive updates and news about the giveaway, along with potential bonus entry opportunities.

Enter before the deadline to ensure your chance to win! Typically, the giveaway dates will be outlined on the promotion page, so keep an eye out.

Prizes to Look Forward To

The Taylormade Golf Club Giveaway 2024 offers various exciting prizes. While exact details may vary, here’s what you can typically expect:

Prize Category Examples
Drivers Taylormade Stealth Driver, M5 Driver
Irons Taylormade PING Irons, M6 Irons
Putters Taylormade Spider Mini Putter, TP Patina Putter
Apparel Taylormade Golf Shirts, Caps, Bags
Accessories Golf Gloves, Balls, and other golf accessories

Taylormade Golf Giveaway Prize PackageTaylormade golf giveaway prize package

Tips for Winning

While giveaways are often about luck, there are strategies you can adopt to improve your chances:

  • Complete All Entry Steps: Make sure to follow every requirement. Missing a step can disqualify you.
  • Engage on Social Media: The more you engage with posts about the giveaway, the more visibility it gains, increasing your chances.
  • Spread the Word: Encourage friends to enter. Some giveaways offer additional points for referrals.
  • Look for Bonus Entries: Some companies offer multiple ways to enter beyond the primary form, like sharing content or engaging with their brand online.

Frequently Asked Questions (FAQ)

Q1: When is the Taylormade Golf Club Giveaway 2024?

A1: The exact dates are yet to be announced, so check the official Taylormade website for updates.

Q2: Who can enter the giveaway?

A2: Most giveaways are open to residents of the country where the event takes place. Be sure to read the terms and conditions.

Q3: Is there an entry fee?

A3: Typically, there is no fee to enter, but always double-check the specific giveaway rules.

Q4: How will winners be notified?

A4: Winners are usually notified via email or direct messages on social media.

Q5: Are there limits on how many times I can enter?

A5: This varies by giveaway. Some allow multiple entries, while others limit it to one per person.

Q6: Can I win if I don’t follow on social media?

A6: Following on social media is often a requirement, but check the specific rules for the giveaway.

Q7: What happens if I don’t claim my prize?

A7: Most giveaways have a timeframe for prize claims; failure to do so may result in the loss of the prize.

Q8: Can I enter if I live outside the United States?

A8: Eligibility often depends on the giveaway’s specific rules. Consult the official rules to confirm.

Q9: What happens to my personal information after entering?

A9: Personal information is typically used solely for the giveaway and not shared without consent. Refer to the privacy policy.

Q10: Can I enter from multiple devices?

A10: This is generally allowed, but it’s better to check the rules to avoid disqualification.

Key Takeaways

  • The Taylormade Golf Club Giveaway 2024 is a great chance to win high-quality golf gear and accessories.
  • To enter, complete the official entry form and engage with Taylormade on social media.
  • Prizes include drivers, irons, apparel, and accessories, all well-known for their performance.
  • Increase your chances of winning by fully participating and taking advantage of multiple entry opportunities.

This year’s Taylormade Golf Club Giveaway holds exciting possibilities for golfers of all levels. Whether you’re hoping to win a new driver or something more, make sure to follow the steps laid out in this guide. Best of luck this season, and may your game continue to improve!

Ezgo Golf Cart Speed Limiter

how to remove speed limiter on ezgo golf cart

If you’re a golf cart enthusiast, you might find yourself itching for a little more speed on the course or around the neighborhood. An EZGO golf cart is known for its reliability and versatility, but some models come equipped with speed limiters to ensure safety and prolong battery life. In this guide, we’ll walk you through how to remove the speed limiter on your EZGO golf cart while keeping safety in mind. Let’s dive in!

Understanding Speed Limiters

Before we get into removing speed limiters, it’s important to understand what they are and why they are installed on golf carts.

  • What is a Speed Limiter?

A speed limiter is a device designed to restrict the maximum speed of a vehicle. In golf carts, this is often set to prevent accidents and maintain control.

  • Why Are They Used?

Speed limiters can help with safety for inexperienced drivers, conserve battery life, and enhance the longevity of the vehicle. However, some drivers may find these restrictions inconvenient.

Do You Need to Remove the Speed Limiter?

Before taking any action, consider whether you truly need to remove the speed limiter. Here are some questions to ponder:

  • Will you be driving in areas where speed is a concern?
  • Do you have experience operating faster vehicles?
  • Are the benefits worth the potential risks?

The Pros and Cons of Removing the Speed Limiter

Pros Cons
Increased performance and speed Higher risk of accidents
Enhanced driving experience Greater battery consumption
Improved vehicle responsiveness May void warranty if not done correctly

Ezgo Golf Cart Speed LimiterEZGO Golf Cart Speed Limiter

Steps to Remove the Speed Limiter on EZGO Golf Carts

Now that you’ve weighed the pros and cons, let’s look at how to safely remove the speed limiter from your EZGO golf cart. Follow these steps carefully to ensure you do it right.

Tools You’ll Need

  • Socket wrench set
  • Screwdriver set
  • Multimeter (optional, for double-checking connections)
  • Safety glasses
  • Gloves

Step-by-Step Instructions

  1. Locate the Limiter

    • For EZGO electric models, the speed limiter is usually found on the controller. The controller is typically located under the seat at the rear of the cart.
    • For gas models, it could be located on the throttle assembly.
  2. Disconnect the Battery

    • Safety first! Before working on any electrical components, disconnect the battery terminals. Start by removing the negative terminal to avoid accidental short circuits.
  3. Access the Speed Limiter

    • Use your socket wrench to remove any screws or bolts holding the controller cover in place. Take care to keep all parts organized.
  4. Identify the Speed Limiter Wires

    • Look for the wires connected to the speed limiter. Usually, these wires will be color-coded (check your owner’s manual for accurate identification).

Ezgo Golf Cart Speed Limiter WiresEZGO Golf Cart Speed Limiter Wires

  1. Modify or Remove Wires

    • Carefully cut or disconnect the speed limiter wire, ensuring you do not damage other components. If you’re uncertain, it’s a good idea to consult the manual or a professional.
  2. Reconnect the Battery

    • After making changes, reconnect the negative terminal on the battery, and make sure all your connections are secure.
  3. Test the Cart

    • Power on the golf cart and take it for a test drive. Ensure that the speed limiter is disabled and check for any unusual sounds or behaviors. If you notice anything odd, it’s best to consult a professional.

Important Safety Reminders

  • Always wear safety glasses and gloves when working on your golf cart.
  • Make sure you perform this process in a well-ventilated area.
  • Be cautious of how fast you drive your golf cart after modification. Increased speed can lead to accidents.

When to Consult a Professional

Sometimes, the DIY route isn’t the best option. If you feel uncomfortable or unsure about any part of the modification, it might be wise to consult with a professional mechanic or a service center specializing in golf carts.

Key Takeaways

  • Understand the function of speed limiters before deciding to remove them.
  • Assess the risks and benefits of modifying your golf cart.
  • Follow the steps carefully to ensure safe removal of the speed limiter.
  • Always prioritize safety by wearing appropriate gear and considering professional help if needed.

Frequently Asked Questions (FAQs)

1. Will removing the speed limiter void my warranty?

Yes, tampering with the golf cart’s components, including the speed limiter, can void your warranty. Always check with your manufacturer for specifics.

2. What is the average speed of an EZGO golf cart?

Typically, an EZGO golf cart can reach speeds of 12-20 mph, depending on the model and conditions. Removing the speed limiter can increase this.

3. How can I tell if the speed limiter is working?

A quick test drive should help you determine if the speed limiter is functioning. If the cart doesn’t exceed the expected speed limits, it may be working properly.

4. Can I install a new speed limiter if I change my mind?

Yes, you can install a new speed limiter if you choose to revert the modification. Specialized kits are available for this purpose.

5. What are the legal considerations for speed limits on golf carts?

Check local and state regulations. Many areas have specific speed limits for golf carts, especially on public roads. Always comply with these laws for safety.

Ezgo Golf Cart On RoadEZGO Golf Cart On Road

6. Are there aftermarket speed limiter devices?

Yes, there are aftermarket options available that can provide controlled speed limits or enhancements. Research to find reputable products that fit your model.

7. How often should I check my golf cart’s speed limit?

Periodically checking it, especially before the start of the season or after modifications, is recommended to ensure safety.

8. Will removing the speed limiter affect battery life?

Yes, operating at higher speeds can lead to increased battery consumption, possibly reducing overall battery life if used continually at high speeds.


Removing the speed limiter on your EZGO golf cart can provide a thrilling experience, but it’s essential to do so safely and responsibly. Whether you’re cruising the golf course or enjoying a leisurely ride, understanding your vehicle’s capabilities is crucial for safety and fun. If you follow the steps outlined in this guide, you’ll be well on your way to enjoying your golf cart to its fullest potential!

Golf Cart Battery Voltage Test

how to refurbish golf cart batteries

Golf carts serve as versatile vehicles, perfect for not only cruising around a golf course but also for neighborhood rides and errands. Like any other vehicle, though, golf carts rely heavily on their batteries. The cost of replacing these batteries can add up, often leaving owners searching for ways to refurbish and extend the life of their existing batteries. In this guide, we’ll walk you through the process of refurbishing golf cart batteries while maintaining a friendly and straightforward tone.

Understanding Golf Cart Batteries

Before diving into the refurbishment process, it’s essential to understand what kind of batteries are used in golf carts. Most golf carts use either lead-acid batteries or lithium-ion batteries. Lead-acid batteries are the most common due to their cost-effectiveness, whereas lithium-ion batteries are emerging as a more high-performance option.

Common Issues with Golf Cart Batteries

  • Sulfation: This occurs when lead sulfate crystals form on the plates, reducing efficiency.
  • Low water levels: Water is vital for the operation of lead-acid batteries.
  • Corroded terminals: This can cause poor connectivity.
  • Age: Batteries typically last 4-6 years but can last longer with care.

Step-by-Step Process to Refurbish Golf Cart Batteries

1. Gather Your Materials

Before starting, make sure you have the necessary tools and materials:

  • Safety goggles and gloves
  • Distilled water
  • Baking soda
  • A multi-meter
  • Battery charger
  • Wire brush or terminal cleaner
  • voltmeter for checking battery health

2. Safety First

Before you dive into the refurbishment process, ensure you’re wearing safety goggles and gloves. Battery acid is hazardous and can splash during the refurbishment. Work in a well-ventilated area to avoid inhaling harmful vapors.

3. Evaluate the Condition of the Batteries

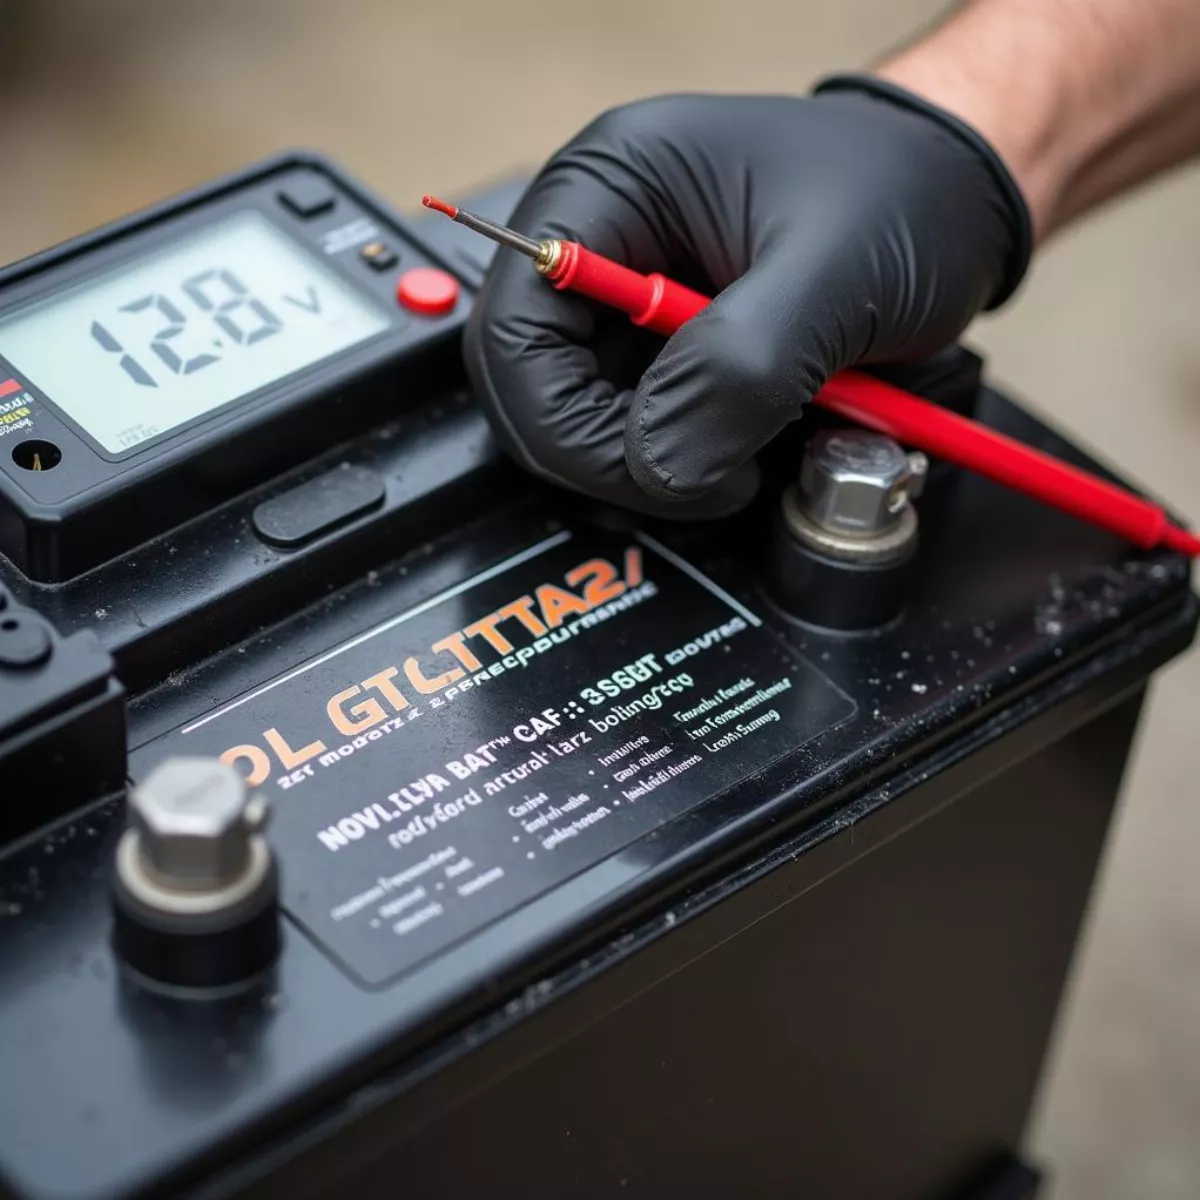
To refurbish your batteries effectively, first assess their condition by testing the voltage with a multi-meter. Follow these steps:

  • Disconnect the batteries from the golf cart.
  • Use the multi-meter to measure the voltage of each battery.
  • Note any batteries that read below 12.0 volts, as they may need refurbishing.
Typical Voltage Levels Battery Condition Voltage Level
Fully Charged 12.6 – 12.8 V
Charged 12.4 – 12.6 V
Needs Refurbishing Below 12.0 V

Golf Cart Battery Voltage TestGolf Cart Battery Voltage Test

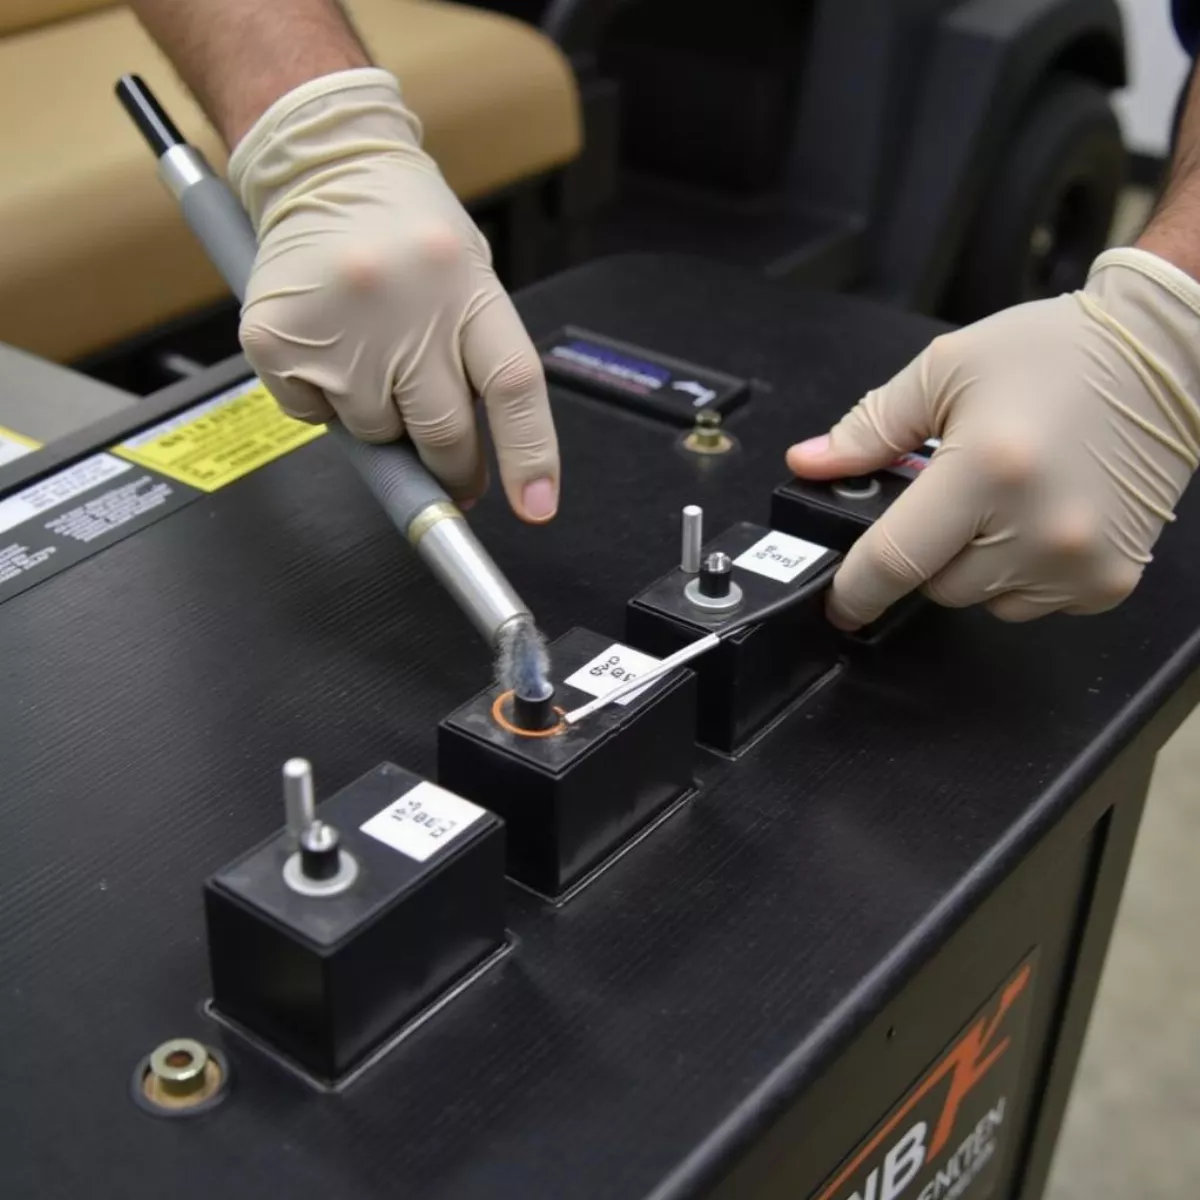
4. Clean the Battery Terminals

Corrosion can hinder performance, so cleaning the battery terminals is essential.

  • Mix baking soda with water to create a paste.
  • Apply the paste to corroded areas using a brush.
  • Allow it to sit for a few minutes and then scrub away the residue.
  • Rinse with water and dry thoroughly.

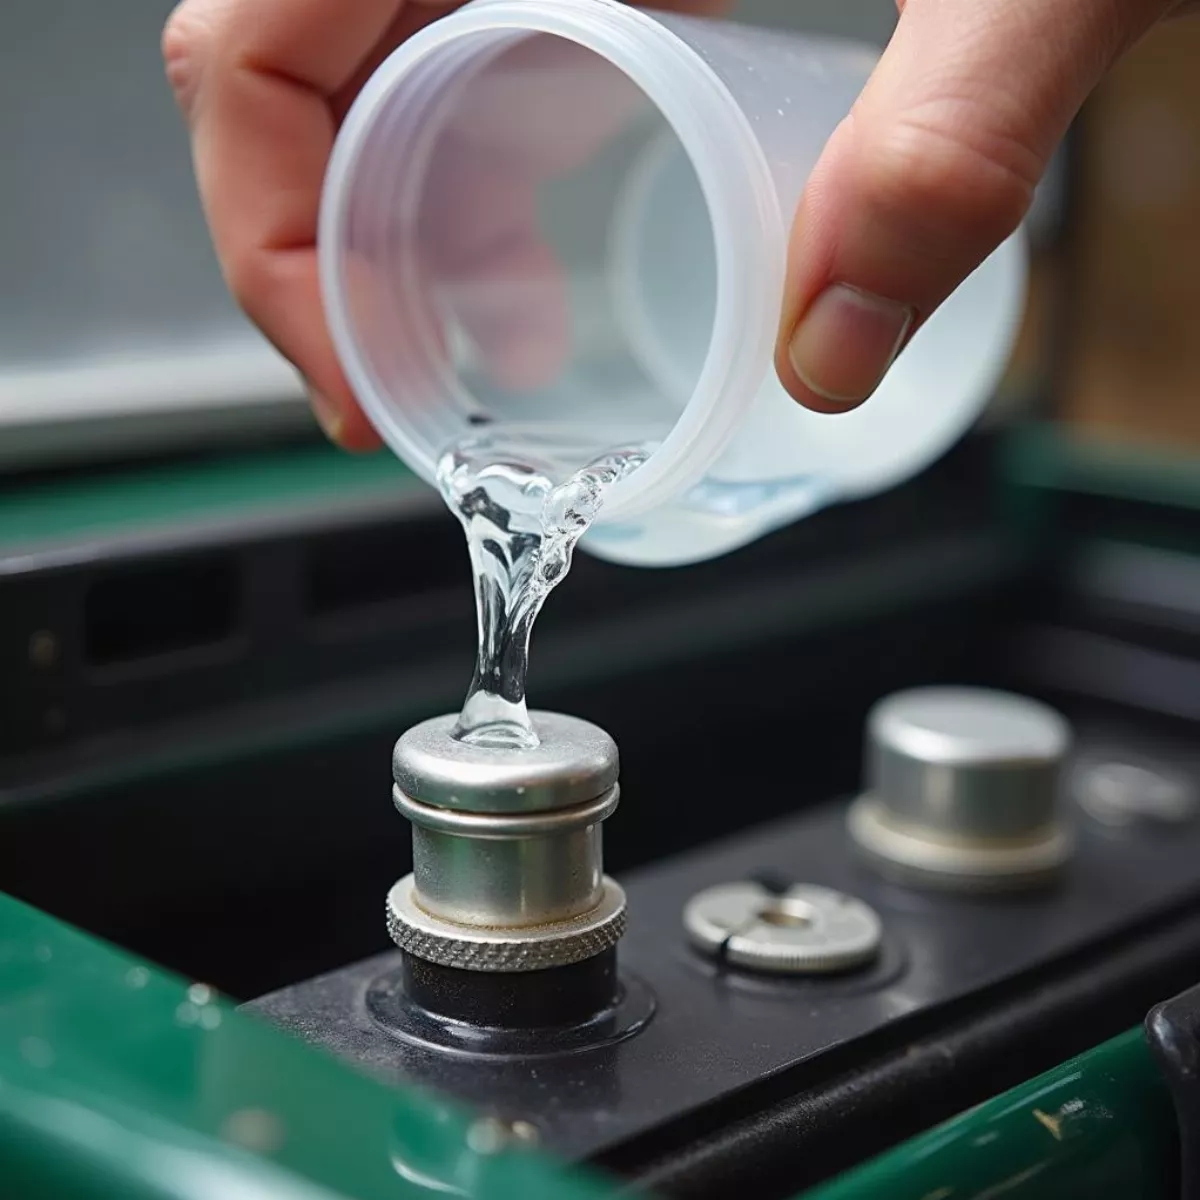
5. Top Up Distilled Water

Lead-acid batteries need sufficient water for optimal functioning.

  • Open the caps and check the water levels in each cell.
  • Add distilled water if levels are low, up to the recommended fill line. Avoid tap water as it may contain minerals that can interfere with battery performance.

Refilling Golf Cart Battery With Distilled WaterRefilling Golf Cart Battery with Distilled Water
6. Equalize the Batteries

Equalization is done to balance the charge in each battery cell. This helps prevent sulfation and extends battery life.

  • Hook up your battery charger to the batteries and set it to the equalization mode (if available).
  • Leave the charger connected until the batteries are fully charged.

7. Test the Batteries Again

After refurbishing, it’s crucial to test the batteries again.

  • Use your multi-meter to check voltage levels.
  • Ensure all batteries are at or above 12.4 volts.

8. Reinstall the Batteries

Once you are satisfied that the batteries are cleaned, topped up, and charged, you can reinstall them in the golf cart.

  • Be cautious to reconnect the terminals correctly:
    • Positive to positive
    • Negative to negative

9. Monitor Performance

Once the batteries are back in the golf cart, monitor their performance for a week or two. Keep an eye on charging times and the distance traveled on a single charge to gauge improvements.

Maintenance Tips to Extend Battery Life

  • Regular Charging: Charge batteries after each use to prevent deep discharging.
  • Water Checks: Regularly check water levels and top them up.
  • Proper Storage: Store batteries in a cool, dry place when not in use.
  • Frequent Cleaning: Clean terminals and cables periodically to prevent corrosion.

Cleaning Golf Cart Battery TerminalsCleaning Golf Cart Battery Terminals

Key Takeaways

  • Evaluate the batteries first using a multi-meter.
  • Clean terminals and refill with distilled water.
  • Equalize your batteries for balanced charge.
  • Test voltage after refurbishment for optimal performance.
  • Regular maintenance is essential for longevity.

Frequently Asked Questions (FAQ)

1. How often should I refurbish my golf cart batteries?

While it depends on the usage, consider refurbishing them every 1-2 years to maintain optimal performance.

2. Can I refurbish lithium-ion batteries?

Refurbishing lithium-ion batteries is more complex and often not recommended due to safety issues; replacing them is generally preferred.

3. What tools do I need to refurbish golf cart batteries?

You’ll need a multi-meter, battery charger, distilled water, and basic cleaning supplies.

4. How can I tell if my battery is beyond refurbishment?

If the voltage readings are consistently below 10.0 volts or if you notice physical damage, it may be time to replace the battery.

5. What does sulfation mean?

Sulfation is the formation of lead sulfate crystals on the battery plates, which occurs when the battery is left in a discharged state for too long.

6. Why is distilled water recommended for lead-acid batteries?

Distilled water is free from minerals and impurities, ensuring it doesn’t harm the battery chemistry.

7. How can I check if my battery charger is working correctly?

Try connecting the charger to a different battery set. If the charger still doesn’t function, consider replacing it.

8. What’s the lifespan of a golf cart battery?

On average, lead-acid batteries last 4-6 years, depending on maintenance and use.

9. What should I do if my batteries are leaking?

If you notice any leakage, disconnect them immediately and check for damage. Dispose of them correctly at a recycling facility.

10. Where can I find more information on battery maintenance?

Check out additional resources on battery maintenance and refurbishment on Battery University or your golf cart’s manufacturer’s website.

In conclusion, refurbishing golf cart batteries can significantly extend their lifespan and save you money in the long run. By following the steps outlined in this guide and maintaining your batteries regularly, you can ensure you enjoy seamless rides on your golf cart for years. Happy refurbishing!

Golf Cart Lifted With Jack And Secured With Jack Stands

how to raise a golf cart without using a kit

Golf carts are not just for the golf course anymore; they’ve become incredibly versatile vehicles, ideal for various outdoor activities, events, and even community transport. However, one common quest among golf cart owners is finding ways to raise their golf carts effectively without breaking the bank on expensive kits. In this guide, we’ll explore step-by-step methods you can use to raise your golf cart on your own, ensuring better off-road capability and that extra bit of style.

Why Raise Your Golf Cart?

Before diving into the “how,” let’s talk about the “why.” Raising your golf cart can provide several benefits:

  • Improved Off-Road Capability: A higher ride allows for easier navigation over uneven terrains.
  • Better Tire Choices: With additional lift, you can upgrade to larger tires that enhance traction and performance.
  • Increased Ground Clearance: This reduces the risk of bottoming out on tough terrains.
  • Enhanced Visual Appeal: A lifted cart just looks cooler, and an aesthetically pleasing cart can be a great conversation starter.

Tools and Materials Needed

Before you start, gather all necessary tools and materials:

  • Basic Tools: Wrenches, sockets, and ratchets
  • Jack and Jack Stands: To lift your cart safely
  • Heavy-Duty Springs or Spacers: For raising the cart
  • Wood Blocks or Planks: Optional, for temporary height adjustments
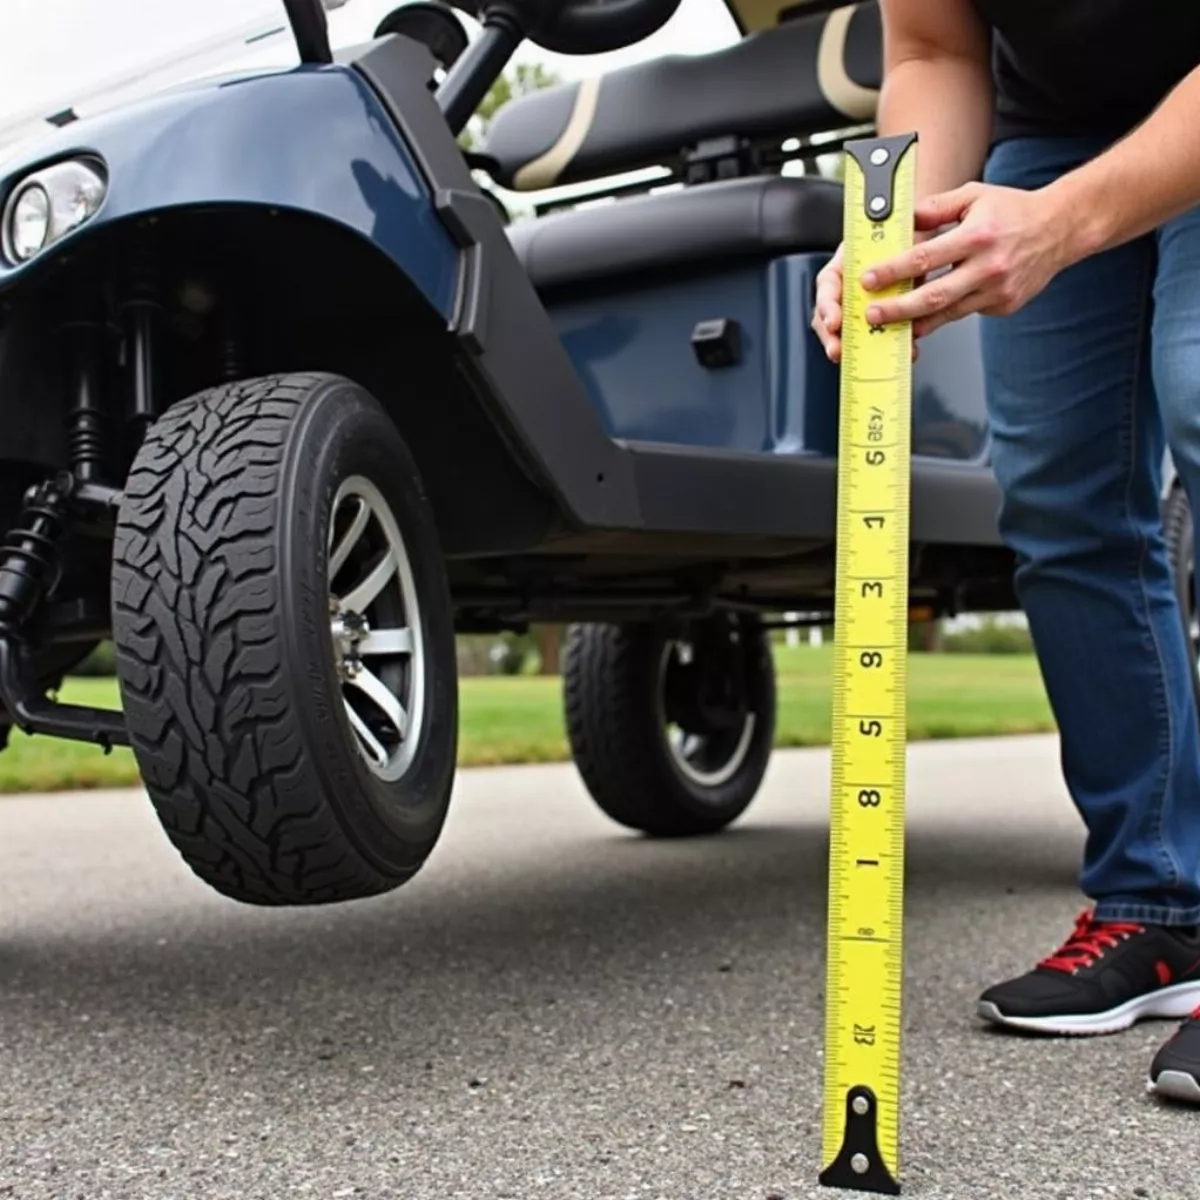
  • Measure Tape: To ensure desired height is achieved
  • Lubricant: For easier disassembly of bolts and nuts

Step-by-Step Instructions

Step 1: Prepare Your Golf Cart

  1. Choose a Safe Location: Ensure your golf cart is on a flat, stable surface.
  2. Disconnect the Battery: Safety first! Always disconnect the battery before starting any maintenance work.
  3. Measure Initial Height: Use a tape measure to find the current ground clearance. This will help you gauge how much you want to raise it.

Step 2: Lift Your Golf Cart

  1. Jack Up the Cart: Using a jack, lift the back or front of the cart high enough to work comfortably underneath. Support it with jack stands for safety.
  2. Secure the Cart: Before working on it, give it a light shake to confirm it’s stable.

Golf Cart Lifted With Jack And Secured With Jack StandsGolf cart lifted with jack and secured with jack stands

Step 3: Remove Old Springs or Shocks

  1. Locate the Suspension Components: Identify the springs and shocks.
  2. Remove Nuts and Bolts: Use your wrenches to take out the fasteners holding the shocks in place.
  3. Take Out Old Springs/Shocks: Carefully wiggle them free.

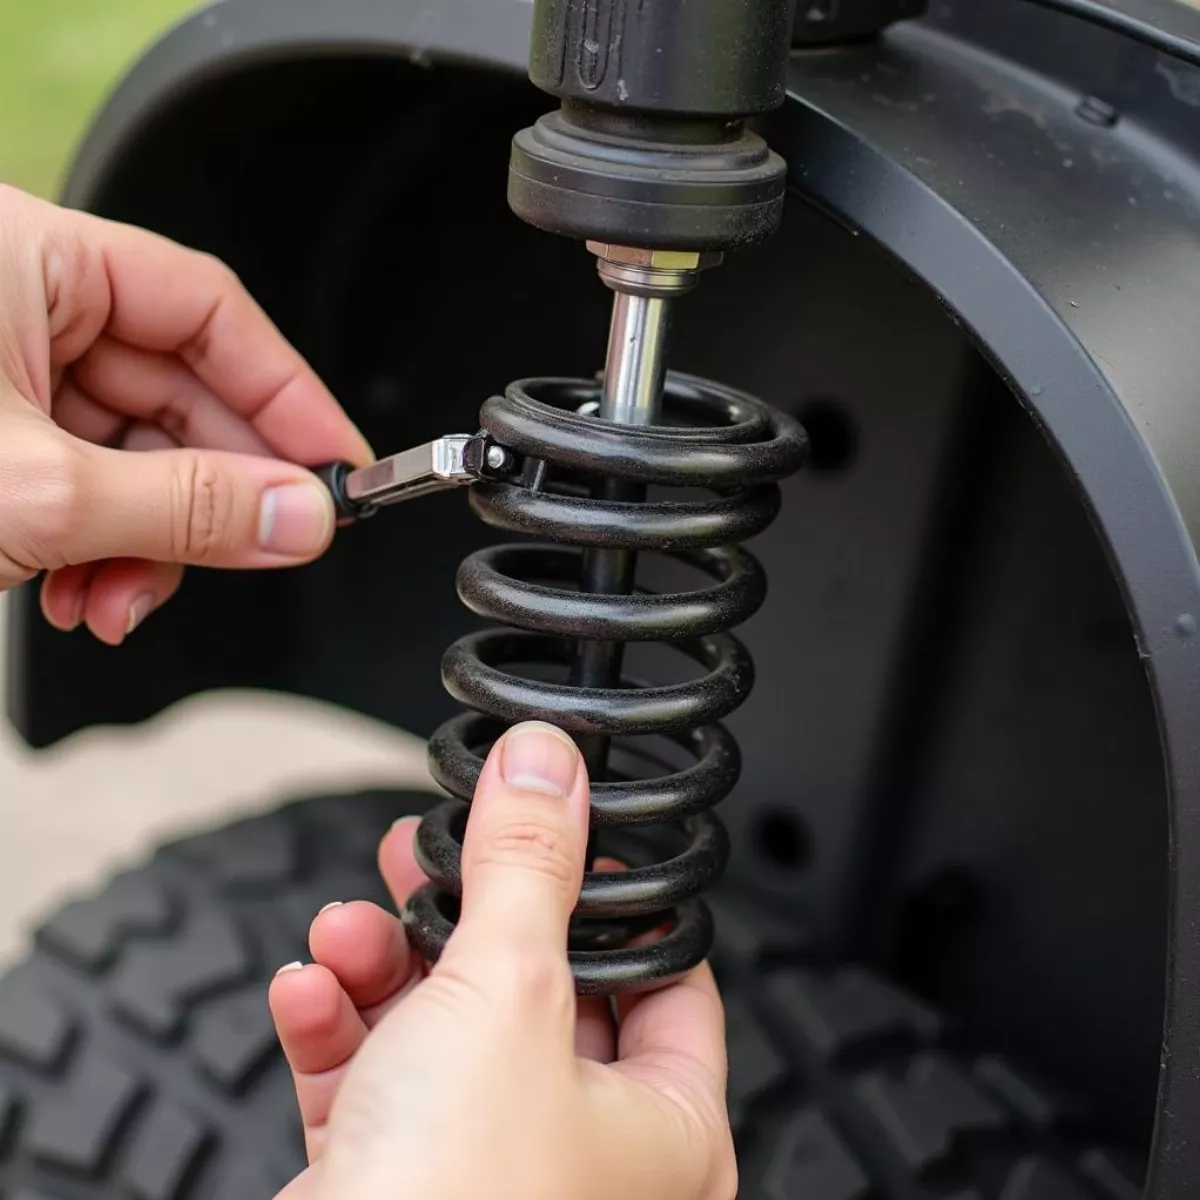
Step 4: Install New Springs or Spacers

  1. Choose Your Replacement: Depending on how high you want your cart to go, you can use either heavy-duty springs or spacers.
  2. Install New Components:
    • If using springs: Fit the new springs into place and secure them using the same nuts and bolts.
    • If using spacers: Position them above the existing springs, ensuring they fit snugly.
  3. Double Check Your Work: Ensure everything is tight and properly positioned.

Installing New Springs On A Golf CartInstalling new springs on a golf cart

Step 5: Reassemble and Test

  1. Reattach Shocks: Fix the shocks back into their places.
  2. Reconnect the Battery: If everything looks good, reconnect the battery.
  3. Lower Your Cart: Carefully remove jack stands and lower the cart to the ground.
  4. Final Measurement: Measure the ground clearance again. Congratulations, you’ve raised your golf cart!

Maintenance Tips

After you’ve raised your golf cart, it’s essential to keep it in great condition. Here are some tips:

  • Regularly Inspect the Suspension: Keep an eye on the springs and shocks for any signs of wear.
  • Lubricate Moving Parts: Ensure all moving parts operate smoothly for better longevity.
  • Check Tire Pressure: With larger tires, the right pressure becomes crucial for performance and safety.

Key Takeaways

  • Raising a golf cart without a kit is achievable by using basic tools and some heavy-duty springs or spacers.
  • Always prioritize safety by working in a stable environment and disconnecting the battery.
  • Regular maintenance will ensure your modified golf cart remains in excellent condition.

FAQs About Raising a Golf Cart Without a Kit

1. Can I raise my golf cart without modifications to the frame?

Yes, using heavy-duty springs or spacers allows you to raise the cart without needing to modify the frame.

2. Will raising my golf cart affect its speed or power?

Generally, it can lead to slightly reduced speed due to added weight, but upgraded tires can enhance traction which potentially improves handling.

3. How high can I raise my golf cart?

Typically, you can safely raise it 2-4 inches depending on the components used and the manufacturer’s recommendations.

Measuring Golf Cart'S Ground ClearanceMeasuring golf cart's ground clearance

4. Should I replace my tires when raising my golf cart?

It’s advisable to consider larger tires for better performance and stability after raising the cart.

5. Is it necessary to change the shocks when I raise my cart?

While it’s not strictly necessary, upgrading the shocks might be beneficial for better handling and stability.

6. How can I ensure my cart remains safe after modifications?

Regularly inspect all suspension components and keep an eye on the alignment and tire pressure.

7. Will raising my golf cart void my warranty?

This depends on your golf cart’s warranty policies. Always check your warranty terms before making modifications.

8. How long does the raising process take?

If done correctly, this can take anywhere from two to four hours, depending on your experience and the tools available.

9. Can these methods be applied to electric golf carts?

Yes, electric golf carts can be raised using the same methods; however, consider the potential impact on the battery placement and weight distribution.

10. Where can I find specific parts for raising my cart?

Look for local parts websites or retailers that specialize in golf cart components, or check with your golf cart’s manufacturer.

Raising your golf cart can truly change how you use it, enhancing performance while adding a personal touch. Now that you’ve got the knowledge and steps to do it, you’ll be cruising in style in no time!

Impact-Resistant Glass

how to protect windows from golf balls

If you’re living in proximity to a golf course or you have a passionate golfer in your household, you’re probably familiar with the risk of golf balls crashing into your windows. These little projectiles can cause significant damage, leading to costly repairs and even safety hazards. But fear not! In this guide, we will explore various effective strategies to protect windows from golf balls while keeping your home safe and stylish.

Why Golf Balls are a Concern

Before diving into protective measures, it’s important to understand why golf balls can be a concern in residential areas. Golf balls, although small, are made of hard materials like plastic and rubber and can travel at high speeds. A well-hit golf ball can reach speeds of over 160 mph. Imagine what kind of damage that can inflict on a window!

Factors Contributing to Window Damage

  • Proximity to the Golf Course: Homes situated near golf courses are at higher risk.
  • Type of Windows: Older or single-pane windows are generally more vulnerable than modern double-pane alternatives.
  • Wind Conditions: Wind can alter the trajectory of a golf ball, making it more likely to hit your windows.

Effective Strategies to Protect Your Windows

Now that we’ve covered the risks, let’s explore some effective strategies for protecting your windows from unwanted golf balls.

1. Install Impact-Resistant Glass

One of the most durable solutions for protecting windows is to install impact-resistant glass. This type of glass is designed to withstand high-velocity impacts. It incorporates a polyvinyl butyral (PVB) layer that holds the glass together, even when shattered.

  • Benefits:
    • Durable and long-lasting
    • Less likely to shatter
    • Reduces noise and increases energy efficiency

Impact-Resistant GlassImpact-Resistant Glass

2. Use Window Film

Another cost-effective option is applying window film. This specialized film enhances the window’s strength and holds the glass together when it’s hit.

  • Advantages:
    • UV Protection: Reduces harmful UV rays.
    • Privacy: Adds a level of privacy without sacrificing visibility.
    • Easy to Install: Many films can be applied by homeowners themselves.

3. Install Protective Screens

Protective screens can physically block golf balls from hitting the glass. Made from sturdy materials, these screens can absorb the impact of golf balls.

  • Features:
    • Variety of Designs: Screens can be customized to match your home’s aesthetics.
    • Versatility: Can be removed or adjusted as needed.

Protective Window ScreensProtective Window Screens

4. Employ Strategic Landscaping

Using strategic landscaping can help deflect golf balls before they get to your windows. By placing shrubs, trees, or other features, you create a natural barrier.

  • Best Plants: Consider using dense foliage such as:
    • Holly bushes: Thick and tall, providing effective cover.
    • Bamboo: Grows quickly and can create a protective screen.

5. Create a Net Barrier

Installing a net barrier between your home and the golf course can be an effective deterrent. This solution is particularly useful for homes situated very close to the course.

  • Material Options:
    • Heavy-duty nylon: For durability.
    • Metal mesh: For added strength.

Golf Course Net BarrierGolf Course Net Barrier

6. Consider a Golf Course Buffer

If you have the resources, creating a buffer zone between your home and the golf course can be extremely beneficial. This might involve purchasing additional land or working with local authorities to establish protective measures.

  • Benefits:
    • Reduces the impact of stray golf balls.
    • Enhances the scenic beauty of your property.

7. Opt for Solar Screens

Installing solar screens can serve a dual purpose. They protect against harmful UV rays while also providing a buffer against golf balls.

  • Features:
    • Energy Efficiency: Helps in maintaining cooler interiors.
    • Privacy: Provides a level of seclusion.

8. Reinforce Existing Windows

If replacing windows is not an option, you can reinforce your existing windows using simple methods.

Ways to Reinforce:

  • Use shatterproof film: This glass protective solution can be applied over your existing windows.
  • Install storm shutters: These can be closed during potential golf ball storm days.

Key Takeaways

  • Impact-resistant glass is a top choice for durability.
  • Window film adds both protection and UV resistance.
  • Protective screens prevent direct impacts from golf balls.
  • Strategic landscaping can create natural barriers.
  • Buffer zones and net barriers can ward off incoming golf balls effectively.

Frequently Asked Questions

Q1: How much does impact-resistant glass cost?

A1: The cost can vary widely based on size and installation, typically ranging from $500 to $1,500 per window.

Q2: Can I install window film myself?

A2: Yes, many window films come with DIY installation kits, but be sure to follow the instructions carefully.

Q3: Are protective screens visible from the outside?

A3: Most protective screens can be designed to blend seamlessly with your home’s exterior.

Q4: How do I maintain my protective screens?

A4: Routine cleaning with mild soap and water will generally suffice; avoid abrasive materials that could cause scratches.

Q5: Is installing a net barrier effective?

A5: Yes, a properly installed net can significantly reduce the likelihood of golf balls reaching your windows.

Q6: What plants are best for deflecting golf balls?

A6: Dense shrubs like holly or fast-growing plants like bamboo can create an effective barrier.

Q7: Can I reinforce existing windows without replacing them?

A7: Absolutely, applying shatterproof film or installing storm shutters are great options.

Q8: Will a solar screen block my view?

A8: Solar screens are designed to reduce glare while still allowing visibility, so your view should remain largely intact.

Q9: What are the benefits of a golf course buffer?

A9: A buffer zone can significantly lessen the chance of golf balls reaching your home while enhancing your property’s appeal.

Q10: Are there local regulations regarding installing barriers?

A10: Yes, always check with local zoning and homeowners’ association (HOA) regulations before installing barriers.

Conclusion

Protecting your windows from errant golf balls doesn’t have to be complicated or costly. By understanding the options available, such as impact-resistant glass, window films, and landscaping, you can ensure the safety and longevity of your every window while enjoying peace of mind. Whether you’re a golf enthusiast or simply a homeowner, these practical solutions will keep your home safe and stylish for years to come.

By taking proactive steps to safeguard your windows, you can enjoy the lush beauty of a nearby golf course, minus the worry of shattered glass. Happy golfing, and may your windows remain intact!

Westbrook Village Golf Course Lakes Overview

westbrook village golf club lakes course

Nestled within the heart of Arizona’s beautiful Westbrook Village, the Lakes Course at Westbrook Village Golf Club presents a unique golfing experience for players of all skill levels. Known for its stunning scenery, meticulously maintained greens, and friendly atmosphere, this course is much more than just a place to play golf – it’s a destination. In this article, we will delve into the distinct features of the Lakes Course, its amenities, tips for playing, and why it’s a must-visit for golf enthusiasts.

The Essence of the Lakes Course

The Lakes Course is one of two exceptional 18-hole courses at Westbrook Village Golf Club. What sets it apart is not only the beautiful surroundings but also its design. Originally opened in 1982, the course was crafted by the renowned course architect, Jim Colbert. It features numerous water hazards and lush landscaping, providing breathtaking views and a serene atmosphere.

Course Layout and Features

  • Length: The course stretches over 6,910 yards from the championship tees, making it a challenging yet enjoyable experience.
  • Par: The Lakes Course is a par 72 layout, featuring four sets of tees to accommodate golfers of varying skill levels.
  • Water Hazards: True to its name, water is a prominent feature. Players can expect to navigate through multiple lakes, which add both beauty and challenge to the game.
  • Greens: The greens are well-kept and fast, promoting an exciting game that tests the players’ putting skills.

As you play, you’ll encounter various flora and fauna native to Arizona, enhancing your experience and connecting you with nature.

Westbrook Village Golf Course Lakes OverviewWestbrook Village Golf Course Lakes Overview

A Friendly Atmosphere

At Westbrook Village Golf Club, the emphasis is not just on the game but also on the community. The staff and members pride themselves on creating an inviting environment. Whether you are a seasoned golfer or a novice, you’ll feel welcomed.

Commentary from Players

“The Lakes Course offers a peaceful round of golf with exceptional views. Every time I play, I discover something new!” – Local Golfer

Golfers Enjoying Westbrook Village CourseGolfers Enjoying Westbrook Village Course

Amenities at Westbrook Village

When you visit the Lakes Course, you are not just stepping onto a golf course; you are entering a complete golfing experience:

Clubhouse

  • Dining Options: The clubhouse features a restaurant and bar offering a variety of delicious meals, perfect for a post-game feast.
  • Pro Shop: A well-equipped Pro Shop stocked with the latest golf gear, apparel, and accessories.

Practice Facilities

  • Driving Range: A spacious range to practice your swings.
  • Putting Greens: Dedicated areas to hone your putting skills.

Tips for Playing the Lakes Course

Course Management

Understanding how to navigate the Lakes Course can greatly influence your score. Here are some tips:

  • Study the Scorecard: Familiarize yourself with the layout and any challenges you might face on each hole.
  • Club Selection: The water hazards require thoughtful club selection. Don’t be afraid to choose a longer club to avoid risks.
  • Stay Confident: The picturesque views can be distracting, so maintain focus on your game.

Practice Before You Play

  • Visit the Driving Range: Spend some time warming up.
  • Work on Your Short Game: The greens can be tricky; spend additional time practicing putting.

Golfer Preparing To Tee Off At Westbrook VillageGolfer Preparing to Tee Off at Westbrook Village

Nature and the Environment

Beyond the golf, the Lakes Course is a sanctuary for wildlife. Many players report sightings of native birds and other creatures during their rounds. This connection with nature not only enhances the golfing experience but also promotes environmental awareness.

Key Takeaways

  • The Lakes Course offers a challenging yet enjoyable golfing experience, thanks to its beautiful design and maintained greens.
  • A community-oriented atmosphere provides a welcoming environment for golfers of all levels.
  • An array of amenities, including a restaurant and practice facilities, enhances your visit.
  • Course management and strategic club selection are key to mastering the challenges presented by water hazards.

Frequently Asked Questions

  1. What is the best time of year to play the Lakes Course?

    • The course is best enjoyed between October and April when the weather is mild and perfect for golfing.
  2. Is there a dress code at Westbrook Village Golf Club?

    • Yes, players are expected to wear appropriate golf attire. Collared shirts and golf shoes are recommended.
  3. Are tee times required?

    • Yes, it is advisable to book tee times in advance, especially during peak season to ensure availability.
  4. Is the Lakes Course suitable for beginners?

    • Absolutely! With four sets of tees, the course can be adapted to fit a beginner’s skill level.
  5. Are there any special events or tournaments held at the Lakes Course?

    • Yes, the course frequently hosts events and tournaments. Check the Westbrook Village Golf Club website for upcoming events.
  6. Can I rent golf clubs at the Lakes Course?

    • Yes, club rentals are available at the Pro Shop for those who need them.
  7. What are the green fees at the Lakes Course?

    • Green fees vary by season and day, so it’s best to check their website or contact the clubhouse for the most current pricing.
  8. Is there a walking option available on the course?

    • The course allows walking, but many players prefer using golf carts for convenience.
  9. Does the course have a challenging layout for experienced golfers?

    • While it caters to all skill levels, the Lakes Course offers challenges like water hazards that experienced players will appreciate.
  10. Are there any golf clinics or lessons available?

    • Yes, the club offers lessons and clinics. Check with the Pro Shop for more information.

By understanding the unique offerings of the Lakes Course at Westbrook Village Golf Club and implementing the tips provided, you’re well on your way to enjoying a memorable golfing experience. Pack your clubs, invite your friends, and prepare for a round of golf in this picturesque setting that will surely leave a lasting impression.

Dustin Pedroia Fielding For The Boston Red Sox

is dustin pedroia a hall of famer

When discussing the legends of baseball, few names spark debate quite like Dustin Pedroia. The former Boston Red Sox second baseman had a glittering career, earning accolades that seem to place him high on the list of Hall of Fame candidates. But does his legacy truly warrant a place among baseball’s greatest? Let’s dive deep into Pedroia’s career achievements, statistics, impact on the game, and whether he deserves induction into the Hall of Fame.

The Career of Dustin Pedroia

Dustin Pedroia, often affectionately nicknamed “Petey,” was drafted by the Boston Red Sox in the second round of the 2004 MLB Draft. His journey to the majors was marked by hard work and determination. He made his MLB debut in 2006 and quickly became a key player for the Red Sox.

Career Highlights

  1. 2007 AL Rookie of the Year: Pedroia burst onto the scene, taking home the Rookie of the Year honor while helping the Red Sox win the World Series.
  2. 2008 AL Gold Glove Winner: His defensive prowess at second base earned him a Gold Glove, showcasing his ability to make spectacular plays.
  3. 2008 AL MVP: Perhaps the pinnacle of his career, Pedroia was named the American League Most Valuable Player in 2008, solidifying his status in the league.
  4. Three-time All-Star: He was selected as an All-Star three times during his playing career, a testament to his consistent performance.
  5. Two-time World Series Champion: Pedroia was an integral part of the Red Sox teams that won championships in 2007 and 2013.

These accolades paint a picture of a player who performed at an elite level for several years and contributed significantly to his team’s success.

Statistical Overview

To gauge Pedroia’s Hall of Fame credentials, we can analyze several key statistics:

Statistic Career Total
Batting Average .299
Home Runs 140
Runs Batted In (RBI) 725
On-Base Percentage (OBP) .365
Wins Above Replacement (WAR) 51.1

Pedroia’s batting average of .299 is notably impressive, and his OBP of .365 demonstrates his ability to get on base. His WAR of 51.1 places him among respectable company in terms of overall player value.

Dustin Pedroia Fielding For The Boston Red SoxDustin Pedroia Fielding for the Boston Red Sox

Factors Influencing Hall of Fame Consideration

Longevity and Consistency

While Pedroia enjoyed a remarkable peak, his career was hampered by injuries in his later years. He played in just 926 games over his final six seasons and eventually retired in 2019. The lack of longevity raises questions about his overall impact and whether he achieved enough over a sustained period to meritoriously earn a Hall of Fame spot.

Defensive Contributions

Pedroia was more than just a competent hitter; he was known for his defensive acumen. His Gold Gloves and reputation as one of the best fielding second basemen in the game bolster his case. The value of defense in Hall of Fame consideration shouldn’t be overlooked, as players like Ozzie Smith and Brooks Robinson are enshrined primarily for their defensive skills.

Dustin Pedroia Celebrating A World Series VictoryDustin Pedroia Celebrating a World Series Victory

Impact on the Game

Beyond statistics and awards, Pedroia’s leadership qualities and competitive spirit left an indelible mark on his teams. He was often described as a “grinder,” a player who gave everything for his team. This tenacity resonated with fans and players alike, adding intangible value to his career. His resurgence after injuries also inspires young players.

The Hall of Fame Mythology

What Determines Induction?

The Hall of Fame selection process is rigorous and somewhat subjective. Here are a few key factors that influence a player’s candidacy:

  • Statistics: Players are often compared against their peers using statistical measures.
  • Era: Performance must be contextualized within the era in which the player competed.
  • Influence on the Game: A player’s impact, both on and off the field, can add to their legacy.
  • Longevity vs. Peak Performance: Balancing a player’s peak years against their career length is crucial.

The Case for Pedroia

  • Strong Peak Performance: Pedroia enjoyed several seasons of high-level play.
  • Tangible Contributions to Winning: His role in securing World Series titles enhances his résumé.
  • Legacy as a Player: His competitive nature and leadership qualities resonate within the Red Sox community and beyond.

Dustin Pedroia Batting At Fenway ParkDustin Pedroia Batting at Fenway Park

The Case against Pedroia

  • Injury-Hampered Late Career: Pedroia’s inability to remain on the field diminishes his overall statistics.
  • Shorter Career Span: Other second basemen have longer tenures and higher overall numbers that could overshadow Pedroia.
  • Evolving Metrics: With advancements in analytics, newer metrics may diminish the weight given to traditional statistics.

Conclusion

Dustin Pedroia’s career encapsulates the essence of a hard-nosed player who excelled during his prime and left a lasting legacy within the game. While his argument for Hall of Fame induction is compelling, he faces tough competition. Age-old discussions surround his injury troubles and whether he played long enough to justify a spot.

As the Hall of Fame deliberations continue, it’s essential to weigh all facets of his career. Could he ultimately be an overlooked star? Only time will tell.

Key Takeaways

  • Dustin Pedroia had a stellar career filled with notable achievements.
  • His contributions included being a two-time World Series champion and NBA MVP.
  • Key statistics, including a .299 batting average and 51.1 WAR, are central to evaluating his credentials.
  • Injury struggles have raised questions about his career longevity.
  • Both defensive contributions and the impact of leadership play significant roles in his consideration.

FAQs About Dustin Pedroia’s Hall of Fame Candidacy

1. What were Dustin Pedroia’s career achievements?

  • Pedroia won the 2007 AL Rookie of the Year, 2008 AL MVP, and two World Series championships, among other honors.

2. How did injuries impact Pedroia’s career?

  • While he had a successful peak, injuries curtailed his playing time in the latter part of his career.

3. What are Dustin Pedroia’s key statistics?

  • He recorded a .299 batting average, 140 home runs, and a 51.1 WAR throughout his career.

4. Why is defense important for Hall of Fame candidates?

  • Defense contributes significantly to a player’s overall value, and many Hall of Famers are recognized for their exceptional defensive skills.

5. Is Pedroia considered a “grinder”?

  • Yes, his work ethic and competitive spirit earned him the reputation of a “grinder,” resonating with both fans and teammates.

6. How does Pedroia compare to other Hall of Fame second basemen?

  • Comparisons can be made based on statistics, achievements, and impact; consistency is key in determining a player’s legacy.

7. What is the Hall of Fame selection process?

  • The Hall of Fame selection involves a panel that evaluates players based on statistics, career length, seasons played, and overall impact.

8. Is there a timeline for Pedroia’s Hall of Fame eligibility?

  • Pedroia will be eligible five years after his retirement, which means he could be considered in 2024.

By examining the entire landscape of Dustin Pedroia’s career, we get a clearer view of his potential Hall of Fame candidacy. Regardless of the outcome, he will always hold a special place in the hearts of Red Sox fans and baseball enthusiasts alike.

Golf Club Cleaning Kit

how to properly clean golf clubs

Keeping your golf clubs in top condition is essential for enhancing your performance on the course. Like any equipment, golf clubs require regular maintenance to ensure they perform at their best. Whether you’re a beginner or a seasoned golfer, knowing how to properly clean your golf clubs can help maintain their lifespan and keep them looking polished. In this guide, we’ll walk you through the steps and tips for cleaning various types of golf clubs, the best tools to use, and some common mistakes to avoid.

Why Clean Your Golf Clubs?

Before we dive into the specifics, let’s discuss why cleaning your golf clubs is important to your game:

  • Improved Performance: Dirty clubs can affect your ability to hit the ball efficiently. Dirt and debris can impact ball spin and distance.
  • Extended Lifespan: Regular cleaning can prevent rust and other damage, prolonging the life of your clubs.
  • Aesthetics: Clean clubs look better and can enhance your confidence on the course.

Tools You’ll Need

Before getting started, gather the following cleaning tools:

Tool Purpose
Soft-bristled brush Removes dirt from club faces and grooves
Bucket of warm water For soaking heads and cleaning
Mild dish soap Breaks down grime and grease
Towel For drying and polishing
Toothpick or metal tip cleaner For cleaning stubborn debris
Spray bottle (optional) For easy application of water

Golf Club Cleaning KitGolf club cleaning kit

Step-by-Step Cleaning Process

1. Preparation

Make sure you have your workspace organized. Lay out your tools and set the bucket of warm, soapy water nearby.

2. Cleaning the Clubheads

  • Iron and Wedge Cleaning:
    • Submerge the clubheads (not the shafts) in warm, soapy water.
    • Let them soak for a few minutes to loosen dirt.
    • Use a soft-bristled brush to scrub the clubface, ensuring you pay special attention to the grooves.
    • Tip: For stubborn mud, use a toothpick to carefully scrape it away.
  • Driver and Woods Cleaning:
    • Wipe the heads down with a damp towel to remove surface dirt.
    • Avoid submerging the club in water; instead, use the brush with soapy water for the crown and face.
    • Wipe dry with a towel.

3. Cleaning the Shafts

  • To clean the shafts:
    • Use a damp cloth with a little soap to wipe them down.
    • Avoid soaking the entire club as this can loosen the grip over time.
    • Pay attention to the grip; a clean grip gives you better control.

Cleaning A Golf Club ShaftCleaning a golf club shaft

4. Drying

  • After cleaning, thoroughly dry each club with a towel. This will help prevent rust and corrosion.

5. Finishing Touches

  • Check for golf ball marks or debris in the grooves and use your cleaning tool as necessary.
  • Store your clubs in a dry environment—avoid leaving them in damp areas like basements.

Cleaning Golf Clubs Regularly

How Often Should You Clean Your Clubs?

  • After every round of golf.
  • After hitting at the driving range.
  • If you’ve played in wet conditions.

Doing this routinely will help maintain their performance and appearance.

Common Mistakes to Avoid

  • Using Harsh Chemicals: Avoid bleach or strong chemicals that may damage club finishes.
  • Neglecting the Grips: Grips are often overlooked but require just as much attention.
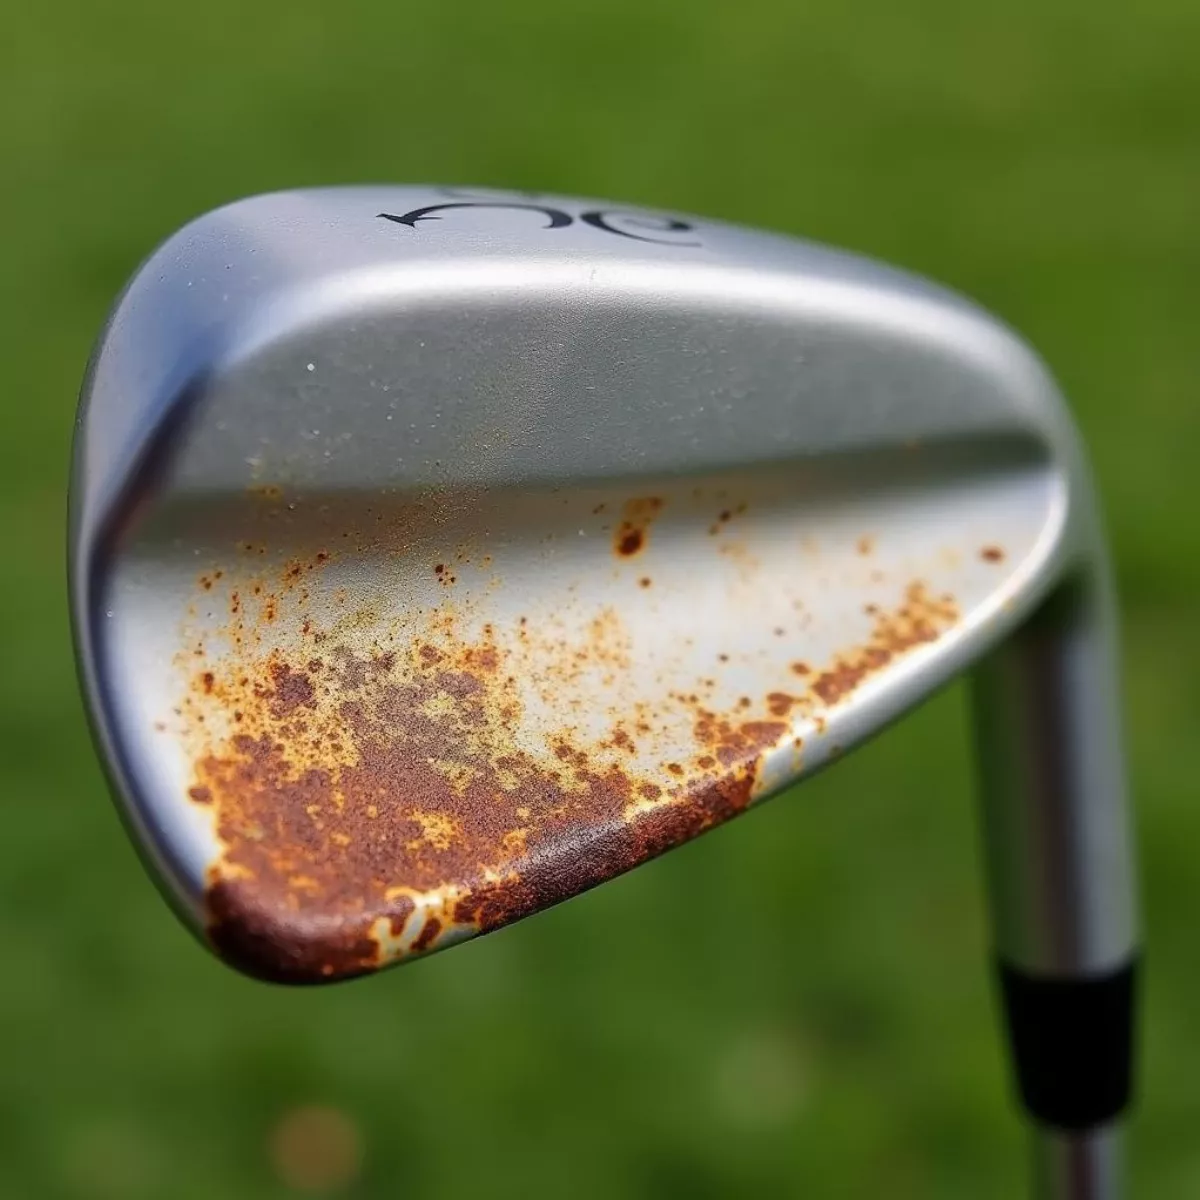
  • Inadequate Drying: Not drying your clubs properly can lead to rust.

Rusty Golf Club HeadRusty golf club head

FAQs about Cleaning Golf Clubs

Here are some frequently asked questions regarding golf club cleaning:

  1. How often should I clean my golf clubs?
    • After each round and after practice sessions, particularly after playing in wet conditions.
  2. Can I put my clubs in the dishwasher?
    • No, dishwashers spray high heat and can damage the finishes and grips of the clubs.
  3. What’s the best way to clean grips?
    • Use a damp cloth with mild soap, and rinse with clean water; let them air dry fully.
  4. Can I clean my clubs with a wire brush?
    • It’s not recommended as a wire brush can scratch and damage the club surfaces.
  5. Does club cleaning improve performance?
    • Yes, clean clubs enhance your contact with the ball, thereby improving performance.
  6. What should I do if my clubs rust?
    • You can often remove surface rust with vinegar or metal polish; if it’s severe, consulting a professional may be best.
  7. Is it necessary to clean my driver differently?
    • Yes, avoid submerging the driver in water; instead, use a damp cloth and soft brush.
  8. Do I need to take special care of antique clubs?
    • Yes, antique clubs may require special cleaning solutions or techniques to avoid damage.
  9. Can I use a pressure washer to clean my clubs?
    • Avoid pressure washers as they can force water into club heads and damage them.
  10. How do I know if my clubs are clean enough?
    • They should be free of dirt and debris, especially in the grooves of clubfaces for optimal performance.

Key Takeaways

  • Always clean your golf clubs after every use to maintain their performance and aesthetic.
  • Use mild soap, water, and the right tools like a soft-bristled brush to clean effectively.
  • Dry your clubs thoroughly to prevent rust and deterioration.
  • Stay clear of harsh chemicals and avoid soaking shafts to protect the grips.
  • Give special attention to cleaning the grooves for improved shot accuracy.

By following these guidelines, you’ll ensure that your golf clubs remain in excellent condition, maximizing your performance on the course. Keeping clubs clean isn’t just about aesthetics; it’s about ensuring you perform at your best every time you step up to tee off!

Golfer On The Course With Clean ClubsGolfer on the course with clean clubs

Now that you have everything you need to keep your golf clubs clean and performing well, it’s time to hit the course! Happy golfing!