Different Golf Putter Types

heavy putter vs light putter

Choosing the right putter can make a significant difference in your overall golf performance. Among the choices, heavy putters and light putters stand out, each offering unique benefits and challenges. In this comprehensive guide, we’ll explore the differences between heavy and light putters, their advantages and disadvantages, and how you can choose the putter that best suits your needs.

What Is a Putter?

A putter is a specialized golf club primarily used on the green for, you guessed it, putting! Its design focuses on precision and accuracy over distance. Putters come in various weights, materials, and shapes, allowing golfers to find the perfect fit for their style.

Heavy Putter: An Overview

Heavy putters are generally those that weigh more than 350 grams. Many players believe that increased weight can enhance stability and control during the putting stroke.

Benefits of Heavy Putters

  • Enhanced Stability: The extra weight helps stabilize the putting stroke, limiting unwanted movements.
  • Greater Control: A heavy putter can provide better control over the ball’s distance, especially on longer putts.
  • Increased Momentum: The mass can help maintain speed through impact, resulting in a smoother stroke.

Drawbacks of Heavy Putters

  • Fatigue Factor: Prolonged use of a heavy putter may lead to fatigue, especially for those with less upper body strength.
  • Difficulty in Touch: Some golfers may find that heavy putters reduce their feel for finesse shots.
  • Adaptation Time: Switching to a heavy putter can require a transitional period, which could affect short-term performance.

Light Putter: An Overview

A light putter typically weighs between 320 and 350 grams. This variety allows for more agility but may affect stability.

Benefits of Light Putters

  • Increased Feel: Lighter putters often provide a better feel for the ball, which can help with touch on delicate putts.
  • Ease of Use: Players may find that lighter putters are easier to handle during long rounds, as they cause less fatigue.
  • Faster Adjustments: Switching between different stroke styles is often easier with a light putter.

Drawbacks of Light Putters

  • Reduced Stability: Lighter putters may lead to a less stable stroke, which can affect accuracy and consistency.
  • Less Distance Control: They might require more finesse to control the distance, especially on longer putts.
  • Potential for Over-Hitting: A lighter putter can sometimes result in players over-hitting the ball.

Different Golf Putter TypesDifferent Golf Putter Types

The Science Behind Weight and Performance

How Putter Weight Affects Putting

The weight of a putter affects several dynamics:

  1. Swing Dynamics: Heavier putters affect the swing tempo and stability. Meanwhile, lighter putters might promote a faster tempo.
  2. Contact Point: A heavier putter flows through the ball differently, while a lighter putter might require more accurate contact.
  3. Mechanics: Different weights can lead to varying putting mechanics, influencing the overall path and impact with the ball.

Table of Putter Weight Effects

Feature Heavy Putter Light Putter
Stability High Moderate
Distance Control High Moderate
Feel Lower High
Impact on Fatigue Higher risk Lower risk
Adaptation Period Longer Shorter

Which Putter Is Right for You?

Choosing between a heavy putter and a light putter involves assessing your unique playing style, physical attributes, and personal preferences.

Factors to Consider:

  • Physical Strength: Do you have strong upper body strength? If so, you might favor a heavy putter.
  • Putting Style: Are you a more aggressive putter or do you prefer delicate touch? This could influence your weight preference.
  • Feel vs. Control: If you prioritize feel on the greens, a light putter may be your best bet. If control is your main concern, then consider a heavy putter.

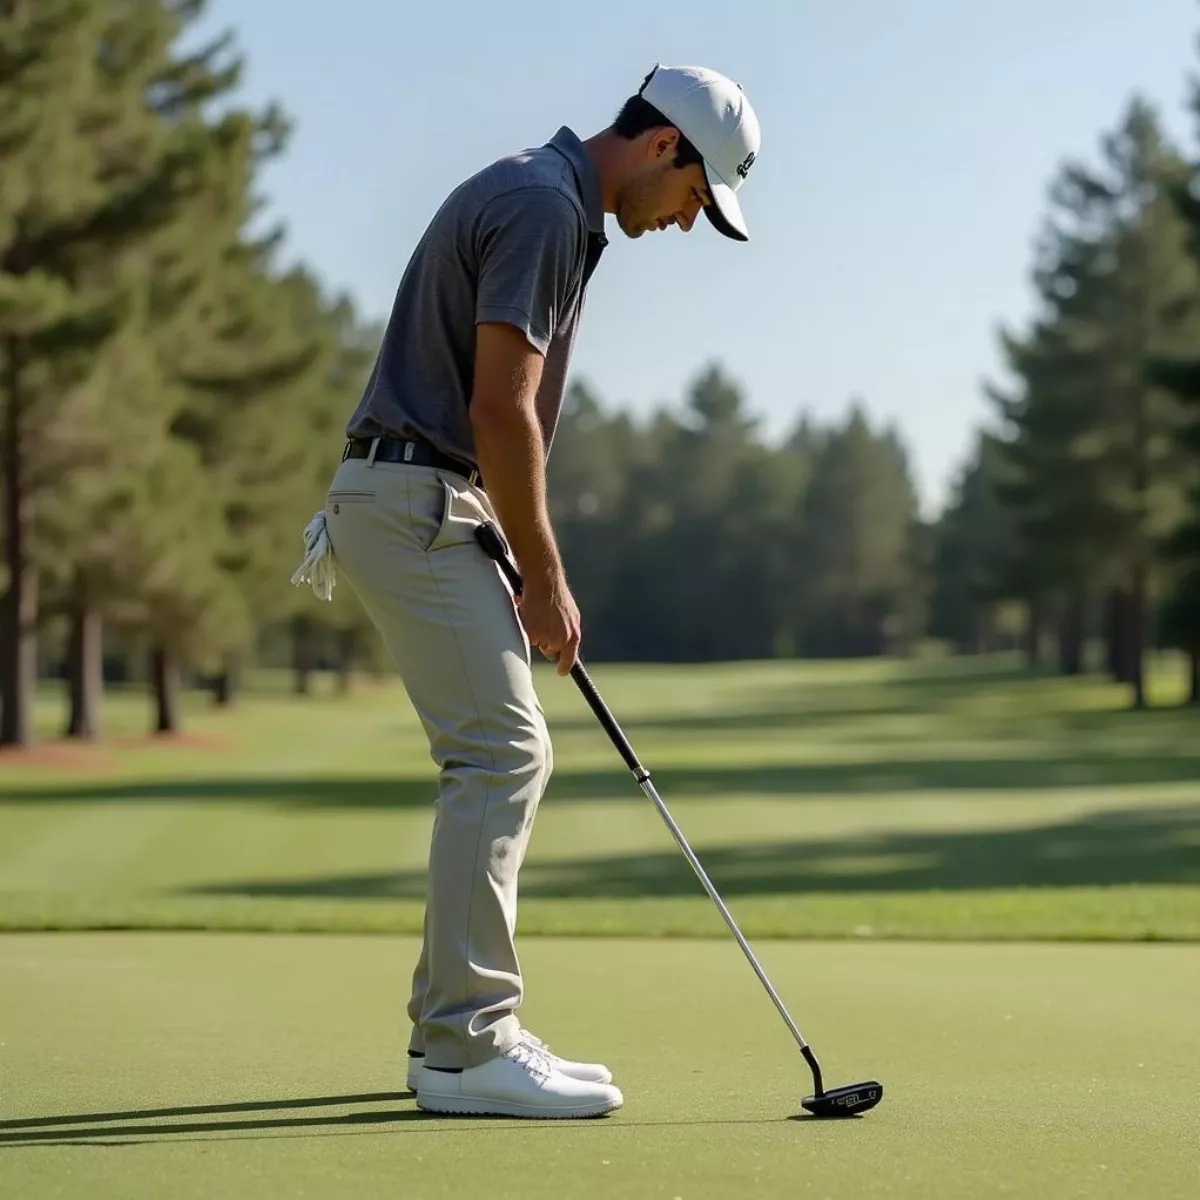
Golfer Putting On The GreenGolfer Putting on the Green

Testing Your Options

To find the right putter for you, consider the following:

  • Try Both Options: Spend time testing both heavy and light putters on the green.
  • Consult a Professional: Seek advice from your local golf pro or club fitter who can analyze your putting stroke.
  • Use Technology: Many golf shops have devices that analyze your stroke and ball performance, helping to pinpoint the best option.

Tips for Transitioning Between Putter Weights

If you decide to switch between a heavy and light putter, consider these tips:

  • Gradual Adjustment: Slowly integrate practice sessions with the new putter while still using your old one.
  • Concentrate on Technique: Focus more on your putting mechanics and fundamentals during the transition.
  • Practice with Purpose: Set specific drills and targets during practice sessions to build confidence.

Key Takeaways

  • Putter Weight Matters: Choosing between heavy and light putters affects stability, control, and feel.
  • Understand Your Game: Your physical strength and putting style should dictate your putter choice.
  • Experiment and Adjust: Test different weights and seek professional guidance to find the best fit for your game.

FAQ Section

1. What is the average weight of putters?

Most putters range from 320 to 350 grams, but heavier options can exceed 350 grams.

2. Can a beginner benefit from a heavy putter?

Yes, a heavy putter can provide greater stability, which might help beginners develop a consistent putting stroke.

3. Why is putter weight important in golf?

The weight of a putter impacts stability, feel, and overall performance, making it crucial for successful putting.

Close-Up Of Golf Ball And PutterClose-up of Golf Ball and Putter

4. How can I determine if a heavy putter suits my style?

Try out different weights at a golf store, practice on the greens, and consult with a professional to find the best fit.

5. Are there specific brands known for heavy/light putters?

Brands like Odyssey and TaylorMade offer a range of both heavy and light putter options to suit different player needs.

6. Can I adjust the weight of my putter?

Some putters come with adjustable weights, allowing you to customize the feel and performance to your liking.

7. Is it necessary to switch putters throughout a season?

Not necessarily, but depending on your game, you might benefit from trying different putters as your skills improve or conditions change.

8. What should I do if I experience fatigue when using a heavy putter?

Consider integrating lighter putters or practicing with your heavy putter to build stamina over time.

Conclusion

Whether you’re leaning towards a heavy putter for its stability and control or a light putter for its feel, understanding the differences is the key to improving your game. Experimentation and practice will ultimately reveal which putter style enhances your performance on the greens. Happy putting!

Miniature Golf Course With Obstacles

how long does a round of miniature golf take

Miniature golf, often referred to as mini-golf or putt-putt, is a fun-filled activity that evokes nostalgia and brings joy to players of all ages. Whether you’re playing a spirited round with friends, a romantic date night, or a family outing, the question on everyone’s mind is: How long does a round of miniature golf take? This guide dives into the factors that influence the duration of a mini-golf game, tips for a smoother experience, and answers to frequently asked questions.

Factors Influencing Time Duration

The length of a typical miniature golf game can vary based on several factors. Let’s explore:

  • Number of Players: The more players involved, the longer the game will likely take. On average, a group of four may take 45 minutes to 1 hour to complete a full course.
  • Skill Level: Beginners may take longer to navigate the course as they familiarize themselves with the game, while seasoned players might whip through in record time.
  • Course Difficulty: Each miniature golf course presents its own unique challenges. The number of obstacles, water features, and intricate layouts can affect how long it takes to complete a round.
  • Time of Day: Playing during peak hours, typically on weekends or during vacation seasons, may lead to longer waits at particularly tricky holes due to congestion.
  • Pacing: A casual stroll through the course can turn into an adventure. Take your time to appreciate the whimsical decor and fun challenges, or hustle through if you’re in a rush.

Miniature Golf Course With ObstaclesMiniature golf course with obstacles

Average Play Time Breakdown

Scenario Estimated Time
Solo Player 30-45 minutes
Small Group (2-4) 45 minutes – 1 hour
Large Group (5+) 1-1.5 hours
Busy Hours 1.5-2 hours

How to Make Your Round of Mini-Golf More Efficient

While the length of time spent on the course can depend on several factors, there are some tips you can incorporate to help improve your game or make it more enjoyable:

  • Plan Your Time: If you know the busiest hours at your favorite mini-golf venue, consider scheduling your outing during slower times to avoid any delays.
  • Limit Distractions: While taking pictures and enjoying the atmosphere are essential, try to keep the pace moving.
  • Play Strategically: Encourage players to take their shots in turns and be ready for the next hole as soon as it’s their turn to avoid delays.
  • Practice: If you frequently go mini-golfing, practicing your putting skills can help speed up your game.

Friends Playing Mini GolfFriends playing mini golf

Example Game Scenario

Let’s say you head out to a mini-golf course for a group outing with three friends. Here’s a breakdown of how your experience might unfold:

  1. Arrival & Check-In (10 mins): You arrive at the course, pay the fees, and get your clubs and balls.
  2. Course Overview (5 mins): Take a quick look at the scorecards and layout to strategize.
  3. Playing the Course (45-60 mins): If everyone is at the same skill level, playing might average around 50 minutes. If you take some extra time to enjoy, perhaps look at the whimsical designs or engage in light-hearted banter, it can stretch to about an hour.
  4. Wrap-Up & Scorecard Analysis (10 mins): Once you finish, enjoy discussing the game, calculating scores, and perhaps picking a winner!

Average Overall Time: 75-85 minutes

Key Takeaways

  • The average round of miniature golf will take between 30 minutes to 2 hours, depending on factors like group size, skill level, and course complexity.
  • Playing in smaller groups, choosing off-peak hours, and practicing your skills can all contribute to a more efficient and enjoyable game.
  • It’s not just about the time; enjoying the atmosphere and creating fun memories are what miniature golf is all about!

Family Celebrating Mini Golf VictoryFamily celebrating mini golf victory

Frequently Asked Questions (FAQ)

  1. What is the average duration for a round of miniature golf?

    On average, a round lasts between 45 minutes and 1 hour for a group of 2-4 players.

  2. Can we play miniature golf in the rain?

    Most courses remain open during light rain, but be sure to check their policy. Heavy rain may result in closures for safety.

  3. Is there a dress code for miniature golf?

    Generally, there’s no strict dress code. Comfortable clothing and shoes are recommended for an enjoyable experience.

  4. What if a player takes too long?

    If someone in your group takes longer, encourage them gently to keep up the pace, or simply enjoy the environment more while waiting!

  5. Are reservations required for large groups?

    It’s best to call ahead for larger groups, as many courses offer group rates. Reservations may be needed during busy times.

  6. Are there age restrictions for mini-golf?

    Typically, there are no age restrictions, making miniature golf a family-friendly activity perfect for all ages.

  7. Can I bring my own equipment?

    Most courses provide clubs and balls, but you can inquire if you’re allowed to bring your own if you prefer.

  8. Are there any local competitions or events?

    Many mini-golf courses host events throughout the year. Check their calendar or website for updates!

  9. Can I have food or drinks while playing?

    Some courses allow this, so check their policy before your visit. Snacks can enhance the fun!

  10. What types of courses are available?

    Miniature golf courses vary from whimsical themes to challenging obstacles. Explore different courses to find your favorite!

In conclusion, the next time you think about taking a swing at your local mini-golf course, you’ll know what to expect regarding time, how to maximize fun, and what to keep in mind for a great experience. Ready to putt your troubles aside? Let’s play!

how long do golf grips need to dry

When it comes to maintaining your golf clubs, one of the most frequently overlooked aspects is the condition of your golf grips. Proper grip maintenance can significantly enhance your game performance. Whether you’re new to the sport or a seasoned player, one burning question often arises: how long do golf grips need to dry after being cleaned or replaced?

In this article, we’ll delve into the drying process for golf grips, providing you with essential tips and tricks for ensuring your grips are ready for action in no time.


Why Drying Golf Grips Properly Is Important

Before we answer the main question, it’s crucial to understand why drying golf grips properly matters.

  • Performance: Wet grips can lead to slippage, affecting your swing and shot accuracy.
  • Durability: Proper drying helps maintain the grip’s material integrity, extending its lifespan.
  • Hygiene: Cleaning grips removes dirt and oil, promoting better hygiene and comfort.

How Long Do Golf Grips Need to Dry?

The drying time for golf grips largely depends on several factors:

  1. Material of the Grip: Rubber grips typically dry quicker than synthetic ones.
  2. Ambient Temperature and Humidity: Warmer and less humid conditions promote faster drying.
  3. Method of Cleaning: The cleaning technique used also impacts drying time.

Typical Drying Times

Here’s a quick reference table on drying times based on these factors:

Grip Material Drying Time (Hours)
Rubber 1-2
Synthetic 2-4
Corded 2-3
Leather 4-6

Typically, you can expect rubber grips to dry the quickest, while leather grips may take longer due to their absorbent nature.

Steps to Properly Dry Your Golf Grips

Now that you know the expected drying times, let’s discuss how to properly dry your golf grips after cleaning or replacing them.

Step 1: Clean the Grips

To ensure your grips dry effectively, start with a comprehensive cleaning. Use a mixture of warm water and mild soap or a specialized grip cleaner.

  • Tip: Avoid using abrasive materials that could damage the grip.

Step 2: Rinse Well

Make sure to rinse off all soap thoroughly. Any residual soap can cause the grip to remain tacky and take longer to dry.

Step 3: Pat Dry

Using a soft towel, gently pat the grips to remove excess moisture. This helps cut down on drying time.

Step 4: Air Dry

Place your cleaned grips in a well-ventilated area. For optimal results, try to keep them away from direct sunlight, which could warp or damage the material.

Step 5: Check for Doneness

Before hitting the golf course, give your grips a squeeze to ensure they are completely dry.

Common Mistakes to Avoid

While drying your grips might seem straightforward, some common mistakes can prolong the process:

  • Using a Hair Dryer or Heat Source: High temperature can damage the grip material.
  • Drying in Direct Sunlight: This can lead to deterioration or warping.
  • Not Allowing Enough Time: Rushing the process can lead to wet grips on the course.

Tips for Maintaining Golf Grips

To keep your grips in top condition, consider the following maintenance tips:

  • Regular Cleaning: Clean your grips every few rounds to remove dirt, sweat, and oil.
  • Inspect Regularly: Check for wear and tear, replacing grips when necessary.
  • Use Grip Tape: Refreshing the grip tape can enhance feel and control.

Key Takeaways

  • Drying Time: Rubber grips take 1-2 hours while leather grips can take 4-6 hours to dry.
  • Proper Cleaning: Clean your grips with warm soapy water and pat dry before air drying.
  • Avoid Sun and Heat: Do not use direct sunlight or heat sources to dry your grips.
  • Regular Maintenance: Keep your grips clean and inspect them regularly for signs of wear.


Frequently Asked Questions (FAQ)

1. Can I use a hair dryer to speed up the drying process?

No, using a hair dryer can damage the grip material. It’s best to let grips air dry at room temperature.

2. How often should I replace my golf grips?

Typically, you should replace your grips every 30-40 rounds or whenever they show significant wear.

3. Are there specific products recommended for cleaning golf grips?

Yes, many manufacturers offer grip cleaning solutions. Alternatively, warm water mixed with mild soap works well.

4. Is it safe to use alcohol to clean golf grips?

While isopropyl alcohol can be effective, it may dry out certain materials. Use it with caution and always follow up with a damp cloth.

5. How can I tell if my grips are too worn?

Look for signs of wear such as a slick feel, cracking, or loss of texture. If your grips feel slippery, it’s time to replace them.

6. What if my grips feel too tacky after drying?

This could indicate leftover soap residue. Rinse again and allow them to dry thoroughly.

7. Can I use regular tape instead of grip tape for re-gripping?

It’s best to use specialized grip tape as it provides a better tacky feel and durability.

8. Should I store my clubs in a cool, dry place?

Yes, improper storage can lead to damage. Ideally, store them in a climate-controlled environment away from extreme temperatures.

9. Can I clean both rubber and leather grips the same way?

While the cleaning processes are similar, leather grips may require more gentle care to prevent damage.

10. What’s the best condition to start a round of golf with?

Using dry and clean grips enhances feel and control, greatly improving your game performance.


By following these guidelines, including attention to drying times and upkeep, you can ensure your golf grips stay in top condition. Happy golfing!

For more tips and guidance on golf gear maintenance, check out our articles on how to sharpen your golf clubs or the importance of club fitting.

Average Golf Cart Financing Duration Chart

how long can you finance a golf cart

Golf carts are more than just cute vehicles to zip around the golf course; they serve various purposes, including residential transport, community mobility, and even commercial use. If you’re considering acquiring one, financing might be the best path for you. Understanding the financing options available for golf carts is essential to making a smart financial decision.

In this article, we’ll explore the ins and outs of golf cart financing, answering crucial questions like how long you can finance a golf cart, what factors influence financing terms, and tips to secure the best deal.

Understanding Golf Cart Financing

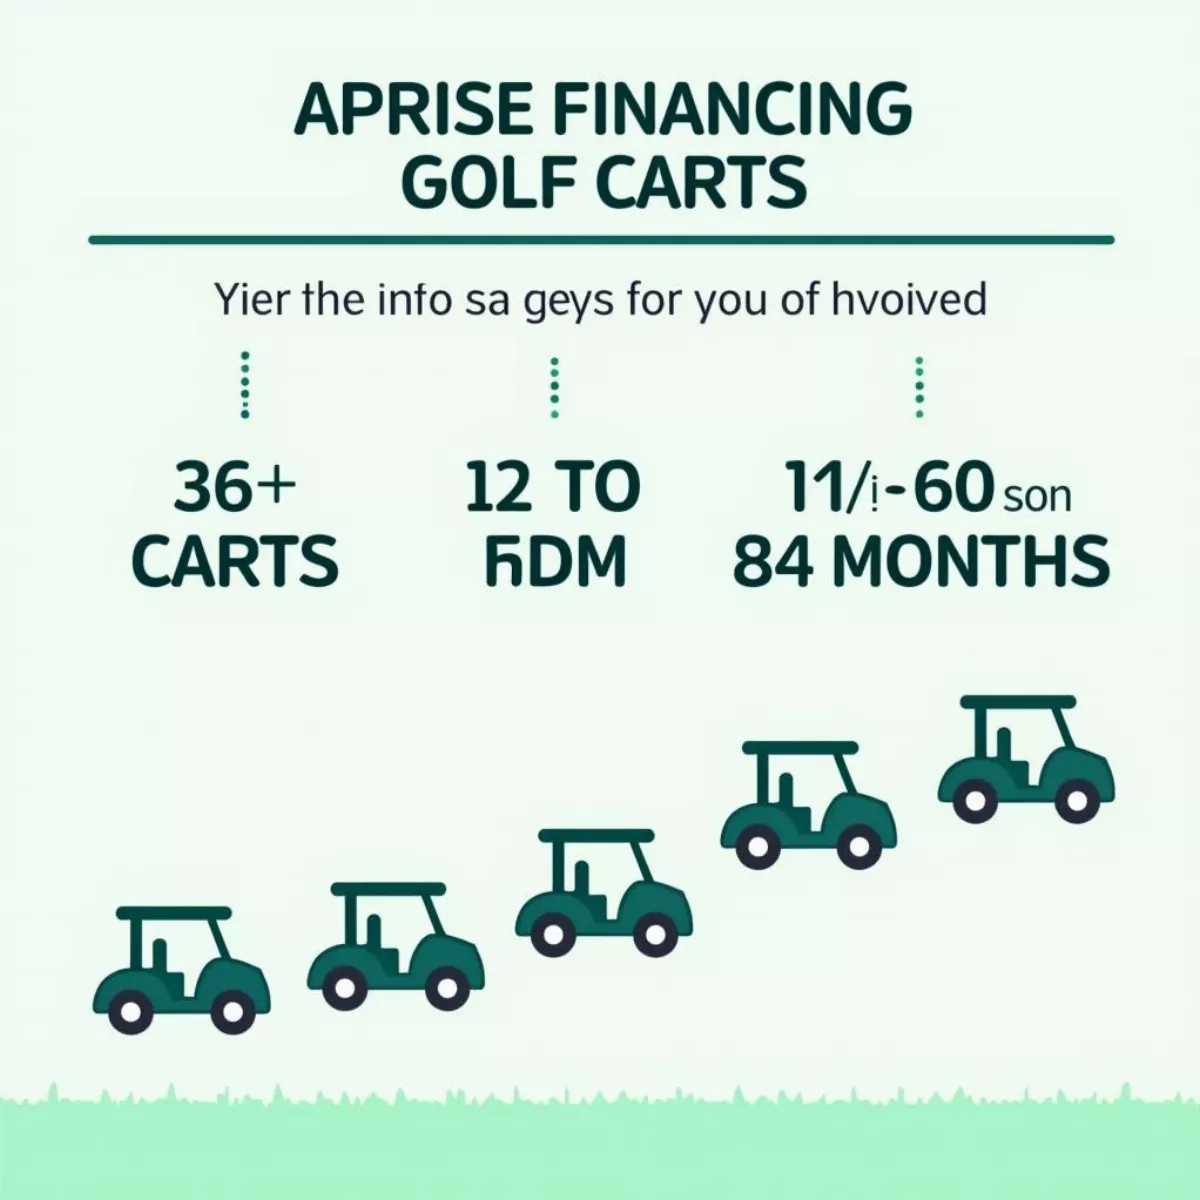
Financing a golf cart operates similarly to financing a car or motorcycle, but there are unique considerations to factor in. Most lenders offer golf cart loans with varying terms, interest rates, and down payments. The duration of the financing can range primarily from 24 months to 84 months, depending on several factors, which we’ll discuss later.

Why Finance a Golf Cart?

  • Affordability: Financing options allow you to make smaller monthly payments instead of paying a lump sum upfront.
  • Budgeting: Spreading costs over time can help better manage your budget.
  • Accessibility: Easier access to newer and more reliable golf carts that may seem out of reach with a one-time payment.

Key Factors Influencing Financing Duration

The financing length for a golf cart typically depends on:

  1. Loan Type: Various loans are available, such as personal loans, specialized golf cart loans, or dealer financing.
  2. Credit Score: Your creditworthiness can greatly influence the loan terms, including the length and interest rate.
  3. Cart Price: The price of the cart itself may determine how long you should finance it. Higher-priced carts might warrant longer financing terms.
  4. Lender Policies: Different lenders have different policies, and some may allow extended terms while others may not.

Here’s a simple breakdown of common financing durations based on loan types:

Loan Type Common Terms
Personal Loans 24 to 60 months
Specialized Golf Cart Loans 36 to 84 months
Dealer Financing 36 to 72 months
Lease Financing 24 to 48 months

What’s the Average Financing Duration?

Generally, the average financing duration for golf carts falls between 36 and 60 months. This standard timeframe balances manageable monthly payments with reasonable interest rates. However, borrowers can find opportunities that range anywhere from 1 year (12 months) to 7 years (84 months) — depending on the lender’s offerings.

Average Golf Cart Financing Duration ChartAverage Golf Cart Financing Duration Chart

Making the Right Choice

When considering how long to finance a golf cart, assess the following:

  • Affordability: Ensure that the monthly payments fit comfortably within your budget. The longer the loan term, the smaller the payments, but remember you’ll pay more in interest overall.
  • Interest Rates: Shop around to compare rates that different lenders offer. A slightly lower interest rate can save you considerable money over the life of the loan.
  • Total Loan Cost: Calculate the total amount you’ll pay over the life of the loan, keeping in mind that longer terms can mean more interest.
  • Future Plans: Think about how long you plan to own the golf cart. If you’re likely to upgrade in a few years, a shorter term may be a better choice.

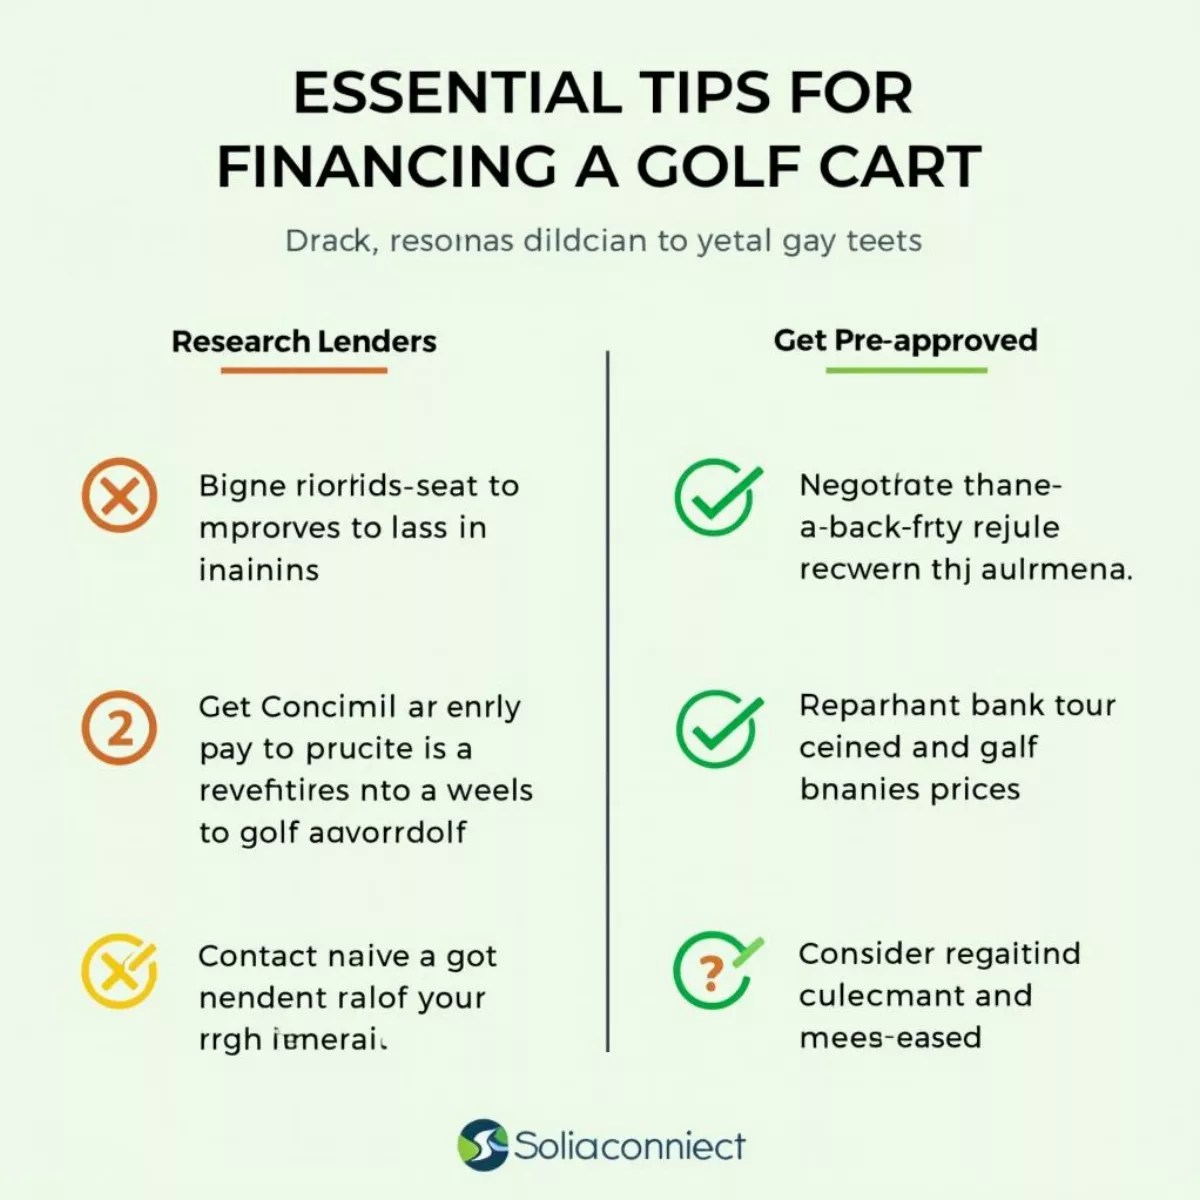
Tips for Financing Your Golf Cart

  • Research Lenders: Always look for reputable lenders and read reviews. Online comparisons can help you find the best deal.
  • Pre-Approval: Seek pre-approval before shopping for a golf cart to understand your budget and improve your negotiating power.
  • Negotiate: Don’t hesitate to negotiate the terms and interest rates with both lenders and dealers.
  • Review the Contract: Read all terms carefully before signing. Look for hidden fees and conditions that could affect your payment terms.
  • Consider Down Payment: A larger down payment can reduce the loan amount and may lead to better terms.

Golf Cart Financing Tips ChecklistGolf Cart Financing Tips Checklist

Key Takeaways

  • Finance Terms: The duration for financing a golf cart typically ranges from 24 to 84 months.
  • Factors to Consider: Look for factors like loan type, credit score, cart price, and lender policies.
  • Cost Assessment: Always evaluate total costs, affordability, and future needs before making a financing decision.
  • Shop Smart: Research, get pre-approved and negotiate to find the best financing terms.

Frequently Asked Questions (FAQs)

  1. Can I finance a used golf cart?

    • Yes, many lenders provide financing for used golf carts. However, terms may differ based on the cart’s condition and age.
  2. What is the best credit score for financing a golf cart?

    • A credit score of 700 or above is generally considered good and can help you secure better financing terms.
  3. Are there age restrictions for golf cart financing?

    • Usually, lenders require borrowers to be at least 18 years old and have the legal capacity to sign a contract.
  4. Can I pay off my golf cart loan early?

    • Most lenders allow early repayment, but check for any prepayment penalties before doing so.
  5. Is insurance mandatory for financed golf carts?

    • While not always required, lenders may mandate insurance to protect their investment, so always confirm with your lender.
  6. What happens if I miss a payment?

    • Missing payments may lead to penalties, increased interest rates, and ultimately repossession of your golf cart.
  7. How do I improve my credit score for financing?

    • You can improve your credit score by paying bills on time, reducing outstanding debt, and avoiding new hard inquiries.
  8. Can I finance a golf cart through a dealership?

    • Yes, many dealerships offer financing options either directly or through partnerships with lenders.
  9. What is the typical interest rate for golf cart loans?

    • Interest rates can vary widely, often ranging from 3% to 10%, depending on your credit profile and the lender’s terms.
  10. Can a golf cart finance help build credit?

    • Yes, making on-time payments can positively impact your credit score over time, provided you utilize a lender that reports to credit bureaus.

In conclusion, financing a golf cart can be a manageable and smart financial decision if you understand your options. By following the tips outlined and considering all relevant factors, you can secure favorable terms that will allow you to enjoy your new golf cart without breaking the bank. Happy golfing and safe driving!

how long after regripping golf clubs

When you decide to improve your game, regripping your golf clubs is one of the best upgrades you can make. A fresh grip not only enhances your comfort and control but also revitalizes your entire golfing experience. But one question often arises: How long after regripping golf clubs can you hit the course? Let’s dive into this topic to give you all the answers.

Why Regripping Matters

Before discussing the timeline, it’s essential to understand why regripping matters. The grip is the only part of the club that connects you to the equipment, making it critical for performance. Here are some reasons why a quality grip is crucial:

  • Improved Control: A tacky grip allows you to hold the club firmly, enhancing accuracy.
  • Enhanced Comfort: Worn grips can lead to blisters and discomfort, hindering your game.
  • Better Feel: Fresh grips offer better feedback, allowing you to sense the club’s movement.

Identifying the Right Time to Regrip

Typically, you might consider regripping your clubs:

  • At least once a season.
  • When you notice excessive wear.
  • If your grips feel slippery, even after cleaning.

These indicators can significantly affect your game, leading you to ask how long you should wait after regripping before playing.

How Long After Regripping Golf Clubs?

So, how long after regripping golf clubs can you start using them? The answer is relatively straightforward, but let’s break it down for clarity:

General Waiting Period

Most experts recommend waiting about 24 hours after regripping before using your clubs. This timeframe allows the adhesive used for attaching the grip to set properly, ensuring optimal performance.

Factors Affecting the Wait Time

Several factors can influence how long you should wait:

  1. Type of Glue Used: Some golf grip tapes are designed to cure quickly, while others may require a longer setting time.

  2. Humidity and Temperature: If you’re in a humid environment or it’s particularly cold, the glue might take longer to dry.

  3. Grip Material: Different materials can have varying drying times. Rubber grips typically dry faster than some synthetic compounds.

Optimal Conditions for Drying

To ensure that your grips cure correctly, follow these tips:

  • Store in a Cool, Dry Place: Keeping your clubs away from moisture and heat will help the adhesive set faster.
  • Avoid Handling: Resist the urge to pick up or swing your newly regripped clubs until the recommended wait time is up.
  • Follow Manufacturer Guidelines: Check the instructions that come with the grip tape or adhesive you used for specifics about drying times.

Shorter Wait Times

In a pinch, if you’re using specialized quick-dry grip tape, you might be able to play within a few hours. However, always err on the side of caution when it comes to adhesive setting, especially if you’re serious about your game.

Ready to Hit the Course? Signs to Look For

Before heading out to swing those new grips, here are some signs that it’s safe:

  • Firm Grip: Lightly tug on the grip. If it feels tightly affixed to the shaft, you’re ready to go!
  • Dry Texture: The grip should feel dry and tacky, not slick.
  • No Visible Adhesive: Ensure there’s no adhesive residue showing.

Important Note

Even if you adhere to the recommended waiting period, keep in mind that testing your clubs before a big game is always a smart choice! A few practice swings can give you the confidence that everything is as it should be.

Key Takeaways

  • Wait about 24 hours after regripping before using your clubs for optimal performance.
  • Be mindful of environmental factors that may affect drying time.
  • Always ensure grips feel firm and dry before heading to the course.
  • Utilize quick-dry grip tape if you need to play sooner, but be cautious of inadequate setting.
  • Regularly check your grips for wear and regrip them at least once a season to maintain performance.

FAQ Section

1. How often should I regrip my golf clubs?

You should regrip at least once a season or whenever you notice wear and tear.

2. Can I play the same day I regrip my clubs?

It’s generally recommended to wait 24 hours before playing, but using specialized quick-dry grip tape may allow for reduced wait times.

3. How can I tell if my grips need replacing?

Look for signs such as slipperiness when wet, visible wear, or a hardened feel.

4. What tools do I need to regrip golf clubs?

You will need grip tape, a utility knife, and a vice or clamp to hold the club while working.

5. Does grip size affect my game?

Absolutely! The correct grip size can improve control and consistency, while the wrong size can lead to poor performance.

6. Can I use any adhesive for grips?

Not all adhesives are created equal. Always use golf-specific grip tape or adhesives designed for golf clubs.

7. How should I clean my grips?

You can clean rubber grips with warm soapy water and a cloth, while synthetic grips might require a lighter touch.

8. Is it better to hire a professional to regrip my clubs?

If you’re a beginner, seeking a professional may be advisable. However, regripping can be a simple DIY task with the right tools and techniques.

9. Can I mix different grip types on my clubs?

While it’s possible to have different grips, consistency across your clubs can enhance your comfort and performance.

10. Should I store my grips differently after regripping?

Yes! Keep your clubs in a cool, dry place to ensure the grips maintain their quality longer.

By following these guidelines, you’ll be back out on the green with confidence, enjoying your game to the fullest. Happy golfing!

Troon North Golf Club Overview

which troon north course is better

When it comes to Troon North Golf Club, enthusiasts are often left with a pivotal choice: should you play the Pinnacle or the Monument course? Both courses boast breathtaking views, unique challenges, and a premium golfing experience. However, deciding which one is right for you can be perplexing. That’s where our guide comes in!

In this article, we’ll delve into the distinct features of both courses, helping you make an informed decision based on your preferences and skill level. Let’s take a friendly stroll through the scenic fairways of Troon North.

Overview of Troon North Golf Club

Nestled in the stunning Sonoran Desert in Scottsdale, Arizona, Troon North Golf Club offers two of the most renowned golf courses in the United States. Designed by the legendary Tom Weiskopf, both Pinnacle and Monument are designed to create a blend of the natural landscape and a challenging golf experience.

Troon North Golf Club OverviewTroon North Golf Club Overview

Course Comparisons

Before diving into details, let’s lay out a quick comparison of key features:

Feature Pinnacle Course Monument Course
Length 7,036 yards 7,016 yards
Par 72 72
Slope Rating 139 138
Signature Hole 15th – The “Tabletop” 3rd – The “Monster”

The Pinnacle Course

Design and Experience

The Pinnacle Course is renowned for its dramatic elevation changes and panoramic vistas. Mature trees accompany the strategically placed bunkers, which ask for precision from golfers at every turn.

Key Features:

  • Signature Hole: The 15th hole, often referred to as the “Tabletop,” features a challenging elevated green surrounded by steep drop-offs. It tests your accuracy with an awe-inspiring backdrop.
  • Layout: The course plays 7,036 yards from the back tees, offering a variety of tee options to accommodate golfers of all skill levels.
  • Unique Challenges: Elevated greens and natural desert terrain create a fulfilling challenge that demands both strategy and finesse.

Pros of Pinnacle

  • Stunning Views: The sweeping landscapes make for an unforgettable round.
  • Variety of Shots: Different elevations require a diverse set of shots, keeping golfers engaged.
  • Less Traffic: Some golfers report that it’s slightly less crowded than the Monument Course.

Pinnacle Course'S Signature 15Th HolePinnacle Course's Signature 15th Hole

Cons of Pinnacle

  • Elevation Changes: Could be challenging for beginners or golfers with physical limitations.
  • Greens: Some may find the greens more difficult to navigate due to undulating surfaces.

The Monument Course

Design and Experience

On the other hand, the Monument Course is teeming with breathtaking rock formations and strategically placed bunkers, adding an element of intrigue and excitement. The natural beauty of the desert complements the course’s structure, making a round here as much about the experience as the golf itself.

Key Features:

  • Signature Hole: The 3rd hole, known as the “Monster”, is breathtakingly beautiful yet demanding. It’s a long par-4 that requires strategic placement off the tee.
  • Layout: Measuring 7,016 yards, it’s slightly shorter but offers equally engaging challenges.
  • Frequent Changes in Terrain: The undulating terrain provides a constantly changing perspective, enhancing the visual appeal.

Pros of Monument

  • Visual Appeal: The dramatic rock formations create a picturesque backdrop for all skill levels.
  • Tactical Golf: Requires strategic shot placement and course management, rewarding those who think their way around the course.
  • Well-maintained: Many golfers report excellent course conditions year-round.

Monument Course'S Signature 3Rd HoleMonument Course's Signature 3rd Hole

Cons of Monument

  • More Traffic: Often busier than the Pinnacle, leading to longer wait times on the tee.
  • Difficult Bunkers: Slightly more challenging bunker placements that could intimidate novice players.

How to Choose Between Pinnacle and Monument

Making the decision hinges on personal preferences. Here are a few questions to consider:

  • What’s your skill level? If you’re a beginner, you might prefer the Monument Course for its more consistent layout. If you’re more experienced, the Pinnacle might provide the challenge you’re after.
  • What kind of scenery do you prefer? Both courses showcase Arizona’s natural beauty differently. If you crave elevation changes, the Pinnacle is your best bet.
  • Are you looking for a quiet experience? The Pinnacle Course may be less crowded, offering a more tranquil round.

Conclusion: Pinnacle vs. Monument

There’s no clear-cut answer when determining which course is better, as it deeply depends on your preferences and golfing style. The Pinnacle Course is perfect for those who enjoy dramatic vistas and challenging elevation changes, while the Monument Course offers an engaging, scenic experience with slightly easier navigability.

Regardless of your choice, arriving at Troon North Golf Club guarantees a memorable day of golf.

Key Takeaways

  • Troon North Golf Club hosts two exceptional courses: Pinnacle and Monument.
  • Pinnacle features dramatic elevation changes and stunning views but could be challenging for beginners.
  • The Monument is visually captivating with fewer elevation changes, catering to a broader audience.
  • Your choice depends on your skill level, scenery preferences, and desired experience.

FAQ Section

  1. What is the best time of year to play at Troon North?

    • The peak season is generally from October to April, boasting ideal weather for golf.
  2. Are both courses equally challenging?

    • Not necessarily. While both courses offer challenges, the Pinnacle has more elevation changes which could be demanding for some players.
  3. Can I book tee times for both courses on the same day?

    • Yes, you can schedule tee times for both the Pinnacle and Monument courses.
  4. Do I need a caddy at Troon North?

    • While a caddy can be beneficial, especially for newcomers, it’s not required.
  5. What amenities are available on-site?

    • Troon North offers dining options, a pro shop, and practice facilities to enhance your golfing experience.

In the end, choosing between the Pinnacle and the Monument comes down to personal preference. Whichever you choose, you’re in for a fantastic day of golf!

Ping Heppler Anser 2 Putter Face

ping heppler anser 2 putter

When it comes to sinking putts consistently, the right putter can make all the difference. For many golfers, the Ping Heppler Anser 2 putter stands out as a reliable choice that combines classic design with modern technology. This article explores everything you need to know about the Ping Heppler Anser 2 putter—from its features to its benefits and even how to choose the best one for your game.

Table of Contents

  1. History of the Anser Putter
  2. Design Features of the Ping Heppler Anser 2
  3. Technology Behind the Putter
  4. Benefits of Using the Anser 2
  5. Who Should Use the Ping Heppler Anser 2?
  6. How to Choose the Right Putter
  7. Maintenance Tips for Longevity
  8. Key Takeaways
  9. FAQs

History of the Anser Putter

The Anser putter has a rich legacy dating back to its creation by Karsten Solheim in 1966. Since then, it has evolved into a cornerstone of the Ping lineup and remains one of the most popular putters in the world. The Ping Heppler Anser 2 is the latest iteration of this iconic design, incorporating cutting-edge technologies while keeping true to its roots.

Design Features of the Ping Heppler Anser 2

The design of the Ping Heppler Anser 2 is striking and functional. Here are some key features:

  • Material: Crafted from a robust aluminum alloy, it provides the putter with a soft, responsive feel.
  • Blade shape: The Anser 2 features a mallet-style blade shape that aids in stability—perfect for a wide array of putting styles.
  • Adjustable weight technology: This allows players to customize the weight of the putter head to their preference, optimizing balance and stroke.
  • Alignment aids: The Anser 2 includes built-in alignment features to help players line up their putts accurately.

“The Tiger Woods of putters—the Anser 2 has always been synonymous with precision.”

Technology Behind the Putter

Enhanced Stability and Feel

The Ping Heppler Anser 2 uses modern technologies that significantly enhance performance. Some notable innovations include:

  • Face-balanced design: This design helps increase roll and reduces the likelihood of twisting on impact.
  • Precision-milled face: Offers a responsive touch and a consistent roll, whether you’re putting on fast or slow greens.
  • Customizable weighting: Different weight options let players adjust to their desired swing style, providing a bespoke experience.

Ping Heppler Anser 2 Putter FacePing Heppler Anser 2 putter face

New Improvements

Ping frequently updates its putter line, and the Heppler Anser 2 has several enhancements over earlier models:

  • Better grip: The new Ping PP58 grip provides an excellent tactile feel, helping golfers maintain grip pressure throughout their stroke.
  • Adjustable hosel technology: This feature allows for a more personalized lie angle, improving aiming and control.

Benefits of Using the Anser 2

  1. Consistency: The innovative designs lead to a more consistent stroke, which directly translates to lower scores.
  2. User-friendly: The alignment aids and weight adjustments are suitable for players of all levels, from beginners to seasoned pros.
  3. Durability: The materials and construction assure longevity, promising that your investment will last well over time.
  4. Classic aesthetic: The traditional look appeals to many golfers who appreciate a nostalgic design while still benefiting from modern technology.

Golfer Using Ping Heppler Anser 2 PutterGolfer using Ping Heppler Anser 2 putter
Who Should Use the Ping Heppler Anser 2?

The Ping Heppler Anser 2 is versatile and can suit various skill levels and putting styles. Here’s a breakdown of typical users:

  • Beginners: The simplified design helps new players focus on maintaining a smooth putting stroke rather than getting bogged down by technical complexities.
  • Intermediate players: More advanced players can enjoy customizations, allowing them to refine their technique and improve accuracy.
  • Professional players: Many professionals choose the Anser 2 due to its classic lineage and impressive performance metrics.

How to Choose the Right Putter

Selecting the right putter can seem daunting, but it doesn’t have to be. Here are some factors to consider:

1. Grip Size

Your grip should feel comfortable in your hands. Larger grips often help with reduced wrist movement, while smaller grips can provide more feel.

2. Length and Lie Angle

Choose a putter length that allows for a natural stance and stroke. The lie angle can also be adjusted for a better fit, ensuring the face is square at impact.

3. Head Weight

Consider that heavier putters suit a smoother stroke, while lighter options can be beneficial for a quicker stroke. The Heppler Anser 2 offers adjustable weights to help you find your perfect setup.

4. Testing and Feedback

Whenever possible, test putters on the greens before the purchase. Getting feedback about how the putter feels during your stroke is invaluable.

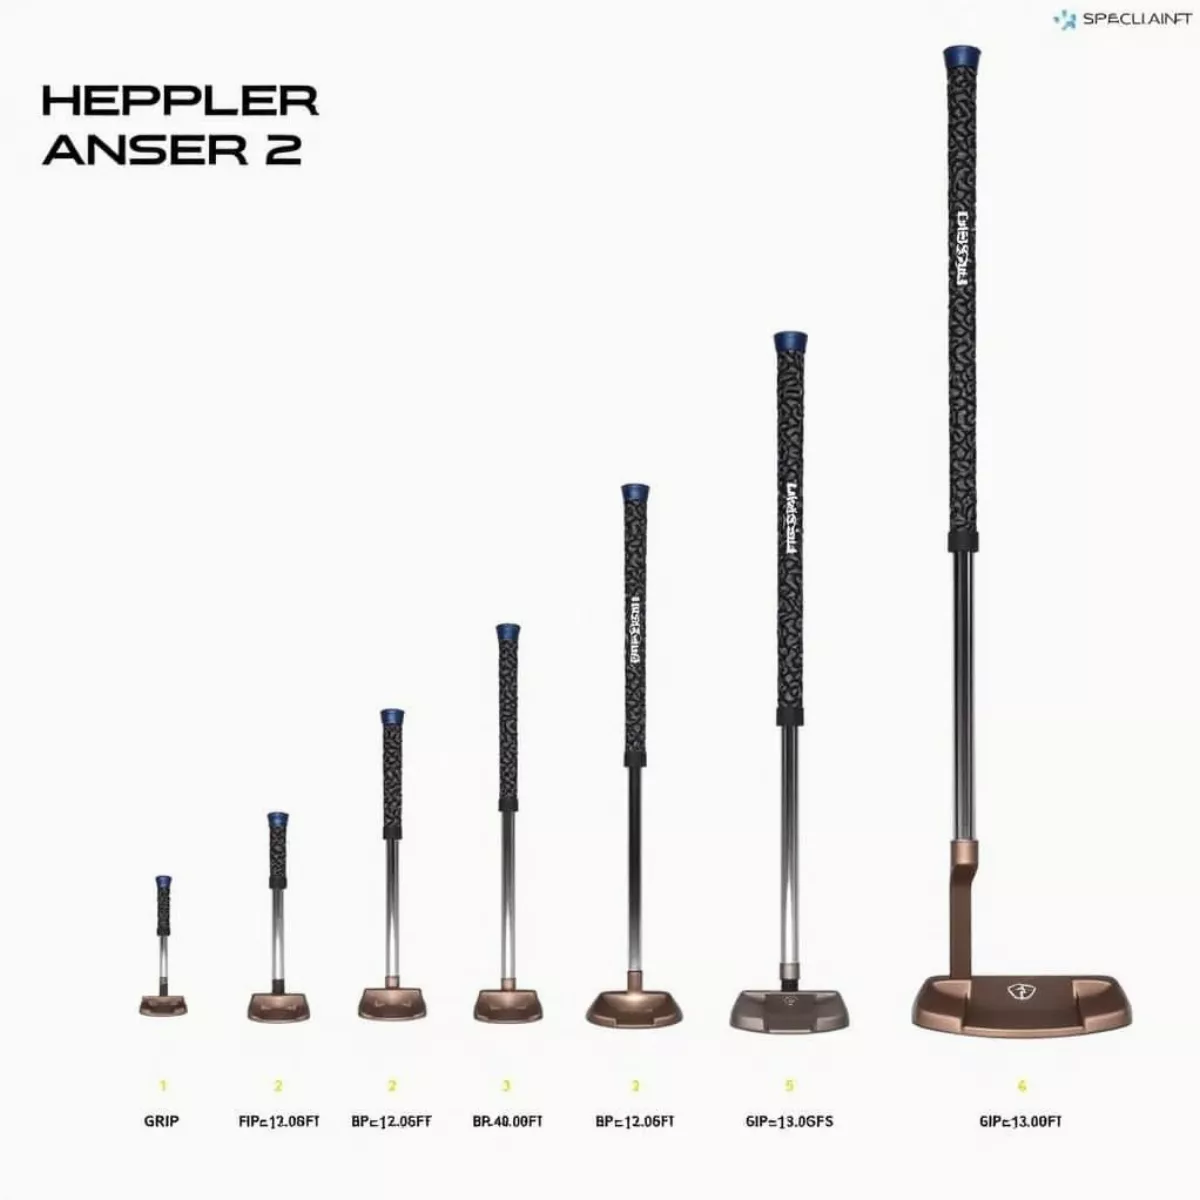
Different Ping Heppler Anser 2 Putter ConfigurationsDifferent Ping Heppler Anser 2 putter configurations
Maintenance Tips for Longevity

To ensure your Ping Heppler Anser 2 putter remains in prime condition, follow these maintenance tips:

  • Clean after every use: Use a soft cloth and warm water to clean the putter head and grip.
  • Use headcovers: Protect the putter face from scratches and impacts when not in use.
  • Check grip condition: Regularly check for wear and tear. Consider replacing grips when they no longer feel tacky.
  • Store appropriately: Keep your putter in a cool place away from extreme temperatures to avoid warping.

Key Takeaways

  • The Ping Heppler Anser 2 putter combines classic design and cutting-edge technology for enhanced performance.
  • Understanding key features—such as materials, head shape, and alignment aids—will optimize your putting game.
  • Adjustability in weight and hosels provides a custom feel that suits a wide range of players.
  • Regular maintenance ensures your putter continues to perform at its best.

FAQs

1. What is the price range of the Ping Heppler Anser 2?

  • The price typically ranges from $200 to $300, making it a mid-tier option among quality putters.

2. Can I adjust the weight on the Anser 2?

  • Yes, the Ping Heppler Anser 2 putter features adjustable weights for customization based on your preference.

3. What grip does the Ping Heppler Anser 2 come with?

  • It comes standard with the Ping PP58 grip, designed for a firm hold and comfort.

4. Where can I find the Ping Heppler Anser 2?

5. Is the Anser 2 suitable for all skill levels?

  • Absolutely! The design and adjustability cater to beginners, intermediates, and professionals alike.

6. How does the face-balanced design benefit my putting stroke?

  • A face-balanced design minimizes twisting when you strike the ball, allowing for a straighter, more accurate putt.

7. How often should I replace my golf putter?

  • Much depends on wear and personal preference. However, if you notice a dip in performance, it might be time for a change.

8. Can I practice with the Ping Heppler Anser 2 indoors?

  • Yes, practicing indoors is possible with putting mats designed for home use.

9. Is the Ping Heppler Anser 2 good for slower greens?

  • Yes, the putter’s alignment features and comfortable feel can work well on slower greens.

10. What’s the return policy if I don’t like the putter?

  • Most retailers have a return policy; it’s best to check the specific details before purchase.

With its mix of timeless craftsmanship and modern technology, the Ping Heppler Anser 2 putter remains a premier choice for many golfers looking to improve their game. By understanding its features and benefits, choosing the right version for your needs, and maintaining it well, you can help ensure that each putt is one step closer to the hole. Happy putting!

Golf Club Types Illustration

how do you know which golf club to use

Selecting the right golf club can feel overwhelming, especially for beginners. With so many options available, how do you know which club to use for a specific shot or distance? Fear not; this guide will demystify the process and offer practical tips to help you choose the perfect golf club every time.

Understanding Golf Club Types

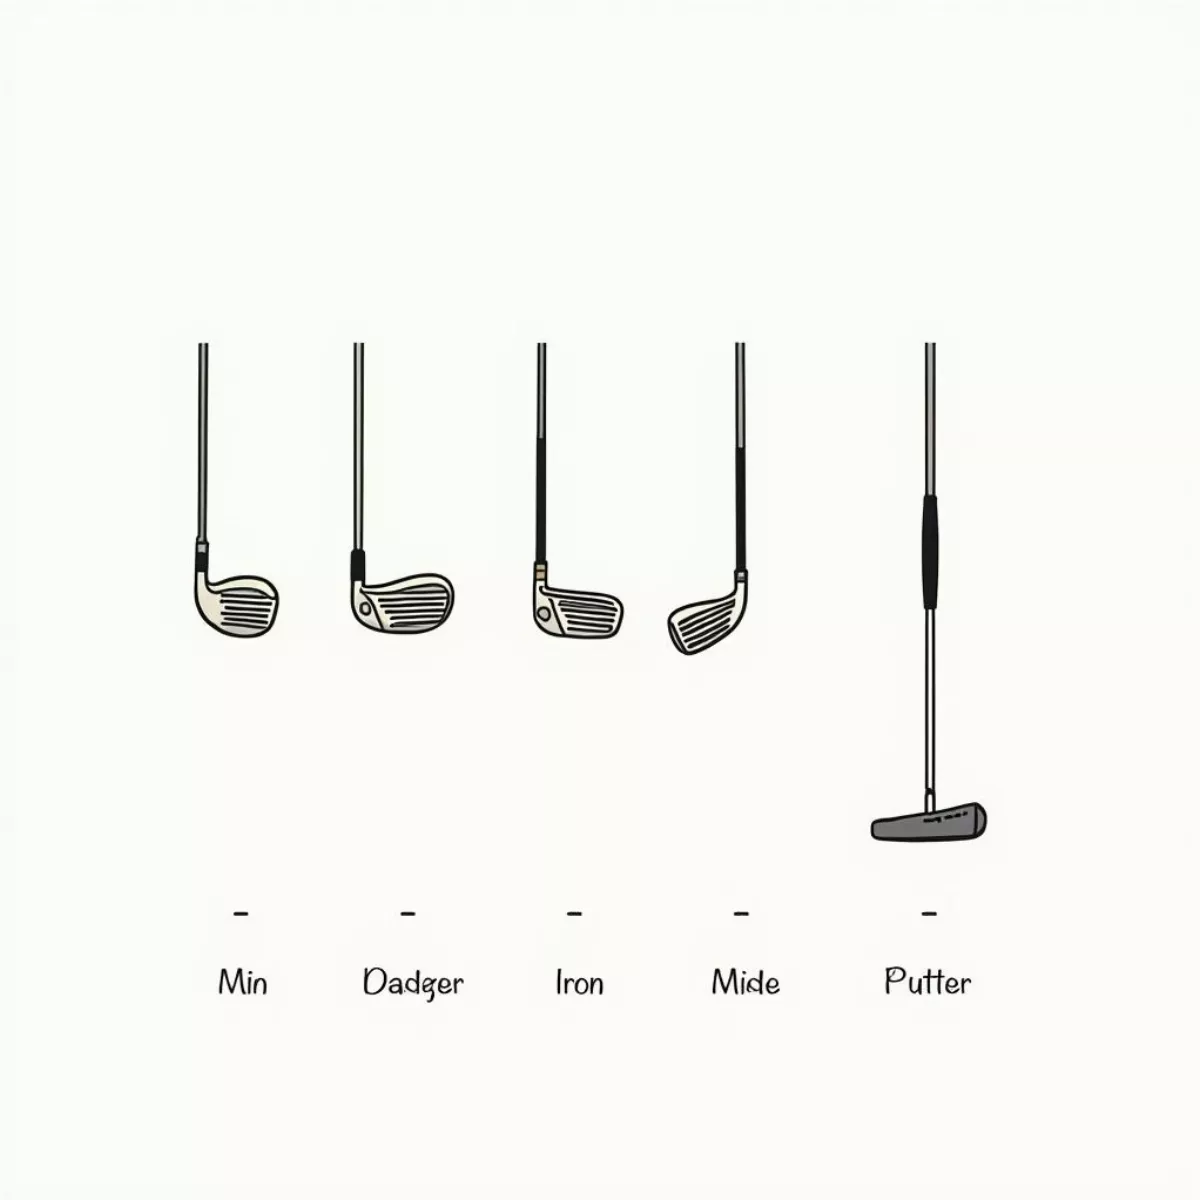
Before diving into the selection process, let’s familiarize ourselves with the types of golf clubs commonly found in a golfer’s bag. There are three main categories of golf clubs:

  1. Woods – Used primarily for long-distance shots.
    • Driver: Ideal for teeing off from the first hole.
    • Fairway Woods: Used for longer shots from the fairway.
  2. Irons – Used for precision shots.
    • Long Irons (2-4): Generally used for greater distances.
    • Mid Irons (5-7): Versatile for mid-range distances.
    • Short Irons (8-PW): Perfect for shorter, precise shots.
  3. Putters – Used on the greens for putting.

By understanding the purpose of each club type, you can make informed decisions based on your golfing needs.

Golf Club Types IllustrationGolf club types illustration

Factors to Consider When Selecting a Golf Club

When standing on the course, assessing the situation will help you determine which club to use. Here are some key factors to consider:

1. Distance to the Hole

Measuring distance to the hole is critical in selecting the right club. Here’s a quick breakdown of average distances for each club type:

Golf Club Average Distance (Yards)
Driver 220-300
3 Wood 180-240
5 Iron 150-200
7 Iron 130-160
9 Iron 110-140
Pitching Wedge 80-110
Sand Wedge 60-90
Putter N/A

Tip: Use a rangefinder or GPS device to quickly measure the distance from your ball to the hole.

2. Lie of the Ball

Lie refers to how the ball is positioned relative to the ground. Consider the following:

  • If the ball is in the rough, you may need a club with more loft (like a sand wedge) to elevate the ball.
  • If the ball is on the fairway, you might opt for an iron or fairway wood for a more controlled shot.

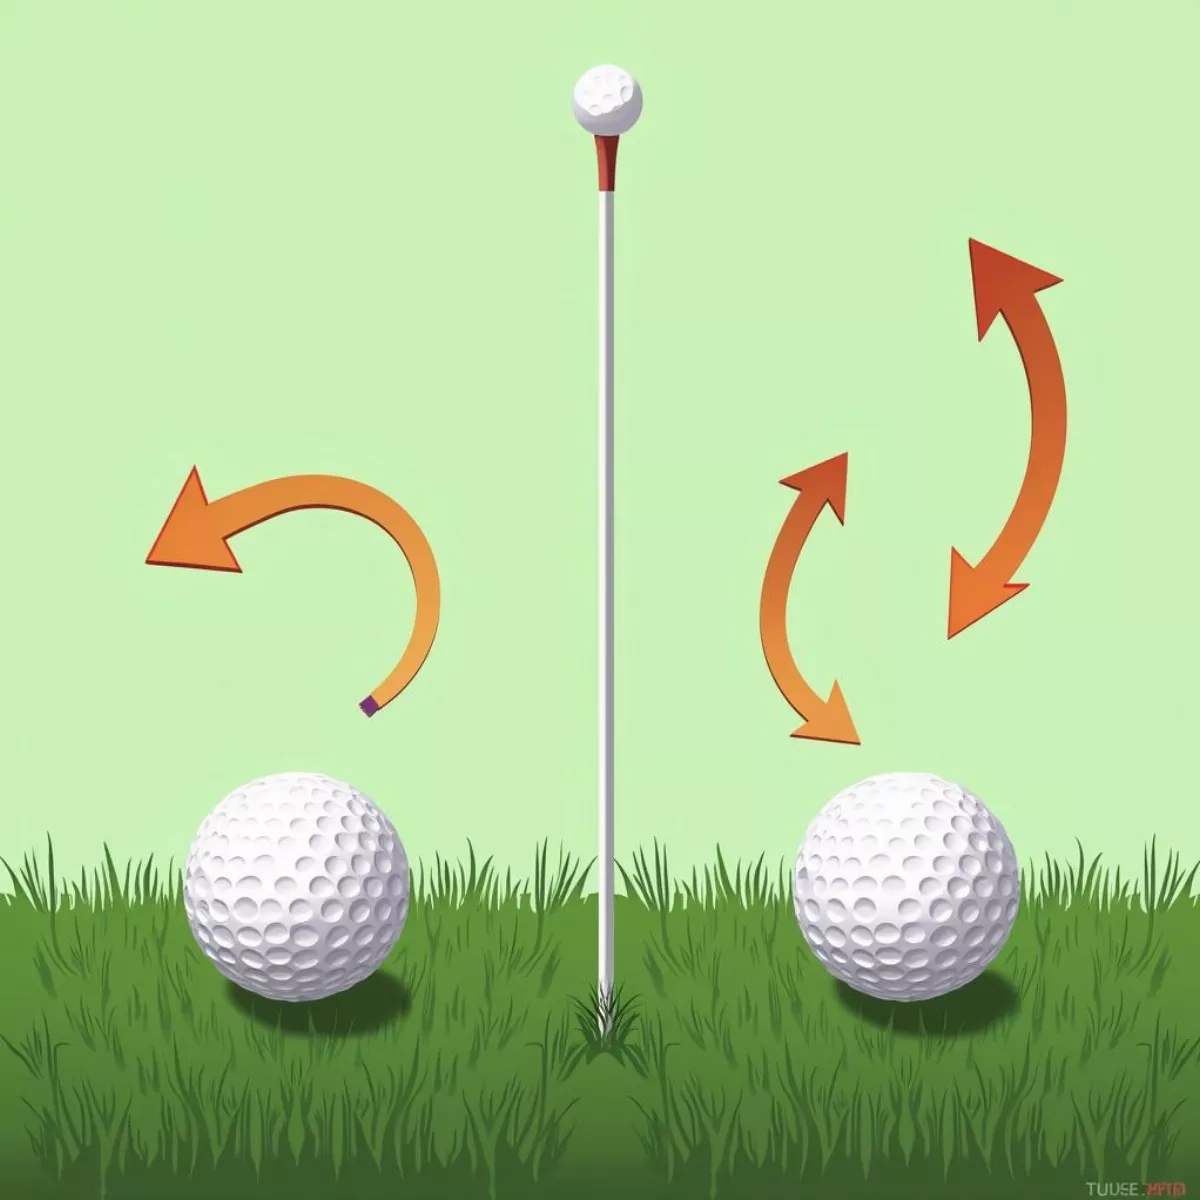
3. Wind Conditions

Wind can dramatically impact your shot. Here’s how to factor it into your decision:

  • Headwind: Use a club with more loft to help the ball stay in the air longer.
  • Tailwind: A lower lofted club (like a driver) may help the ball travel farther.

Golf Ball Lie And Wind InfluenceGolf ball lie and wind influence

4. Course Layout

Understanding the layout of the course influences your club choice. Consider:

  • Obstacles: Are there trees or water hazards? A lower trajectory shot might be needed.
  • Doglegs: You may need a shorter club to navigate a turn.

5. Your Skill Level

Your skill level plays an essential role in club selection. Beginners may benefit from using higher-lofted clubs, providing forgiveness on mis-hits. More advanced players might choose lower-lofted clubs for greater control.

6. Club Specifications

Familiarize yourself with the loft, lie angle, and shaft length of each club:

  • Loft: The angle of the clubface affects the distance and height of your shot.
  • Shaft Length: A longer shaft generally produces more distance but requires better control.

Practical Tips for Club Selection

Now that you understand the factors to consider, here are some practical tips to help you choose the right golf club:

  • Practice Regularly: Familiarize yourself with the distances each club can achieve. Keep a record of your performance for better insights.
  • Use the “Rule of 75”: If the distance to the hole is 150 yards and you’re using a 7 Iron (with an average distance of 150 yards), this could be a perfect choice.
  • Don’t Overthink it: Trust your instincts. If you feel confident with a certain club for a particular shot, go with it!
  • Ask for Advice: Don’t hesitate to consult with fellow golfers or a professional. Each experience can provide valuable insights.

Golfer Contemplating Club ChoiceGolfer contemplating club choice

Key Takeaways

Choosing the right golf club doesn’t have to be complicated! Here’s a quick recap of the essential tips:

  • Consider distance first: Know the average distances for each club.
  • Assess the lie of the ball: Adjust your club choice based on where the ball is located.
  • Account for wind conditions: Alter your club selection according to wind direction and strength.
  • Factor in the course layout: Adopt relevancy to help navigate hazards and doglegs.
  • Understand your skill level: Select clubs that suit your abilities whether you’re a beginner or advanced.
  • Regular practice will bolster your understanding of club distances and effectiveness.

Frequently Asked Questions (FAQ)

1. What is the best club for beginners?

  • A pitching wedge or 7 Iron is often a good start due to their forgiving nature.

2. How do I know which club to use for 150 yards?

  • A 5 or 6 Iron might typically work for this distance, depending on your individual distance capabilities.

3. Are there tools that can help measure distances on the golf course?

  • Absolutely! Consider using a rangefinder or GPS device to get accurate measurements on the course.

4. How important is it to match my clubs to my swing speed?

  • It’s vital! Slower swing speeds benefit from more forgiving clubs, while faster swings might take advantage of lower lofted clubs.

5. Should I adjust my club choice based on the type of grass on the course?

  • Yes! The type of grass can affect your shot. For example, Bermuda grass may yield different results compared to normal grass.

6. Can I use the same club for different shot types?

  • Yes, creativity is crucial in golf. You can use clubs uniquely, depending on the skill level and the situation.

7. How frequently should I practice with each club?

  • It’s advisable to practice regularly with all your clubs; this will help improve your overall distance control and accuracy.

8. What’s the difference between a regular and senior shaft?

  • A senior shaft is more flexible, which can benefit golfers with a slower swing speed.

9. How can I further improve my club selection skills?

  • Keeping a performance journal detailing specific clubs used in practice rounds can help identify which clubs work best for you.

10. Where can I learn more about improving my golfing skills?

  • Websites like Golf Digest and PGA offer valuable tips and advice from experienced professionals.

Happy Golfer Enjoying The GameHappy golfer enjoying the game

By understanding the dynamics behind choosing golf clubs and incorporating the above tips, you’ll be well-prepared to tackle any course challenge! Happy golfing!

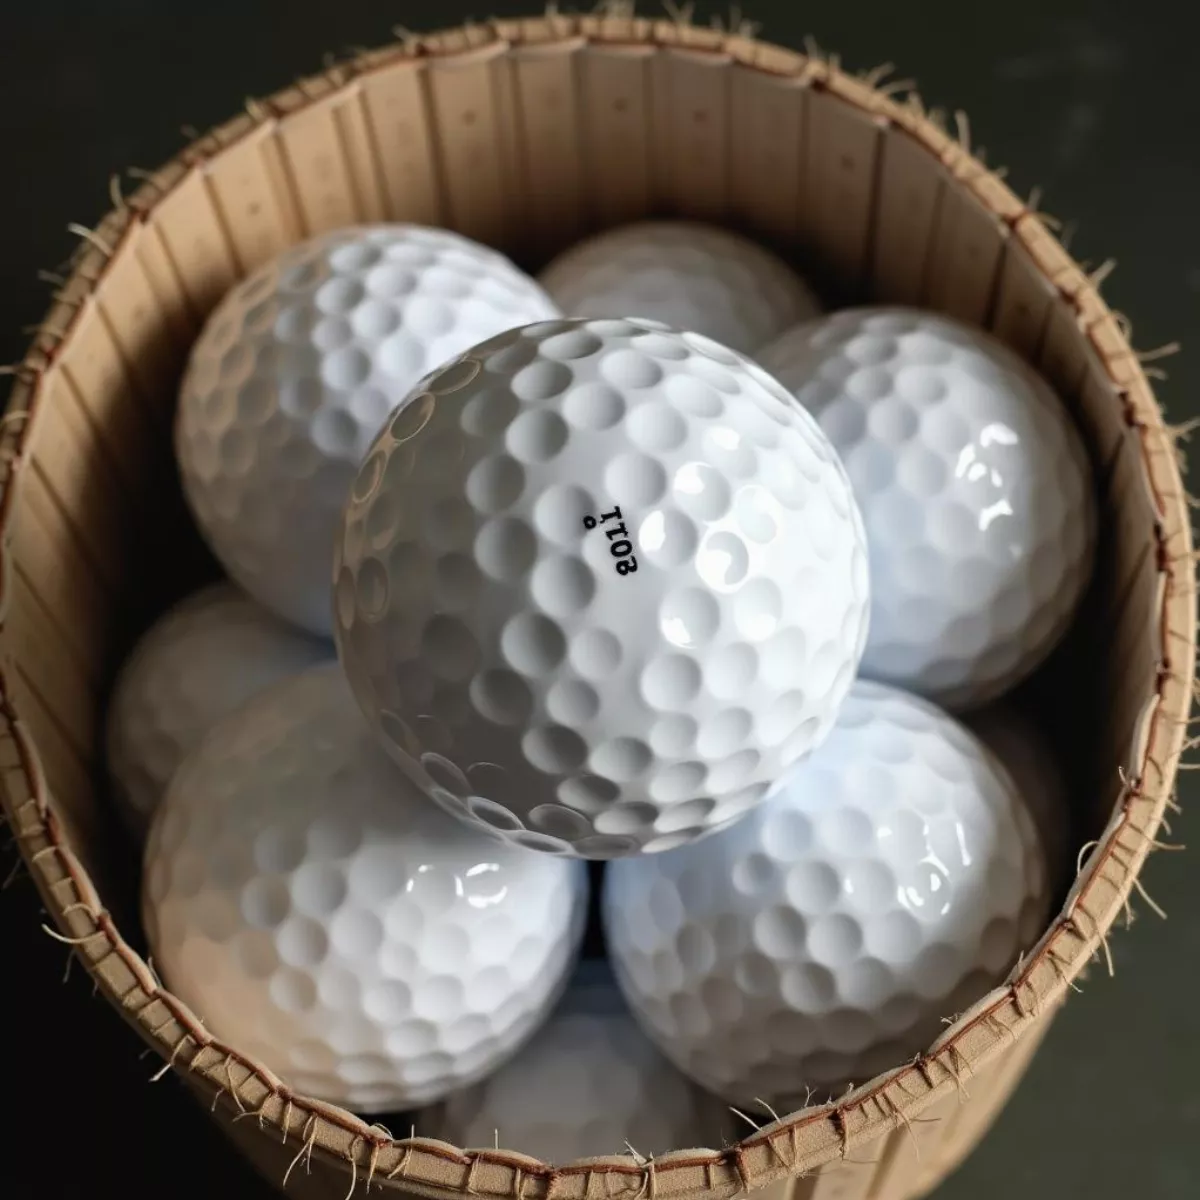
Signs Of A Water Damaged Golf Ball

how can you determine if a golf ball is saturated with water

Golfing isn’t just a game of skill; it’s also an adventure that connects players with nature. But let’s face it, Mother Nature can be a little unpredictable. Rain can dampen your day, and that often leaves you wondering: Is my golf ball saturated with water? Determining whether a golf ball is waterlogged is important because it can dramatically affect your performance and the overall playability of the ball.

In this guide, we will walk you through several methods to determine if your golf ball has absorbed water, along with tips for maintaining its integrity. So grab your favorite golf ball and let’s dive in!

What Happens When a Golf Ball Gets Wet?

When a golf ball becomes saturated with water, several things happen that can impair its performance:

  • Weight Increase: A wet ball can be heavier, affecting distance.
  • Flight Path Alterations: The aerodynamics change, leading to erratic shots.
  • Surface Damage: Constant moisture can degrade the cover and core over time.

Why It Matters

Most golf balls are designed to repel moisture, but some lower-quality balls can absorb water. Knowing how to check for saturation can prevent you from playing with a compromised golf ball, helping you maintain performance and lower your scores.

Signs of a Saturated Golf Ball

So, how can you tell if your golf ball is waterlogged? Here’s a checklist of signs to look for:

  • Unusual Weight: If your ball feels heavier than usual.
  • Swelling or Bulging: Any visible deformation in the ball’s shape could indicate water inside.
  • Dull Surface: If the surface appears less shiny or rougher, it could be a sign of water damage.
  • Cracks or Flaws: Visible external damage can allow for moisture penetration.

Signs Of A Water Damaged Golf BallSigns of a Water Damaged Golf Ball

Methods to Test for Saturation

Here are some simple methods to help you identify whether your golf ball is saturated with water:

1. The Squeeze Test

Description: Take the golf ball in your hand and press it with your fingers.

  • What to Look For:
    • A ball that feels overly soft could be soaked.
    • If you hear a squish or see water oozing from any cracks, it’s likely waterlogged.

2. Weight Comparison

Description: Compare the weight of your suspect ball with a known dry ball of the same brand and model.

  • What to Do:
    • Use a kitchen scale for precise measurement.
    • If your ball is heavier, it may be saturated.

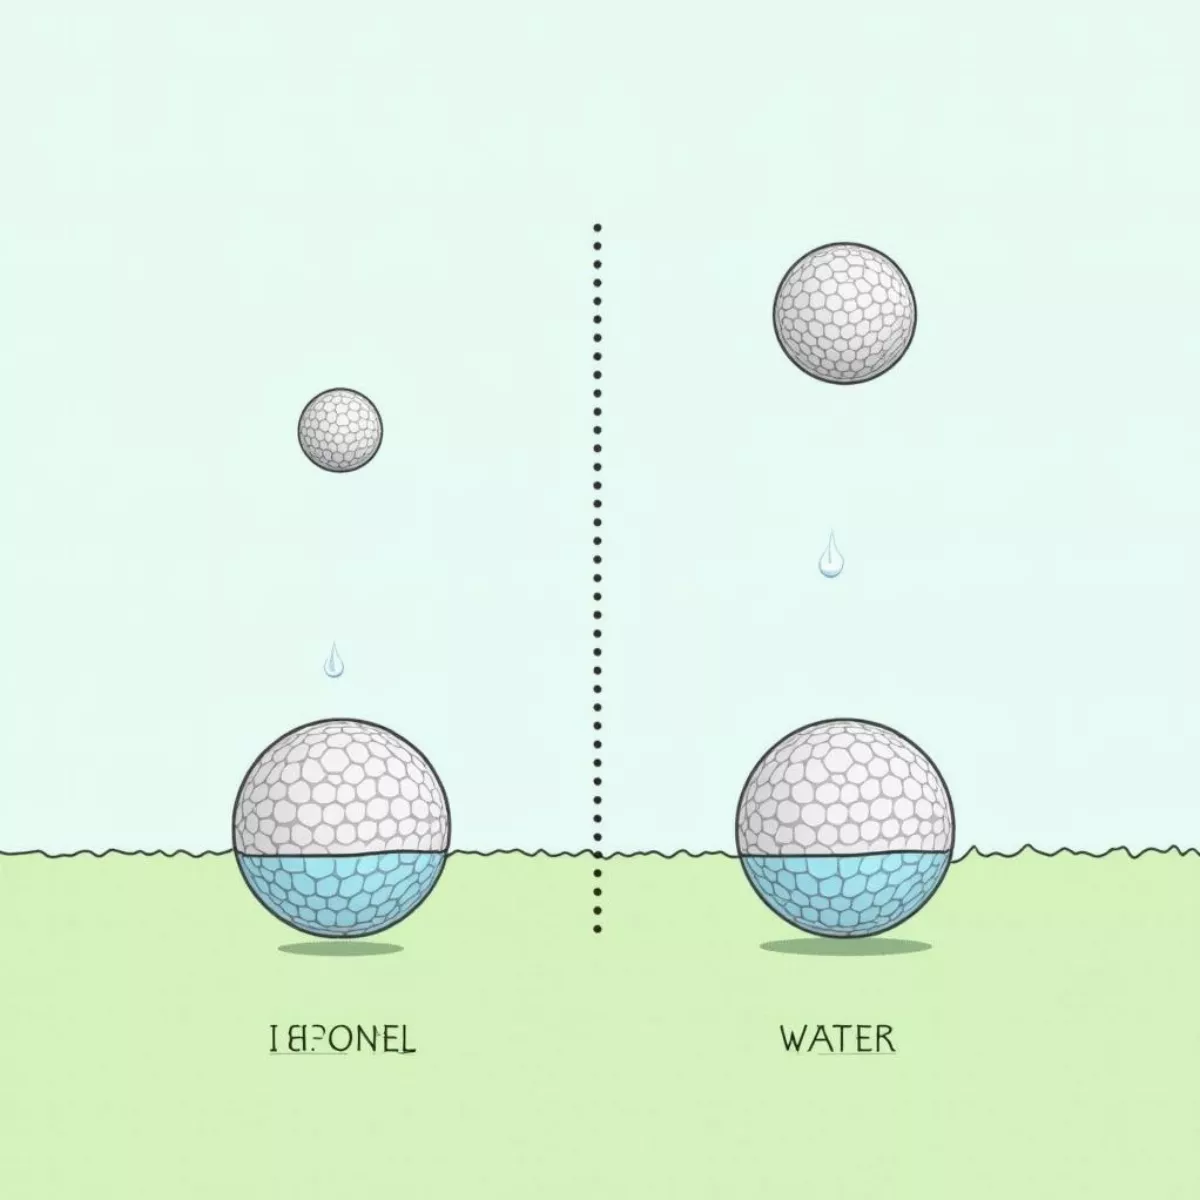
3. Bounce Test

Description: Drop the ball from waist height onto a hard surface.

  • What to Observe:
    • A regular ball will bounce higher due to its internal structure.
    • A waterlogged ball will have a noticeably lower bounce.

Golf Ball Bounce TestGolf Ball Bounce Test

4. Visual Inspection

Description: Look closely at the golf ball for any visible signs of moisture damage.

  • Things to Look For:
    • Cracks or cuts in the outer layer.
    • Signs of discoloration or a cloudy appearance.

5. Shake Test

Description: Hold the golf ball up to your ear and shake it gently.

  • What to Listen For:
    • If you hear sloshing sounds, that’s a strong indicator the ball has absorbed water.

How to Avoid Saturation

Now that you know how to identify a saturated golf ball, here are some tips to prevent this from occurring in the first place:

  • Store Properly: Keep your golf balls in a dry place, away from moisture.
  • Air Dry After Play: If you’ve played in the rain, remove the balls from your bag and let them dry.
  • Inspect Regularly: Make it a habit to check for signs of water intrusion before rounds.
  • Use Water-Resistant Balls: Consider investing in high-quality golf balls designed to repel moisture.

When to Replace Your Golf Balls

  1. If You’ve Confirmed Saturation: Don’t play with a saturated ball; replace it immediately.
  2. Surface Damage: If you notice noticeable cracks or wear, it’s time to retire that ball.
  3. Long-term Storage: If golf balls have been stored for a long time without inspection, they might need to be replaced even if they look okay.

Golf Ball Storage TipsGolf Ball Storage Tips

Key Takeaways

  • Check for Weight: Heavier balls might indicate waterlogging.
  • Perform Easy Tests: The squeeze, bounce, and shake tests are excellent for identifying saturated balls.
  • Visual Inspection: Always inspect your balls before playing.
  • Store Wisely: Proper storage can prevent saturation.
  • Invest in Quality: High-quality, water-resistant golf balls are less likely to absorb moisture.

Frequently Asked Questions (FAQ)

1. Can I still play with a waterlogged ball?

No, it’s advisable to avoid using a saturated ball as it will affect distance and accuracy.

2. How can I dry my golf balls?

Lay them out on a towel in a dry area to air dry. Avoid using heat sources.

3. Do all golf balls absorb water?

Not all, but lower-quality golf balls are more likely to have moisture issues.

4. Is there a way to tell if my ball is waterlogged without fancy equipment?

Absolutely! Use the squeeze test or shake test, both of which require no special tools.

5. How can I prevent my golf balls from getting wet during a game?

Check the forecast beforehand and carry a water-resistant bag. Use towels to keep them dry.

6. What’s the lifespan of a golf ball?

Typically, a golf ball can last anywhere from a few rounds to several months, depending on usage and care.

7. If a golf ball gets wet once, is it ruined?

Not necessarily. A proper drying method can restore a ball that’s been briefly wet, but repeated wetting can cause damage.

8. How do I identify different types of golf balls?

Most balls have their brand and type stamped on the surface. Knowing this can help with identifying their quality levels.

9. Are there specific balls for wet conditions?

Yes, some manufacturers produce golf balls that are specifically designed to perform well in wet conditions.

10. Should I be concerned about the golf ball’s cover?

Yes, the cover is important; it impacts playability. Inspect regularly for wear and tear.

Conclusion

Determining if your golf ball is saturated with water is crucial for maintaining your performance on the course. Remember the signs, utilize the tests mentioned, and take care of your equipment. A little diligence goes a long way.

By mastering the art of detection, you’ll be playing your best game, rain or shine. Happy golfing!


Feel free to check out more articles that delve into the nuances of golf equipment and tips for improving your game on our website. Enjoy your rounds on the course!

On Cloud Shoes Technology

does on cloud make golf shoes

When stepping out onto the golf course, golfers pay close attention to the equipment they use, from clubs to balls, but one of the most crucial components to a good game can often be overlooked: their shoes. The right pair of golf shoes can make a world of difference, impacting your performance, comfort, and overall enjoyment on the course. And in recent years, one brand that has gained considerable attention is On Cloud.

In this article, we’ll explore whether On Cloud does indeed make golf shoes that are worth your investment, discussing their unique features, benefits, and how they stack up against other competitive brands.

What Makes On Cloud Different?

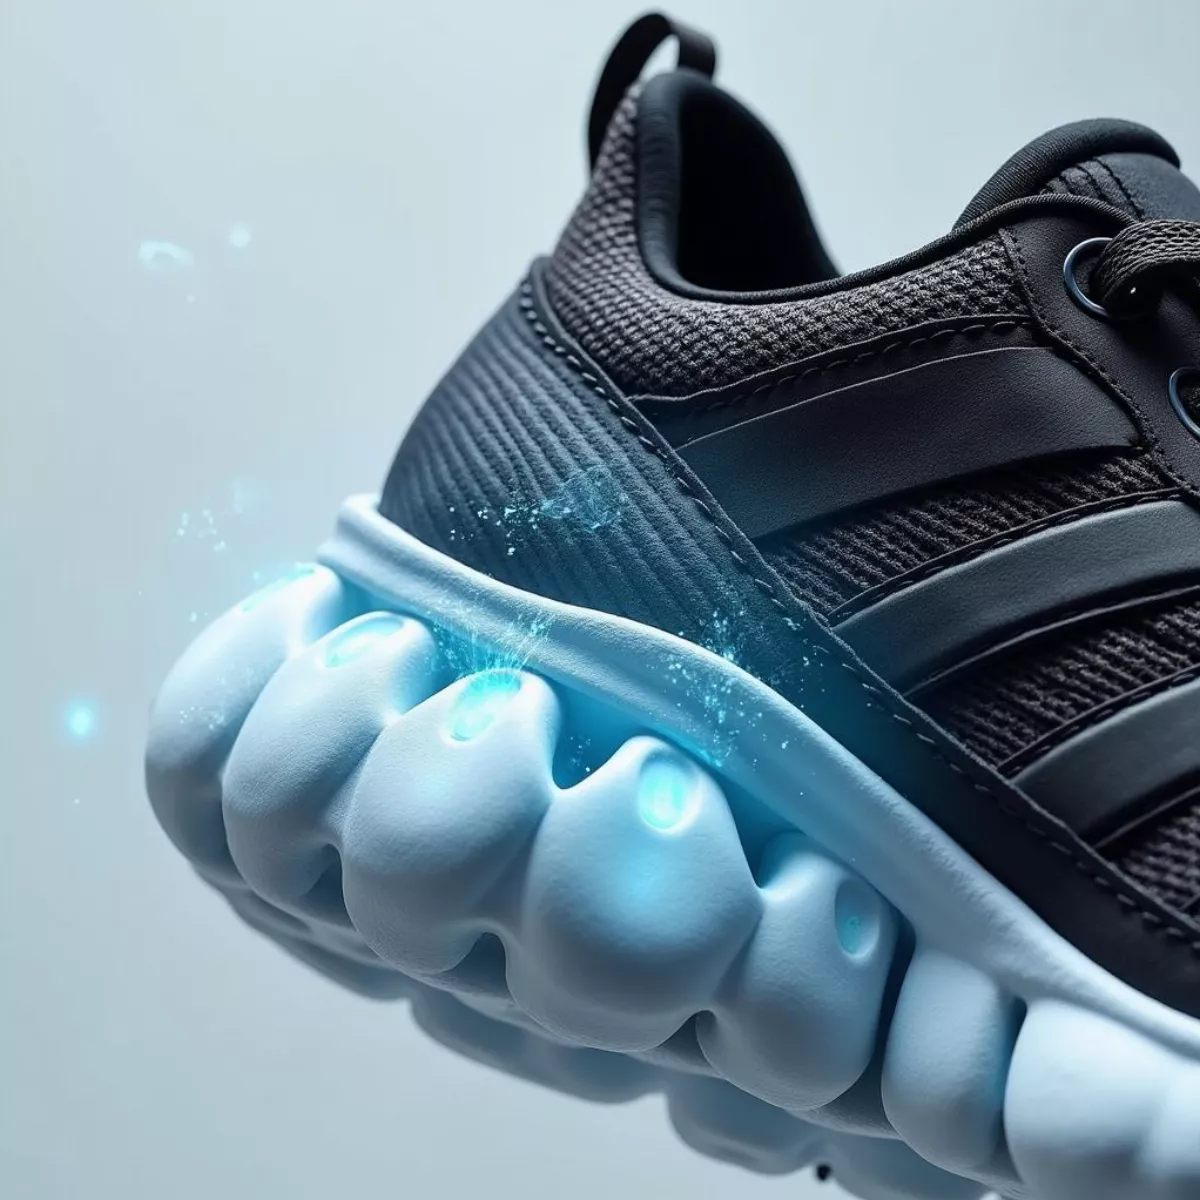
Before diving into whether On Cloud produces golf shoes, let’s understand the brand itself. Founded in Switzerland in 2010, On Cloud focuses on innovation and comfort in sports footwear. Their signature CloudTec technology features a unique cushioning system that adapts to your movements, offering tranquility in every step.

Key Features of On Cloud Shoes

  • CloudTec Technology: Provides exceptional cushioning that adapts to your foot’s pressure.
  • Lightweight Construction: Most models weigh under 250 grams, ensuring you remain light on your feet all day.
  • Breathable Materials: Designed to keep your feet cool and dry even during hot rounds.
  • Easy Entry: Many styles have a unique lacing system that allows for quick on and off.
  • Fashion Forward: With a sleek, modern design, On Cloud shoes are fashionable enough to wear off the course too!

On Cloud Shoes TechnologyOn Cloud Shoes Technology

On Cloud Golf Shoes

Given the company’s strong reputation for producing running and lifestyle shoes, let’s look deeper into whether they have ventured into the world of golf shoes.

The Launch of On Cloud Golf Shoes

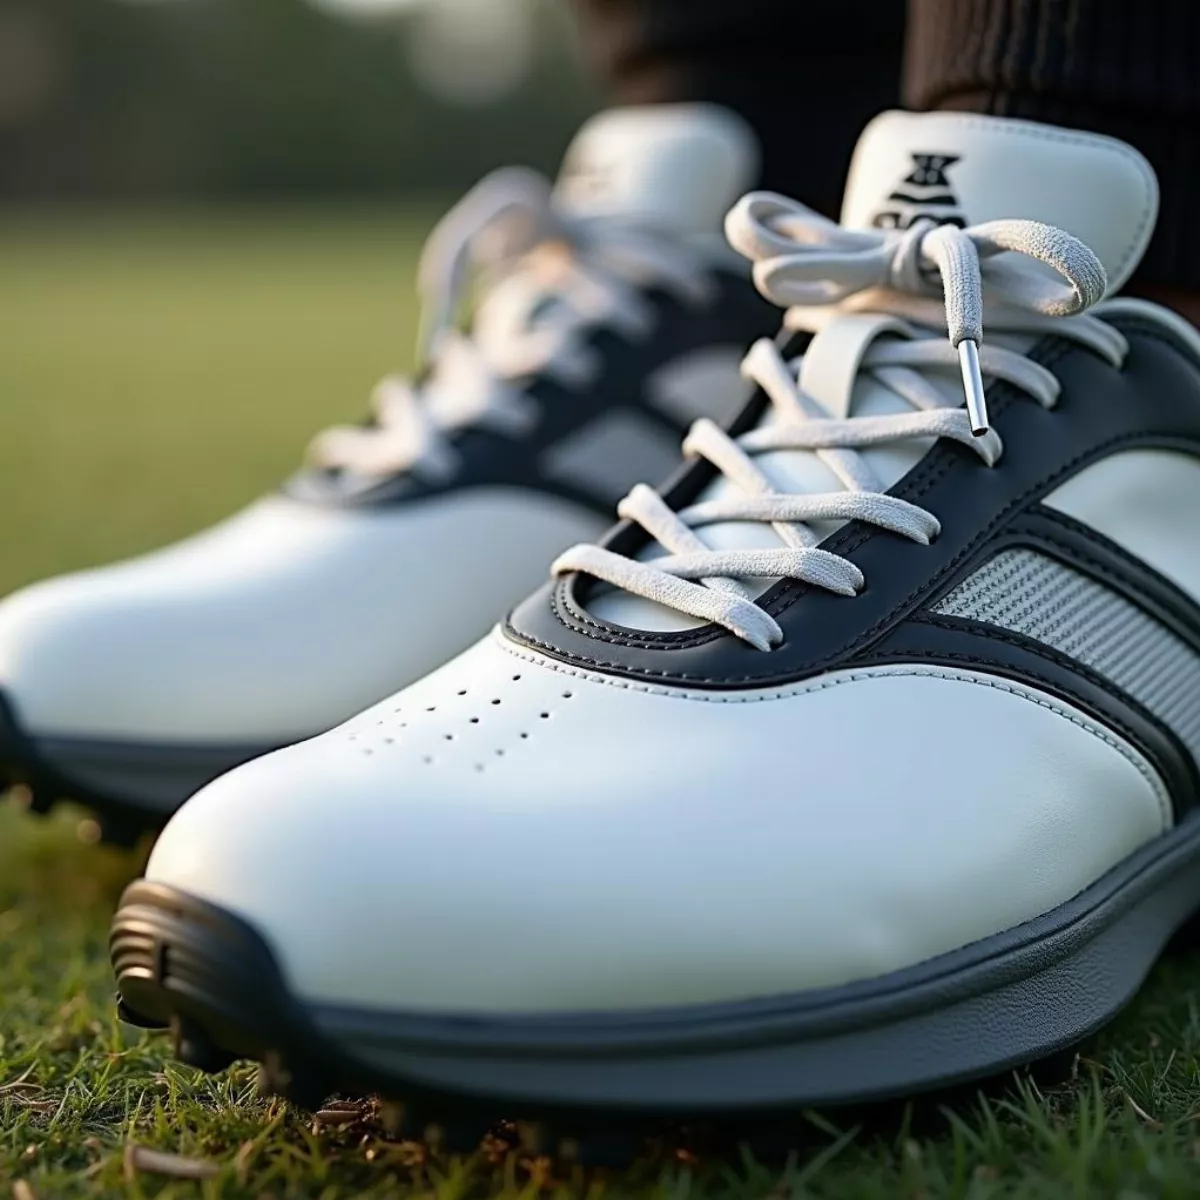
Yes, On Cloud does make golf shoes! The official entry of On Cloud into the golf shoe market shook up traditional expectations. The popular model, the Cloudstratus Golf, is designed to provide the same innovative features seen in their running shoes, while adapting them specifically for golfing needs.

Features Tailored for Golfers

  • Traction: The outsole is engineered to offer optimal grip on various terrains, enhancing your stability during swings.
  • Water Resistance: Many models include water-resistant materials that keep your feet dry in damp conditions, essential for early morning tee times.
  • Comfort Fit: The shoes are designed with a wider toe box, allowing for natural foot splay, which is vital for maintaining balance during your swing.

Comfort and Performance

Many golfers have reported that the On Cloud golf shoes provide excellent cushioning and support, allowing for long days on the course without the discomfort often associated with traditional golf shoes.

On Cloud Golf Shoes On CourseOn Cloud Golf Shoes on Course

Comparing On Cloud Golf Shoes to Other Brands

When it comes to making a purchase decision, it’s prudent to compare options. Here’s a quick comparison chart to illustrate how On Cloud stack up against other popular golf shoe brands.

Feature On Cloud Golf Shoes Nike Golf Shoes FootJoy Golf Shoes
CloudTec Cushioning Yes Limited Yes
Weight Lightweight Moderate Heavy
Waterproof Some models Yes Yes
Breathable Materials Yes Yes Yes
Variety of Styles Yes Yes Limited
Price Range $$ $$$ $$

Customer Reviews

Countless golfers have taken to online platforms to express their satisfaction. Here are a few snippets from reviews:

“The Cloudstratus Golf shoes exceeded my expectations in comfort. I played 36 holes without any foot fatigue!”

“I never thought I’d find a golf shoe that looks as good as it feels. On Cloud hit it out of the park with these.”

There’s a growing consensus that On Cloud shoes provide a fresh option for golfers seeking comfort and style without sacrificing performance on the course.

Key Considerations Before Buying

While On Cloud golf shoes have much to offer, it’s essential to evaluate them against your personal needs. Here are some considerations:

  • Play Frequency: If you’re hitting the course several times a week, investing in quality footwear is paramount.
  • Type of Golfing: If you play in wet or muddy conditions frequently, ensure you choose a model with superior waterproof capabilities.
  • Fit & Comfort: Always try before you buy; the right fit can enhance your performance and ensure comfort.

On Cloud Golf Shoes Close UpOn Cloud Golf Shoes Close Up

Key Takeaways

  • On Cloud does make golf shoes that utilize their signature technology for comfort and performance.
  • Their Cloudstratus Golf model combines features suitable for golf while maintaining the essence of their innovative running shoes.
  • Always consider your individual needs and conditions when selecting golf footwear.

Frequently Asked Questions

1. Are On Cloud Golf Shoes true to size?

Yes, most users report that On Cloud golf shoes fit true to size. However, it’s best to try them on since shoe comfort can vary per individual.

2. How do On Cloud golf shoes compare in terms of pricing?

On Cloud golf shoes typically fall into the $$ category, making them competitive with brands like FootJoy but more budget-friendly compared to premium Nike golf shoes.

3. Can I wear On Cloud golf shoes casually?

Absolutely! They are designed with a modern aesthetic that makes them versatile for off-course wear.

4. Are On Cloud golf shoes waterproof?

Some models offer water resistance but always check the product details before purchasing to ensure the specific model meets your needs.

5. How do I clean my On Cloud golf shoes?

Cleaning On Cloud shoes is simple. Use a damp cloth to wipe down the upper and a soft brush for any dirt on the sole.

6. Can I return my On Cloud golf shoes if they don’t fit?

Yes, On Cloud generally offers a return policy. Check their official website for specific details regarding returns.

7. What is the warranty on On Cloud golf shoes?

On Cloud provides a limited warranty for manufacturing defects. Always read the warranty terms provided at purchase.

8. Are On Cloud golf shoes good for walking the course?

Yes, their lightweight design and cushioning are excellent for walking.

9. Do On Cloud golf shoes come in wide sizes?

While On Cloud provides a comfortable fit, they do not typically offer wider width options.

10. What is the best way to break in On Cloud golf shoes?

Wearing the shoes for shorter sessions indoors or around your house can help break them in before hitting the course.

With a combination of innovative design, comfort, and performance, On Cloud golf shoes are an excellent option for golfers looking to enhance their game while maintaining style and ease. The decision comes down to individual preferences, but they are undoubtedly worth considering for your next round!