lead tape on a driver

When it comes to golf, every shot counts. Every millimeter of precision can mean the difference between sinking that long putt and watching it roll past the hole. One tool that has gained popularity among both pros and amateurs is lead tape. But what is it, and how can it help you improve your drives? Let’s dive into the details!
What is Lead Tape?
Lead tape is a thin, sticky strip of lead used to adjust the weight and balance of your golf clubs—most notably, your driver. By applying lead tape, you can modify the swing characteristics of the club to better suit your playing style. It’s a simple, effective way to enhance your performance without spending a fortune on new gear.
Why Should You Consider Using Lead Tape?
- Customization: Golf is a highly individualized game. Lead tape allows you to tailor your clubs to your personal swing.
- Weight Adjustment: Adding weight can improve stability and control.
- Cost-Effective: Rather than investing in a whole new driver, a roll of lead tape offers a budget-friendly solution.
- Quick and Easy: Applying lead tape is straightforward and can be done in minutes.
How to Use Lead Tape on Your Driver
Before you grab that tape, make sure to follow these steps for proper application:
1. Choose the Right Tape
- Look for a lead tape that is thin and comes in rolls. It is available at most sporting goods stores or online.
2. Clean Your Driver Clubhead
- Wipe down the clubhead with a clean cloth to ensure that dirt and debris don’t interfere with the tape’s adhesive.
3. Determine the Placement
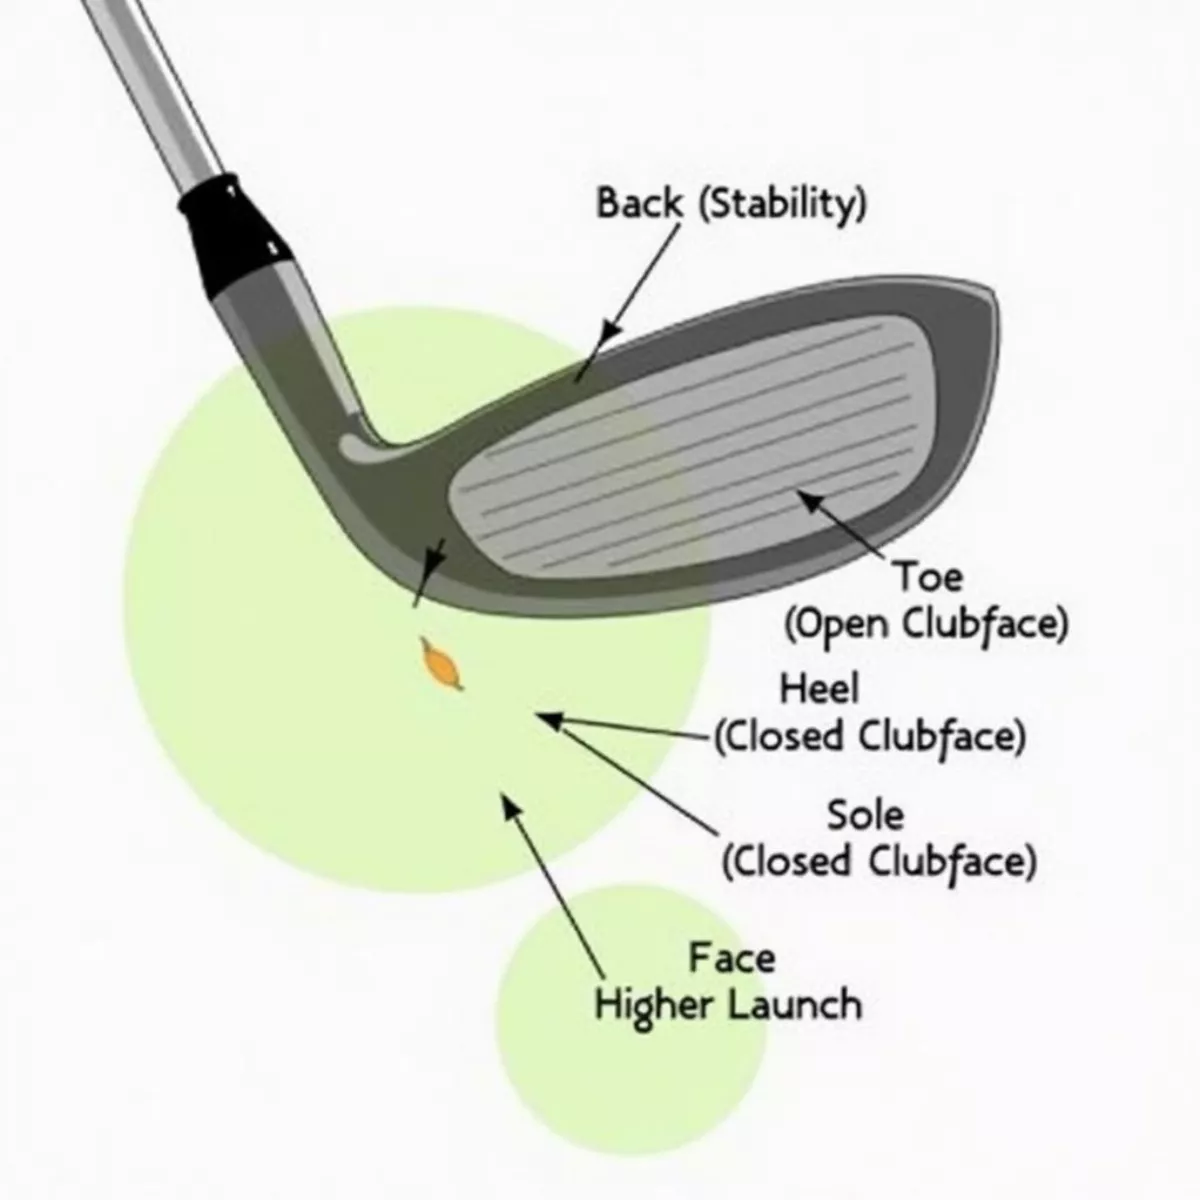
- Applying tape at different locations on the clubhead will yield different results:
- At the back: Increases the moment of inertia, promoting stability.
- Near the face: Increases ball speed and can add distance.
- On the sole: Lowers the center of gravity, assisting with launch angles.
4. Cut and Apply the Tape
- Cut the desired length of lead tape, usually between 1-2 inches, and firmly press it onto the chosen area.
5. Test It Out
- Hit a few practice shots. Adjust as necessary until you find the feel you love.
Quick Application Tips:
- Start Small: Begin with a smaller amount of tape (usually around 1-2 grams) to see how it affects your swing.
- Record Your Changes: Keep track of adjustments to help you figure out what works best.

The Science of Lead Tape: Why It Works
When you add weight to the club, you’re modifying its balance and swing dynamics. Here’s how:
- Increased Stability: More weight means your driver will be less likely to twist upon impact with the ball, offering a straighter shot.
- Control: A well-balanced club improves your feel, making it easier to deliver consistent swings.
The Balance Equation
| Weight Added (grams) | Resulting Effect |
|---|---|
| 1-2 | Increased control and stability |
| 3-5 | Higher launch angle and ball speed |
| 5+ | Possible loss of speed, but enhanced stability |
Pros and Cons of Using Lead Tape
Before you head to the golf course swinging your newly modified driver, let’s look at the pros and cons of using lead tape.
Pros
- Tailored Performance: Achieve a personalized feel for your swing.
- Improved Control: Allow for straighter, more consistent shots.
- Affordable: A simple, cost-effective adjustment compared to buying a new driver.
Cons
- Trial and Error: It may take some time to find the right balance.
- Potential for Overweighting: Too much weight can hinder your swing speed.

Key Takeaways on Using Lead Tape
- Customization is Key: Use lead tape to adjust for your specific swing mechanics.
- Start Small: Begin with small increments of weight.
- Experiment: Don’t be afraid to test different placements and weights to find your sweet spot.
- Keep Track: Document your modifications to figure out what effectively enhances your driver performance.
Frequently Asked Questions (FAQ)
1. How much lead tape should I add to my driver?
Start with a small amount—about 1-2 grams—and adjust based on your results.
2. Where should I place the lead tape?
Placement depends on your desired effect:
- For stability, place it at the back.
- For added distance, consider applying it near the face.
3. How do I remove lead tape?
Gently peel it off the club. It should come off without damaging the clubhead. A bit of adhesive remover may help if residue is left behind.
4. Is lead tape safe for my golf clubs?
Yes, as long as you don’t overload your clubs with too much weight. Proper application ensures safety.
5. Will using lead tape affect my swing mechanics?
It may take some getting used to. Allow yourself time to adjust to the new feel.
6. Can I use lead tape on other clubs?
Absolutely! Lead tape can be used on any club to fine-tune its performance.
7. How do I know if the lead tape is working?
Monitor the consistency and direction of your shots. If you’re seeing improvements, stick with your adjustments.
8. Where can I buy lead tape?
You can find it at golf shops, sporting goods stores, and online retailers.
9. Does adding lead tape void any warranties?
Check your club warranty details. Modifications can sometimes void warranties, so it’s best to confirm.
10. Can I use lead tape along with other adjustments?
Yes! Lead tape can be combined with other customizations, like grips or shaft changes.
Conclusion
Using lead tape on your driver is an excellent way to customize your game and improve your overall performance. Whether you’re a beginner or a seasoned player, a few inches of tape could lead to big changes on the fairway. Dive into this affordable, simple modification and experience the results for yourself.
By understanding and applying lead tape, you’re one step closer to fine-tuning your game and achieving your golfing goals!

Feel free to share your experiences with lead tape in the comments below! Happy golfing!